Tamiya 1/35th Hanomag

Millitary miscellany; Tanks, AFV, Trucks and other Soft-Skin vehicles etc.
User avatar
Dazzled
Modelling Gent and Scholar
Posts: 9592
Joined: October 1st, 2011, 11:08 pm
Location: Mid Glamorgan, South Wales
Contact:

Tamiya 1/35th Hanomag

Post by Dazzled »

Tamiya's old Sdkfz 251/1 Hanomag half track.

Image

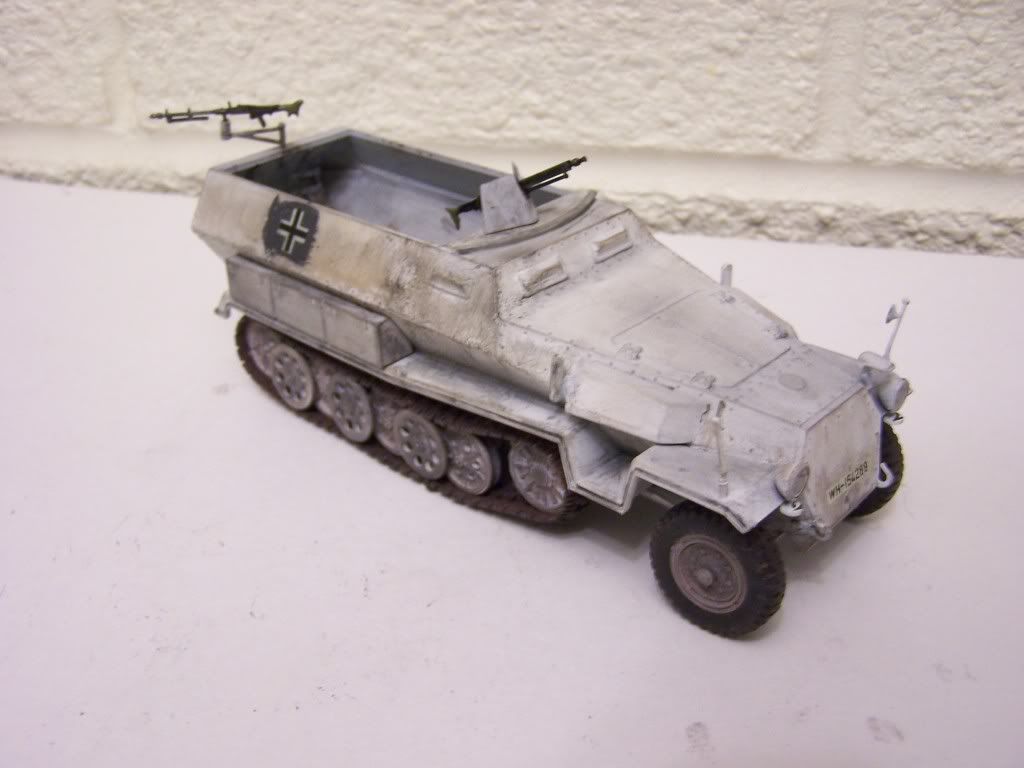
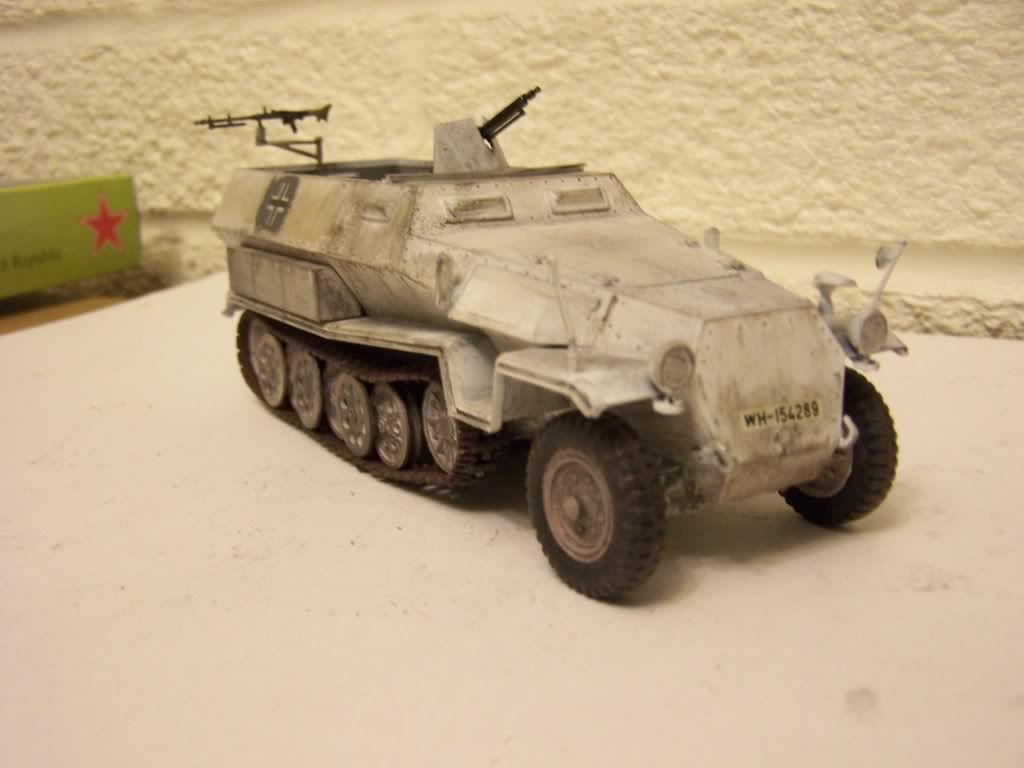
I've had this kit in the stash for a while now, always with a view to using it in a diorama alongside a model of a Nashorn I built a few years back. Sort of an Eastern front Winter bivouac scene circa 1942-43.

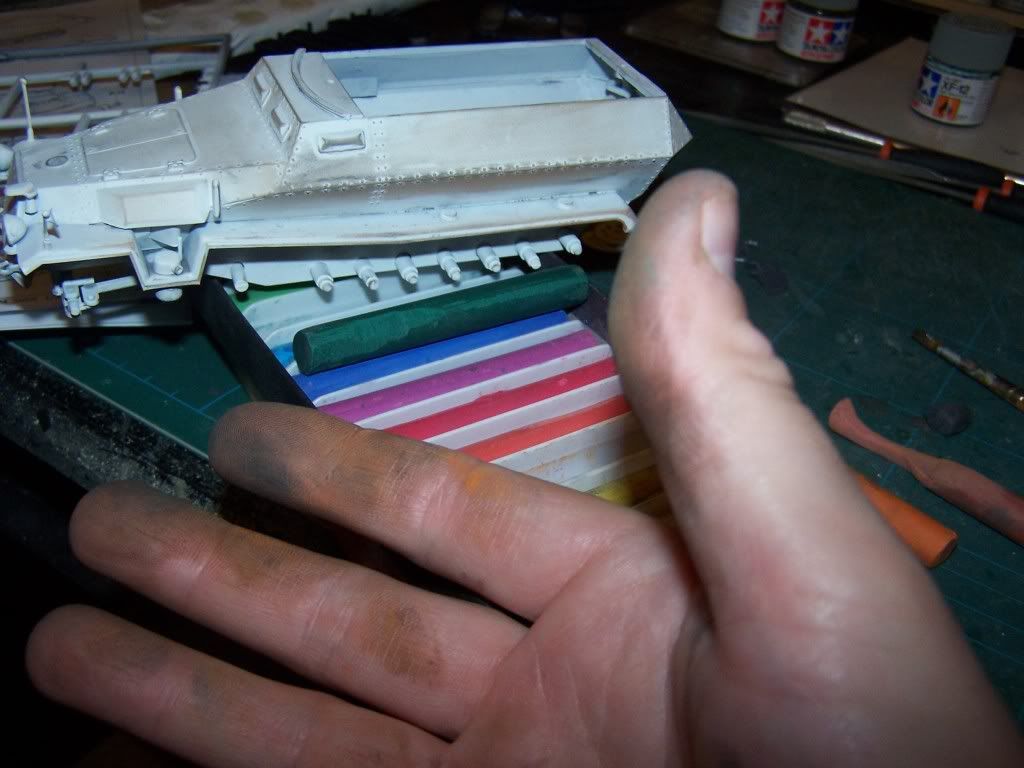
Anyhow, following a hiccup with my airbrush (my own fault for using old paint) and waiting for spares to arrive, I looked for something that I could build without the airbrush. A Hanomag in Winter white, roughly weathered fitted the bill perfectly as it could be undercoated with the ever versatile white car primer and then finished off using hand brushing techniques.

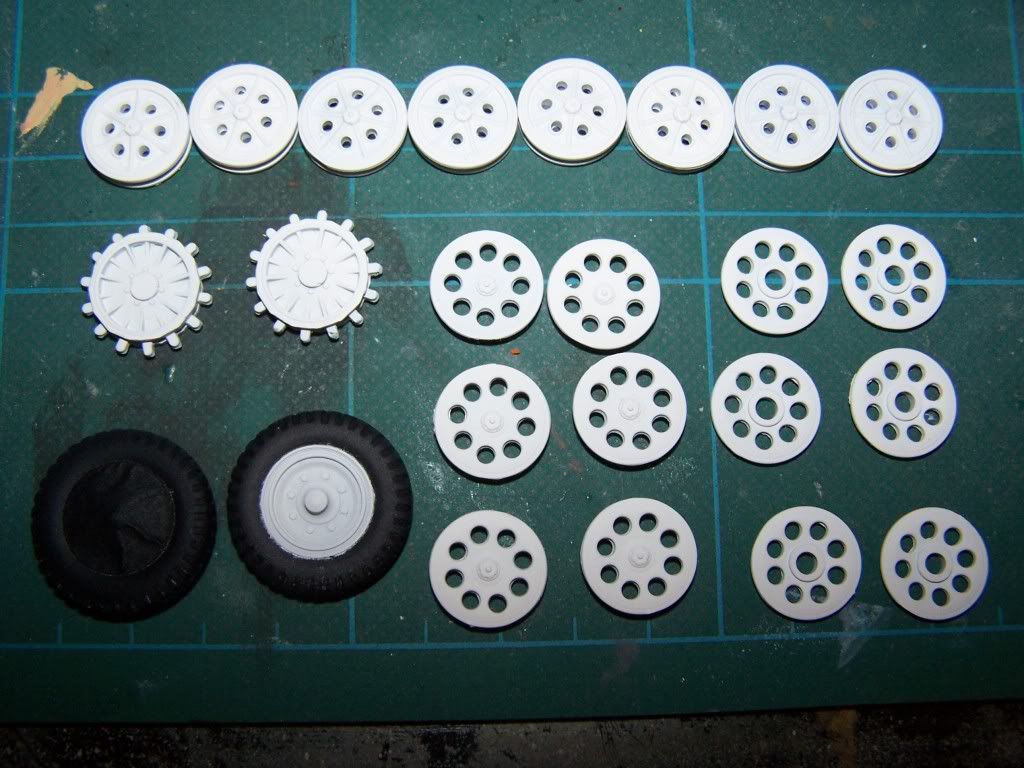
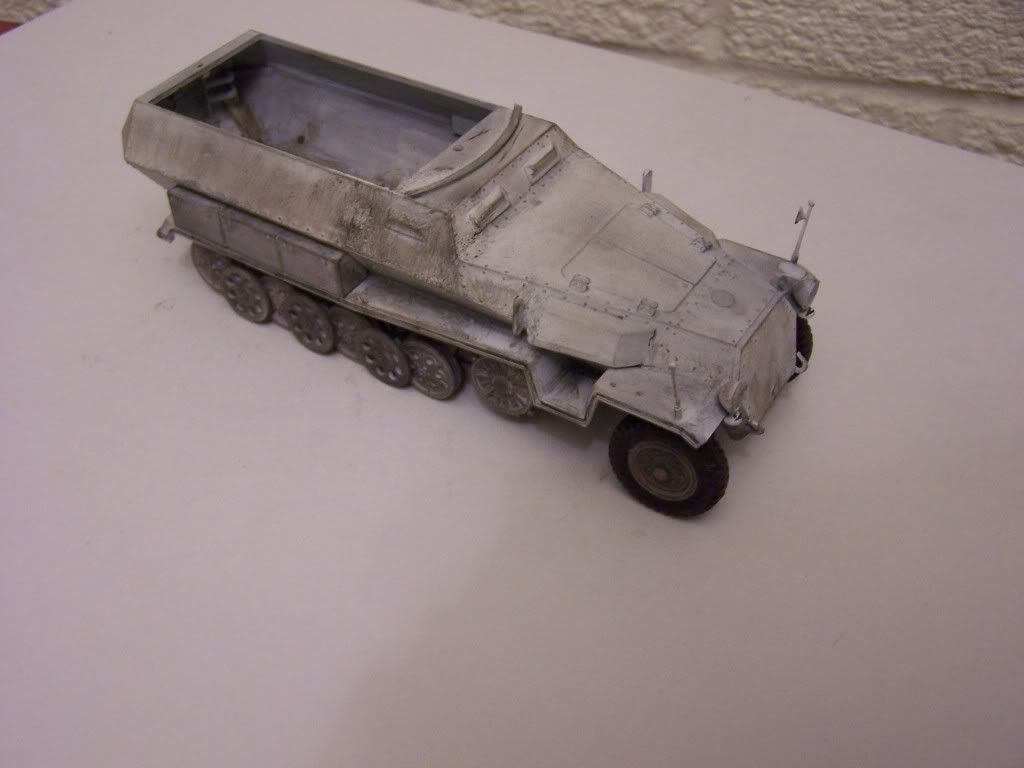
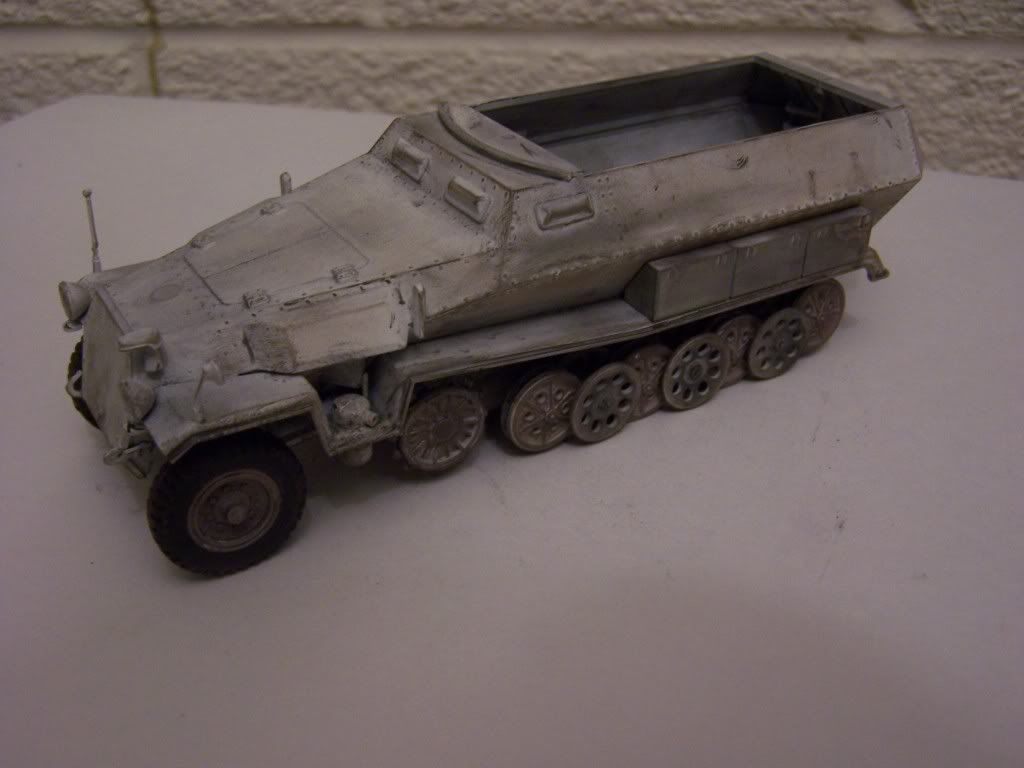
The kit assembled very well and was a pretty straightforward build, even allowing for all those wheels, and has come to this stage in about 10 hours.


Image

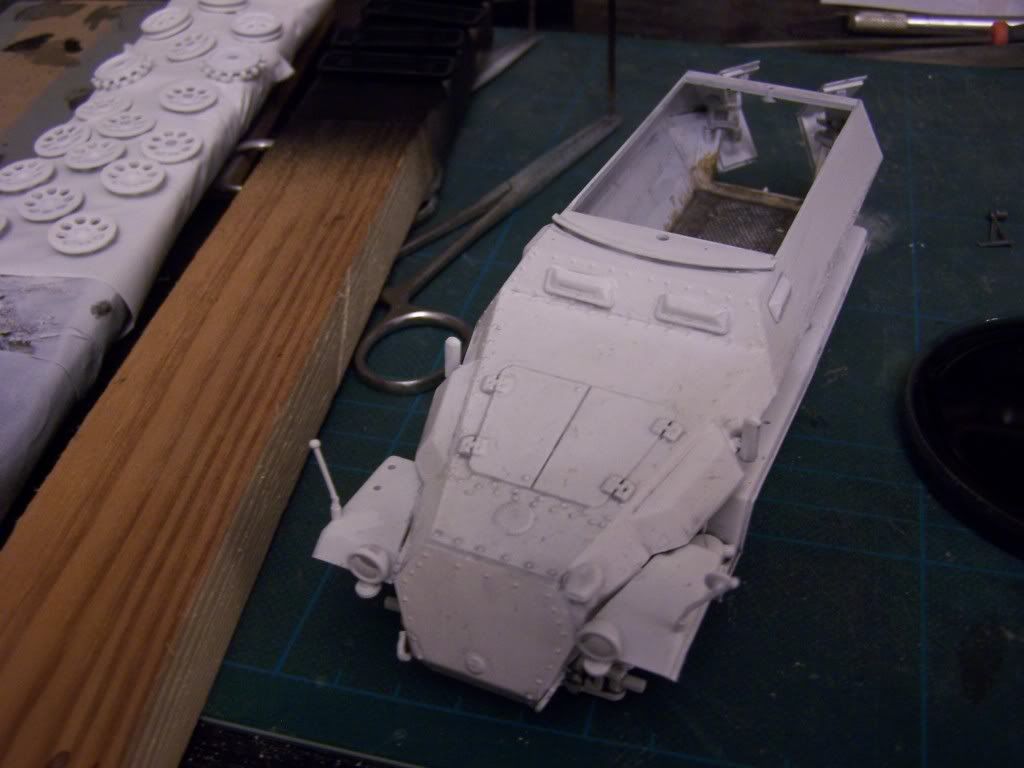
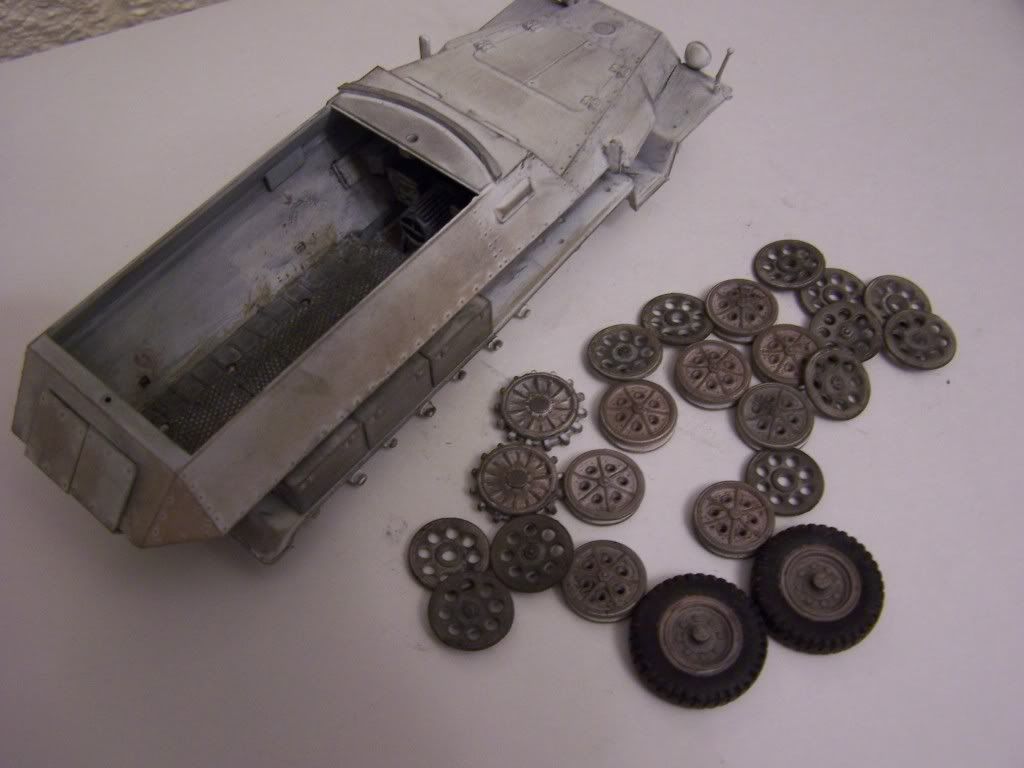
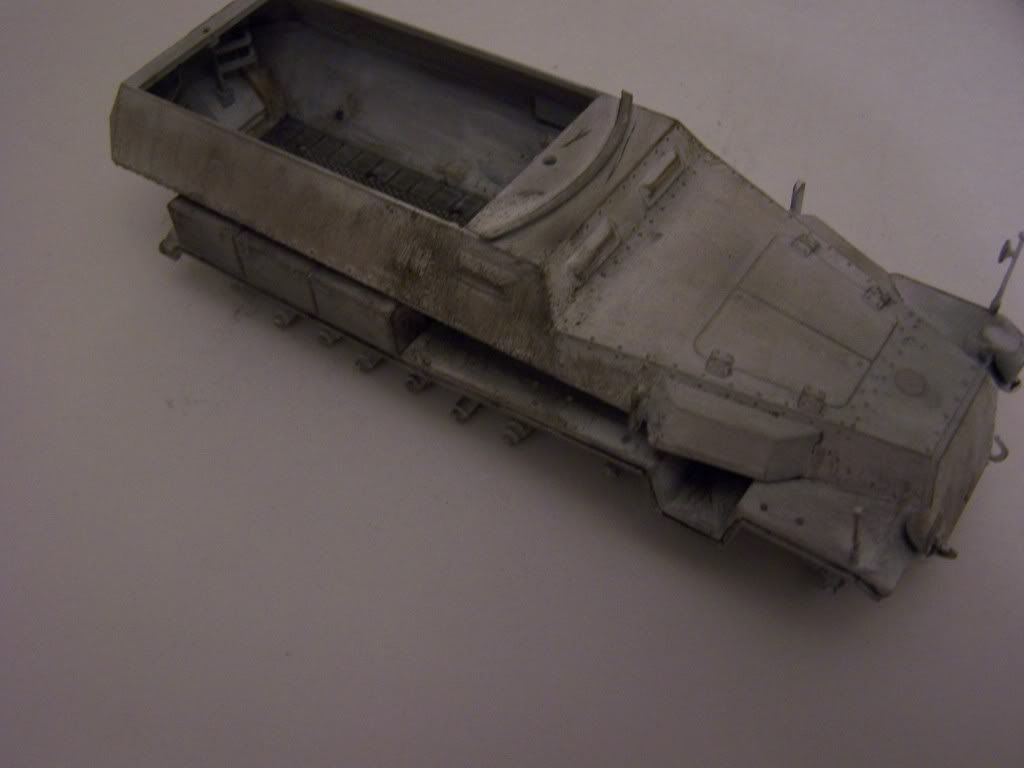
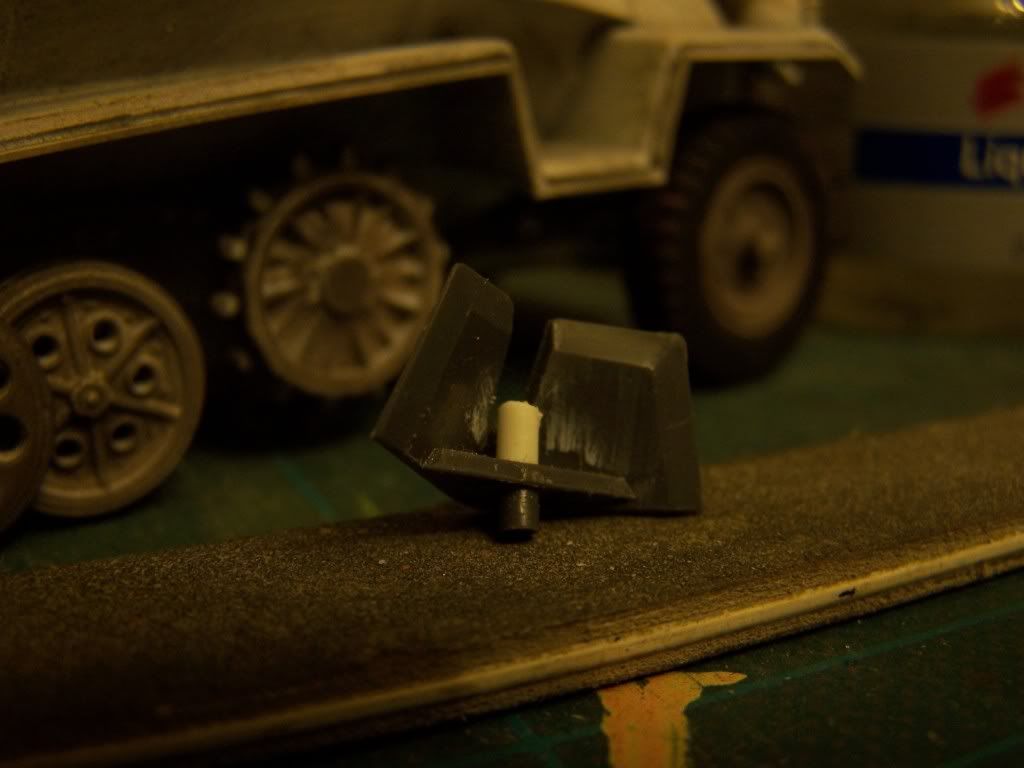
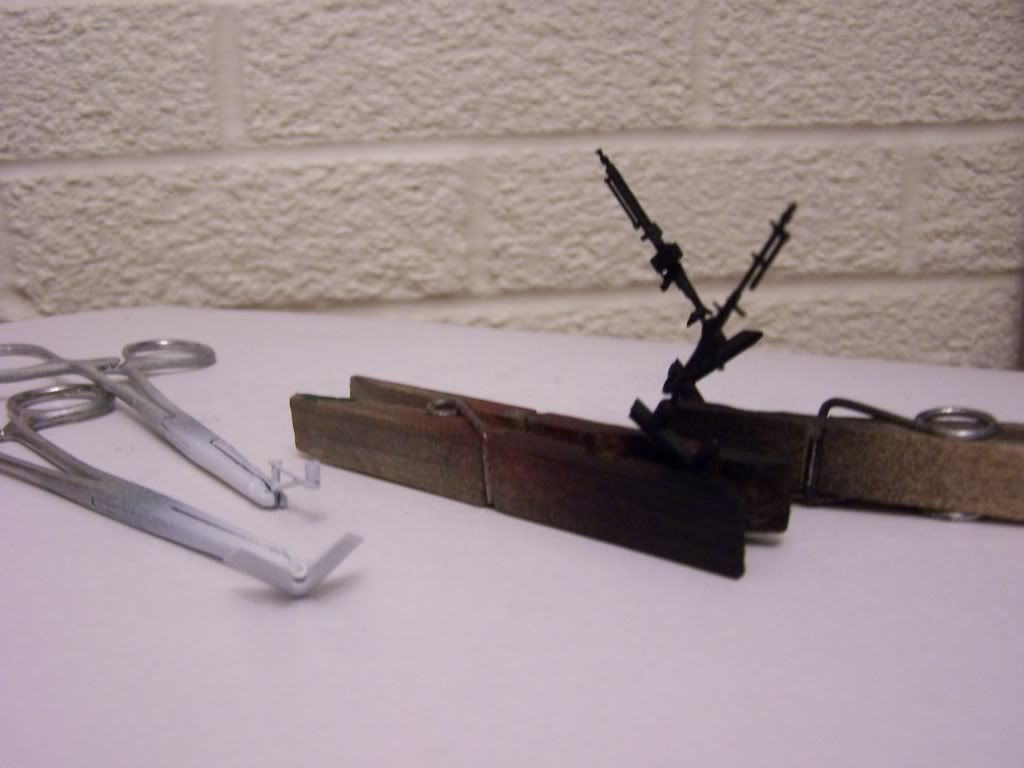
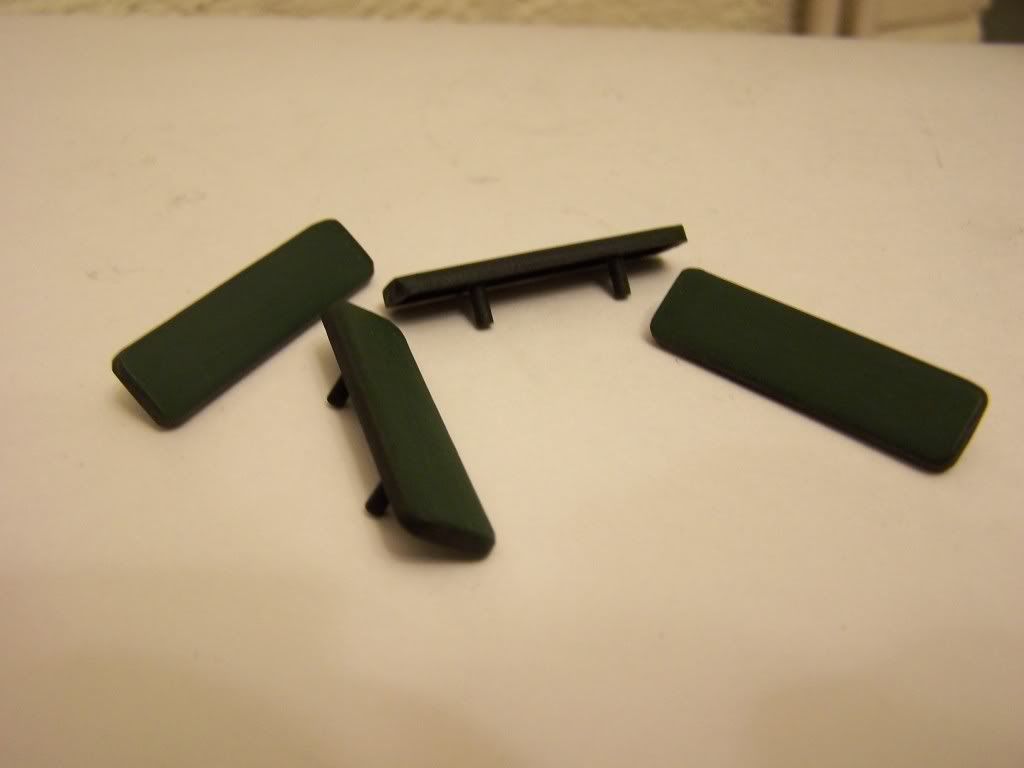
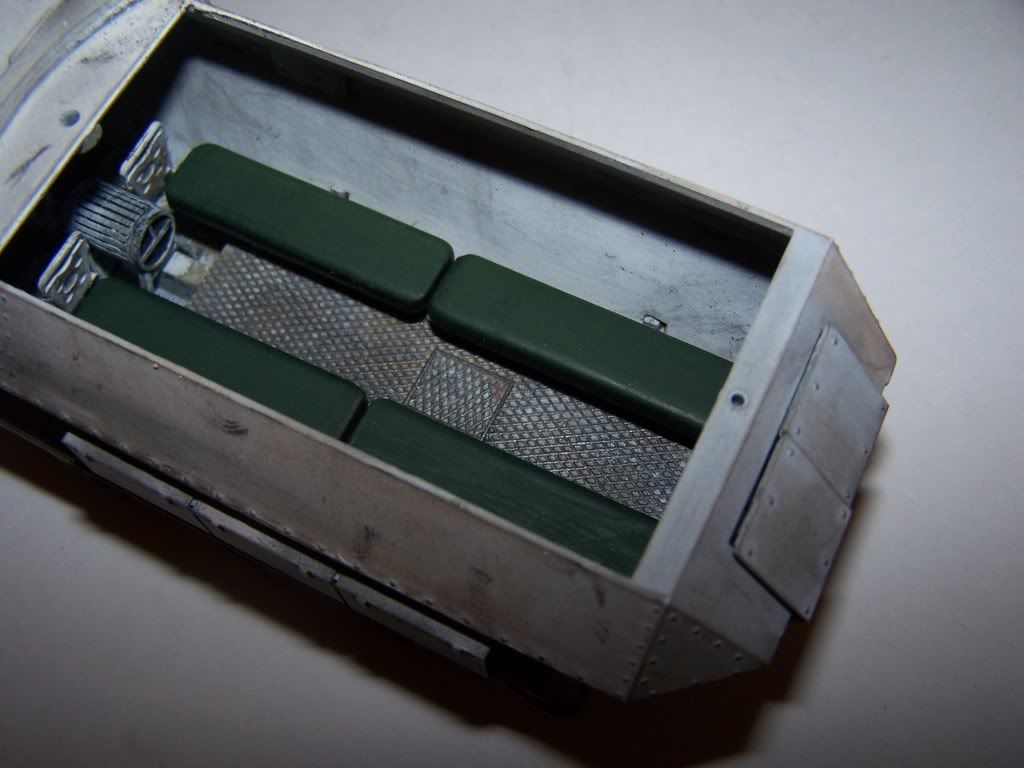
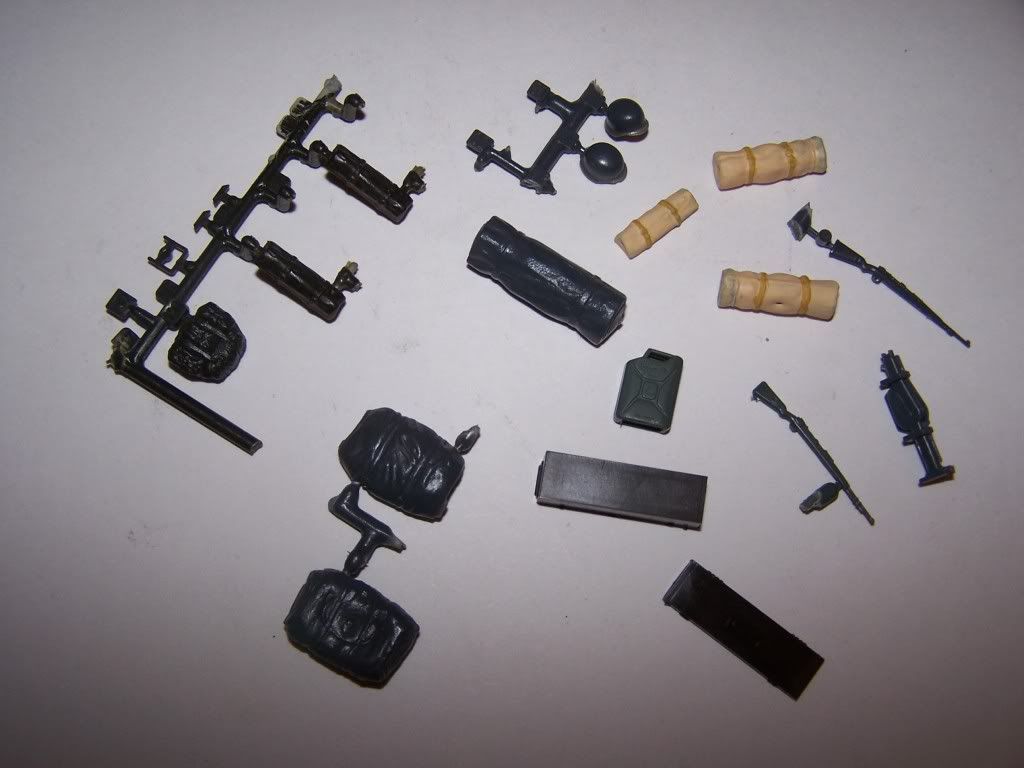
Most of the components are assembled, the track running wheels and drivers are laid out and have received a base coat. The steering wheels are undercoated, masked and sprayed and the seats and other interior bits are well under way. The whole vehicle has been coated with primer and has just been given a thin black wash to highlight surface details. It'll need a few days to fully dry before the decals go on and get sealed in. Then it'll be time for more serious weathering. It'll get plenty of chance as I'll be away for a few days (Oktoberfest-Belgium) and, before I go I'll finish off some of the peripheral pieces like tools and equipment lockers.
COLD WAR S.I.G. LEADER

Wherever there's danger, wherever there's trouble, wherever there's important work to be done....I'll be somewhere else building a model!
User avatar
Softscience
Staring out the window
Posts: 7454
Joined: April 5th, 2011, 4:34 pm
Location: Maryland, near Washington DC

Re: Tamiya 1/35th Hanomag

Post by Softscience »

This brings back memories. I built this kit many years ago, shortly after I started building models. It didn't look as good as what you're getting there. I like what I see with the interior floor.

More piccies please!
User avatar
Dazzled
Modelling Gent and Scholar
Posts: 9592
Joined: October 1st, 2011, 11:08 pm
Location: Mid Glamorgan, South Wales
Contact:

Re: Tamiya 1/35th Hanomag

Post by Dazzled »

4 WHEELS ON MY WAGON I WISH!

Image

All the wheels finished and ready to fit. The mask is still on one of the steering wheels.
COLD WAR S.I.G. LEADER

Wherever there's danger, wherever there's trouble, wherever there's important work to be done....I'll be somewhere else building a model!
User avatar
Dazzled
Modelling Gent and Scholar
Posts: 9592
Joined: October 1st, 2011, 11:08 pm
Location: Mid Glamorgan, South Wales
Contact:

Re: Tamiya 1/35th Hanomag

Post by Dazzled »

TIME TO GET MESSY!

Time for weathering. A method I like to use over white camoflage on armoured vehicles is the "dirty hands" method.

Taking pastel chalks and grinding/crushing/rubing them into and over the model and working them in with brushes and fingers highlights surface detail and can be worked into relief areas.

Image

It does leave you with "weathered" hands though, and you have to be careful not to catapult any small details across the room.

The body and wheels get this treatment using black, brown, orange, green and a little blue pastel. The wheels get heavier treatment worked into the recesses, reflecting the patterns seen in reference pictures.

Image

Also, I've added the side equipment lockers, which have been painted and weathered separately. Leaving them off until now allowed access for painting/weathering under the body overhang.
COLD WAR S.I.G. LEADER

Wherever there's danger, wherever there's trouble, wherever there's important work to be done....I'll be somewhere else building a model!
User avatar
Dazzled
Modelling Gent and Scholar
Posts: 9592
Joined: October 1st, 2011, 11:08 pm
Location: Mid Glamorgan, South Wales
Contact:

Re: Tamiya 1/35th Hanomag

Post by Dazzled »

MOVING ON....

The model still looked a bit too clean in places so black ink was applied with a cocktail stick around the running boards/mudguards, again referring to photos of the real thing. This was then feathered/lightened with a stiff, flat brush. The black ink was also used in places to indicate oil leaks and general scraping/marking.

Image

The same brush was then used to dry brush a little Tamiya XF-56 (Metallic Grey) over the floor, followed by a similar treatment with XF-52 (Flat Earth). The resulting slurry from wiping the brush on a piece of paper towel was livened up with a little car screen wash and applied, with the flat brush, to selected areas of the bodywork in a downward motion to indicate "run-off". This is prettty effective as the XF-56 gives a bit of an oily sheen to the weathering, and hard rubbing with the brush blends the mixture in with the pastels.
COLD WAR S.I.G. LEADER

Wherever there's danger, wherever there's trouble, wherever there's important work to be done....I'll be somewhere else building a model!
User avatar
Dazzled
Modelling Gent and Scholar
Posts: 9592
Joined: October 1st, 2011, 11:08 pm
Location: Mid Glamorgan, South Wales
Contact:

Re: Tamiya 1/35th Hanomag

Post by Dazzled »

THE WHEELS...THE WHEELS...

Time to put the wheels on my wagon.

Image

This was a relatively painless process, although the running wheels needed drilling out to remove excess paint and allow them to fit snugly over their axles. Care was needed to align these correctly, particularly the single outer/inner dishes, which have very little attchment area to keep them straight. I also found that one of the drive axles had come adrift, despite my efforts with the cyano glue under the floor. This was remedied by trickling liquid poly down the side of the shaft. Also, before fitting, the inner faces of the centre wheels were given a quick dash of medium grey to stop them "glowing" white against the weathering.

I have to say that, when designing this kit, Tamiya seem to have lost the plot a little in respect to the running wheels. I mean, who would want them to rotate, as suggested in the instructions? How far could it be pushed accross the floor, given the fragility of the wheels?

Anyhow, mine are glued good and solid!

Image

And now it looks like a half-track :grin: and here's a view of the left side just to show that I didn't skimp and did actually paint both sides.
COLD WAR S.I.G. LEADER

Wherever there's danger, wherever there's trouble, wherever there's important work to be done....I'll be somewhere else building a model!
User avatar
Marek
Modelling Gent and Scholar
Posts: 2455
Joined: May 1st, 2011, 8:03 am
Location: Madison, WI
Contact:

Re: Tamiya 1/35th Hanomag

Post by Marek »

Perfect looking winter brute! Quite an effective dirty-ing techniques I must confess.
User avatar
Dazzled
Modelling Gent and Scholar
Posts: 9592
Joined: October 1st, 2011, 11:08 pm
Location: Mid Glamorgan, South Wales
Contact:

Re: Tamiya 1/35th Hanomag

Post by Dazzled »

BUM!

Guess who just catapulted the machine gun mounting accross the room.

:oops:

Oh well...where's me evergreen rod.
COLD WAR S.I.G. LEADER

Wherever there's danger, wherever there's trouble, wherever there's important work to be done....I'll be somewhere else building a model!
User avatar
Dirkpitt289
NUMA's Auto Mechanic
Posts: 8724
Joined: May 2nd, 2011, 1:55 am
Location: New jersey USA
Contact:

Re: Tamiya 1/35th Hanomag

Post by Dirkpitt289 »

Now this is a weathering technique even I can do. Time to break out some armor.... :mrgreen:
.... Dirk

Beware of the DOG's of WAR

My Youtube Channel
https://www.youtube.com/user/ModelingGu ... rid&view=0
User avatar
Dazzled
Modelling Gent and Scholar
Posts: 9592
Joined: October 1st, 2011, 11:08 pm
Location: Mid Glamorgan, South Wales
Contact:

Re: Tamiya 1/35th Hanomag

Post by Dazzled »

A new MG bracket from plastic rod.

Image

Undercoated with white, next to MGs undercoated in matt black.

Image
COLD WAR S.I.G. LEADER

Wherever there's danger, wherever there's trouble, wherever there's important work to be done....I'll be somewhere else building a model!
User avatar
Dazzled
Modelling Gent and Scholar
Posts: 9592
Joined: October 1st, 2011, 11:08 pm
Location: Mid Glamorgan, South Wales
Contact:

Re: Tamiya 1/35th Hanomag

Post by Dazzled »

The seats, painted in black with green tops.

Image

And fitted to the interior.

Image

They look a little too "new" though. More on this later.


A root around among the spares rack turned up some interesting bits for the interior without me having to raid my detailing kits and bits.

Image

Several bed rolls, a jerry can, a couple of helmets, a jack, an ammo box and two Mauser rifles. So far, so good.
COLD WAR S.I.G. LEADER

Wherever there's danger, wherever there's trouble, wherever there's important work to be done....I'll be somewhere else building a model!
User avatar
Dazzled
Modelling Gent and Scholar
Posts: 9592
Joined: October 1st, 2011, 11:08 pm
Location: Mid Glamorgan, South Wales
Contact:

Re: Tamiya 1/35th Hanomag

Post by Dazzled »

TRACK TREATMENT TIME.

This is my usual method for treating/weathering tracks on armoured vehicles.

First, gather together the relevant equipment and materials.

Image

What we have is:

1. A pot of Tamiya XF-56 metallic grey paint (any acrylic paint of a similar shade will do).

2. A large (ish) brush. Don't use your best one, or something rock hard either.

3. A clear plastic bag, preferably sealable.

4. Pastel chalks. For this it's mostly (again) blacks and brown/rust colours you'll need.

5. A pair of shiny tracks, straight out of the box.

METHOD.

First off, I should point out that this is quite a messy procedure, so some people may want to don rubber gloves. Some of you may wear them normally but, hey, who am I to judge what you do in your spare time.

1. Grind up some pastels until you get a nice pile of a suitable colour. The amount you need depends on the size of the tracks you have. For this model about half an eggcup is sufficient. Put the pastels in the bag.

2. Now you have to be quick. Liberally coat the tracks with the paint ONE AT AT TIME. Try not to block up the holes, although it's not too much of a problem if you do, and drop it into the bag.

3. Seal, or hold, the top shut and give it a good shake. This works best if you can trap some air in the base of the bag with the track rattling around in it.

4. Repeat for as many tracks as you have, adding them to the bag with the other(s) as you go.

5. Leave in the bag to dry overnight.

And this is how they come out.

Image

They're still a little rough but the coating will continue to fall of while they are being handled and fitted. After that, there will be a little more weathering to pick out detail and highlight areas of wear.
COLD WAR S.I.G. LEADER

Wherever there's danger, wherever there's trouble, wherever there's important work to be done....I'll be somewhere else building a model!
User avatar
Dazzled
Modelling Gent and Scholar
Posts: 9592
Joined: October 1st, 2011, 11:08 pm
Location: Mid Glamorgan, South Wales
Contact:

Re: Tamiya 1/35th Hanomag

Post by Dazzled »

The next move was to get the tracks on. This was a simple process with Tamiya's attachment system of a push-through tab working perfectly. When they were on, the top of the tracks were glued to the tops of the roadwheels to give a bit of realistic sag and then a dry brush of metallic grey was applied to the outside. I had a nice picture of this but Photobucket refused to upload it. :evil:

Next up were the MGs and decals.. The MGs already had a black undercoat and this was supplemented by dry brushing with Tamiya X-19 (smoke) and XF-56 (metallic grey) in turn. The stocks were then painted with XF-49 (khaki). These were attached along with their brackets, which had been similarly weathered.

Image

The decals turned out to be a source of some confusion. There is no actual white camoflague option in the kit instructions, so I turned to research for some guidance. The Winter distemper camoflage application seems to have varied widely, on these and similar machines. Some machines were white with full markings reapplied over the top while others had their markings totally obscured by the camoflage. Many had something in between, with insignia painted around and other identifying marks re-applied randomly. I decided to go for a compromise (life's like that) and painted on some dark grey patches, on which to apply the national insignia, and numberplates. Unit/ theatre markings were left off completely. Johnsons Klear was applied where the decals were to be attached and they went down nicely with a little Microset. Then they were sealed with some Xtracolour matt varnish.

After a bit more tweaking of the weathering, this is the stage I'm at now. With just the tools and, maybe some interior details, to go, the end is in sight.

Image

Image
COLD WAR S.I.G. LEADER

Wherever there's danger, wherever there's trouble, wherever there's important work to be done....I'll be somewhere else building a model!
User avatar
Dazzled
Modelling Gent and Scholar
Posts: 9592
Joined: October 1st, 2011, 11:08 pm
Location: Mid Glamorgan, South Wales
Contact:

Re: Tamiya 1/35th Hanomag

Post by Dazzled »

Lol. I live in Wales. I'm more likely to get a picture of it in a puddle.
COLD WAR S.I.G. LEADER

Wherever there's danger, wherever there's trouble, wherever there's important work to be done....I'll be somewhere else building a model!
User avatar
Dazzled
Modelling Gent and Scholar
Posts: 9592
Joined: October 1st, 2011, 11:08 pm
Location: Mid Glamorgan, South Wales
Contact:

Re: Tamiya 1/35th Hanomag

Post by Dazzled »

:lol:

Maybe I should've built a schwimmwagen.
COLD WAR S.I.G. LEADER

Wherever there's danger, wherever there's trouble, wherever there's important work to be done....I'll be somewhere else building a model!
Post Reply

Return to “Tanks, AFV and other Military Models”