A golden oldie, but a fav of mine.
Painted up as part of the Leibstandarte at Normandy in July 0f 1944
Pzkw V Panther Tamiya 1/35
- Dirkpitt289
- NUMA's Auto Mechanic
- Posts: 8724
- Joined: May 2nd, 2011, 1:55 am
- Location: New jersey USA
- Contact:
Re: Pzkw V Panther Tamiya 1/35
WOW, That is fantastic!!!!!
.... Dirk
Beware of the DOG's of WAR
My Youtube Channel
https://www.youtube.com/user/ModelingGu ... rid&view=0
Beware of the DOG's of WAR
My Youtube Channel
https://www.youtube.com/user/ModelingGu ... rid&view=0
Re: Pzkw V Panther Tamiya 1/35
That is brilliant, well done you, just makes me want to play dot to dot on it though
"When a prang (crash) seems inevitable, endeavor to strike the softest, cheapest object in the vicinity as slow and gently as possible." - Advice given to RAF pilots during WWII
- Woodstock
- Getting well comfy!
- Posts: 65
- Joined: May 1st, 2011, 11:02 pm
- Location: South Kilworth Leicestershire
Re: Pzkw V Panther Tamiya 1/35
Looks good Chris nice build, I love the camo..
The only way I got to keep them Tigers busy is to LET THEM SHOOT HOLES IN ME!
Re: Pzkw V Panther Tamiya 1/35
Thanks guys, it took several hours to do the stipling on that one.
I always liked the 'ambush' camo the germans started using in 1944, makes for very interesting projects.
- MrDyzio
- The Bug Has Well And Truly Bitten
- Posts: 353
- Joined: May 2nd, 2011, 12:24 am
- Location: DC Metro Area
- Contact:
Re: Pzkw V Panther Tamiya 1/35
Chris it's nice to see some armor models here. I don't know how long you build tanks, but I see couple areas for improvement.
I believe you use brush, which caused little to heavy coat of paint. Try to thin down the paint. More light coats rather than thick one.
Second picture shows two not the best areas. On the right side first outer road wheel sits on the angle. On the joint of front hull plate with
side is huge glue/putty blob. Quick sanding would fix this.
Third picture shows on the bottom of commander's cupola not removed glue/putty?
Picture #4 Spare track links show some missing paint - easy fix. In the future, you might try to paint additional details before mounting them to hull.
Picture#5 Wooden crates on the rear would look better if painted wood colors.
I would also add some brown wash to highlight the details.
Excuse my few words of criticism, but I would love to see you improving your builds. Keep them coming. If you have questions about armor models I'll be glad to help.
My modeling Blog Dyzio Scale Models
Re: Pzkw V Panther Tamiya 1/35
Since you went to the trouble of making a long post, i'll answer.
first, the history of the kit is it was a brown blob wreck given to me because i claimed i could fix up any kit no matter how bad off it was. The job was done some 25 years ago.
Also, when doing armor camo, thin coats on WWII german armor is incorrect, in the field the german military used whatever stocks were available and rarely cleaned a subject before painting, it was far more common to spray right over mud and damage and rust.
also tank crews had little skill as this, how the job was done was at teh descrestion of the platoon commander which is why you see such huge array of differnt types with little conformity.
If you look closely the entire gun mantle is actually putty, he had ripped part of it off and made 'shell holes' and tried to do zimmerit quite badly, all removed and reworked by me.
In this case its supposed to look as if it was just painted and the crew is starting it up fresh.
first, the history of the kit is it was a brown blob wreck given to me because i claimed i could fix up any kit no matter how bad off it was. The job was done some 25 years ago.
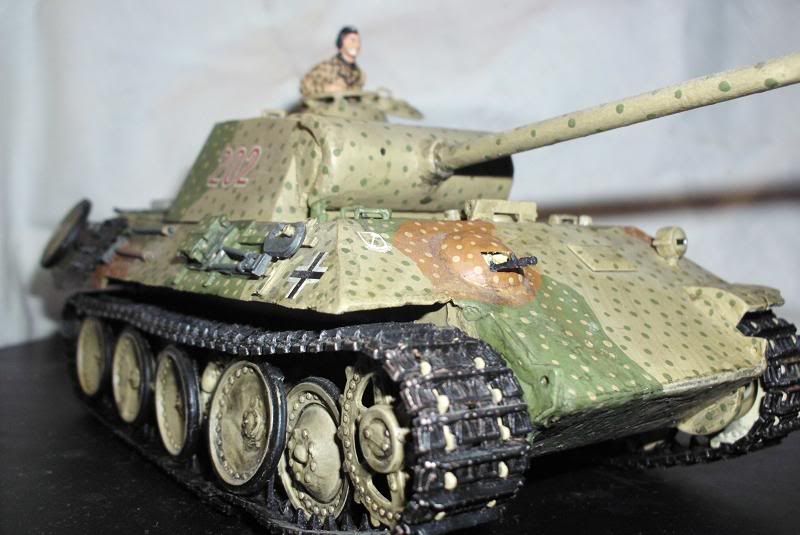
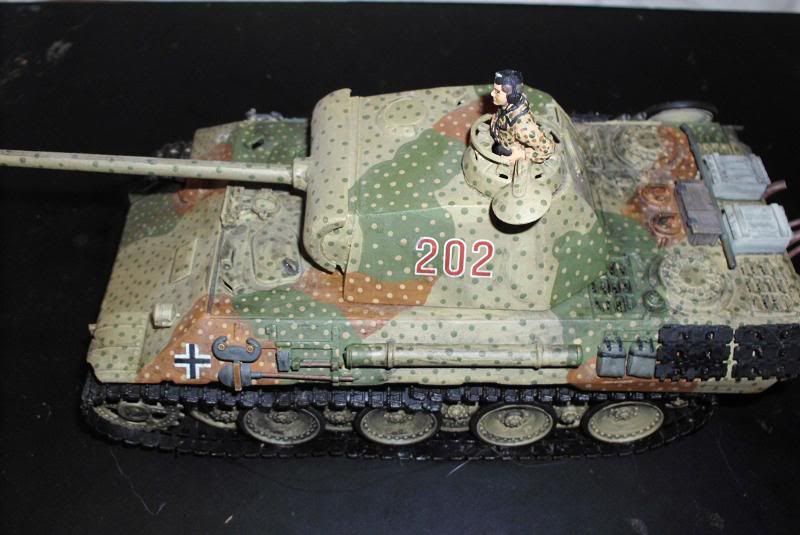
The cammo was done with an air brush except for the stipling.MrDyzio wrote:Chris it's nice to see some armor models here. I don't know how long you build tanks, but I see couple areas for improvement.
I believe you use brush, which caused little to heavy coat of paint. Try to thin down the paint. More light coats rather than thick one.
Also, when doing armor camo, thin coats on WWII german armor is incorrect, in the field the german military used whatever stocks were available and rarely cleaned a subject before painting, it was far more common to spray right over mud and damage and rust.
also tank crews had little skill as this, how the job was done was at teh descrestion of the platoon commander which is why you see such huge array of differnt types with little conformity.
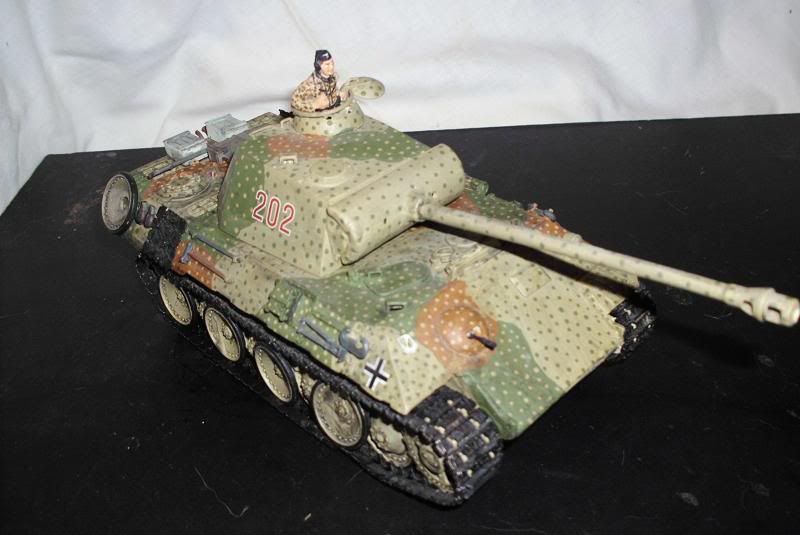
That only shows up in the macro photography i use to take the shots, the naked eye doesn't catch it, and if you look closely you will see the tracks on the left side over lap because the only tread i had was a nichimo which didn't fit properly, in those days replacement tracks meant buying another kit!Second picture shows two not the best areas. On the right side first outer road wheel sits on the angle. On the joint of front hull plate with
side is huge glue/putty blob. Quick sanding would fix this.
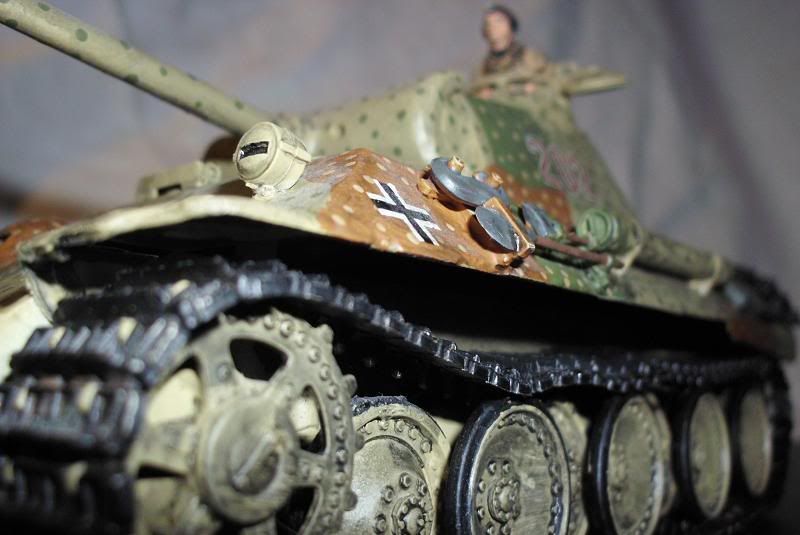
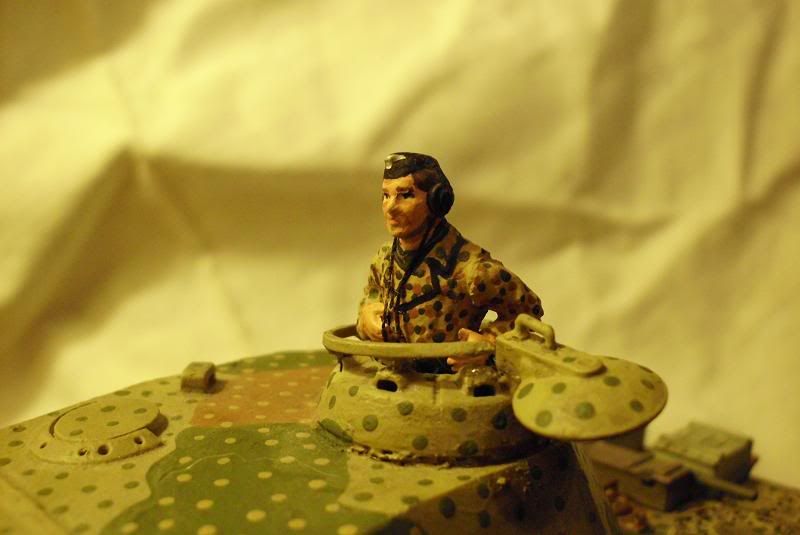
Is a weld line, the guy who did the kit originally wanted to show battle damage and claimed the cupola was rewelded in the field, thus you see that.Third picture shows on the bottom of commander's cupola not removed glue/putty?
If you look closely the entire gun mantle is actually putty, he had ripped part of it off and made 'shell holes' and tried to do zimmerit quite badly, all removed and reworked by me.
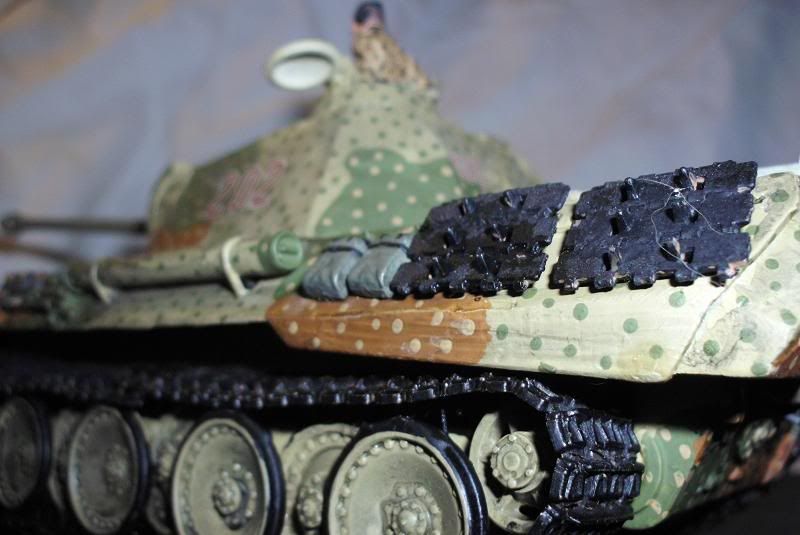
Again, the naked eye doesn't pick that up, only the macro photog stuff does.Picture #4 Spare track links show some missing paint - easy fix. In the future, you might try to paint additional details before mounting them to hull.
Wood comes in many colors my friend, including balsa looking shades.Picture#5 Wooden crates on the rear would look better if painted wood colors.
Would distort the ambush sceme, when you do washes they have to blend to the camo used, the green and rust don't take brown washes well, it makes it look like dust and obscures the effect.I would also add some brown wash to highlight the details.
In this case its supposed to look as if it was just painted and the crew is starting it up fresh.
I don't mind at all, I build them for fun not perfection.Excuse my few words of criticism, but I would love to see you improving your builds. Keep them coming. If you have questions about armor models I'll be glad to help.
- bromo
- On a long, long journey
- Posts: 1249
- Joined: May 2nd, 2011, 7:05 pm
- Location: Wolverhampton,England
Re: Pzkw V Panther Tamiya 1/35
Nice paint job Chris, i nearly bought one of these the other month how do they go together? anyy problems?
BEEN A WHILE
Re: Pzkw V Panther Tamiya 1/35
Not that i could see, I took most of it apart when I was rebuilding it, the fit seems pretty good for such an old kit.
Re: Pzkw V Panther Tamiya 1/35
love the paint job