Simon's Red From Under The Bed

A single type GB, the Bell P-39 (or P-400) Airacobra in any scale, boxing, etc.
Runs June 18th to July 15th.
GB Leader is Brews.
User avatar
SJPONeill
Modelling Gent and Scholar
Posts: 3525
Joined: May 1st, 2011, 12:01 am
Location: Near the Spiral, NZ.
Contact:

Simon's Red From Under The Bed

Post by SJPONeill »

I had decided to sit this one out but then there was that discussion on what is actually in the Eduard box so i fished mine out from under the bed where it resided to have a look - I'd seen just a few days before so knew exactly where it was - Carmen asked if I was going to start another model and I said I was just having a look at it but it looked so simple, there in its box, so here I go...

Apologies for the crappy pic - will have to check the camera to see what happened there...

Image

I think I scored this off one of the many promotional deals at NKR Models about ten years ago...as was my wont at the time, I removed all the 'not necessary' parts on delivery and they are languishing in one of the spares boxes somewhere.

I plan to build the Soviet version pretty well OOB....
Please critique my posts honestly i.e. say what you think so I can learn and improve...
The World According To Me
User avatar
SJPONeill
Modelling Gent and Scholar
Posts: 3525
Joined: May 1st, 2011, 12:01 am
Location: Near the Spiral, NZ.
Contact:

Re: Simon's Red From Under The Bed

Post by SJPONeill »

First minor hiccup...I clearly wasn't paying attention when I clipped the 'not needed' parts all those years ago and now I have one flattened main gear tyre and one fully-rounded...
Please critique my posts honestly i.e. say what you think so I can learn and improve...
The World According To Me
User avatar
SJPONeill
Modelling Gent and Scholar
Posts: 3525
Joined: May 1st, 2011, 12:01 am
Location: Near the Spiral, NZ.
Contact:

Re: Simon's Red From Under The Bed

Post by SJPONeill »

Carrying with a recce through the parts - it really does look very well-desgned and so simple - only glitches I have found are an incy bit of flash and the fact that the nose guns are only represented by flat faces where the barrels should be...I'll drill these out but may have to wait til I find a suitable barrel for each...
Please critique my posts honestly i.e. say what you think so I can learn and improve...
The World According To Me
User avatar
JohnRatzenberger
Why is he so confused ?
Posts: 15734
Joined: April 5th, 2011, 3:42 pm
Location: Living on a sandbar - Nags Head, NC.

Re: Simon's Red From Under The Bed

Post by JohnRatzenberger »

SJPONeill wrote:First minor hiccup...I clearly wasn't paying attention when I clipped the 'not needed' parts all those years ago and now I have one flattened main gear tyre and one fully-rounded...
Sounds like a maintenance diorama ....
John Ratzenberger :???:
It's my model and I'll do what I want with it.
User avatar
SJPONeill
Modelling Gent and Scholar
Posts: 3525
Joined: May 1st, 2011, 12:01 am
Location: Near the Spiral, NZ.
Contact:

Re: Simon's Red From Under The Bed

Post by SJPONeill »

Cheers, Brews

Didn't think of using those - from memory I have some buried in a spares box in the garage; if not, I'll take you up on that...

I seem to have crappipicturitis and this one isn't very sharp either...

Image

Did some basic assembly last night...this is a really simple kit - so far - the cockpit just fell together although I did forget the prop driveshaft that runs through the nose gear bay so will have to slip that in tonight...I added the main gear roofs and opened up the holes for the wing guns but need to remember where I put my round files to clean the holes up...

Am really enjoying the superb way that this kit is designed and goes together...am very tempted to go straight into another Eduard model (think I have a Roland stashed somewhere) after this...

Tonight will be hand-brush (too cold and wet to make a go of it with the air brush) of the cockpit, and gear bays with Interior Green; and the insides of the intakes with Steel...
Please critique my posts honestly i.e. say what you think so I can learn and improve...
The World According To Me
User avatar
SJPONeill
Modelling Gent and Scholar
Posts: 3525
Joined: May 1st, 2011, 12:01 am
Location: Near the Spiral, NZ.
Contact:

Re: Simon's Red From Under The Bed

Post by SJPONeill »

Hmmm....added a coat of dark steel to the inside of the intakes and the gun barrels (the ones that are supplied anyway) but no joy at all tried to hand paint Tamiya NATO Green as the interior colour - it just wouldn't take and kept coming out all streaky...first time that I had ever had this problem with any paint so maybe there is something to this talk of priming...now that it's morning and the sun is out, I will see if I can find my proper interior green, clean up the inside of the fuselage and have another crack at it...
Please critique my posts honestly i.e. say what you think so I can learn and improve...
The World According To Me
User avatar
Titan
Modelling Gent and Scholar
Posts: 1835
Joined: November 13th, 2011, 10:38 pm
Location: The windswept Isle of Cornwall

Re: Simon's Red From Under The Bed

Post by Titan »

I totally agree with you, I have found this kit well engineered and very enjoyable to put together I have not had any problems with my weekend edition.
Looking forward to seeing more.

Regards
Mark
Regards
Mark
_________________________________________
My models are never perfect, but I kinda like them.
User avatar
SJPONeill
Modelling Gent and Scholar
Posts: 3525
Joined: May 1st, 2011, 12:01 am
Location: Near the Spiral, NZ.
Contact:

Re: Simon's Red From Under The Bed

Post by SJPONeill »

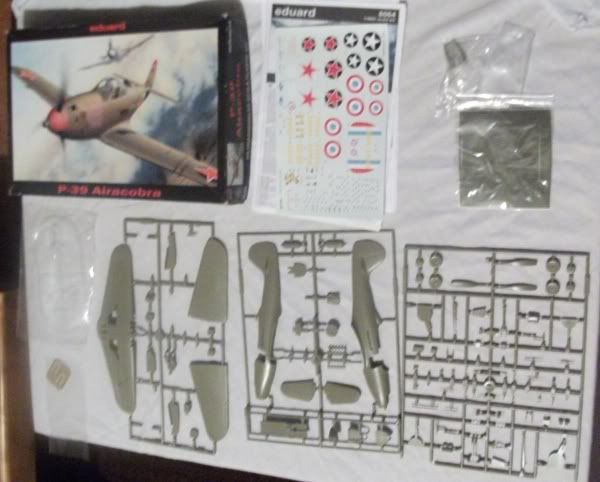
The more I progress this model, the more I want to go out and pick up some more of them - fortunately the nearest model shop is an easy 100km away otherwise I would be in trouble...it is easily the most well-engineered model that I have every built and the first one to every come close to the epithet 'doesn't need filler'...I am very keen now to hook into my other two Eduard kits, the Roland and the Bf-110 but anyway...

...a number of firsts tonight...

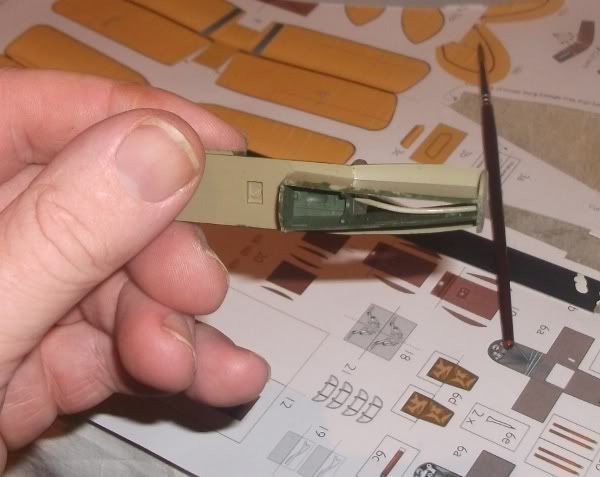
Firstly a big hurrah to Merlin Jones who introduced me to the humble cocktail stick as the primary tool in a modeller's arsenal for removing paint from transparent parts. I forgot that I had fitted the armoured rear window to the cockpit and managed to swipe a painty finger across the rear surface while painting the cockpit. The trusty cocktail stick instantly removes indications of that screw-up.

Second, I then remembered that the model came with a sheet of those precut masky thingies - I've never used them before but thought that it might be an idea to fit them to that window before I did any further painting.

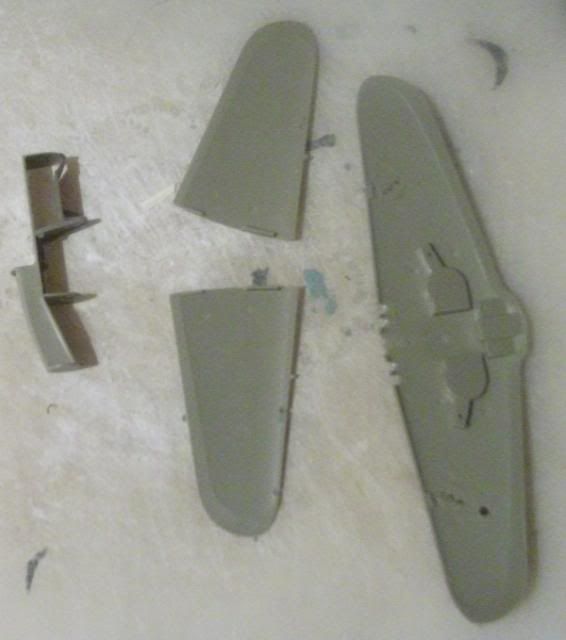
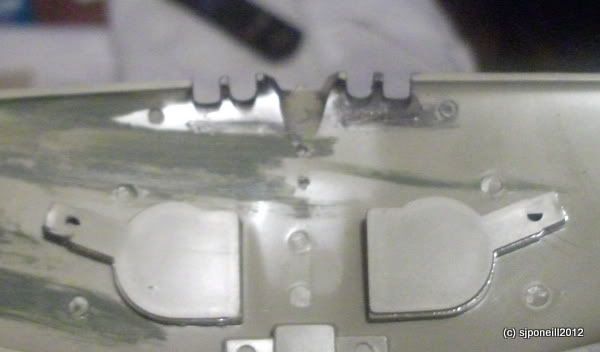
Thirdly, I sought to use the humble cocktail stick to remove some of the paint around the gluing surface for the wing intakes - that didn't work and I ended up doing some scraping with a sharp knife edge to achieve that mission but...the rubbing of the stick against the dry Gunze Burnt Iron paint I used on the intake interiors revealed a lovely polished metal appearance. A quick trip to the bathroom and I was polishing away with a handy button cod to produce lovely shiny metally-looking surfaces...first time I've every done that metal polishing thing.

So here we see the wing intakes, polished on the left, dull and boring and yet to be polished on the right - what a difference!!

Image

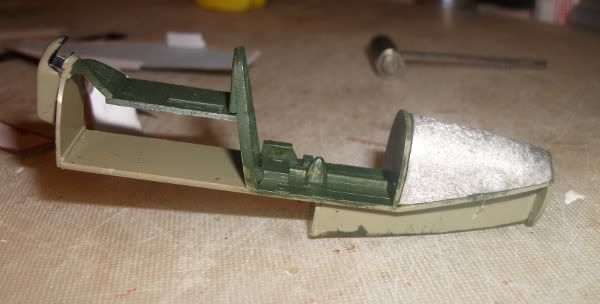
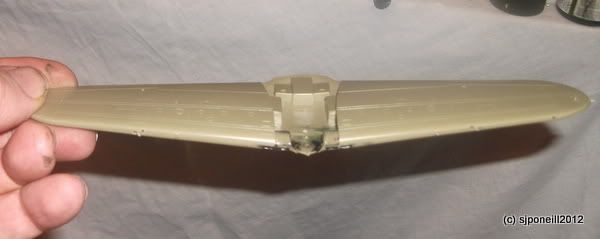
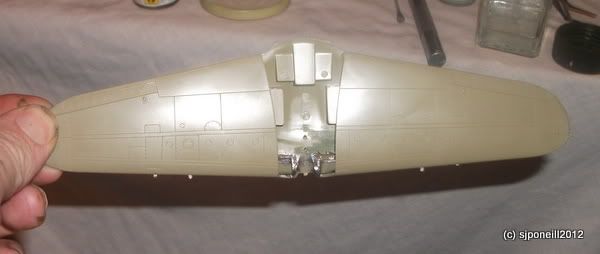
And now two shots of the wings assembled and with another coat of hand-brushed paint in the main gear bays...I found some Tamiya XF-58 in the garage which is what I have always used for US interior green. It went on quite thin but I think I have cracked that problem as well and have tracked it back to my habit of mixing my paint for airbrushing in the bottle so most of my paints are already milky-thin for the airbrush and thus sub-optimal for said hairy stick.

Image

Image

I think my photography is coming back online as these shots seem better than the previous nights' efforts but still a wee way to go because these three are the only really usable ones of the seven I shot...
Please critique my posts honestly i.e. say what you think so I can learn and improve...
The World According To Me
User avatar
Old_Tonto
Modelling Gent and Scholar
Posts: 8063
Joined: May 1st, 2011, 7:41 pm
Location: Middlesbrough, Peoples Republic of Teesside.

Re: Simon's Red From Under The Bed

Post by Old_Tonto »

That looks like very nice surface detail. Nice work so far.
2023 - A:0 B:0 C:0
Current Projects:
East German Air Force (1956-90)
South African Air Force (1958-93)
User avatar
Titan
Modelling Gent and Scholar
Posts: 1835
Joined: November 13th, 2011, 10:38 pm
Location: The windswept Isle of Cornwall

Re: Simon's Red From Under The Bed

Post by Titan »

Again I will echo what Simon has said, it is a great kit to put together so much so I have just bought an Eduard Weekend edition P-400 and a Revell 1/48 P-39 which I understand is the old Monogram kit.

Regards
Mark
Regards
Mark
_________________________________________
My models are never perfect, but I kinda like them.
User avatar
SJPONeill
Modelling Gent and Scholar
Posts: 3525
Joined: May 1st, 2011, 12:01 am
Location: Near the Spiral, NZ.
Contact:

Re: Simon's Red From Under The Bed

Post by SJPONeill »

Had to put all my toys away while the grand-terrors were here on the weekend...go a little more done tonight like fixing the intake to the rear of the cockpit assembly and doing a test fit of the cockpit into the fuselage halves; realised that I will have to add some steel to the inside of the intake on each fuselage half.

Made a sacrifice to the carpet monster in the form of the prop shaft - it was way too long and when I went to pop it clear to shorten it, it flicked away into the distance...no matter as it would have been almost impossible to see anyway; joined the radio halves - the only poor fit in this kit so far, maybe slight short-shot as there is a slight gap between halves in one corner...

Went to fix the nose weight in place only to realise that the UHU or CA were both out in the garage still and it is too cold and wet to venture out this time of night...
Please critique my posts honestly i.e. say what you think so I can learn and improve...
The World According To Me
User avatar
Titan
Modelling Gent and Scholar
Posts: 1835
Joined: November 13th, 2011, 10:38 pm
Location: The windswept Isle of Cornwall

Re: Simon's Red From Under The Bed

Post by Titan »

I believe you just need to sand a small amount(1mm)either side of the bulkhead behind the seat and just below its shoulders to enable the cockpit walls at that point to pull in more when glueing so that the canopy will be flush with the outer fuselage walls once it is in place.
I never found this out until I was too far into the build and I had to fill with liquid putty and then sand flush which I think you are still going to have to do around the front windscreen area to get a flush join if you care to do so.

Regards
Mark
Regards
Mark
_________________________________________
My models are never perfect, but I kinda like them.
User avatar
SJPONeill
Modelling Gent and Scholar
Posts: 3525
Joined: May 1st, 2011, 12:01 am
Location: Near the Spiral, NZ.
Contact:

Re: Simon's Red From Under The Bed

Post by SJPONeill »

Didn't realise I took this pic last night...was hoping that the driveshaft might pop into the mounting holes and look OK - it seemed unusual that a kit that is so well engineered would fubar the length of the shaft like this...clearly it didn't just pop into a good fit and was under a bit of tension: it was when I was removing it to cut a couple of mm off it that it twanged off into the ether...

Image

Painted the inside of the dorsal intake with Burnt Steel tonight and fixed the nose weight into position...

Image

Followed up on Mark's tip re the canopy fuselage join but mine seems OK in width out of the box so will see how it goes on the day...
Please critique my posts honestly i.e. say what you think so I can learn and improve...
The World According To Me
User avatar
SJPONeill
Modelling Gent and Scholar
Posts: 3525
Joined: May 1st, 2011, 12:01 am
Location: Near the Spiral, NZ.
Contact:

Re: Simon's Red From Under The Bed

Post by SJPONeill »

Although the green in not yellow enough on the interior, I can live with it...agin the flash has been quite unforgiving and the finish looks more even that the pic shows...think I am over using a brush to apply acrylics though...
Please critique my posts honestly i.e. say what you think so I can learn and improve...
The World According To Me
User avatar
Titan
Modelling Gent and Scholar
Posts: 1835
Joined: November 13th, 2011, 10:38 pm
Location: The windswept Isle of Cornwall

Re: Simon's Red From Under The Bed

Post by Titan »

So that's what the nose weight looks like. :).
With mine Simon the canopy also looked a good fit unpainted and it could be that mine was worse than the norm but it wasn't until the frames were painted and in situ that I could see how much it was out by which prompted the internet search.

Regards
Mark
Regards
Mark
_________________________________________
My models are never perfect, but I kinda like them.
Locked

Return to “The P-39 Airacobra”