SARowl's Lynx Prototype **Finished**
-
ShaunW
- NOT the sheep
- Posts: 26188
- Joined: November 26th, 2011, 6:11 pm
- Location: Pontefract West Yorkshire
Re: SARowl's Lynx Prototype
Nice work with the PE John, which I think is really helping to bring the cockpit to life. Using PVA to add shape is an old favourite of mine too. The problem with PE - apart from the microscopic size of the some of the parts in the smaller scales - is that all the parts are usually flat, which is not desirable for some items such as flying wires or, indeed, helicopter collectives.
Doing - Tamiya 1/35th Universal Carrier.
Work is the curse of the modelling classes!
IPMS#12300
Work is the curse of the modelling classes!
IPMS#12300
Re: SARowl's Lynx Prototype
Thanks for the encouragement. As I 've said its my first time with most of these techniques, after reading posts on this forum about how other people cope, I thought I'd have a go myself. All my other builds until now were OOB.
John
John
If all else fails, read the instructions...
Building: My first Vacform - Rareplanes Shorts Tucano
Building: My first Vacform - Rareplanes Shorts Tucano
-
ShaunW
- NOT the sheep
- Posts: 26188
- Joined: November 26th, 2011, 6:11 pm
- Location: Pontefract West Yorkshire
Re: SARowl's Lynx Prototype
Trying new techniques is always a bit daunting John but can very satisfying. I usually try new stuff on cheaper kits, just in case it all goes belly up!
Doing - Tamiya 1/35th Universal Carrier.
Work is the curse of the modelling classes!
IPMS#12300
Work is the curse of the modelling classes!
IPMS#12300
-
Justin1980
- Active Participant
- Posts: 643
- Joined: June 27th, 2011, 6:58 pm
- Location: Lincoln
Re: SARowl's Lynx Prototype
Nice work on the Lynx the PE is really bringing the cockpit to life!
Regards
Justin
Regards
Justin
If there are no stupid questions, then what kind of questions do stupid people ask? Do they get smart just in time to ask questions?
-
martin hale

- The Bug Has Well And Truly Bitten
- Posts: 205
- Joined: May 21st, 2011, 12:38 pm
- Location: Poole
Re: SARowl's Lynx Prototype
Keep it up! You're doing just fine.
Martin
Martin
Re: SARowl's Lynx Prototype
Sorry about not posting over the past few days but work and family illness keeps getting in the way of modelling... Anyhow, let's start building the cabin and cockpit.
I've purchased some Pavla resin seats, because they are an an awful lot more detailed than the 'dining room chair' of the kit. I wasn't impressed by the moulded harnesses
on the seat so I removed them and will use PE.
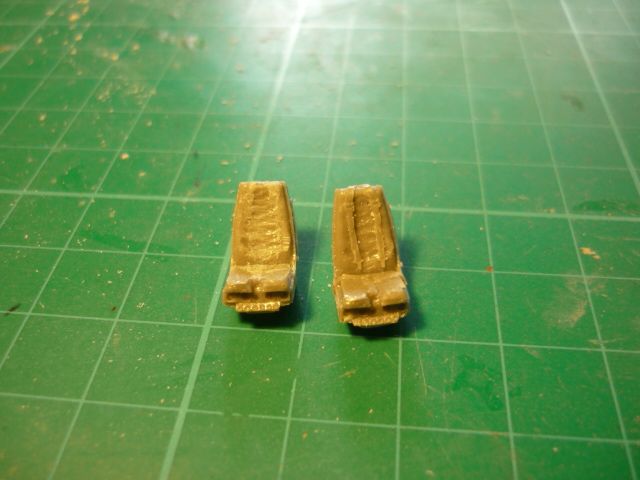
The seat on the left has had the harnesses removed.

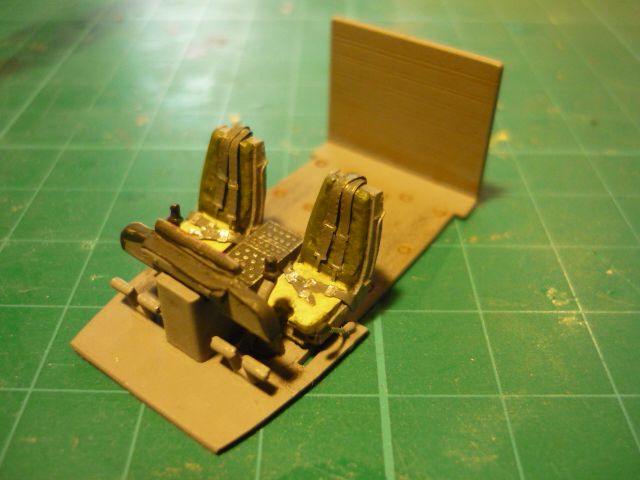
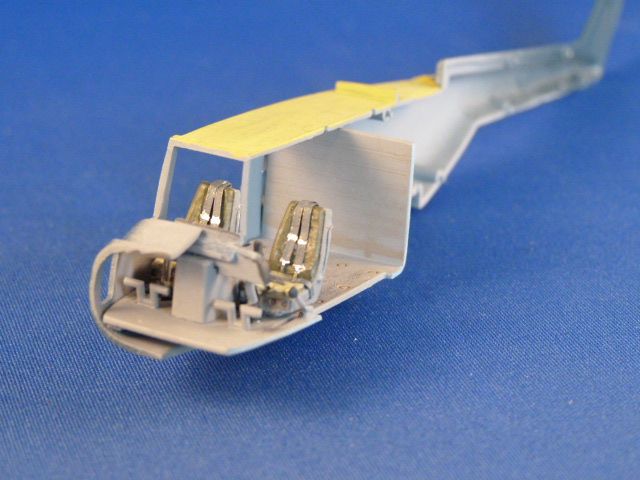
After painting. The seat frame light grey, the back cushion light olive drab, the seat cushion 'weathered' cream, the harnesses blue grey.
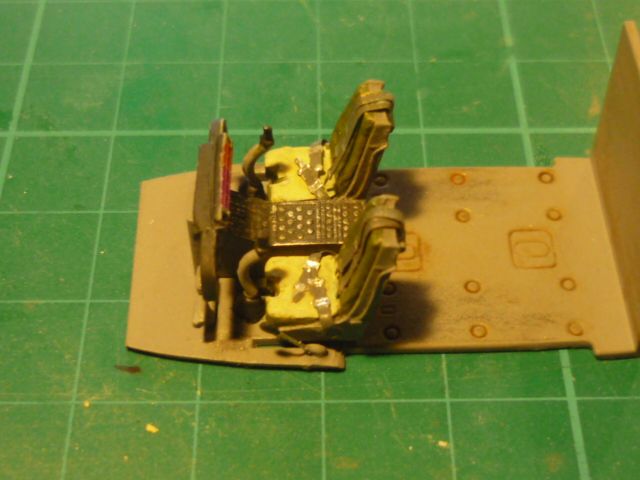
And here is the completed cockpit and cabin. I've kept the weathering to a minimum as this was the prototype aircraft so it would still be new and shiny. I have dirtied the cabin floor to represent some traffic through the cabin and cockpit.
I picked out the central warning panel lights in red and orange felt-tip, dry brushed the centre console and picked out individual instruments on the panel with black felt-tip.
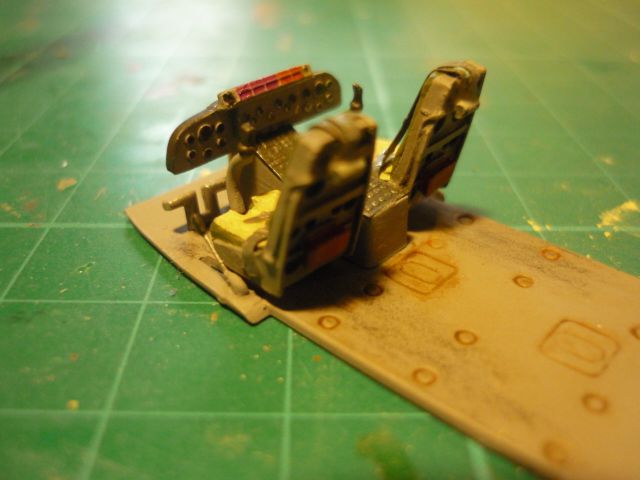
I used a silver ink pen to emphasise the harness buckles
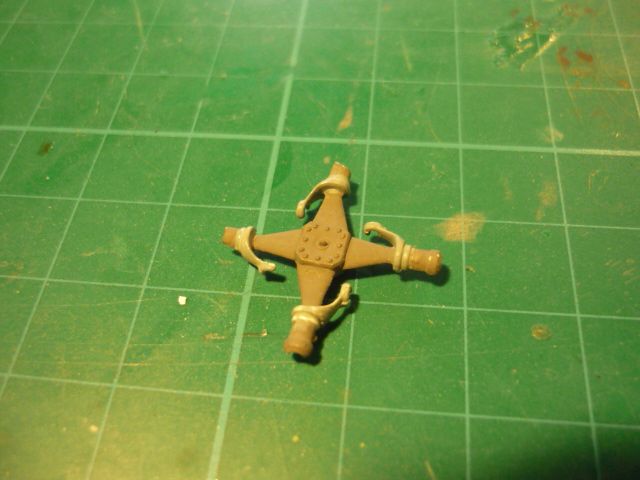
The first problem I've encountered is that the rotor head is incorrectly moulded - short shot? I only noticed it when I started to paint it. This will be my first modelling test.
More news soon.
I've purchased some Pavla resin seats, because they are an an awful lot more detailed than the 'dining room chair' of the kit. I wasn't impressed by the moulded harnesses
on the seat so I removed them and will use PE.
The seat on the left has had the harnesses removed.
After painting. The seat frame light grey, the back cushion light olive drab, the seat cushion 'weathered' cream, the harnesses blue grey.
And here is the completed cockpit and cabin. I've kept the weathering to a minimum as this was the prototype aircraft so it would still be new and shiny. I have dirtied the cabin floor to represent some traffic through the cabin and cockpit.
I picked out the central warning panel lights in red and orange felt-tip, dry brushed the centre console and picked out individual instruments on the panel with black felt-tip.
I used a silver ink pen to emphasise the harness buckles
The first problem I've encountered is that the rotor head is incorrectly moulded - short shot? I only noticed it when I started to paint it. This will be my first modelling test.
More news soon.
If all else fails, read the instructions...
Building: My first Vacform - Rareplanes Shorts Tucano
Building: My first Vacform - Rareplanes Shorts Tucano

-
ShaunW
- NOT the sheep
- Posts: 26188
- Joined: November 26th, 2011, 6:11 pm
- Location: Pontefract West Yorkshire
Re: SARowl's Lynx Prototype
Nice work John. The rotor head does look short shot from here and is always a pain to discover in a kit. Best of luck with correcting it. Other stuff, thankfully not including illness, keeps getting in the way of my build as well - it's been one of those months so far 
Doing - Tamiya 1/35th Universal Carrier.
Work is the curse of the modelling classes!
IPMS#12300
Work is the curse of the modelling classes!
IPMS#12300
-
Jagewa

- Modelling Gent and Scholar
- Posts: 2752
- Joined: April 6th, 2011, 2:18 am
- Location: Christchurch, New Zealand
- Contact:
Re: SARowl's Lynx Prototype
Really smart cockpit work, shame about the rotor head.
Cheers
Jim
Cheers
Jim
Re: SARowl's Lynx Prototype
Thanks for the comments guys.
I think I'll try a tiny repair with Milliput for the rotor head, I've found that you can mould it into shape using a wet finger... With hindsight, I think that the PE harnesses are a bit over scale, next time I'll have a go at making my own from foil/masking tape. Also, in future I'll remove raised instrument detail, drill the instrument panel then back it with black plasticard with an added drop of Klear to represent the glass.
I live and learn.
John
If all else fails, read the instructions...
Building: My first Vacform - Rareplanes Shorts Tucano
Building: My first Vacform - Rareplanes Shorts Tucano
-
ShaunW
- NOT the sheep
- Posts: 26188
- Joined: November 26th, 2011, 6:11 pm
- Location: Pontefract West Yorkshire
Re: SARowl's Lynx Prototype
The instrument panel idea is a good one John and I have used that technique myself with some success, even though I say so myself! I've tried masking tape belts in my Apache and found it a bit of a pain to use as it seemed to attach itself to everything apart from the seats! Once I persuaded it though the tape did fold quite well into passable belts. I have used wine bottle foil on many occasions and it is very good. However, like PE, care is required when painting to try and avoid any shiny bits remaining.
Doing - Tamiya 1/35th Universal Carrier.
Work is the curse of the modelling classes!
IPMS#12300
Work is the curse of the modelling classes!
IPMS#12300
-
MerlinJones
Re: SARowl's Lynx Prototype
Looking at that rotor head, do you have the right guage of tubing handy?
I'd be tempted to remove all of the plastic outwards of the white bits and replace them with appropriate lengths of tubing.
I'd then attach rod to the blades, to slide into the tubes.
Regards,
Bruce
I'd be tempted to remove all of the plastic outwards of the white bits and replace them with appropriate lengths of tubing.
I'd then attach rod to the blades, to slide into the tubes.
Regards,
Bruce
Re: SARowl's Lynx Prototype
Bruce,
Part of the problem is that the 'short shot' is on the spindle bearing, however, the kit splits the spindle bearing horizontally. The top half is moulded on the rotor head - the short shot - the bottom half is on the rotor blade. glue the two halves together and you've attached the rotor blades to the head. The good thing is that the bottom half will give me a template to mould the top half. Clear as mud?
John
If all else fails, read the instructions...
Building: My first Vacform - Rareplanes Shorts Tucano
Building: My first Vacform - Rareplanes Shorts Tucano
-
ShaunW
- NOT the sheep
- Posts: 26188
- Joined: November 26th, 2011, 6:11 pm
- Location: Pontefract West Yorkshire
Re: SARowl's Lynx Prototype
I'm with you John, I don't think I need my glasses to picture what you meanSARowl wrote:
Clear as mud?
Doing - Tamiya 1/35th Universal Carrier.
Work is the curse of the modelling classes!
IPMS#12300
Work is the curse of the modelling classes!
IPMS#12300
Re: SARowl's Lynx Prototype
Hi, back again after a short break over the half term.
Firstly, I've put the cockpit assembly into the fuselage, this also gave me an opportunity to try out my new photo booth (£29.99 - Maplin's on-line).
As you may know, the rotor head was a short shot, so after messing around for nearly a day i gave up and adapted the Airfix monobloc to the correct spec.
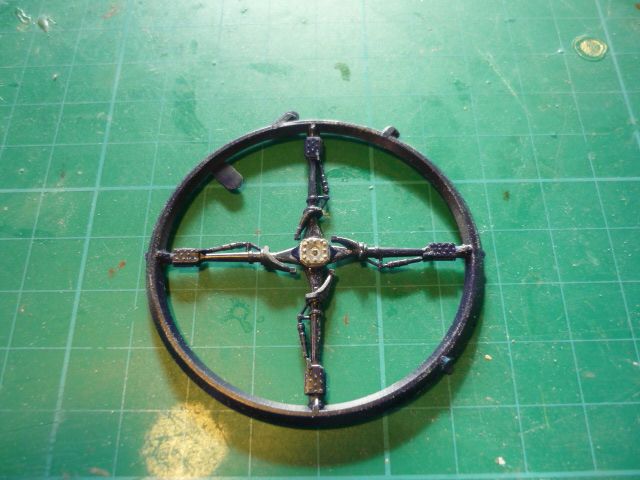
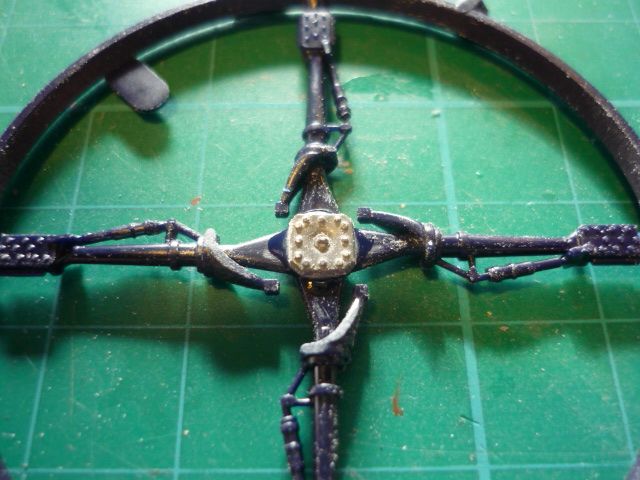
The Airfix head is much better detailed but more delicate and true to scale. however, the carpet monster ate one of the pitch change rods so a slightly larger - white - Matchbox component had to be adapted.
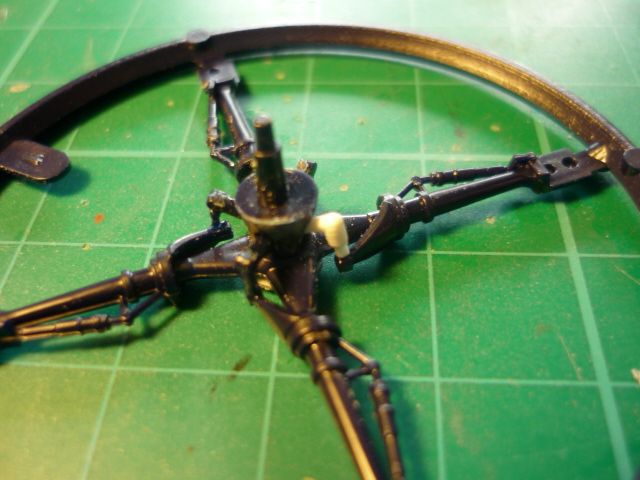
Just waiting for the glue to dry and it's prime time!
Cheers
John
Firstly, I've put the cockpit assembly into the fuselage, this also gave me an opportunity to try out my new photo booth (£29.99 - Maplin's on-line).
As you may know, the rotor head was a short shot, so after messing around for nearly a day i gave up and adapted the Airfix monobloc to the correct spec.
The Airfix head is much better detailed but more delicate and true to scale. however, the carpet monster ate one of the pitch change rods so a slightly larger - white - Matchbox component had to be adapted.
Just waiting for the glue to dry and it's prime time!
Cheers
John
If all else fails, read the instructions...
Building: My first Vacform - Rareplanes Shorts Tucano
Building: My first Vacform - Rareplanes Shorts Tucano