Of course I could just paint it all black
Dazzledovski's Red Secret-Revealed
-
Dazzled

- Modelling Gent and Scholar
- Posts: 9592
- Joined: October 1st, 2011, 11:08 pm
- Location: Mid Glamorgan, South Wales
- Contact:
Re: Dazzledovski's Red Secret
I'll be retouching with the XF-60, either with the airbrush or perhaps using the hairy stick, just to get rid of that overspray. It does look much, much better in real life than it does under the camera.
Of course I could just paint it all black
Of course I could just paint it all black
COLD WAR S.I.G. LEADER
Wherever there's danger, wherever there's trouble, wherever there's important work to be done....I'll be somewhere else building a model!
Wherever there's danger, wherever there's trouble, wherever there's important work to be done....I'll be somewhere else building a model!
-
Dazzled
- Modelling Gent and Scholar
- Posts: 9592
- Joined: October 1st, 2011, 11:08 pm
- Location: Mid Glamorgan, South Wales
- Contact:
Re: Dazzledovski's Red Secret
A little bit of brushwork has hidden the worst of the overspray although I've endevoured to keep as much of a feathered edge as I can.
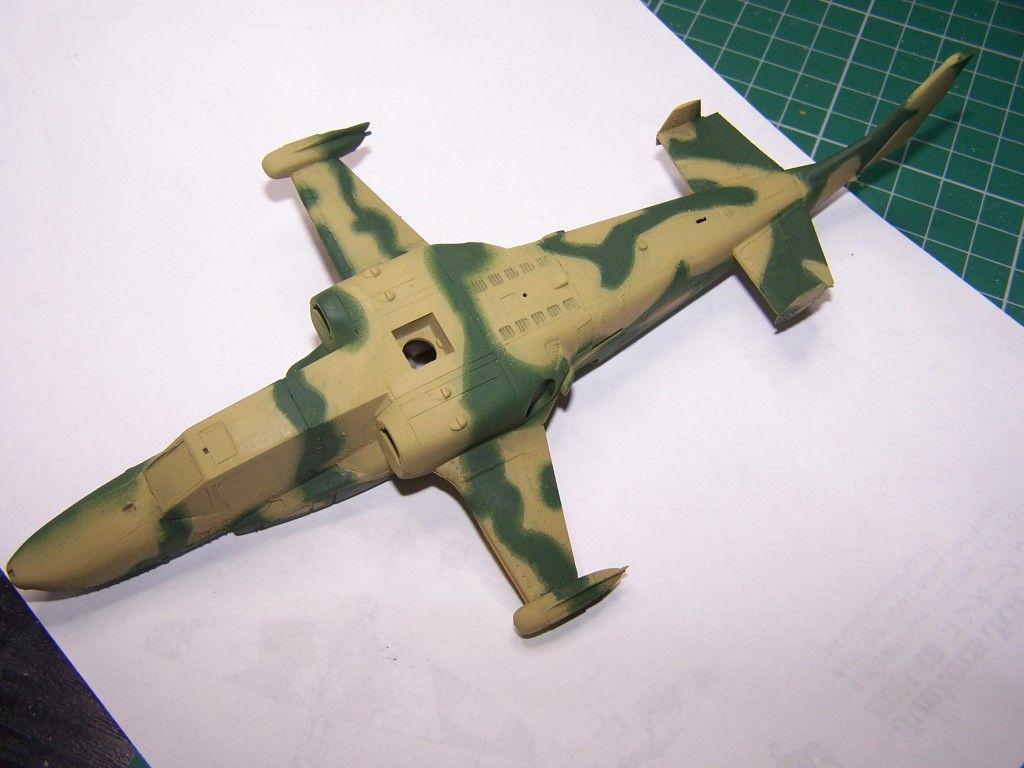

It still looks a little harsh under the camera flash but I'm happy enough with it now to have removed the underside masking.
Black anti-glare and gun recess next
It still looks a little harsh under the camera flash but I'm happy enough with it now to have removed the underside masking.
Black anti-glare and gun recess next
COLD WAR S.I.G. LEADER
Wherever there's danger, wherever there's trouble, wherever there's important work to be done....I'll be somewhere else building a model!
Wherever there's danger, wherever there's trouble, wherever there's important work to be done....I'll be somewhere else building a model!

-
ShaunW
- NOT the sheep
- Posts: 26188
- Joined: November 26th, 2011, 6:11 pm
- Location: Pontefract West Yorkshire
Re: Dazzledovski's Red Secret
Nicely touched up. I'm very hit and miss regarding overspray on freehand paint jobs probably because I don't practice enough. For this model I would have probably bottled a freehand attempt and used blutack sausages and masking.
Doing - Tamiya 1/35th Universal Carrier.
Work is the curse of the modelling classes!
IPMS#12300
Work is the curse of the modelling classes!
IPMS#12300
-
Jagewa

- Modelling Gent and Scholar
- Posts: 2752
- Joined: April 6th, 2011, 2:18 am
- Location: Christchurch, New Zealand
- Contact:
Re: Dazzledovski's Red Secret
OMG I like that a lot, great work on the camo, this is going to be sweet.
Cheers
JIm
Cheers
JIm
-
Dazzled
- Modelling Gent and Scholar
- Posts: 9592
- Joined: October 1st, 2011, 11:08 pm
- Location: Mid Glamorgan, South Wales
- Contact:
Re: Dazzledovski's Red Secret
The last thing to do before I turn in after a busy day of 1:1 scale railway modelling followed by a few relaxing (?) hours at the bench. Time for an update.
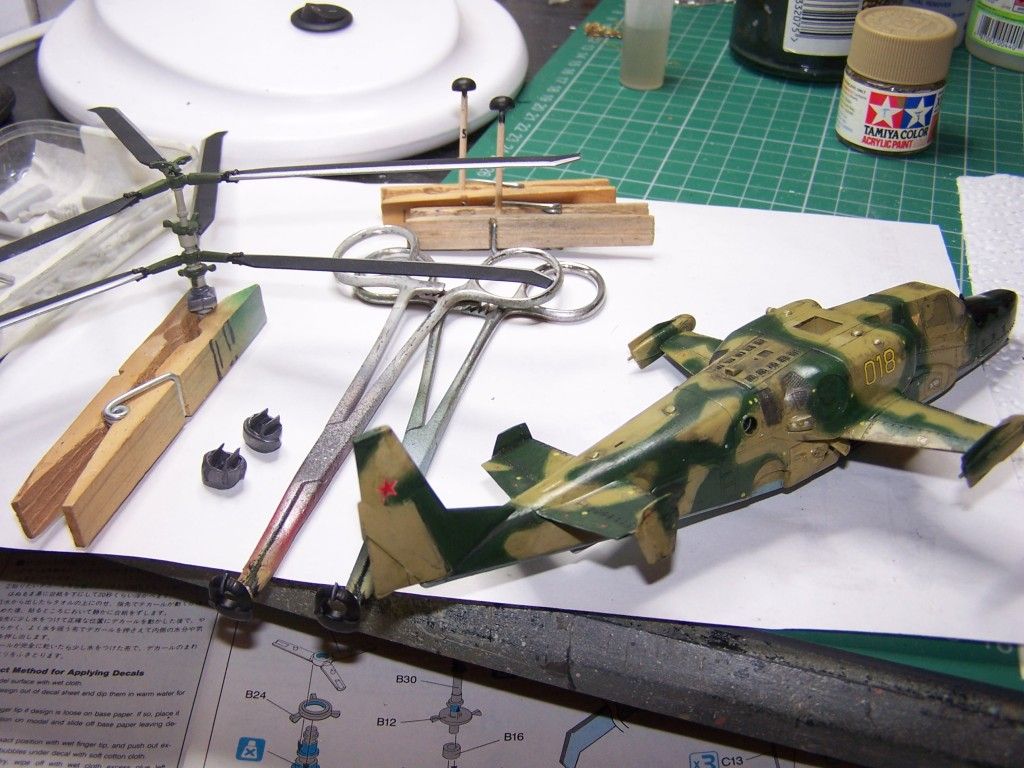
Things are progressing well with the rotors and other extraneous bits.
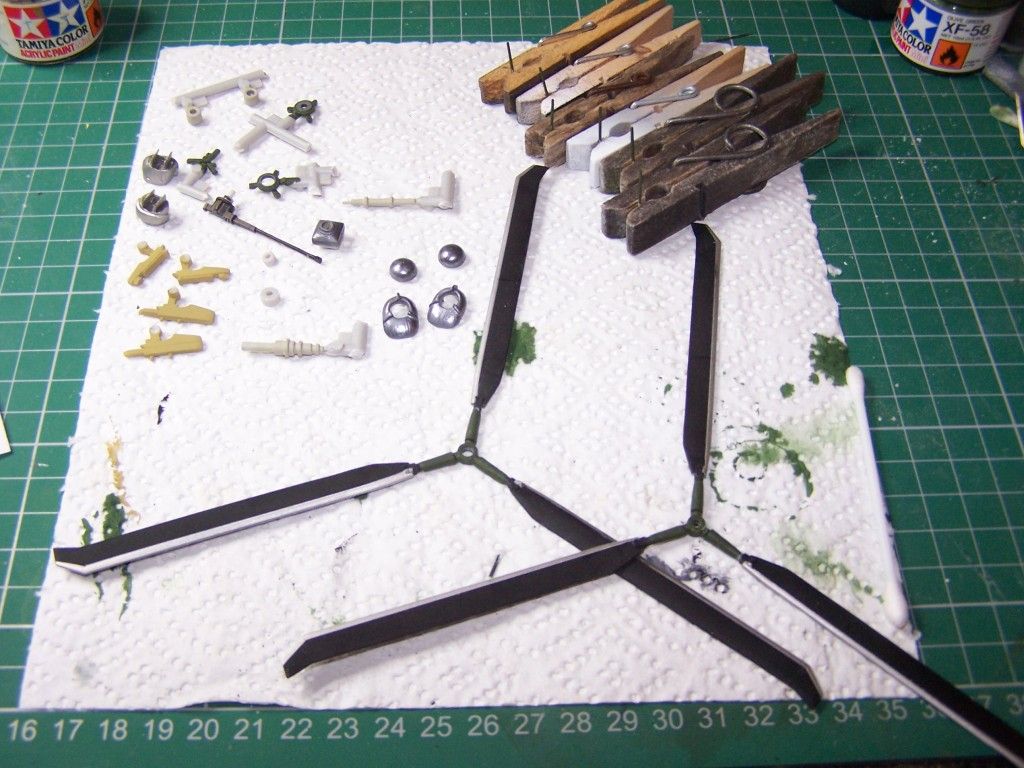
I still need to paint the blade attachment points, probably in gunmetal but, apart from a few touch ups after removal from the sprue, the rotors are pretty much ready to go together.
Things have also advanced with the fuselage.
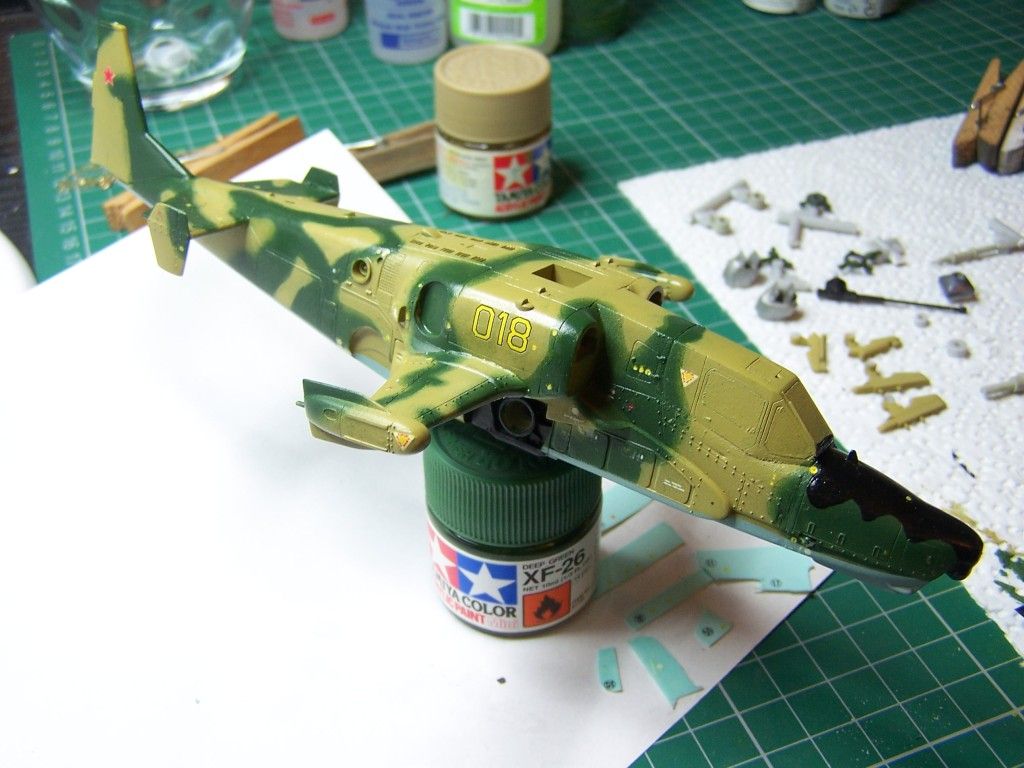
After removal of the remaining underside masking, the black anti glare panel and gun recess have been painted. This was followed, after a suitable drying time, by a sprayed on coat of the ever-versatile Klear. Then it was on to the decals.
Dragons decals are a bit of a mixed bag. On the plus side they are nice and thin and have excellent colour density. Unfortunately they were quite reluctant to come away from the backing paper. Not stuck because of age, they just took their time to release. They also had a propensity to break up. The i.d. numbers on the side for example, went on in 3 pieces and some of the larger stencils also went on jigsaw fashion. Despite this, after a test of patience, they all went on pretty well with the help of Microsol and set. One thing that made the job harder was Dragon's instructions giving placement of the dozens of stencils on the camoflaged version. This made accurate location very difficult, particularly given the quantity involved. A plain 3-view with no shading would have made things much easier.
Things are progressing well with the rotors and other extraneous bits.
I still need to paint the blade attachment points, probably in gunmetal but, apart from a few touch ups after removal from the sprue, the rotors are pretty much ready to go together.
Things have also advanced with the fuselage.
After removal of the remaining underside masking, the black anti glare panel and gun recess have been painted. This was followed, after a suitable drying time, by a sprayed on coat of the ever-versatile Klear. Then it was on to the decals.
Dragons decals are a bit of a mixed bag. On the plus side they are nice and thin and have excellent colour density. Unfortunately they were quite reluctant to come away from the backing paper. Not stuck because of age, they just took their time to release. They also had a propensity to break up. The i.d. numbers on the side for example, went on in 3 pieces and some of the larger stencils also went on jigsaw fashion. Despite this, after a test of patience, they all went on pretty well with the help of Microsol and set. One thing that made the job harder was Dragon's instructions giving placement of the dozens of stencils on the camoflaged version. This made accurate location very difficult, particularly given the quantity involved. A plain 3-view with no shading would have made things much easier.
COLD WAR S.I.G. LEADER
Wherever there's danger, wherever there's trouble, wherever there's important work to be done....I'll be somewhere else building a model!
Wherever there's danger, wherever there's trouble, wherever there's important work to be done....I'll be somewhere else building a model!
-
ShaunW
- NOT the sheep
- Posts: 26188
- Joined: November 26th, 2011, 6:11 pm
- Location: Pontefract West Yorkshire
Re: Dazzledovski's Red Secret
That's looking great Dazzled and the decals are really bringing it to life. It's been a while since I last tussled with any Dragon decals - the 1/48th Ta152H IIRC - but I recall similar issues with items breaking up and the instructions being somewhat vague as to placement.
Doing - Tamiya 1/35th Universal Carrier.
Work is the curse of the modelling classes!
IPMS#12300
Work is the curse of the modelling classes!
IPMS#12300
-
Dazzled
- Modelling Gent and Scholar
- Posts: 9592
- Joined: October 1st, 2011, 11:08 pm
- Location: Mid Glamorgan, South Wales
- Contact:
Re: Dazzledovski's Red Secret
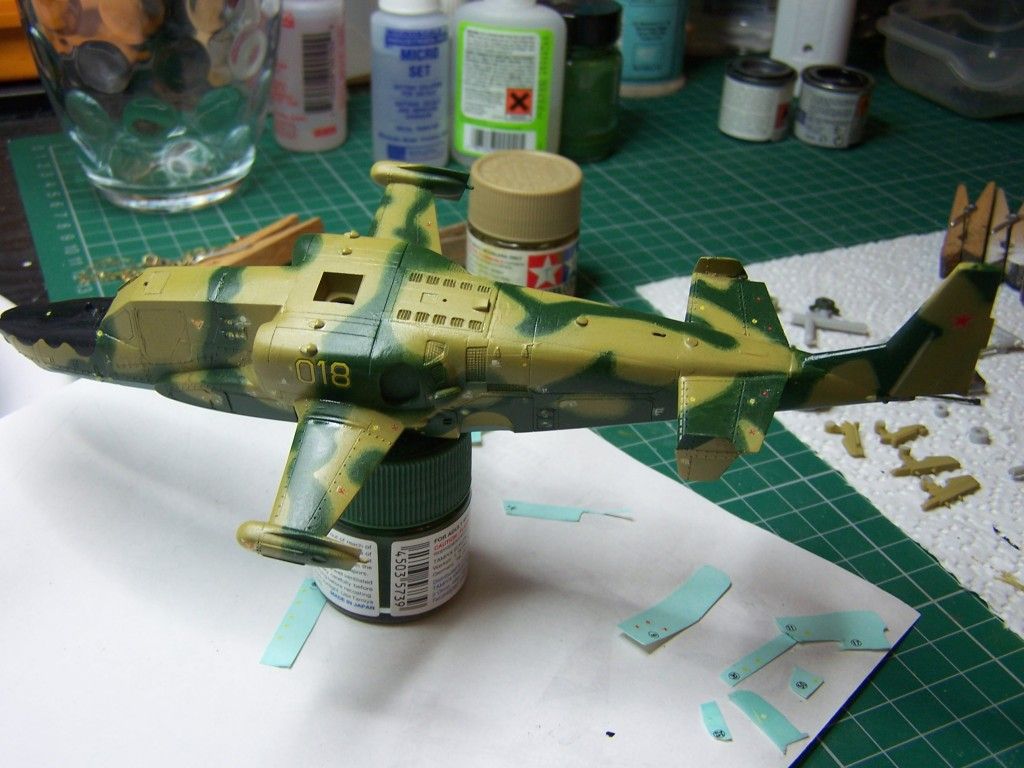
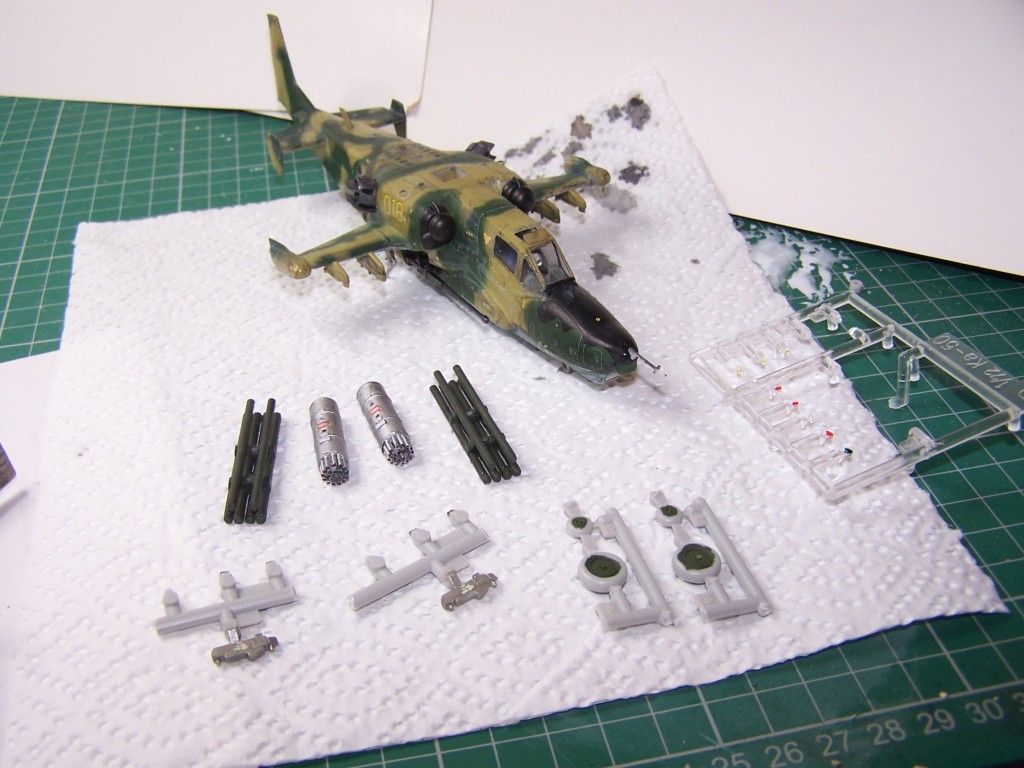
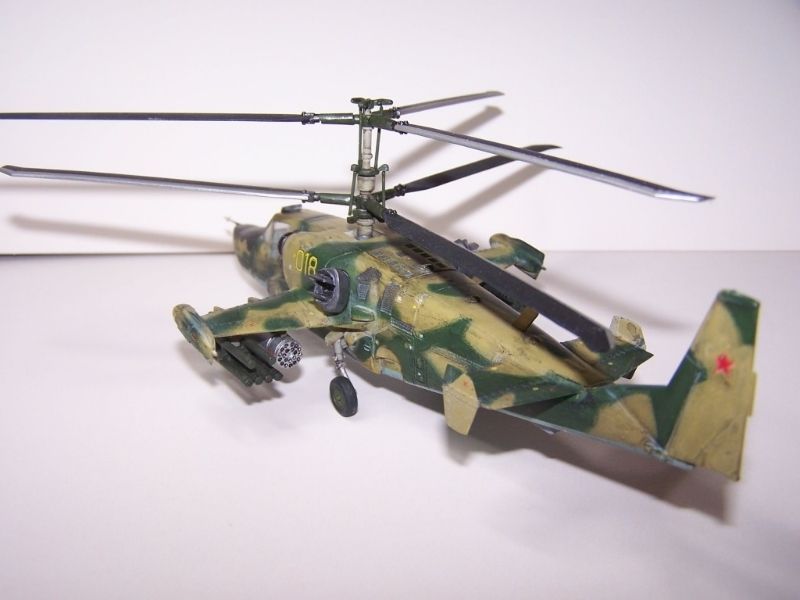
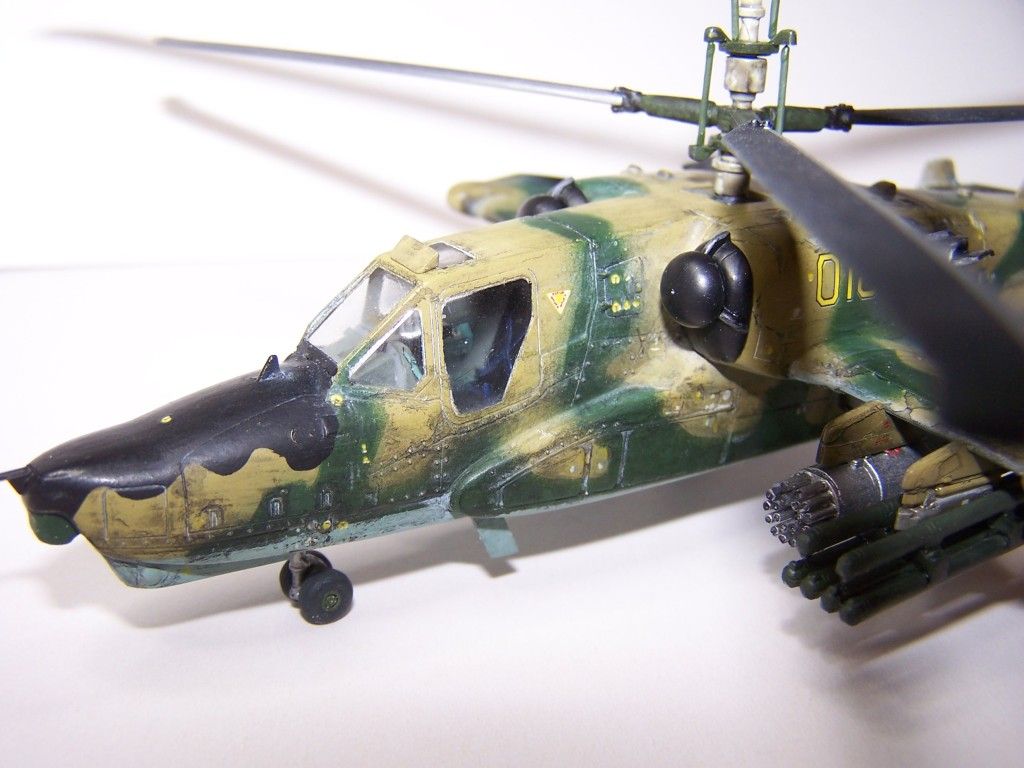
I decided it was time to go for some realism and, looking at some pictures of operational KA-50s rather than shiny airshow ones, realised that these machines were, generally, absolutely filthy. This, I'm reasoning, is something to do with operating from rough strips and fliying about at very low level. Remembering my time working on Harriers and the amount of landscape we used to scrape off them, I thought a bit of dirtying up would be in order.
Time for a black wash then, I thought. It did however turn out a little blacker than I intended, so a couple of hours with cotton buds and micromesh were neccesary to scrub back the wash a little and....
It didn't turn out too badly at all. It's darkened up the paintwork a touch, matching the box art more closely. The decals remined protected by an extra coat of Klear applied before the wash. Odd scratches were touched up by brush or cotton bud but these have added quite nicely to the "texture" of the model.
As can be seen in the picture, the rotor blades and engine bits are also coming along well. I'm starting to feel that it's all coming together.
COLD WAR S.I.G. LEADER
Wherever there's danger, wherever there's trouble, wherever there's important work to be done....I'll be somewhere else building a model!
Wherever there's danger, wherever there's trouble, wherever there's important work to be done....I'll be somewhere else building a model!
-
Molly-new

- Modelling Gent and Scholar
- Posts: 2355
- Joined: May 4th, 2011, 8:42 pm
- Location: Stoke-on-Trent, England
Re: Dazzledovski's Red Secret
That looks like a proper dirty beast now, the weathering has really brought it to life. Definitely getting one of these now. Lovely work.
Airfix WWII Aircraft Of The Aces.
Completed - 10
Building -
Pending -4
Completed - 10
Building -
Pending -4
-
Jagewa
- Modelling Gent and Scholar
- Posts: 2752
- Joined: April 6th, 2011, 2:18 am
- Location: Christchurch, New Zealand
- Contact:
Re: Dazzledovski's Red Secret
Oh yes, great work Dazzled, liking that a lot.
CHeers
Jim
CHeers
Jim
Re: Dazzledovski's Red Secret
Coming along very nicely.
John
John
If all else fails, read the instructions...
Building: My first Vacform - Rareplanes Shorts Tucano
Building: My first Vacform - Rareplanes Shorts Tucano
-
ShaunW
- NOT the sheep
- Posts: 26188
- Joined: November 26th, 2011, 6:11 pm
- Location: Pontefract West Yorkshire
Re: Dazzledovski's Red Secret
Nice work Dazzled, she's coming along very well. Black washes? it's almost like an AFV modelling masterclass in here 
Doing - Tamiya 1/35th Universal Carrier.
Work is the curse of the modelling classes!
IPMS#12300
Work is the curse of the modelling classes!
IPMS#12300
-
Dazzled
- Modelling Gent and Scholar
- Posts: 9592
- Joined: October 1st, 2011, 11:08 pm
- Location: Mid Glamorgan, South Wales
- Contact:
Re: Dazzledovski's Red Secret
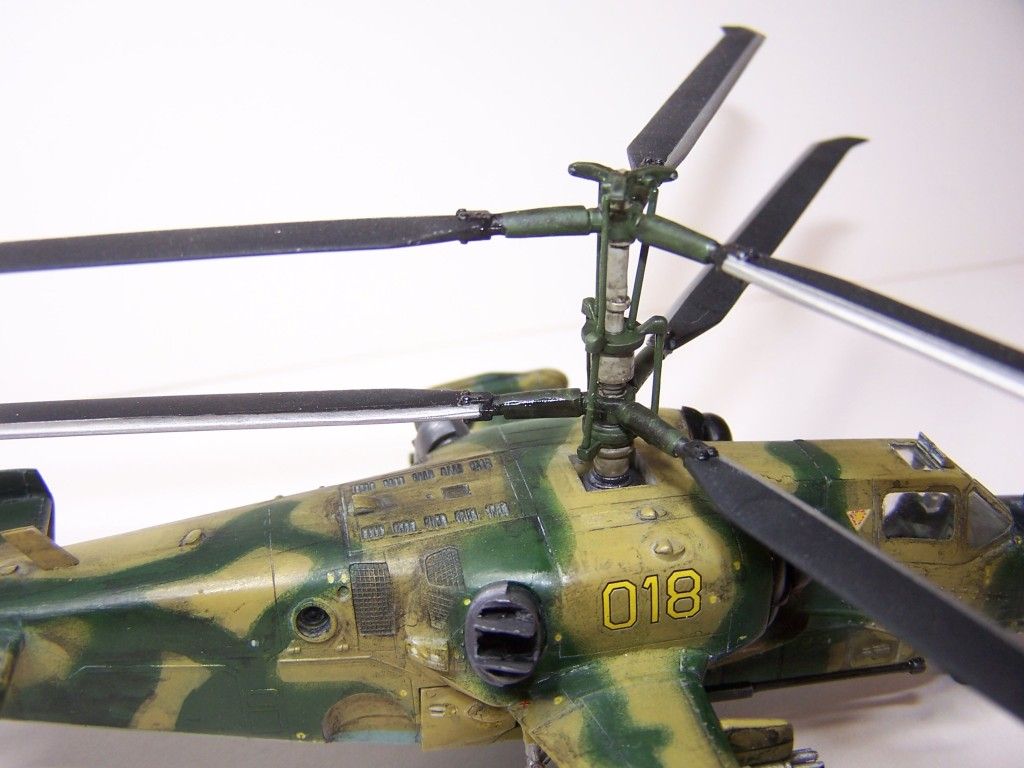
Another push over the last couple of days and more progress with the Kamov.
First I matted down the finish to remove the shine. Then I added engine intakes and exhausts, weapons pylons, aerials, pitot probe and a few other bits. Best of all, I got the u/c legs on so now the model is on it's feet.
I'm sure glad I put all that weight in the nose.
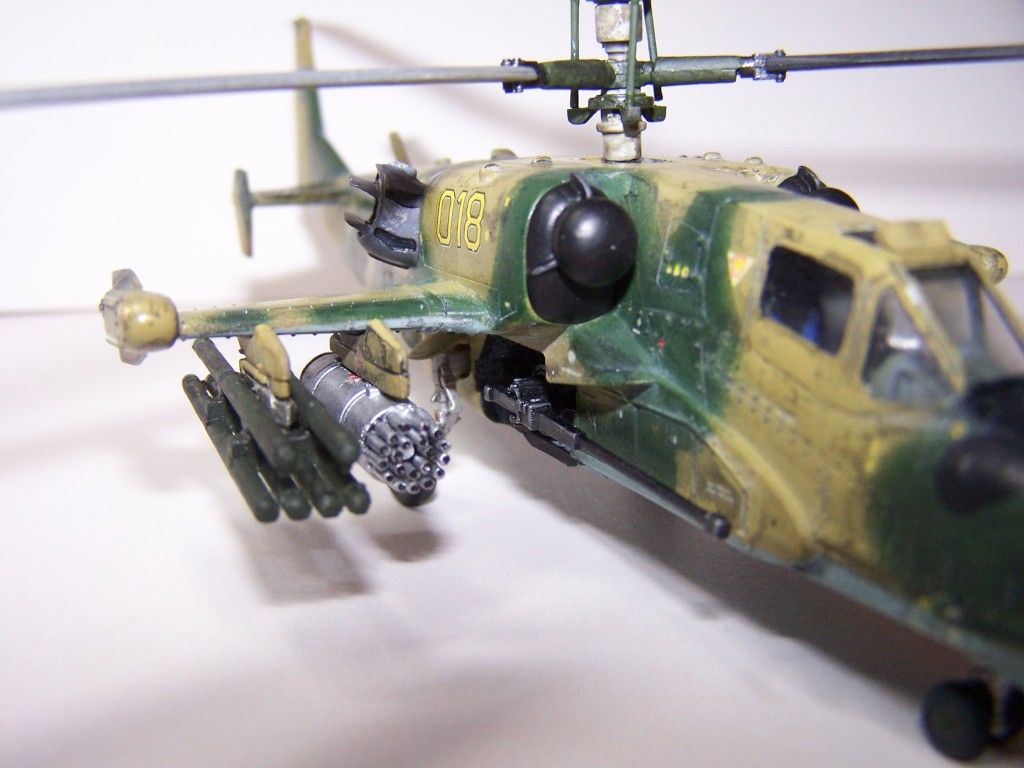
I also got the weapons together, painted the wheel hubs and colour tinted the light lenses ready for fitting. The only bits left to paint are the tyres and pitot plus a bit of minor weathering.
Plus, the rotor head is finished.
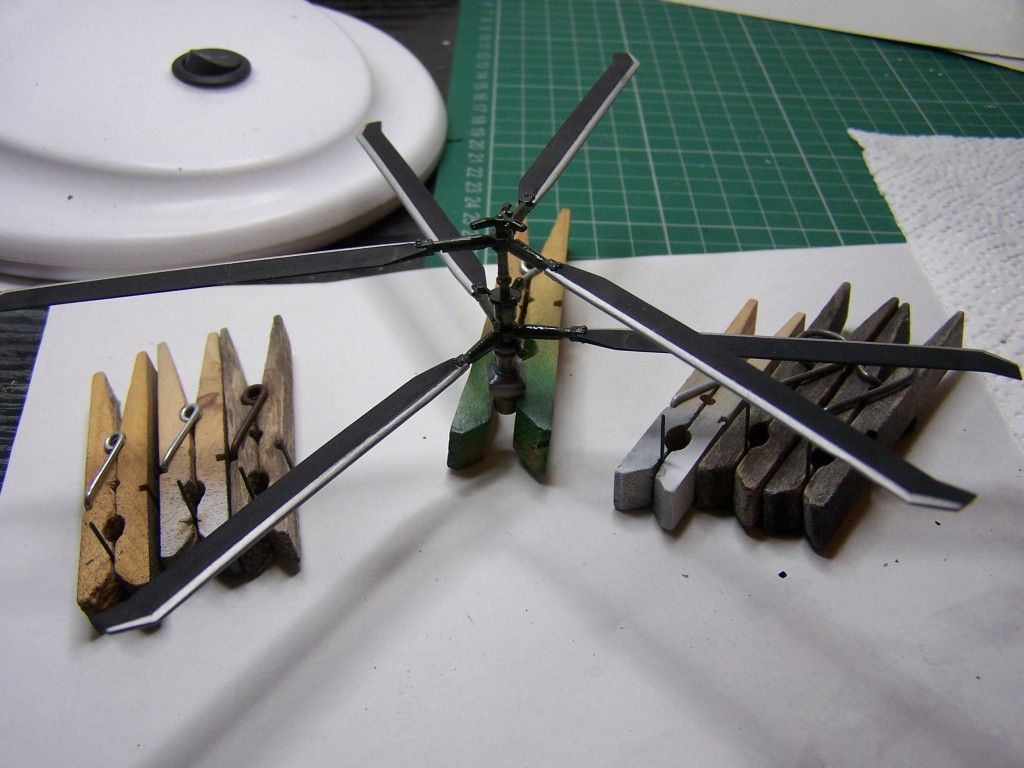
Well nearly. The pitch control rods will be fitted when the assembly is actually on the model.
It goes round and everything
First I matted down the finish to remove the shine. Then I added engine intakes and exhausts, weapons pylons, aerials, pitot probe and a few other bits. Best of all, I got the u/c legs on so now the model is on it's feet.
I'm sure glad I put all that weight in the nose.
I also got the weapons together, painted the wheel hubs and colour tinted the light lenses ready for fitting. The only bits left to paint are the tyres and pitot plus a bit of minor weathering.
Plus, the rotor head is finished.
Well nearly. The pitch control rods will be fitted when the assembly is actually on the model.
It goes round and everything
COLD WAR S.I.G. LEADER
Wherever there's danger, wherever there's trouble, wherever there's important work to be done....I'll be somewhere else building a model!
Wherever there's danger, wherever there's trouble, wherever there's important work to be done....I'll be somewhere else building a model!
-
ShaunW
- NOT the sheep
- Posts: 26188
- Joined: November 26th, 2011, 6:11 pm
- Location: Pontefract West Yorkshire
Re: Dazzledovski's Red Secret
That's looking great Dazzled - another mean looking Russian chopper! Get that working contra-rotor head - how cool is that!
Doing - Tamiya 1/35th Universal Carrier.
Work is the curse of the modelling classes!
IPMS#12300
Work is the curse of the modelling classes!
IPMS#12300
-
Dazzled
- Modelling Gent and Scholar
- Posts: 9592
- Joined: October 1st, 2011, 11:08 pm
- Location: Mid Glamorgan, South Wales
- Contact:
Re: Dazzledovski's Red Secret-Revealed
Like I said, there wasn't much to do. The wheels were painted and attached, the pitot was painted, weapons were attached and, of course, the rotor head was fitted and completed. The only issue I had with today's couple of hours at the bench were the delicate light lenses which pinged across the room with startling predictability as I tried to smooth out their moulding gates. These were replaced with clear paint and lenses from blobs of Clearfix.
And this is it.
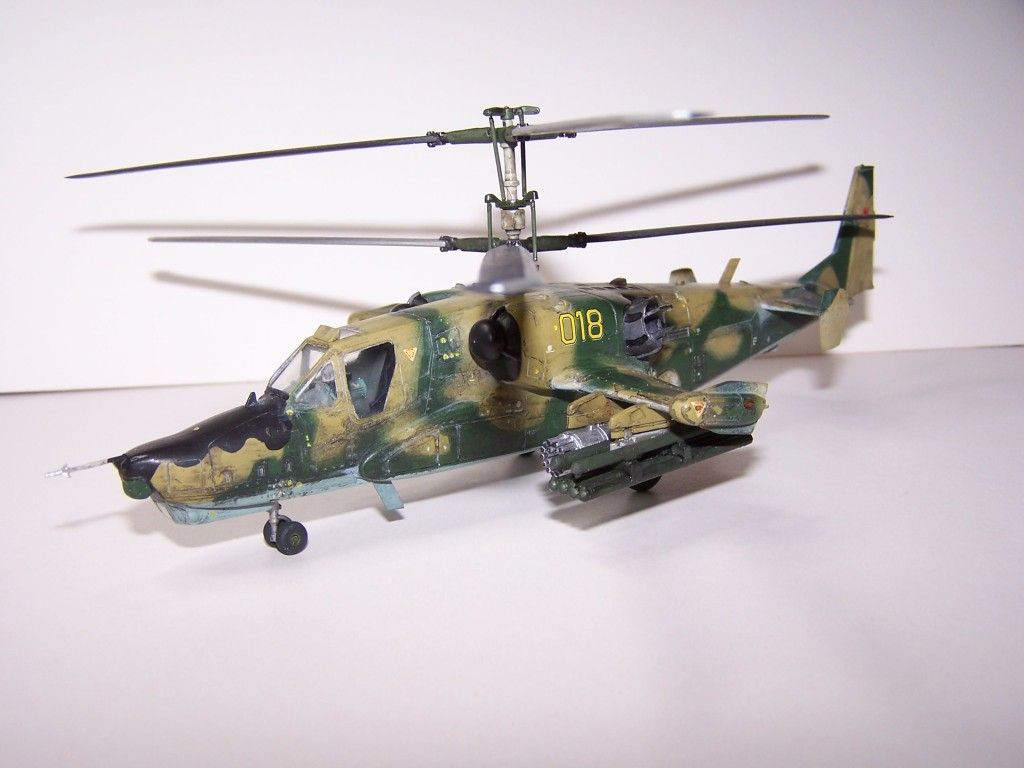
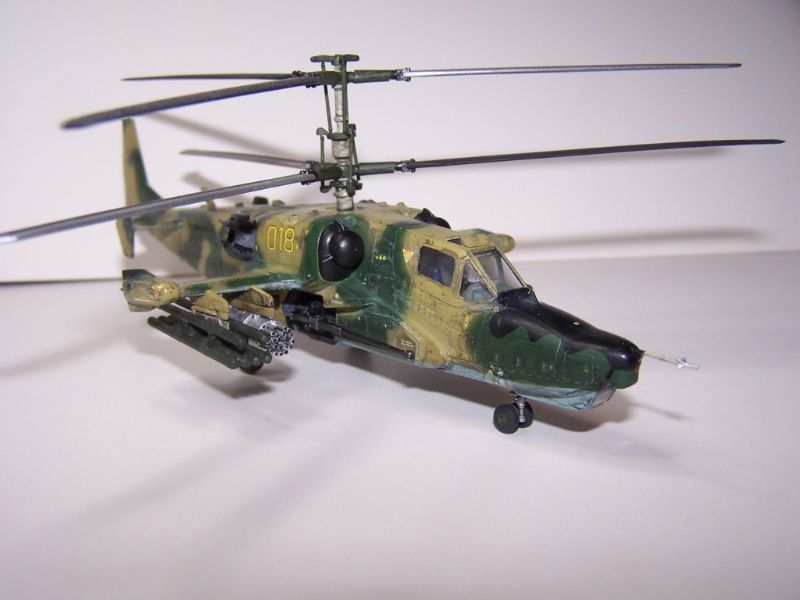
I can't say it's been an easy build although I must admit that I'd have found it considerably easier if I'd chosen to build a black one instead of the camoflaged option.
Stiil, it's the first helo I've completed for years so that's quite encouraging
And this is it.
I can't say it's been an easy build although I must admit that I'd have found it considerably easier if I'd chosen to build a black one instead of the camoflaged option.
Stiil, it's the first helo I've completed for years so that's quite encouraging
COLD WAR S.I.G. LEADER
Wherever there's danger, wherever there's trouble, wherever there's important work to be done....I'll be somewhere else building a model!
Wherever there's danger, wherever there's trouble, wherever there's important work to be done....I'll be somewhere else building a model!