Barry's Build **FINISHED**

The Heller Spitfire XVI Single Kit Group Build
Runs November 12 through December 12.
GB Leader is Old_Tonto
User avatar
lancfan
Avro's Rivet Rhapsodizer
Posts: 8763
Joined: May 2nd, 2011, 3:55 pm
Location: Nelson, Lancashire

Re: Barry's Build : New Question 11/20

Post by lancfan »

lancfan wrote:If it helps-I always copy historically well restored airworthy Spitfires which seem to have light grey undercarriage legs and aluminium/nmf wheels, wheelbays & undercarriage doors are often in the same light green/grey as the cockpit. I believe there were changes in the finish of the wheel bays in late production aircraft, you would have to research the particular version you build.


David.
Matt, you are absolutely right about wheelbays but I did not intend to suggest that these would be natural metal, I used a comma and allowed the sentence to continue when the mention of wheelbays should have been a separate statement. I apologise. As for the colour of paint used for the wheelbays this has always been a grey area (sorry, NPI) surviving examples do seem to use the underside colour in the wheelbays but kit manufacturers (and magazines on occasion) will insist on stating cockpit green for this but do not reveal their sources of information as provenance, it does annoy me that there is so much unattributed statement on these forums and in the hobby in general, indeed you may feel the same way, to counter this I try to use images of original parts and surviving aircraft/machines to clear the fog from subjects such as this but there are still gaps that must be filled with conjecture and unless I can prove something I try not to state supposition as fact but the odd blip does escape.

David.
David.

If you forget the past, you may lose the future.
Barry
Modelling Gent and Scholar
Posts: 2612
Joined: May 1st, 2011, 1:23 am
Location: Eastvale, California, USA

Re: Barry's Build

Post by Barry »

Thanks all. I think I'll go with aluminum lacquer bays/doors and light-ish grey legs.
2012 A:12 B:13 C:0
User avatar
lancfan
Avro's Rivet Rhapsodizer
Posts: 8763
Joined: May 2nd, 2011, 3:55 pm
Location: Nelson, Lancashire

Re: Barry's Build

Post by lancfan »

Matt, History is funny stuff- full of hidden traps lying in wait to grab our ankles and stop us in our tracks.

David.
David.

If you forget the past, you may lose the future.
User avatar
mattbacon
Too Cheerful To Be A JMN
Posts: 2312
Joined: April 11th, 2011, 1:54 pm

Re: Barry's Build

Post by mattbacon »

No prob, David... I wasn't saying that "it was definitely so", just what I believe based on my sources over the years (mostly, in fact, the Spitfire Mk 1 at Cosford, which I was very luckily allowed to get up close and personal with, and which is the most original Spitfire around, so the attendants told me...). You can never tell, but the combination of Edgar Brooks' very well-researched view that Spitfire interior parts that weren't in the cockpit or engine bay were silver, and the idea that in-field resprays were likely not to have too much time for masking etc, it seems to me to be a plausible story that's not actually contradicted by photo evidence. Sooo... I agree with you 100% that there are no definitive answers, but since no one has definitive proof, I'm happy to stick to a plausible story...

bestest,
M.
User avatar
lancfan
Avro's Rivet Rhapsodizer
Posts: 8763
Joined: May 2nd, 2011, 3:55 pm
Location: Nelson, Lancashire

Re: Barry's Build

Post by lancfan »

Matt, Possibly the best source of period colour matches would be the examination and colour matching of well preserved crash site wreckage, providing that the appropriate pieces could be found in the right condition, there are a number of societies that collect and display such pieces and that may be an avenue to follow in the future.


David.
David.

If you forget the past, you may lose the future.
Barry
Modelling Gent and Scholar
Posts: 2612
Joined: May 1st, 2011, 1:23 am
Location: Eastvale, California, USA

Re: Barry's Build

Post by Barry »

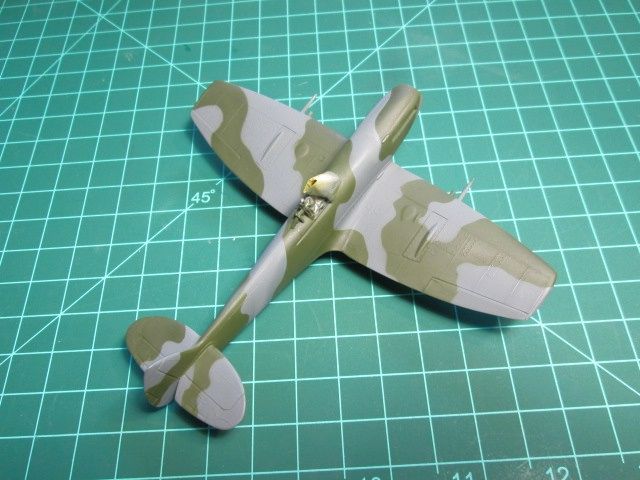
Top side's done


Image
2012 A:12 B:13 C:0
User avatar
JamesPerrin
Looks like his avatar
Posts: 13684
Joined: April 5th, 2011, 8:09 pm
Location: W. Yorkshire
Contact:

Re: Barry's Build

Post by JamesPerrin »

You've done a great job of getting the extra wiggle in the camo. I find I often smooth these curves out too much.
Classic British Kits SIG Leader Better to fettle than to fill
(2024 A:B 5:2) (2023 13:8:7) (2022 21:11) (2021 15:8) (2020 8:4:4)
Barry
Modelling Gent and Scholar
Posts: 2612
Joined: May 1st, 2011, 1:23 am
Location: Eastvale, California, USA

Re: Barry's Build

Post by Barry »

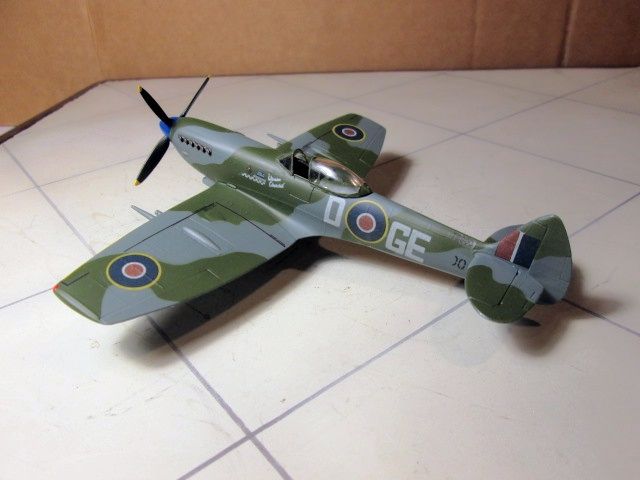
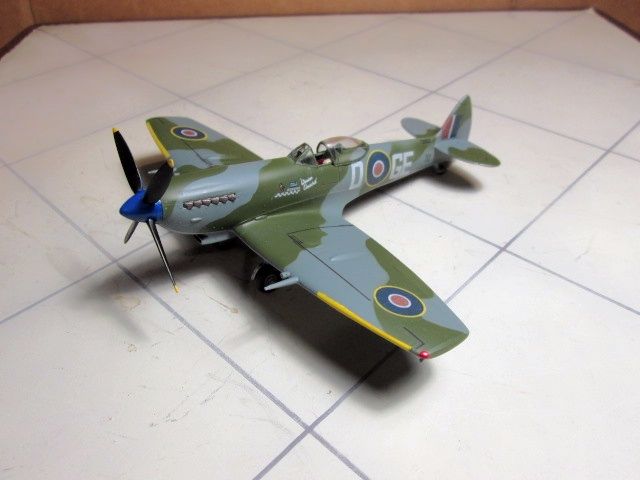
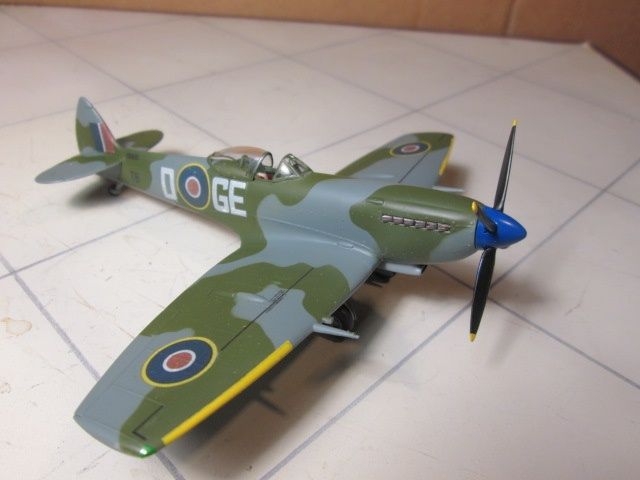
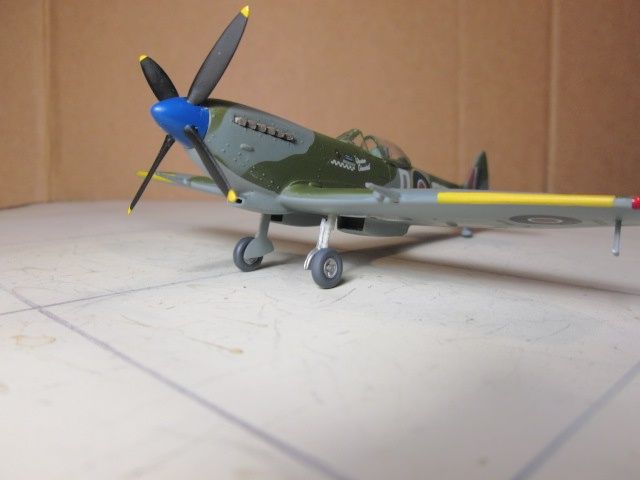
All done. Thanks for doing the job OT, it's been fun.


Decals are from the Matchbox mk IX / XVI kit

Image


Image


Image


Image
2012 A:12 B:13 C:0
User avatar
lancfan
Avro's Rivet Rhapsodizer
Posts: 8763
Joined: May 2nd, 2011, 3:55 pm
Location: Nelson, Lancashire

Re: Barry's Build **FINISHED**

Post by lancfan »

Looks great, and those decals are far better than the heller ones, must try to get hold of a sheet of those.
David.
David.

If you forget the past, you may lose the future.
User avatar
splash
Senior Service Rotorhead
Posts: 13828
Joined: May 1st, 2011, 11:02 am
Location: Somerset England

Re: Barry's Build **FINISHED**

Post by splash »

Nice work it looks great.

Nice work with the satin finish.

Regards Splash
My work bench is starting to look like Portsmouth Naval Dockyard.
Barry
Modelling Gent and Scholar
Posts: 2612
Joined: May 1st, 2011, 1:23 am
Location: Eastvale, California, USA

Re: Barry's Build **FINISHED**

Post by Barry »

Thanks. I bought this, bagged and w/o decals, at a kit swap years ago. Same for the MB kit. One thing about these CBK decals....Providing they don't go all yellowish, they last forever! I've had Hasegawa (for example) decals crumble after only a few years in storage.
2012 A:12 B:13 C:0
User avatar
Old_Tonto
Modelling Gent and Scholar
Posts: 8063
Joined: May 1st, 2011, 7:41 pm
Location: Middlesbrough, Peoples Republic of Teesside.

Re: Barry's Build **FINISHED**

Post by Old_Tonto »

That looks great Barry. The paintwork is spot on.

What paints did you use?
2023 - A:0 B:0 C:0
Current Projects:
East German Air Force (1956-90)
South African Air Force (1958-93)
Barry
Modelling Gent and Scholar
Posts: 2612
Joined: May 1st, 2011, 1:23 am
Location: Eastvale, California, USA

Re: Barry's Build **FINISHED**

Post by Barry »

Thanks OT. Paints are Model Master: US Dark Green 34079, RAF Ocean Grey, and RAF Medium Sea Grey. They also make a RAF Dark Green, but I didn't have a bottle of that at the time and thought the US color would be just fine. The 'sheen" is a mix of MM Clear Gloss and Dull Coat....no specific ratio, just trial and error until I got a result that I liked.
2012 A:12 B:13 C:0
SteveC
The Bug Has Well And Truly Bitten
Posts: 377
Joined: October 28th, 2012, 1:40 pm

Re: Barry's Build **FINISHED**

Post by SteveC »

That is a really nice finish Barry.

Having only attempted one camouflage finish so far, and having trouble, like James, with the edges being too smooth, can I ask how you masked off these areas?

Thanks,

Steve
Barry
Modelling Gent and Scholar
Posts: 2612
Joined: May 1st, 2011, 1:23 am
Location: Eastvale, California, USA

Re: Barry's Build **FINISHED**

Post by Barry »

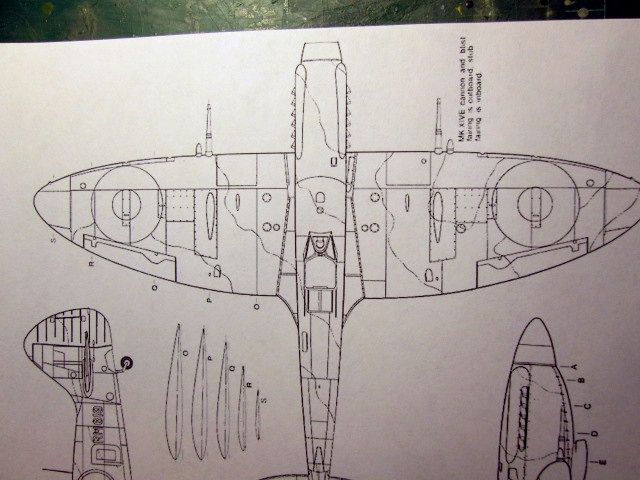
Hi Steve...It goes like this:

1/72 drawing.....found, re-sized, hand drawn...whatever.

Image


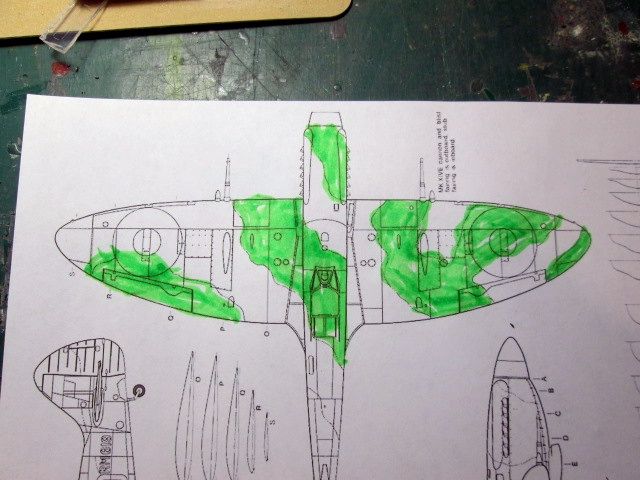
Coloring is optional, but it does help prevent mix-ups later on and it soothes the soul.

Image


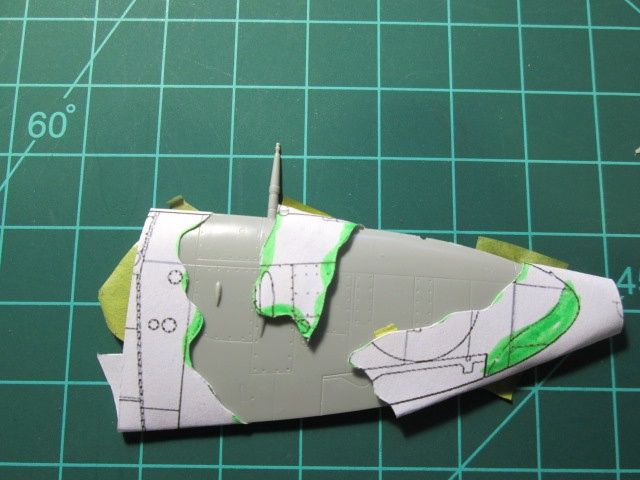
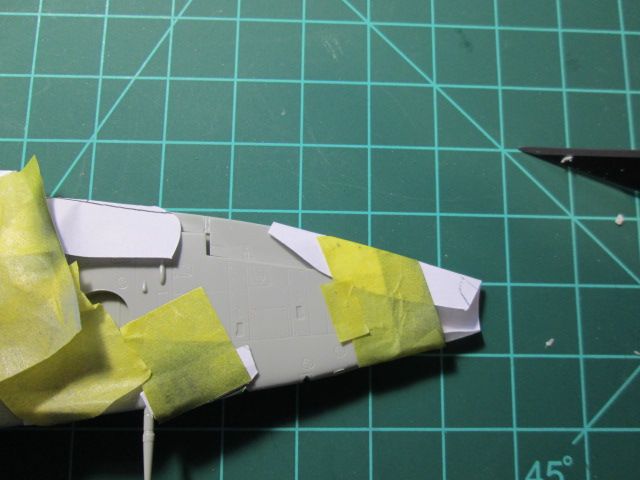
In the case of the Spit, paint the model Ocean Grey and then cut out the masks and tape them in place. Oops, I forgot to remove a section of green on the wing tip and there's a bit of tape peeking out near the roundel there. That's a loop of tape, sticky side out, to hold that 'point' of the mask closer to the surface(need to re-position that). There's another one under that bit covering the bulge over the cannon breach. That section is too high off the surface. . It needs to be mashed down tighter before spraying. I'll spray the green at 18-20 psi, directing the spray as near straight onto the surface as possible to minimize overspray getting under the edge of the masks. Some will, of course, and should result in a very soft edge. I do the model in sections rather than trying to tape the whole thing up at once. Also, here, I would cover the fuselage adjacent to the wing to block any overspray. It gets a little more tricky doing inside corners like where the pattern runs down the fuselage and out onto the wing, but you just use the little loops and sometimes your finger to hold the mask in place and simply work your way around the model until it's done. Then, go back and retouch as necessary. It's tedious and may take a few evenings, but it works.

Image


The underside of the masked wing.


Image
2012 A:12 B:13 C:0
Locked

Return to “Heller Spitfire XVI SKGB”