Page 20 of 21
Re: E.E. Lightning SB 'The Lightning Boys!'
Posted: June 17th, 2017, 8:09 am
by Eric Mc
dwomby wrote:Yes, Airfix converted the moulds of this to 'snap-fit'. I think it was probably back in the brief Palitoy era of the early 80s. I know they did it to the Angel Interceptor too but don't know what else got messed about this way.
Thanks for tip on parts fit due to the 'snap-fit' changes. I haven't got there yet but plan to soon.
David
Even though I love Lightnings I have kept clear of this SB up to now as I have too many other builds going on at the moment which I must finish before embarking on anything else.
I'll keep an eye on the builds here though because I have quite a few Lightnings of various sorts in the stash.
Regarding the above point in respect of the "Snap Fit" era, it was indeed in that period when Airfix was owned by Palitoy (1979-86 or so) and they thought that they could resurrect declining sales by making some of the old moulds "glue free". It was not a success and, in fact, it made some of the models harder to assemble than previous as the connecting lugs were now too large.
As well as the kits mentioned above, the Saturn V got the same treatment. When I was building the recent release version of the Saturn V (which still retains the "Snap Fit" alterations), I found the best solution was to just cut away all the oversize lugs as they simply got in the way of a decent fit. Once removed, the parts mated much better.
Re: E.E. Lightning SB 'The Lightning Boys!'
Posted: June 18th, 2017, 1:39 pm
by MarkyM607
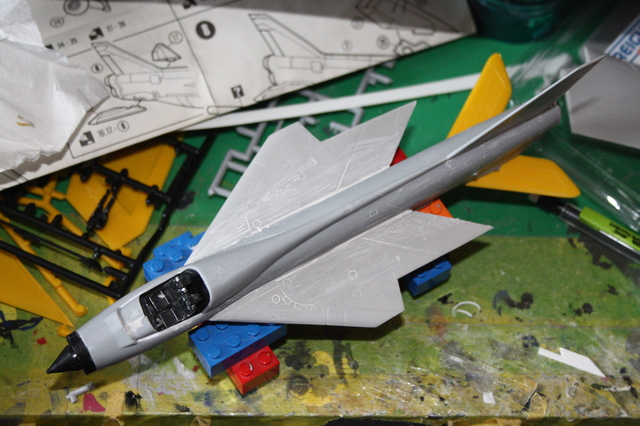
Inner wing sections on and levelled a bit. Because it was designed for another kit, the sections needed sanding and scraping to fit well, and then plastic strip to level them. This if course left gaps and the like which is where the filler came in handy!!...
Re: E.E. Lightning SB 'The Lightning Boys!'
Posted: June 18th, 2017, 9:30 pm
by lancfan
Looking good Mark.
David.
Re: E.E. Lightning SB 'The Lightning Boys!'
Posted: June 18th, 2017, 9:38 pm
by lancfan
Time to make a start on my F.3, the first step was to build up the interior fittings for the fuselage, they were then glued down into the nose, two steel bolts were glued and filled in place to hold the nose down and the fuselage halves were joined together and the tailpipe was cyanoe'd in place.


David.
Re: E.E. Lightning SB 'The Lightning Boys!'
Posted: June 19th, 2017, 8:25 am
by Eric Mc
Every time I see this thread title I keep humming -
"Lightning Boys
Lightning Boys
Laced up boots and corderoys"
Re: E.E. Lightning SB 'The Lightning Boys!'
Posted: June 23rd, 2017, 2:10 pm
by MarkyM607
Left wing on. Another battle, despite using superglue the wing would not attach or seem to set. So I used wire to make two supports in each wing and put more glue on. Wing now seems okay but I've left it as long as possible to make sure it is as set as it can be. Other wing tonight. I am also using the undercarriage legs as supplied in the conversion set (which I didn't on the RAF version), as they are thicker and sturdier looking than the Matchbox ones. I thought this would be better for a Carrier landing aircraft.
Re: E.E. Lightning SB 'The Lightning Boys!'
Posted: June 23rd, 2017, 10:14 pm
by lancfan
The fuselage was completed and wing halves and flaps joined together ready for assembly, when this had dried the wings were glued to the fuselage.


David.
Re: E.E. Lightning SB 'The Lightning Boys!'
Posted: June 24th, 2017, 9:22 am
by Stuart
lancfan wrote:The fuselage was completed and wing halves and flaps joined together ready for assembly, when this had dried the wings were glued to the fuselage.


David.
That's looking really Nice David - What do you think of these Sword Kits?
Re: E.E. Lightning SB 'The Lightning Boys!'
Posted: June 24th, 2017, 9:24 am
by Stuart
MarkyM607 wrote:Left wing on. Another battle, despite using superglue the wing would not attach or seem to set. So I used wire to make two supports in each wing and put more glue on. Wing now seems okay but I've left it as long as possible to make sure it is as set as it can be. Other wing tonight. I am also using the undercarriage legs as supplied in the conversion set (which I didn't on the RAF version), as they are thicker and sturdier looking than the Matchbox ones. I thought this would be better for a Carrier landing aircraft.
That's looking very interesting Mark - Nice work thus far.
I've started on my T.55 this morning - It's not a bad kit.
Re: E.E. Lightning SB 'The Lightning Boys!'
Posted: June 24th, 2017, 9:24 am
by Stuart
Eric Mc wrote:Every time I see this thread title I keep humming -
"Lightning Boys
Lightning Boys
Laced up boots and corderoys"

Re: E.E. Lightning SB 'The Lightning Boys!'
Posted: June 24th, 2017, 12:21 pm
by lancfan
Sir T wrote:What do you think of these Sword Kits?
Stuart, the surface detail is very similar to but slightly lighter than the new tool Airfix Lightnings, the parts fit is quite good but the lack of locating pins means that more Care must be taken during assembly and dry fitting the major parts is essential, the cockpits are very similar to the NT Airfix kits but the resin ejection seats are far better that the plastic Airfix seats. The etched parts are very good but many of the smaller pieces are just not worth struggling with and often cannot be seen when the model is built up, also the otherwise excellent resin seats do not have any harness details moulded into them and these items are not included in the fighter etched sheets but are included on the trainer etch sheets. The decals are very good but the early type warning signs for the nose intakes have an awful and quite stupid spelling mistake included in the text- they warn the ground crews to "KEEP
CLEAN OF INTAKES" and the Xtradecals Lightning stencil sheet is of limited use to replace these as it is badly out of register for red on white decals. Although these kits can be fiddly at times they are well worth the effort, they are not really very difficult to build and reward the builder with a very accurate Lightning.
David.
Re: E.E. Lightning SB 'The Lightning Boys!'
Posted: June 27th, 2017, 8:03 pm
by Stuart
Yes you must make sure those intakes are clean! Thanks for the info David!
Arrrggghhh!!! Would you believe that as well as losing the canopy for the T.55 I've also managed to lose the one from my Airfix NT F.2A kit!!!!
I am however progressing on the T.55 - no paint as yet, just some cockpit assembly and blanking off of jet pipes and intakes etc.
Re: E.E. Lightning SB 'The Lightning Boys!'
Posted: July 2nd, 2017, 2:06 pm
by MarkyM607
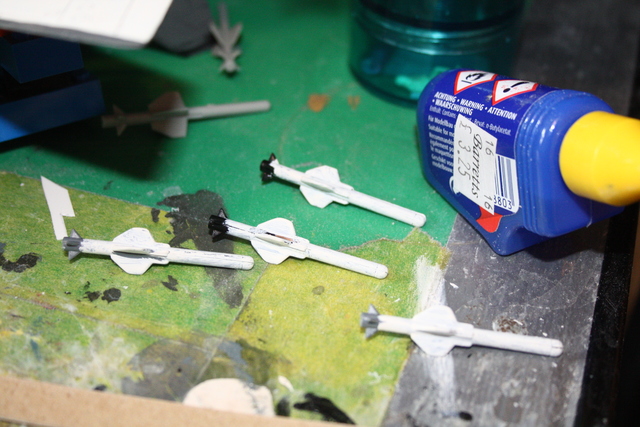
Nearly there. Probes and missiles painting is underway. I've used the over-wing pylons for two extra missiles in case the Navy version was intended to be used as a fleet defence fighter. Two missiles seemed a bit light for this so the F.Mk.8 (my designation!!) will have four. Possibly they would have to be modified to be able to fire then launch rather than drop and fire.
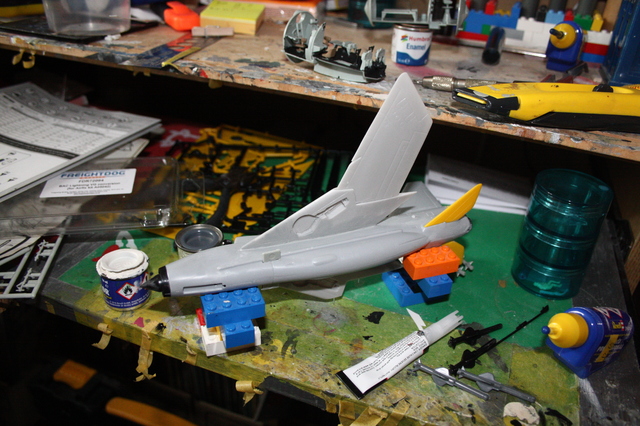
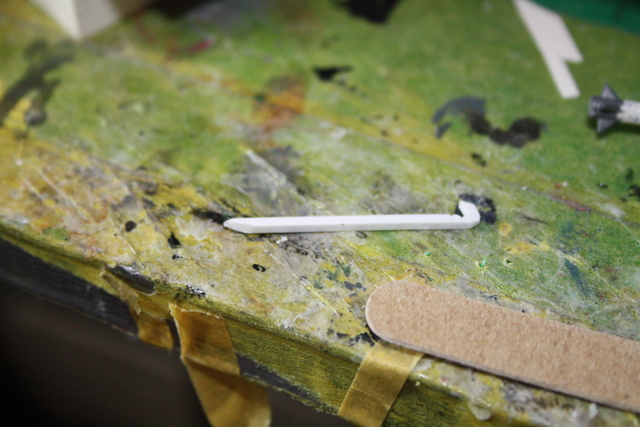
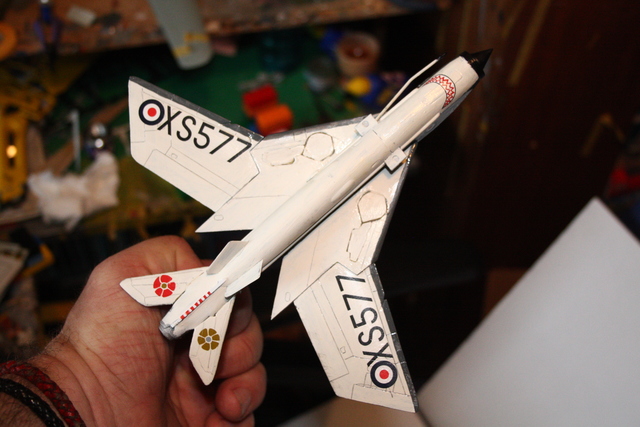
I thought as it is a naval version it ought to have an arrestor hook!!. Not one in the kit obviously so I made one....
Edit: I forgot to add the ventral fins before painting so a retro-fit was in order....

Re: E.E. Lightning SB 'The Lightning Boys!'
Posted: July 14th, 2017, 7:31 pm
by MarkyM607
Rapid progress on the Lightning, decals came off the backing paper about ten seconds after going in the water!!. Looks pretty good and realistic if I do say so myself!!.
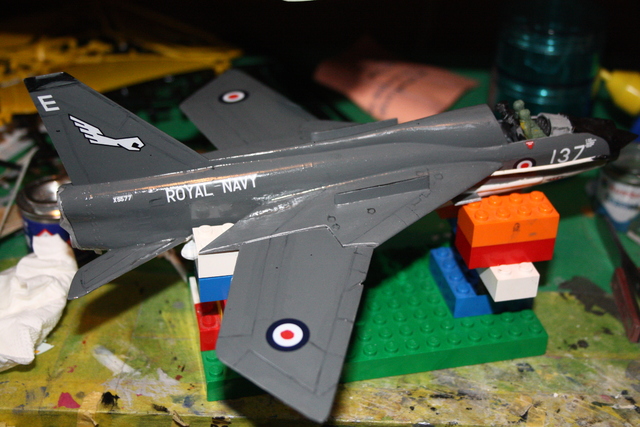
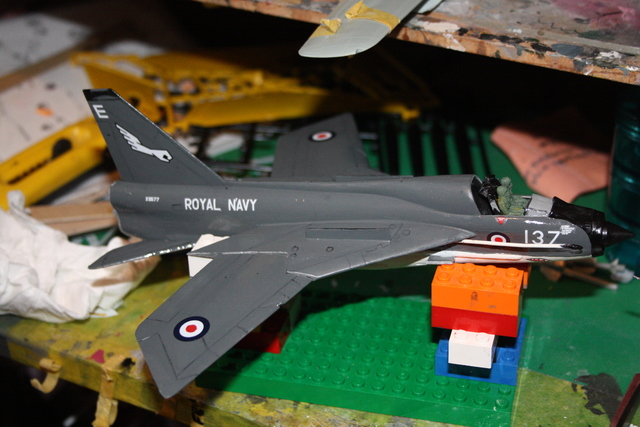
Just need to add the canopy and the missiles, one of which seems to have fired itself and disappeared!!. Not to fuss, spares are around!!. It's now wheels up as the legs and doors (the former resin, the latter plastic), declined to stay glued to each other even with superglue. Even the resin legs were unwilling to stay secured to resin wings, even with two part epoxy glue. Sigh. Still, Bob and Jim are now snuggled into the cockpit!!.
Re: E.E. Lightning SB 'The Lightning Boys!'
Posted: July 15th, 2017, 8:19 pm
by lancfan
Now that Photobucket has been chucked out here are the next shots of the model in black primer and the base coat of Revell Aqua 99 Alluminium.


David.