Page 1 of 12
Frog DH Hornet (F239) 1/72 - AndrewR and Lancfan
Posted: April 7th, 2013, 3:55 am
by AndrewR
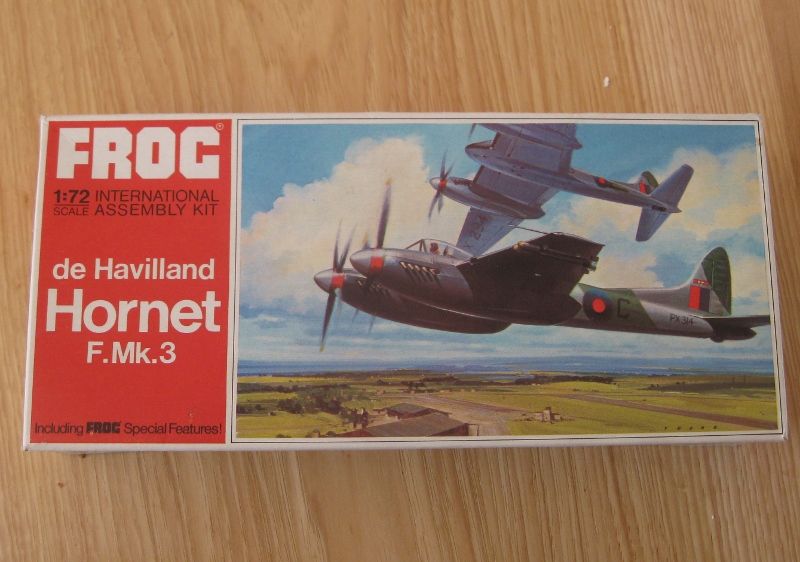
Here is the first of the old Frog kits builds. We will be building this kit:
There are decals for two aircraft:
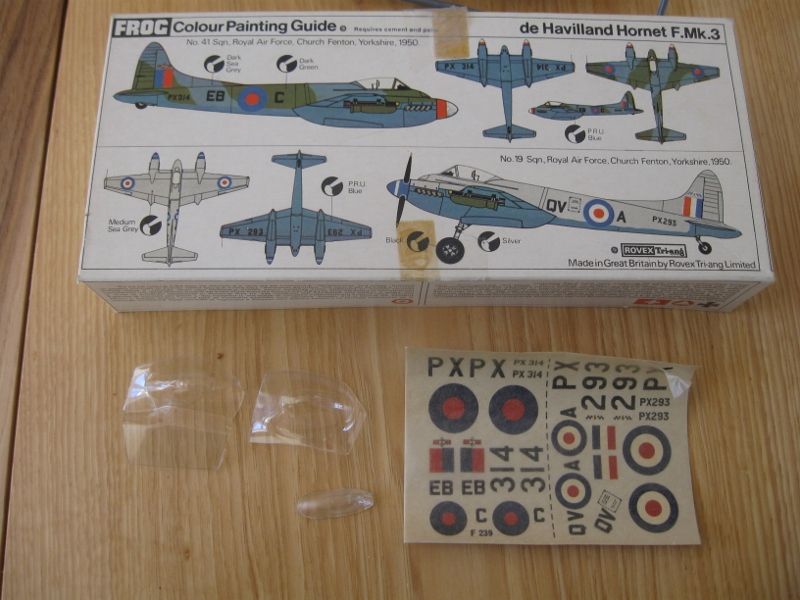
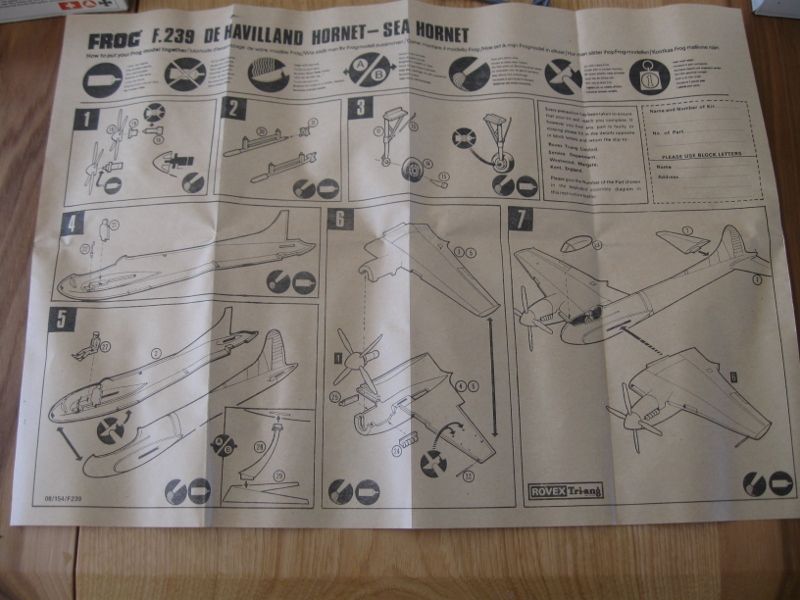
I will be building the lower option, from 19 Sqn. RAF, in Medium Sea Grey with PRU Blue undersides. It will be mostly OOB, except that I have crash moulded two replacement canopies, as the kit canopy looks rather sad. The kit comes on four sprues
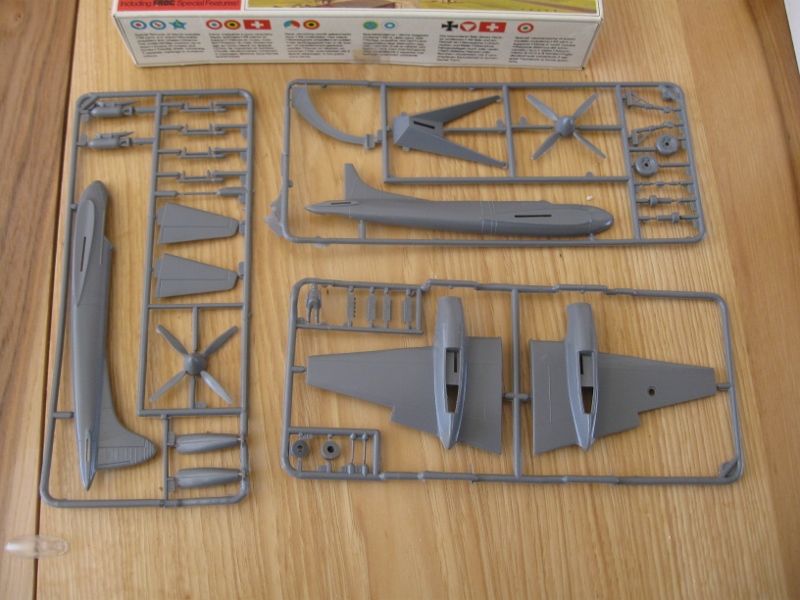
It has raised panel lines, but very few of them, as the Hornet was constructed out of wood. I am undecided on whether to rescribe or not.

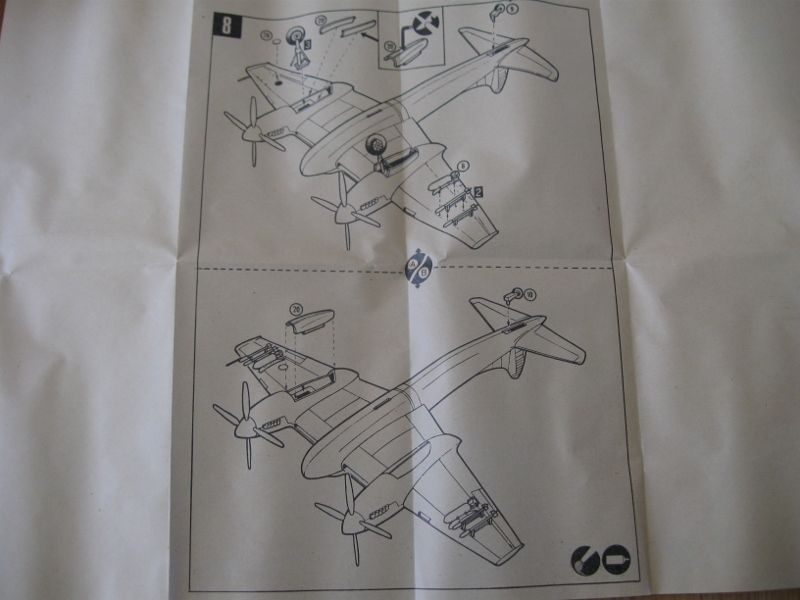
The instructions look straightforward. There are options for rockets or bombs as underwing stores. The rockets are moulded on the rail, and look fairly reasonable. They have separate tails, which are rather thick and would either need thinning or replacing. The bombs are also moulded on the rail, and to my eye, do not really pass muster, particularly in the tail section.
As I'm suffering with shaky hands at the moment, I will do this build with wheels up on the flight stand. Painting the pilot will be the main difficulty!
There are a couple of build reviews here:
http://www.britmodeller.com/forums/inde ... dh-hornet/;
http://airfixtributeforum.myfastforum.o ... 10005.html;
The main comments about the kit in these two articles are that the wings are very blunt at the front, and the vertical tail could do with thinning out a bit.
Internet resources, with photos of the cockpit and aircraft:
http://www.dhhornet50.net/;
No doubt Lancfan will have a much more comprehensive set of references!

cheers
Andrew
Re: Frog DH Hornet (F239) 1/72 - AndrewR and Lancfan
Posted: April 7th, 2013, 9:24 am
by aeroplanegripper
I look forward to watching this progress, an aircraft and a model I have always admired. All the best the pair of you.
Re: Frog DH Hornet (F239) 1/72 - AndrewR and Lancfan
Posted: April 7th, 2013, 12:18 pm
by lancfan
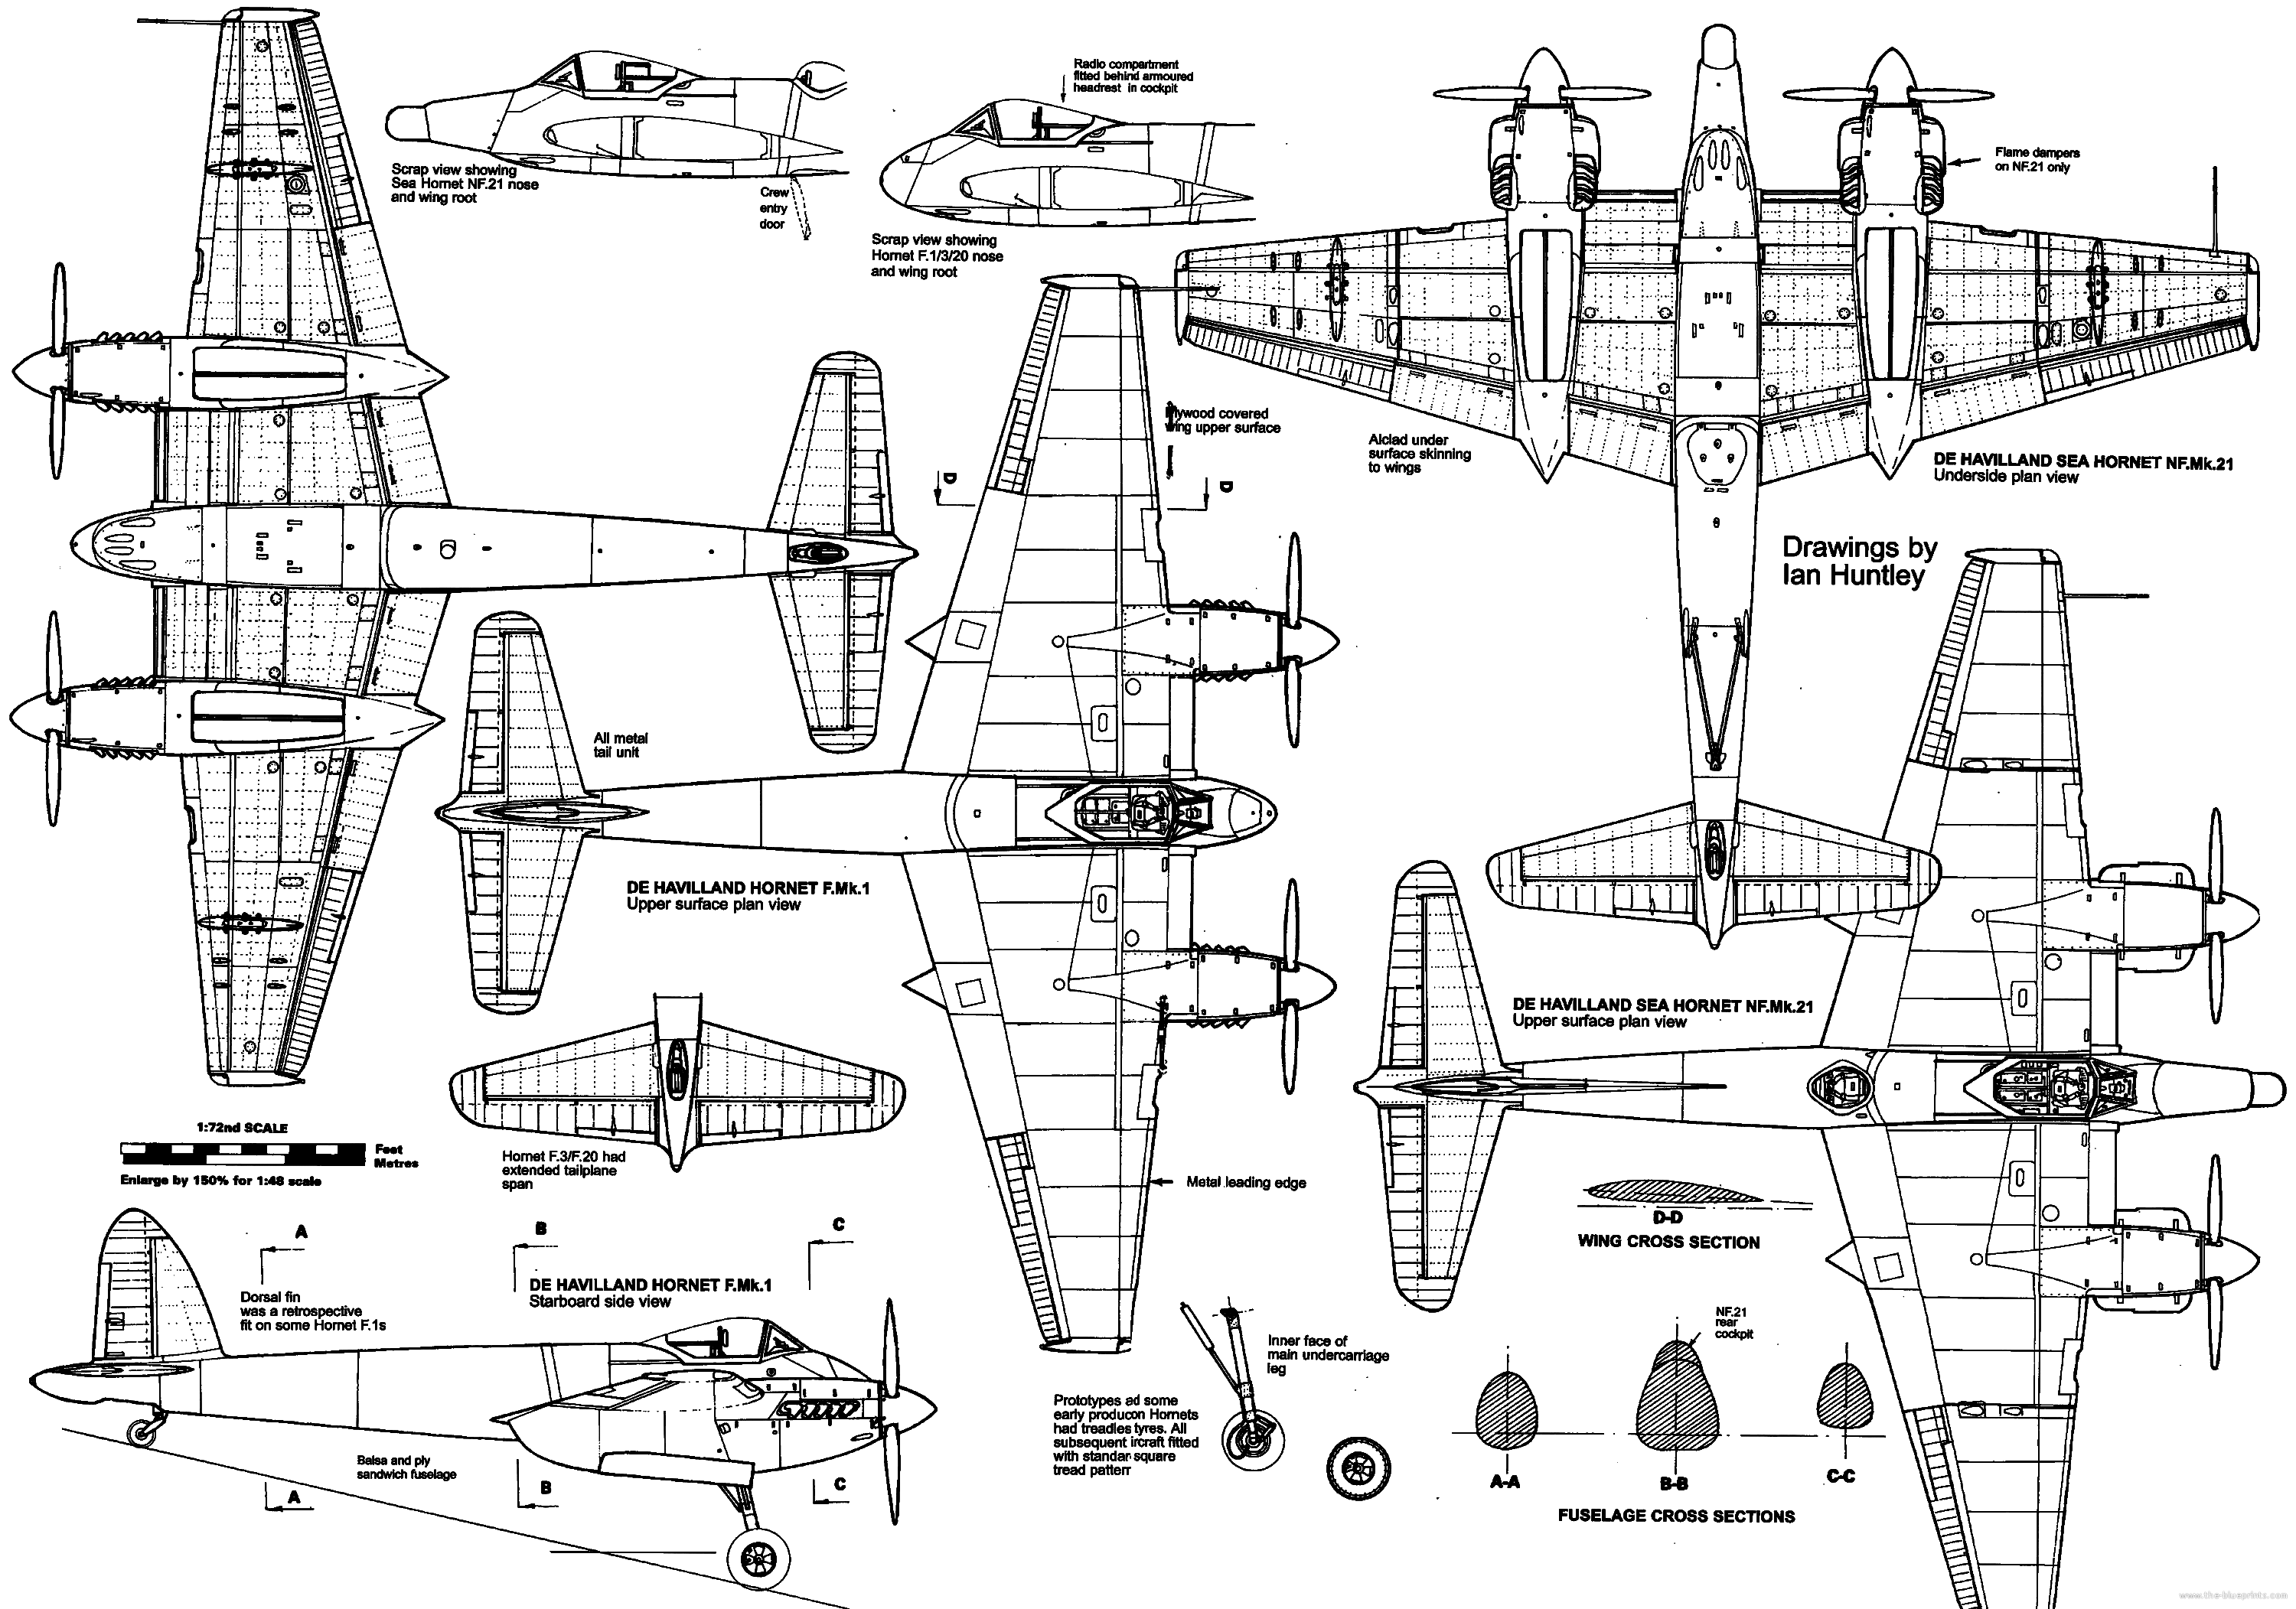
I don't have a massive set of docs for this, Aeroplane Monthly ran a two part history of the Hornet/Sea Hornet with plans which I will use and I found scale drawings online here-
http://www.the-blueprints.com/blueprint ... rnet-3.png;
This site has full airframe construction details-
http://users.skynet.be/BAMRS/dh103/dh103.htm;
My model came without box, decals or instructions and Snowbird very kindly sent a spare set of decals to me, thus allowing the build to begin. I have always liked the Hornet but do not intend building too many of them, when another kit surfaces I will add it to the stash to be built later as a Sea Hornet but this will be the one RAF machine I build. Like andrew I will replace the canopy but my model will stand on its undercarriage, I will detail the cockpit using pictures of the replica nose section shown on the Hornet Project website as a guide and will correct the wing section issues and add more realistic stores. I will also fit the flaps in the lowered position.
The sprues ready for the off later today-

David.
Re: Frog DH Hornet (F239) 1/72 - AndrewR and Lancfan
Posted: April 7th, 2013, 2:36 pm
by AndrewR
I'll scan the instruction sheet for you David. The main thing to watch for is the handedness of the props.
Cheers
Andrew
Re: Frog DH Hornet (F239) 1/72 - AndrewR and Lancfan
Posted: April 7th, 2013, 2:59 pm
by lancfan
Cheers Andrew, the articles are now in your mailbox.
David.
Re: Frog DH Hornet (F239) 1/72 - AndrewR and Lancfan
Posted: April 7th, 2013, 5:25 pm
by AndrewR
lancfan wrote:Cheers Andrew, the articles are now in your mailbox.
David.
And the instructions should now be in your mailbox!
cheers
Andrew
Re: Frog DH Hornet (F239) 1/72 - AndrewR and Lancfan
Posted: April 8th, 2013, 4:02 am
by AndrewR
Having inspected the kit this evening, I have noticed that there is dimpling in the rudder on both sides. I've sanded both sides of the rudder down to make them smooth and also thinned the rudder from the inside somewhat.
Once the fuselage halves are fixed together, I'll try to reshape the leading edge of the rudder to something more aerodynamic, and less of the blunt instrument!
Looking at the cross-section of the wing, by putting upper and lower wings together shows a similar problem. I'd estimate that the wings are about 2mm too thick, and that thickness corresponds to the blunt edge of the leading edge, which is perpendicular to the air flow

I really can't see the de Havilland designers doing that on an aircraft optimized for speed. This wing has all the aerodynamic qualities of an old Volvo estate...
I will thin it down and reshape by removing material from the lower wing, on the grounds that if I mess it up, the damage will be less noticeable. So much for the OOB build!

Cheers
Andrew
Re: Frog DH Hornet (F239) 1/72 - AndrewR and Lancfan
Posted: April 8th, 2013, 10:35 am
by lancfan
I'm starting my build with a good read of the Aeroplane monthly articles and the skynet DH Hornet site, unlike the Mosquito this aeroplane was of mixed metal and wood construction and employed metal to wood bonding with the bottom wing skin, wing leading edge and the tailplane being metal. The rest of the aircraft was wood using the same construction methods as the Mosquito. Having seen this info I don't see how there can ever be a true 1/1 replica of this aircraft built and a lot of compromise will have to be made in it's creation by the Hornet Project. I have amended the link for the Skynet url as I have now found the home page which covers the construction of the whole aircraft, well worth the read if you have any interest in the engineering behind this aeroplane.
Back to the model, the plans show a laminar flow wing section with a fairly sharp, thin leading edge of small radius and is thickest at about mid-chord, the kit plastic is fairly thick so re-shaping this should be quite easy. There will be some panel lines to scribe on the leading edge and the wing underside but the rest is a clean and smooth airframe with just the odd access panel. I will start with the fuselage by removing the moulded-in cockpit floor and instrument panel and will thin out the inside faces of the nose with the hobby drill to give myself more room to scratch the new cockpit.
David.
Re: Frog DH Hornet (F239) 1/72 - AndrewR and Lancfan
Posted: April 8th, 2013, 12:09 pm
by lancfan
This is one side of the fuselage after it has been enlarged for the new cockpit, below which is the same part OOB. The kit cockpit floor is far too high, the only things which ran under the actual cockpit were the gun barrels, the breeches and ammo were behind the seat and below the radios.

The kit has the exhausts glued down before the wing halves are joined together, to make cleaning the joins easier I have glued a plastic card wall behind each exhaust apertures so that they can be attached later after assembly.

David.
Re: Frog DH Hornet (F239) 1/72 - AndrewR and Lancfan
Posted: April 8th, 2013, 12:35 pm
by lancfan
Both cockpit sides are now thinned down, the second side was slightly overdone and had to be cleaned up by applying a wipe of filler instead of a light sanding. The wing halves have also been glued together and work has now stopped whilst this all dries.

David.
Re: Frog DH Hornet (F239) 1/72 - AndrewR and Lancfan
Posted: April 8th, 2013, 3:11 pm
by lancfan
The gun ports have been drilled through to mark their position and the walls of the nose have been thinned down as per the cockpit area.

The cockpit and radio bay floor is now added by packing the lower nose with Miliput and taping the fuselage halves together, when this has dried it can be removed, trimmed to final shape and the cockpit detailing can begin.

David.
Re: Frog DH Hornet (F239) 1/72 - AndrewR and Lancfan
Posted: April 8th, 2013, 3:38 pm
by jssel
Watching with interest as I may Blitz this one in August.
Re: Frog DH Hornet (F239) 1/72 - AndrewR and Lancfan
Posted: April 8th, 2013, 3:49 pm
by AndrewR
Nice work on the cockpit area David. As I'm putting a pilot in (but not the hobbit supplied in the kit), I will probably take much less care over my cockpit area

For my model, I want to make sure that the pilot's head is at the right height, and is in scale with the canopy, as in photos. The kit figure will just not do.
jssel wrote:Watching with interest as I may Blitz this one in August.
It looks pretty blitzable Jeff. I did a dry fit of the wings to fuselage and the fit was good (before I started thinning the wing, of course
).
Re: Frog DH Hornet (F239) 1/72 - AndrewR and Lancfan
Posted: April 8th, 2013, 5:08 pm
by lancfan
I agree with Andrew, built OOB this kit will just fall together.
David.
Re: Frog DH Hornet (F239) 1/72 - AndrewR and Lancfan
Posted: April 8th, 2013, 5:14 pm
by lancfan
Suffered a slight setback when reshaping the first wing- I broke through the surface next to the leading edge and now need to fill the surounding wing void with Miliput before continuing.

Both wings are now shaped and the resultant holes have been filled with Miliput- work has now stopped, waiting for the Miliput to dry.

David.