Honda CB1100R

Time to pimp them rides!
User avatar
Dazzled
Modelling Gent and Scholar
Posts: 9592
Joined: October 1st, 2011, 11:08 pm
Location: Mid Glamorgan, South Wales
Contact:

Honda CB1100R

Post by Dazzled »

Having made some comments on this part of the forum that we don't see enough motorcycle models, and being a long-term biker myself, I've decided to put my money where my mouth is so to speak and build one myself.

I picked this up from Modelzone in Cardiff from their sale rack.

Image

Tamiya's CB1100R in 1/12th scale. It's the first time in a while that a kit I've bought hasn't made it into the stash but has gone straight to the bench. I intend to build it as and when time permits. Between work, studying and rebuilding a 1/1 scale Triumph Sprint I don't get a huge amount of time at the bench at the moment and these commitments are making participation in GBs pretty much impossible as I can't build within time constraints. So, for the time being, I'm pottering along with my own modelling programme at the erratic pace I can manage.

This is actually quite good for me reference-wise as a motorcycle magazine I bought a few months ago features a full restoration of one of these. Who needs the instructions ;-)

So, it's engine first. In motorbike kits this is the equivalent of starting with the cockpit. The engine is always first.

A bit of assembly followed by a coat of Tamiya XF-18.

Image

Followed, after a suitable drying period, by some more painting and assembly to get to this stage.

Image

It's coming together nicely, just slowly and carefully building to the instructions.

I'm working on the frame and swingarm at the moment and will update when I have something worthwhile to add.
COLD WAR S.I.G. LEADER

Wherever there's danger, wherever there's trouble, wherever there's important work to be done....I'll be somewhere else building a model!
ShaunW
NOT the sheep
Posts: 26180
Joined: November 26th, 2011, 6:11 pm
Location: Pontefract West Yorkshire

Re: Honda CB1100R

Post by ShaunW »

Oh yes Dazzled, this is more like it. I remember these beasts from when I was an 80's biker, alas I couldn't hope to afford one at the time but I remember the one owned by a local motorcycle shop owner. Looking good so far and I will follow this build with interest.
Doing - Tamiya 1/35th Universal Carrier.

Work is the curse of the modelling classes!
IPMS#12300
User avatar
IvanV22
Modelling Gent and Scholar
Posts: 1205
Joined: January 24th, 2012, 9:36 am
Location: Norway

Re: Honda CB1100R

Post by IvanV22 »

I agree, would like to see more bikes…
Looking forwards to seeing more of this one, and maybe å photo of the Triumph Sprint ?
Best from Ivan
User avatar
Dazzled
Modelling Gent and Scholar
Posts: 9592
Joined: October 1st, 2011, 11:08 pm
Location: Mid Glamorgan, South Wales
Contact:

Re: Honda CB1100R

Post by Dazzled »

I shall see what I can do about some pictures of the Sprint. I've had little time at the bench for weeks now but I have made some more progress recently.
I'll update as soon as I have the pictures sorted. 8-)
COLD WAR S.I.G. LEADER

Wherever there's danger, wherever there's trouble, wherever there's important work to be done....I'll be somewhere else building a model!
User avatar
Dazzled
Modelling Gent and Scholar
Posts: 9592
Joined: October 1st, 2011, 11:08 pm
Location: Mid Glamorgan, South Wales
Contact:

Re: Honda CB1100R

Post by Dazzled »

Update time....at last.

Modelling has been sadly off the agenda for a while. An Open University course that took up considerably more of my spare time than it should ate horribly into my bench time :cry: but I'm coming to an end with that and, promised DIY tasks aside, I'm going to make a point of spending a bit of quality time with my modelling tools.

Like Shaun, I was an '80s biker. In fact I'm still a biker now with a garage /workshop dedicated to all things two-wheeled (and now much better organised than in the picture) including a 1994 Triumph Sprint 900 triple that's undergoing a resurrection/restoration. As promised, here's a picture of said Triumph taken before the start of the project over a year ago.

Image

It's a bit more stripped down at the moment and I'm having a wrestling match with the carbs....they seem to be winning :roll: .

Anyhow, back to the model....

A while back I painted the frame and rear wheel, following the instructions stage by stage just for a change. The frame is painted in Fiat racing red that I happened to have to hand in a rattle can, a leftover from my as yet unfinished (but soon to be reattempted) Jaguar XKSS. Fasteners were highlighted in silver using both the instructions and the February issue of Practical Sportsbikes magazine, with a feature article on a CB1100R rebuild, as references. I also painted the swingarm and rear brake while I had the red paint out.

Image

The rear wheel was sprayed with Tamiya gold acrylic. I sprayed the front wheel parts at the same time as I had the airbrush out. Spoke, rim and fastener detail was painted in using chrome silver. This seemed a little daunting at first but it was quite easy, if a little time consuming, to achieve a pleasing result. I also painted the brake disc and calliper at this time but failed to take any pictures (doh).

Fast forward a few weeks to the last few days and things started moving again. I got the frame wrapped around the engine only to discover a bit of an issue. I had a painted frame with a big join running along the top tube and down and around the headstock. I had a similar problem with the joint in the swingarm. I got the joins out easily enough with a little sanding and filler but the repaint and masking on the frame looked pretty daunting. In the end I opted to catch some of the paint in a plastic lid and brush paint it on. happily the paint seemed to self level quite nicely and this was the result.

Image

Then I turned my attention to the back end and assembled the swingarm, wheel, chain and brakes all held together with a 20mm long screw. Personally, I'd have preferred a realistic wheel spindle but I'll take the Philips head for the sake of convenience.

Image

And here they are together.

Image

I still have a decal to apply to the chainguard and a few vinyl tubes to pop on but these bits will be joined together in the very near future.

Progress at last :grin:
COLD WAR S.I.G. LEADER

Wherever there's danger, wherever there's trouble, wherever there's important work to be done....I'll be somewhere else building a model!
ShaunW
NOT the sheep
Posts: 26180
Joined: November 26th, 2011, 6:11 pm
Location: Pontefract West Yorkshire

Re: Honda CB1100R

Post by ShaunW »

That looks great Dazzled, a class bit of bike modelling. I like the Triumph too. Carbs, jeez, you don't see them any more! It seems to be all black boxes and laptops these days for bikes and cars. How long have you owned the Triumph?
Doing - Tamiya 1/35th Universal Carrier.

Work is the curse of the modelling classes!
IPMS#12300
User avatar
Dazzled
Modelling Gent and Scholar
Posts: 9592
Joined: October 1st, 2011, 11:08 pm
Location: Mid Glamorgan, South Wales
Contact:

Re: Honda CB1100R

Post by Dazzled »

Hi Shaun. I've owned the Triumph since 1998 but, unfortunately, it languished for a number of years when I was too ill to ride it. Happily, I'm all better now and gleefully bimble around on either a 600ccHonda Hornet or an 800cc Suzuki Intruder, the only two of the stable that are up and running. I also have a 1976 Suzuki GT500 that will be the next project after the Triumph plus a couple of other bikes in bits. I seem to have a stash of bikes to match my stash of unbuilt kits :roll:
COLD WAR S.I.G. LEADER

Wherever there's danger, wherever there's trouble, wherever there's important work to be done....I'll be somewhere else building a model!
User avatar
Clashcityrocker
Modelling Gent and Scholar
Posts: 10806
Joined: May 1st, 2011, 12:31 am
Location: Adelaide. South Australia

Re: Honda CB1100R

Post by Clashcityrocker »

Great work on the plastic bike so far. :grin:

Nigel
ShaunW
NOT the sheep
Posts: 26180
Joined: November 26th, 2011, 6:11 pm
Location: Pontefract West Yorkshire

Re: Honda CB1100R

Post by ShaunW »

Interesting stable of bikes you have there Dazzled. Ye Gods, I haven't seen a GT500 for a good few years (I regularly see GT750 "kettles" on the roads around here during the summer, I think they must be quite a popular classic) and hopefully you will be able to get that old classic up and running. I wonder what an immaculate CB1100R is worth to collectors these days?
Doing - Tamiya 1/35th Universal Carrier.

Work is the curse of the modelling classes!
IPMS#12300
User avatar
Dazzled
Modelling Gent and Scholar
Posts: 9592
Joined: October 1st, 2011, 11:08 pm
Location: Mid Glamorgan, South Wales
Contact:

Re: Honda CB1100R

Post by Dazzled »

What a real one of these is worth is like asking how long is a piece of string? Homolgation specials like this are subject to a number of different factors. A fairly decent one can be picked up for £6,000, while a mint condition early model with a bit of proven racing history can comfortably top five figures. Valuing one is a bit of a minefield.

Anyhow......

Despite a stressful and quite awful weekend, I managed a bit of modelling by way of relaxation.

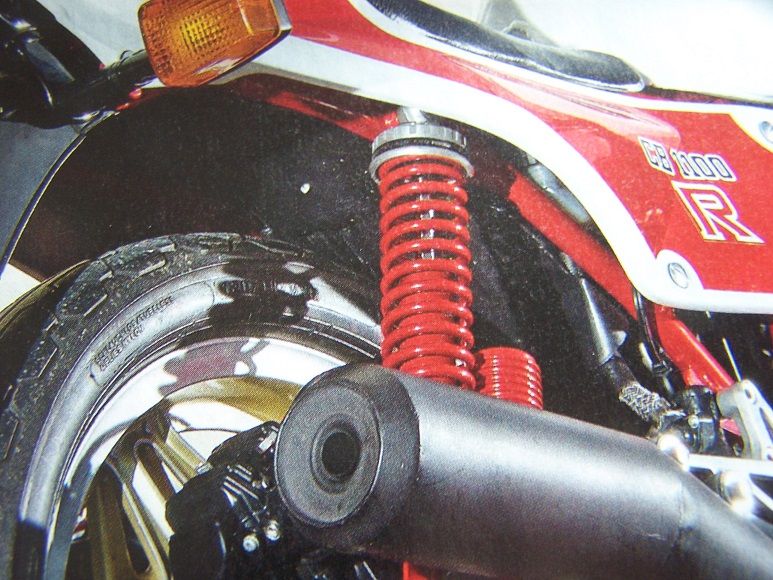
Still looking at the back end I set about the shock absorbers. This picture from the bike mag showed the correct colours.

Image

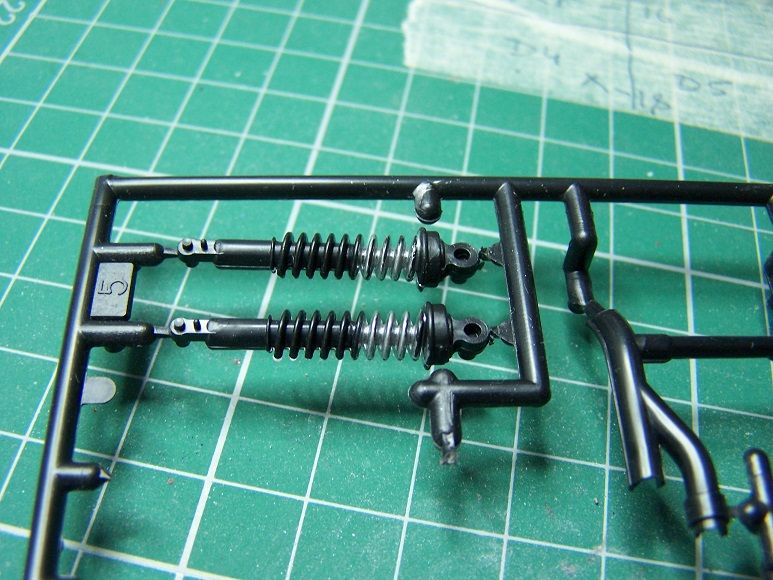
I could have gone down the route suggested in the instructions but I wanted to give an impression at least of the damper rods in the shocks. I thought about attempting to paint these in afterwards but, given my shaky hands ( :roll: ) I decided to try a little masking experiment.

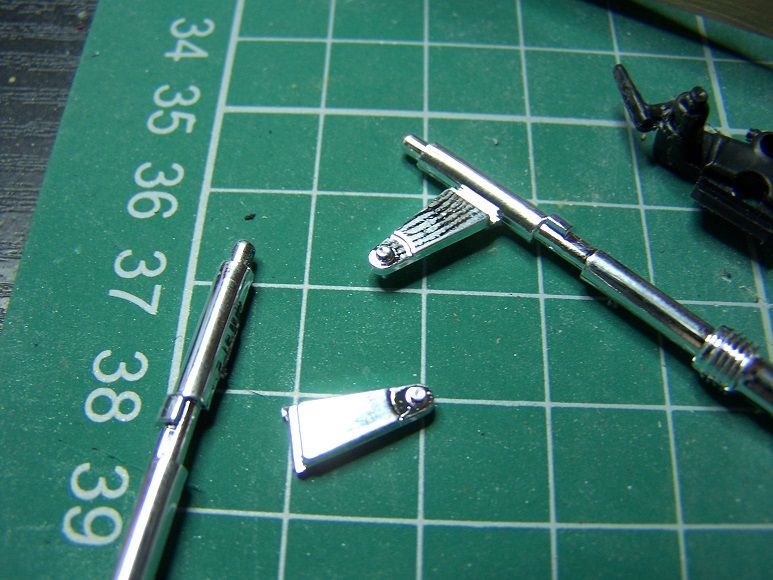
I painted the rods in metalcote silver.

Image

Then I removed them from the sprue and cleaned up the mould lines.

Image

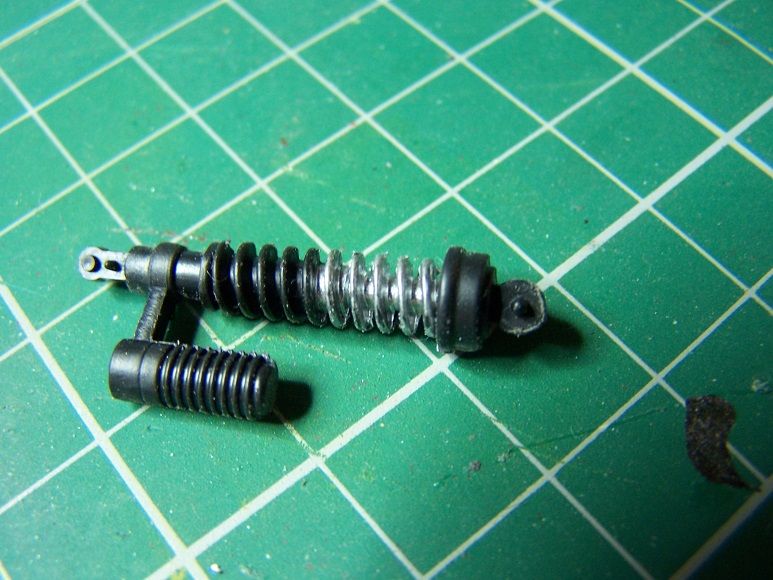
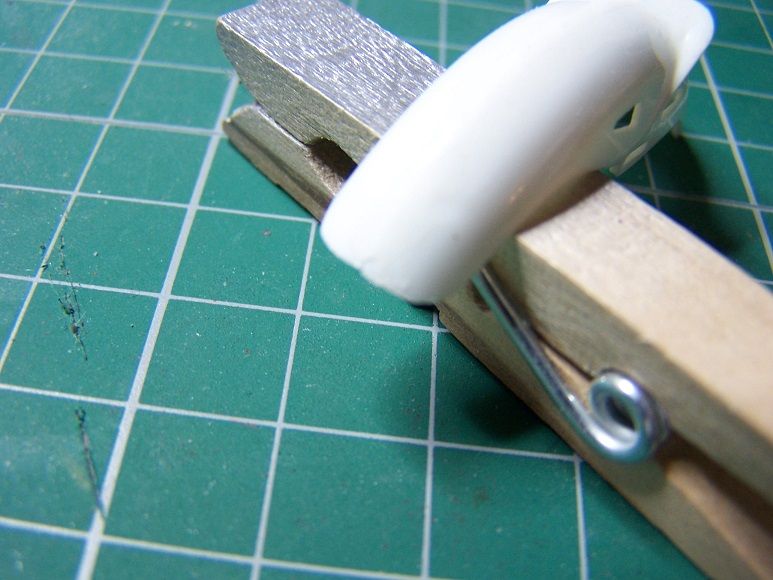
Then I wrapped some embroidery thread (liberated from Mrs Dazzled's sewing box) around the centre spiral.

Image

Followed by a good thick coat of Fiat Racing Red out of the can.

Image


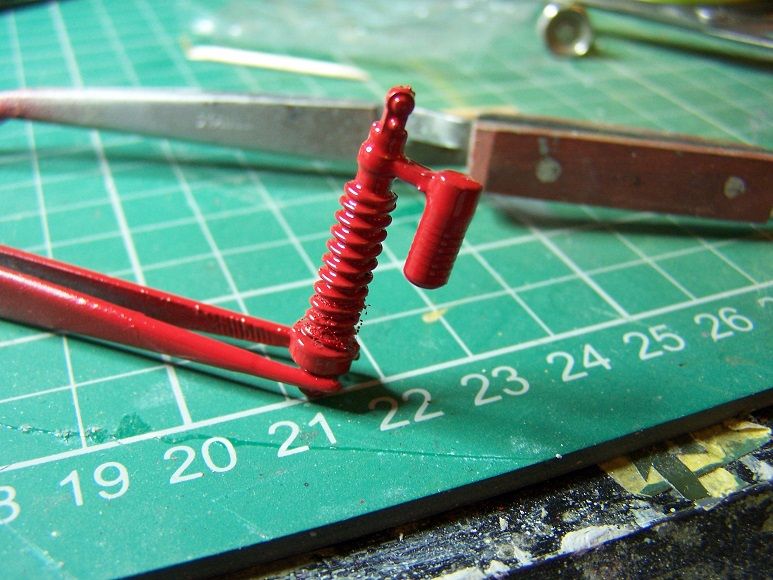
When this dries I'll pull the thread off with fingers crossed. I'm not sure why I try these masking experiments in full sight. Maybe I just want to give everyone else a chance to have a laugh.


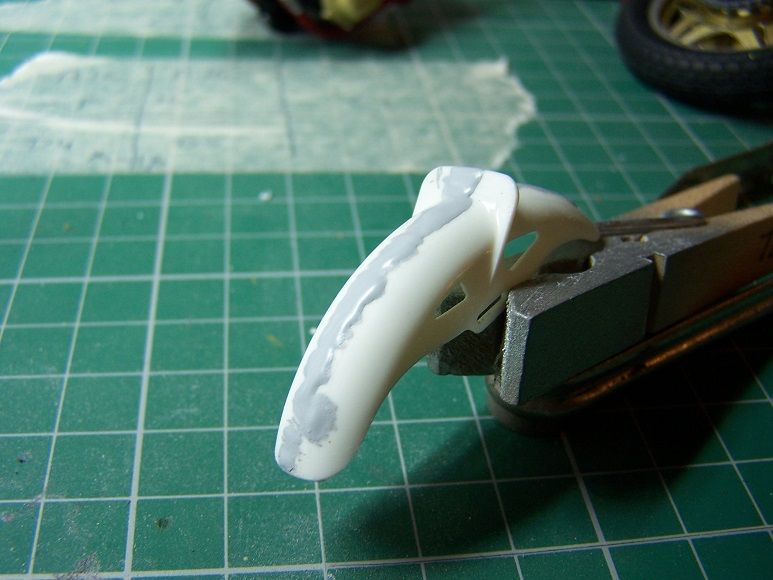
With the shocks drying, I turned my attention to the front end, removing the appropriate bits from the sprue. The front mudguard isn't the best so the ends needed some reshaping.

Image

With that little sanding job done I applied some Mr Surfacer to hide the join and a couple of sink marks.

Image

Some of the parts in the kit needed modifying for this particular bike. I've never built one but I assume that this kit probably shares a sprue with Tamiya's CB750 and/or CB900f kit.

Image

The forks were then sprayed a coat of Tamiya Gold Leaf and set aside to dry.

With things drying and some previously painted bits ready to fit it made sense to fit the swingarm assembly.

Image

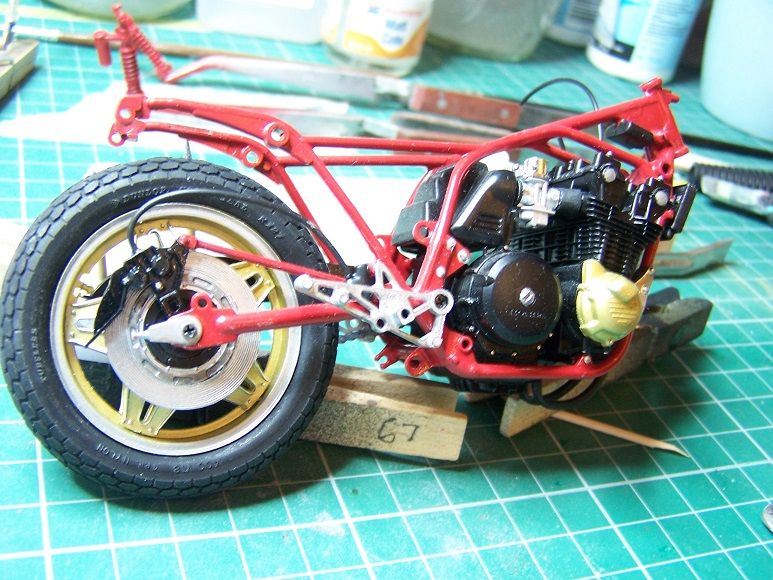
The rear footrest hangers went on too, fixed with the same screws that hold the swingarm. While I was about it I fitted the oil cooler and indulged in a little plumbing, fitting the oil cooler pipes, rear brake lines, speedo drive, plug leads and rear brake hose.

While applying the tubework I spotted something of an issue with the fit and location of the clutch cable.

Image

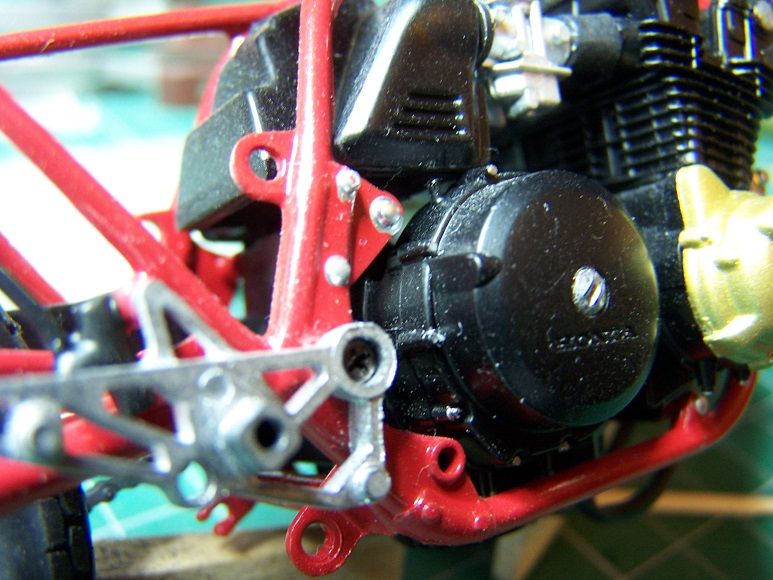
Tamiya would have the modeller plug the thin tubing onto a lug at the top of the engine case. It doesn't fit under the airbox. The reason for this is that it's supposed to go at the rear of the casing where the semi-oval flat section is. There's supposed to be a lever there facing inwards with the cable attached to the end. I think that this may be a detail worthy of scratchbuilding which'll give me something to do while the front end goes together.

More progress soon....I hope.
COLD WAR S.I.G. LEADER

Wherever there's danger, wherever there's trouble, wherever there's important work to be done....I'll be somewhere else building a model!
User avatar
Clashcityrocker
Modelling Gent and Scholar
Posts: 10806
Joined: May 1st, 2011, 12:31 am
Location: Adelaide. South Australia

Re: Honda CB1100R

Post by Clashcityrocker »

Nice idea for masking the shocks. I hope it works.

Nigel
User avatar
Dazzled
Modelling Gent and Scholar
Posts: 9592
Joined: October 1st, 2011, 11:08 pm
Location: Mid Glamorgan, South Wales
Contact:

Re: Honda CB1100R

Post by Dazzled »

Thanks Nigel.

And it did work quite well. So well that I painted the rest of the shocks and fitted them.

Image

Just minimal touching up was required.

While I was at the bench I started on scratchbuilding the clutch linkage.

Image

It doesn't look like much now but it'll develop. Once everything sets up hard I'll trim and sand it to shape.

And finally for today, I'm making progress with the front end.

Image

The fork tubes have been repainted with chrome silver metalcote and I've gone through the joy of painting the front wheel (It actually wasn't as complex as it looks) and I've gathered most of the bits together minus, I've just noticed, the brake discs. Still, who wants to stop? Not me now I've started having fun at the modelling bench again :-D
COLD WAR S.I.G. LEADER

Wherever there's danger, wherever there's trouble, wherever there's important work to be done....I'll be somewhere else building a model!
User avatar
beany
Fat git, glasses, goatie - Avoid!
Posts: 4331
Joined: April 6th, 2011, 11:05 am
Location: Chellaston, Derby

Re: Honda CB1100R

Post by beany »

I'm loving your build report mate, keep it coming. I've got several bikes in various scales in the stash that I really must re-start one day. My pride and joy are the Tamiya 1/6th CB750 Four and CB750F. I recently saw the Four now has an RRP of over £130.00!! Mine will be built, not sold however, juit don't hold your breath.
Cheers
Al.
2024 Acquired: 9 Built: 1
ShaunW
NOT the sheep
Posts: 26180
Joined: November 26th, 2011, 6:11 pm
Location: Pontefract West Yorkshire

Re: Honda CB1100R

Post by ShaunW »

Great work here Dazzled, this '80's icon is coming along a treat. Good idea for the shock absorber masking too.
Doing - Tamiya 1/35th Universal Carrier.

Work is the curse of the modelling classes!
IPMS#12300
User avatar
Dazzled
Modelling Gent and Scholar
Posts: 9592
Joined: October 1st, 2011, 11:08 pm
Location: Mid Glamorgan, South Wales
Contact:

Re: Honda CB1100R

Post by Dazzled »

Thanks for the encouragement guys. I'd love one of Tamiya's 1/6th scale bikes particularly the CX500 Turbo. I remember those as a 16 year-old biker and wanting one. I know better these days but I still like the look of them and a model would be a more practical option than a real one.

Although I reckon I could squeeze another bike in the garage ;-) .......

Progress has been spotty this week with work, household jobs and exam revision all conspiring to keep me away from the bench. This is how it's gone.

The new clutch linkage was finished and painted.

Image

And fitted to a hole drilled in an appropriate place in the clutch cover.

Image

I painted the gold onto the fork stanchions and assembled and painted the exhausts. The joins in the silencers took a little work to smooth out but I got there in the end. I painted these with Humbrol 201 "metallic black" as this seemed, to my eye at least, to be a closer match to the black chrome finish found on the originals than the semi-gloss black that Tamiya suggest.

Image

I also gave the front mudguard a blow over with some rattle can red.

Image

And got all the rest of the bits of the front end (including the brake discs 8-) ) painted in their base colours using the trusty Aztek. These will be detailed using the hairy stick later.

Image

With lots of stuff covered in wet or semi-wet paint I thought it would be a good time to look at some bodywork. The tank, seat cowl and fairing halves were duly removed from their sprues, cleaned up and joined together using zap-a-gap. I hadn't expected miracles from a kit of this vintage.

Image

And I wasn't disappointed in my low expectations. The seams are pretty horrible so I know what I'll be doing the next time I get a bit of bench time. The fairing and seat cowl I can understand but, even with the moulding technology of 30 years ago I can't see why the tank, which is hollow underneath, couldn't have been made as one piece. It's even more galling because it has the worst seam of all and right down the middle too :evil: .

Image

To cure myself of fretting over this I went on to fitting the now dry exhausts (This is an update over a few days remember). This looked quite daunting as they are in 7 different pieces all of which have to be lined up to fit on the bike and into each other. It took a few dry fits and a little head scratching before I figured out that it was best to fit the silencers first before moving forward to the collector box and finally the downpipes one by one. With a bit of touching up of the paint it all came together rather well.

Image

And that's where it is so far.

I still have an exam to revise for on October 8th ( a design exam at the end of a course that involved building models :grin: ) so work will be in fits and starts but I'm finding modelling to be a great de-stressing exercise at the moment.

I'll have to include "bench time" in my study timetable 8-)
COLD WAR S.I.G. LEADER

Wherever there's danger, wherever there's trouble, wherever there's important work to be done....I'll be somewhere else building a model!
Post Reply

Return to “Cars, Trucks, Bikes, Locos and other civvie vehicles”