Paul's Swiss Miss **FINISHED**

A single kit GB for the new-tool Airfix vampire T.11
It runs October 1st to 31st.
Your host & GBL is lancfan
User avatar
PaulBradley
Staring out the window
Posts: 21203
Joined: April 6th, 2011, 3:08 pm
Location: Flagstaff, AZ

Paul's Swiss Miss **FINISHED**

Post by PaulBradley »

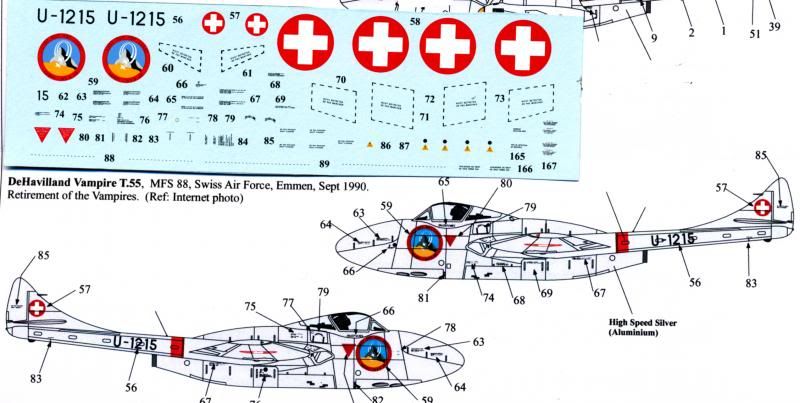
I'll be doing the kit OOB, but with Xtradecals' Swiss AF T.55 option. I saw one of these at Dubendorf over the summer - you can see the walkaround elsewhere on the site - http://uamf.org.uk/viewtopic.php?f=86&t=7162;

The T.55 was basically the same as the T.11, at least externally. No mods will need to be made to the kit.

Not going to bother with sprue shots - others have done that. But here are the decals and decal placement guide:

Image
Paul

За демократію і незалежний Україну

"For Democracy and a Free Ukraine"
ShaunW
NOT the sheep
Posts: 26180
Joined: November 26th, 2011, 6:11 pm
Location: Pontefract West Yorkshire

Re: Paul's Swiss Miss

Post by ShaunW »

It'll be nice to see a Swiss version Paul. This build is largely being taken over by Team Kiwi :ha:
Doing - Tamiya 1/35th Universal Carrier.

Work is the curse of the modelling classes!
IPMS#12300
Saxon
Modelling Gent and Scholar
Posts: 1407
Joined: May 1st, 2011, 4:05 am
Location: Behind You

Re: Paul's Swiss Miss

Post by Saxon »

The graphic does a good job of feeling space on the overall silver finish which can be quite plain. Should look good when done, I considered getting decals for this one as well.
User avatar
PaulBradley
Staring out the window
Posts: 21203
Joined: April 6th, 2011, 3:08 pm
Location: Flagstaff, AZ

Re: Paul's Swiss Miss

Post by PaulBradley »

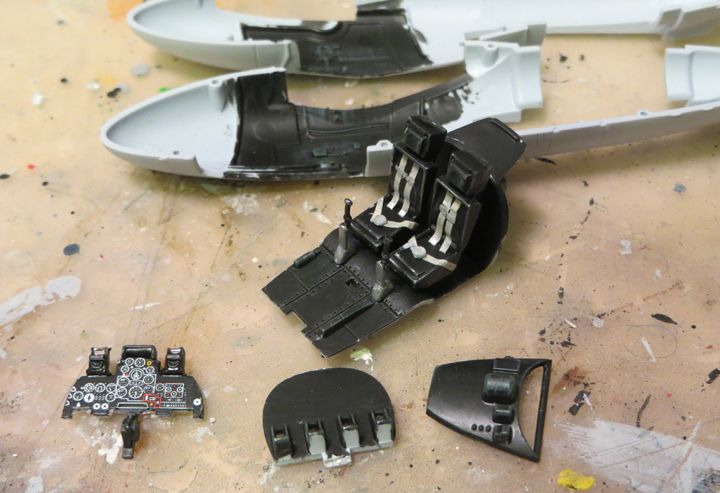
So here's the cockpit parts all set:

Image

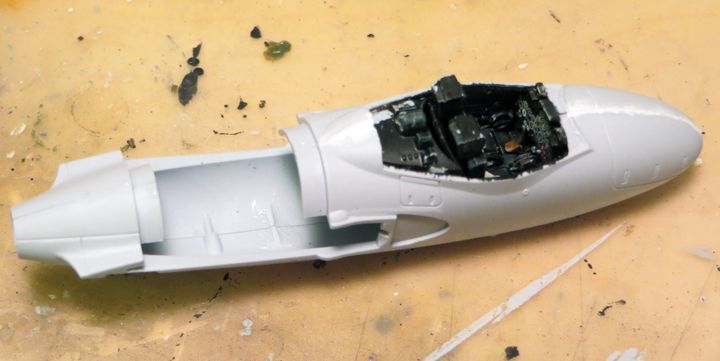
Reasonable detail, though the seats are rather simplistic compared to the real thing. A Vampire cockpit is, in real life, very cramped, but within the limitations of cost, I think Airfix have done an OK job. Those who really want that crampiness should go aftermarket. This is an OOB build, however. :)

Got the pod together - I got hung up somewhere and couldn't figure it out. Why is it that you can dry-fit a hundred times and get perfect fit, yet the moment you add glue..... :roll: Anyways, a minor fit issue just behind the cockpit, which I've filled with a sliver of putty - it looks worse than it is as I haven't sanded back the putty yet.

Image

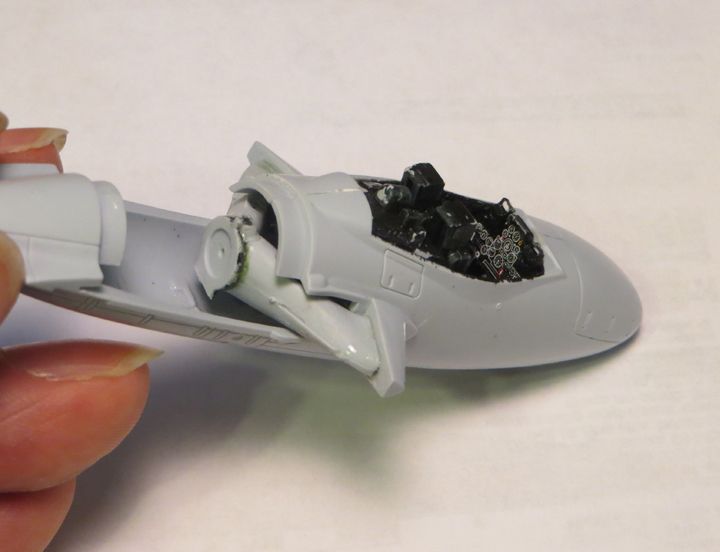
The fit of the gun pod cover was not perfect by any means, and that wasn't caused by the pod, as the underside seam was very good.

Image

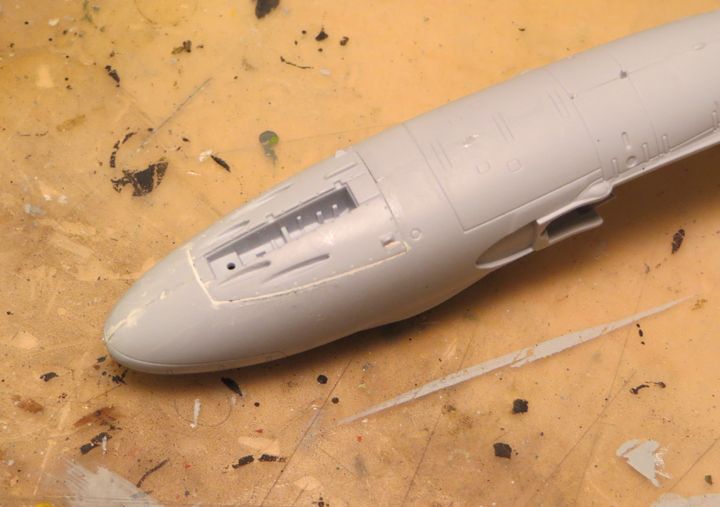
I need perfect seams on this, as nothing shows up a poor seam like a metal finish, so there's putty along the nose as well, though the fit is good.
Paul

За демократію і незалежний Україну

"For Democracy and a Free Ukraine"
User avatar
PaulBradley
Staring out the window
Posts: 21203
Joined: April 6th, 2011, 3:08 pm
Location: Flagstaff, AZ

Re: Paul's Swiss Miss

Post by PaulBradley »

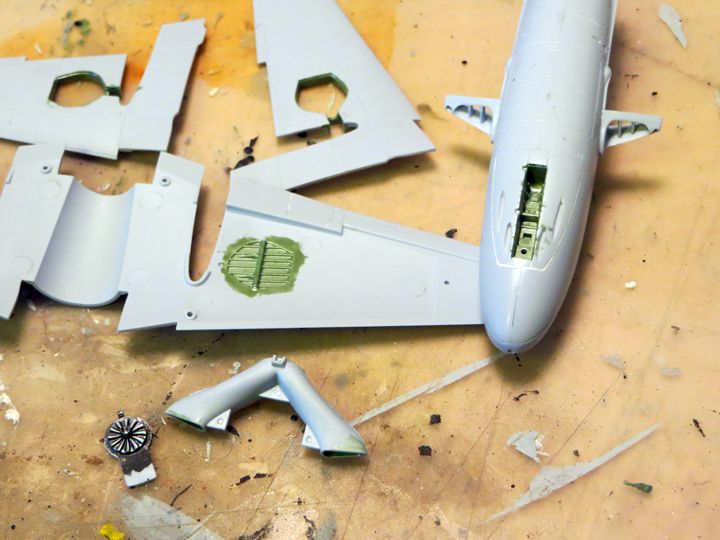
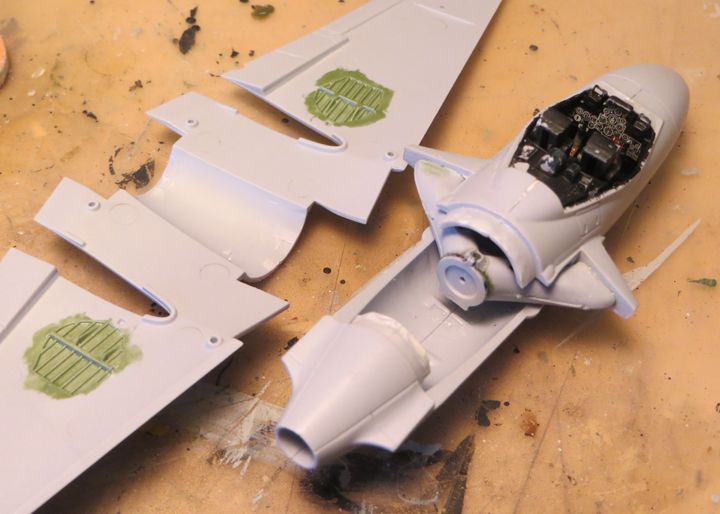
Got some little things done this morning. Most important, I think I've eliminated the seams on the pod. ;-) Next, I painted the insides of the gear bays, doors and intake trunking in a fetching metallic green (more metallic than it looks in this photo), as seen on the example at Dubendorf. I don't know if this is common to all Vampires, but the Swiss appeared to use it. Painted the compressor face black then heavily drybrushed with alu. Added the intakes to the sides of the pods.

Image

Not sure about this sequence of building, but I'll follow Airfix's instructions, as I have to assume they know what they are doing. It seems a rather awkward breakdown of parts, but we'll see how it all fits together.
Paul

За демократію і незалежний Україну

"For Democracy and a Free Ukraine"
User avatar
aeroplanegripper
Active Participant
Posts: 563
Joined: October 20th, 2012, 5:05 pm
Location: Malvern, Worcestershire.

Re: Paul's Swiss Miss

Post by aeroplanegripper »

That's coming along really nice Paul, that's going to look really colourful when those decals go on.
Best Regards

Mark

"bis vivit qui bene vivit"
IPMS UK No 9960

On the go (ish), and under the bench or about to be:

Academy P-51C Mustang -1/72nd
Academy Grumman Hellcat II - 1/72nd
Hasegawa Brewster Buffalo I - 1/72nd
User avatar
PaulBradley
Staring out the window
Posts: 21203
Joined: April 6th, 2011, 3:08 pm
Location: Flagstaff, AZ

Re: Paul's Swiss Miss

Post by PaulBradley »

Cheers, Mark - who is this "Chris" you speak of? :ha: ('Sokay, I've done that before.... ;-) )

Anyways, as I suspected, there were some fit issues. I had to trim the intake trunking assembly a little to get it to fit properly - there was a step inside the intake, looking from the front.

Image

Got that fixed with a little thought, and judicious trimming of the receiving slots on the pod. :)

Also, with the intake trunking firmly in place, I noted some fit issues with the upper wing part, resulting in more trimming of the tabs in the pod and thinning the front and rear edges of the wing/fuselage part; then some light sanding on the outer edges of the intakes. It almost seems as if the intakes went in at the wrong angle, looking from above, although I have no idea how that could have happened.

Image

So I glued it in as best I could, then added a touch of superglue to weld things in place. Not too happy with the resulting gaps, but at least I eliminated the steps. I promise there are no steps, although it might seem so looking at this photo - they are all gaps...

Image

Hmmm. Anyone else having these issues? :???:
Paul

За демократію і незалежний Україну

"For Democracy and a Free Ukraine"
ShaunW
NOT the sheep
Posts: 26180
Joined: November 26th, 2011, 6:11 pm
Location: Pontefract West Yorkshire

Re: Paul's Swiss Miss

Post by ShaunW »

The detail seems to be more than adequate for the scale Paul and from what I can see in your pics, the cockpit looks busy enough. The fit issues are a tad disappointing for a new tool kit though - I like to think that I'm far too much of a gentleman to suggest that the modeller could be the issue, rather than the kit :ha:
Doing - Tamiya 1/35th Universal Carrier.

Work is the curse of the modelling classes!
IPMS#12300
User avatar
PaulBradley
Staring out the window
Posts: 21203
Joined: April 6th, 2011, 3:08 pm
Location: Flagstaff, AZ

Re: Paul's Swiss Miss

Post by PaulBradley »

:shock: Moi?! Le issue??!! :shock: Merci beaucoup, Shaun..... :ha:

Could be. I've cleaned everything up now and it doesn't look too bad. The proof of the pudding will be in the priming.

Next up - the booms. Which also don't dry fit terribly well... :???:
Paul

За демократію і незалежний Україну

"For Democracy and a Free Ukraine"
User avatar
Sissel
Modelling Lady and Scholar
Posts: 4097
Joined: October 31st, 2011, 12:39 pm
Location: Island in Norway

Re: Paul's Swiss Miss

Post by Sissel »

PaulBradley wrote:Cheers, Mark - who is this "Chris" you speak of? :ha: ('Sokay, I've done that before.... ;-) )
Well, atleast he didn't call you Shaun. :-D :ha:

Looking real good here. The aircraft, interior.
And nice choice of markings too. Having a Swiss themed period? :grin:
Confused as always, and somewhere in hiding on the Scandinavian peninsula...
User avatar
PaulBradley
Staring out the window
Posts: 21203
Joined: April 6th, 2011, 3:08 pm
Location: Flagstaff, AZ

Re: Paul's Swiss Miss

Post by PaulBradley »

Prisca wrote:And nice choice of markings too. Having a Swiss themed period? :grin:
Yes - inspired by my visit over the summer, and by the great collection at the Fliegerflab Museum in Dubendorf. I'm doing this and a Fokker D.VII, and am planning a Mirage IIB for the Mirage III GB next month. :grin:
Paul

За демократію і незалежний Україну

"For Democracy and a Free Ukraine"
User avatar
Ian
Blitzbau hero
Posts: 5137
Joined: May 4th, 2011, 10:01 am

Re: Paul's Swiss Miss

Post by Ian »

I have the same gaps on mine. I think the intakes needed to be added after the upper wing section had been glued in place.
I'm a mostly full-time modeller put a part-time poster....
User avatar
PaulBradley
Staring out the window
Posts: 21203
Joined: April 6th, 2011, 3:08 pm
Location: Flagstaff, AZ

Re: Paul's Swiss Miss

Post by PaulBradley »

That might be the case, Ian. I'll certainly try that with the next one I do. The issue then would be lining up the intake trunking with the intakes.
Paul

За демократію і незалежний Україну

"For Democracy and a Free Ukraine"
User avatar
PaulBradley
Staring out the window
Posts: 21203
Joined: April 6th, 2011, 3:08 pm
Location: Flagstaff, AZ

Re: Paul's Swiss Miss

Post by PaulBradley »

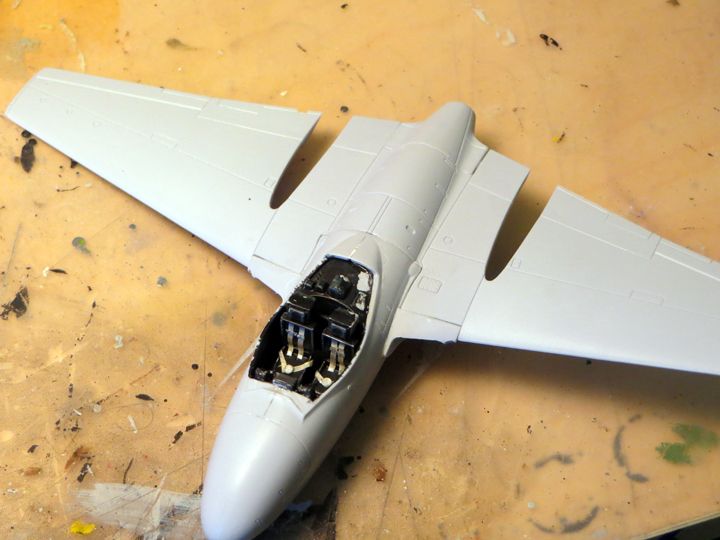
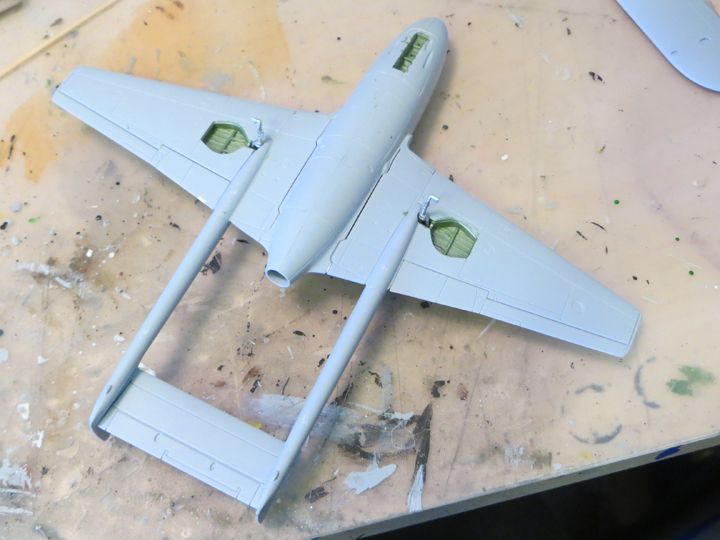
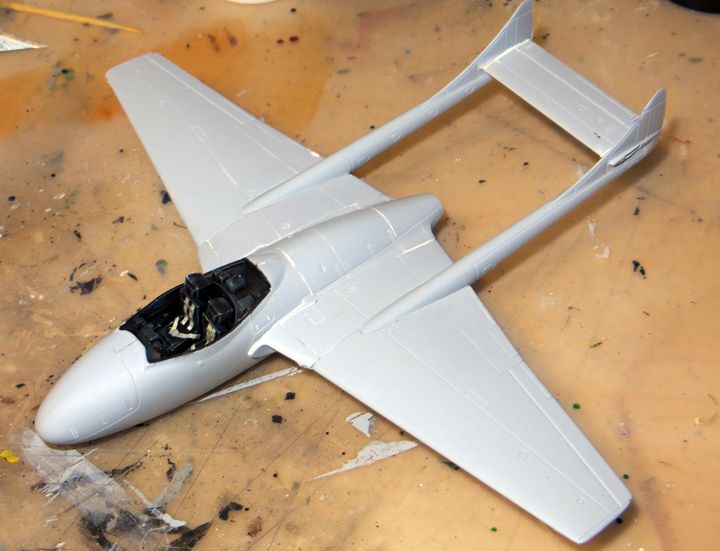
Well, I have a nearly complete airframe:

Image

Image


As you can see, there were a fair few gaps to fill. Nothing major, but with a metal finish, etc. etc, blah, blah. :roll: :ha:

The tailbooms were interesting - a very positive location and fit by Airfix, but the starboard one was canted out a couple of degrees - I had to twist it a bit after it was dry to get it to vertical. Odd. Fit of the underside panels wasn't as tight was the rest, so a little more filler on them (post-photo). Otherwise, not a lot of trouble.

During the week, I'll hope to get the rest of the bits on, including the canopy. Dry fitting that suggests few issues. Then, hopefully, to the spray booth next weekend. Huzzah. :)
Paul

За демократію і незалежний Україну

"For Democracy and a Free Ukraine"
ShaunW
NOT the sheep
Posts: 26180
Joined: November 26th, 2011, 6:11 pm
Location: Pontefract West Yorkshire

Re: Paul's Swiss Miss

Post by ShaunW »

Nice one, this kit does look good built up. Of course, any sanding or filling sins will be revealed to all and sundry with a NMF :-D
Doing - Tamiya 1/35th Universal Carrier.

Work is the curse of the modelling classes!
IPMS#12300
Locked

Return to “Airfix new-tool Vampire T.11 SKGB”