It's coming on great, I look forward to seeing how you deal with the clear parts.
Have you thought about using laminating pouches just run through a laminator without the paper?
Or would that be to thick?
Regards Splash
Simon's Affichage En Papier **DNF**
-
splash

- Senior Service Rotorhead
- Posts: 13828
- Joined: May 1st, 2011, 11:02 am
- Location: Somerset England
Re: Simon's Affichage En Papier
My work bench is starting to look like Portsmouth Naval Dockyard.
-
SJPONeill

- Modelling Gent and Scholar
- Posts: 3525
- Joined: May 1st, 2011, 12:01 am
- Location: Near the Spiral, NZ.
- Contact:
Re: Simon's Affichage En Papier
Probably too thick, I think, Splash...it has to fit between two paper parts (inside and outside) so strength should not be too much of an issue and I think these covers may also be close to scale thickness...tonight will tell..!
Please critique my posts honestly i.e. say what you think so I can learn and improve...
The World According To Me
The World According To Me
-
Clashcityrocker

- Modelling Gent and Scholar
- Posts: 10823
- Joined: May 1st, 2011, 12:31 am
- Location: Adelaide. South Australia
Re: Simon's Affichage En Papier
It's great to see it progressing so well, love all the detail in there too.
Nigel
Nigel
-
despondman

- Active Participant
- Posts: 773
- Joined: July 15th, 2013, 6:49 pm
- Location: Lincolnshire
Re: Simon's Affichage En Papier
Have been following this thread from the start - some really great work going on here!
-
SJPONeill
- Modelling Gent and Scholar
- Posts: 3525
- Joined: May 1st, 2011, 12:01 am
- Location: Near the Spiral, NZ.
- Contact:
Re: Simon's Affichage En Papier
A bit of a slow night last night...was after 8-30 by the time I finished watering etc and I was a bit knackered...
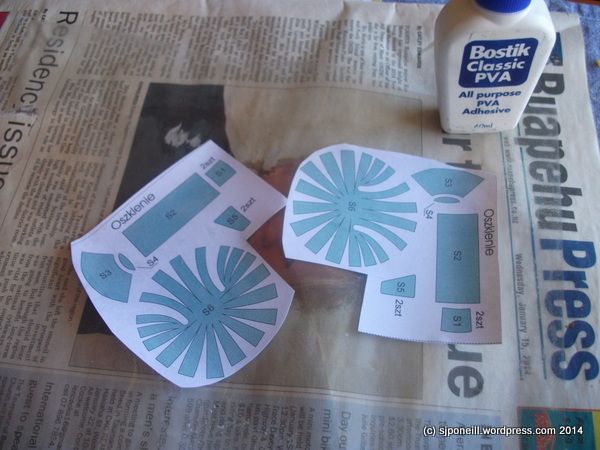
I did make the effort though to mount the templates for the clear parts on to one of my sheets of clear plastic so that it would have all night to cure. Thought that gluing would be the best way of attaching the templates so that there would be no movement during the cutting process. I used a bog-standard PVA glue because my plan (yet to be proved cunning or 'totherwise) is to cut out the parts and them soak them in water to remove the paper templates...
I also mounted these templates for the shape of the turret to some card...I may have to make a lot more of these and assemble them into a star or even a solid form over which to shape the clear part...
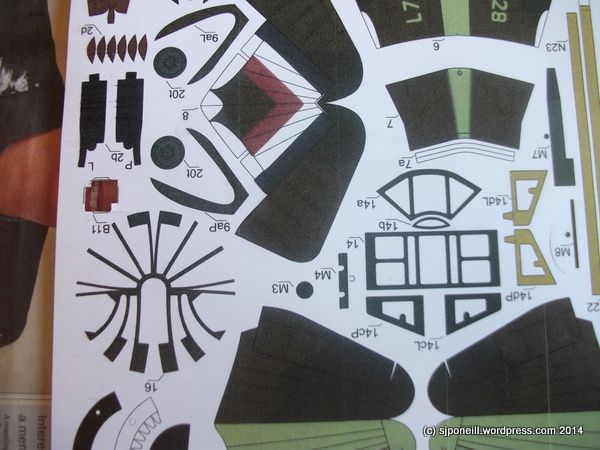
Also ready to go under the knife are the inner and outer frames for the clear parts. Strangely (or perhaps not considering the erratic design philosophy in some parts of the model), there is no interior green part of the inside of the turret - but there is untold detail for the lower part of the turret that would never be seen!
Two hours of Coro tonight and cutting will commence during that...

I did make the effort though to mount the templates for the clear parts on to one of my sheets of clear plastic so that it would have all night to cure. Thought that gluing would be the best way of attaching the templates so that there would be no movement during the cutting process. I used a bog-standard PVA glue because my plan (yet to be proved cunning or 'totherwise) is to cut out the parts and them soak them in water to remove the paper templates...

I also mounted these templates for the shape of the turret to some card...I may have to make a lot more of these and assemble them into a star or even a solid form over which to shape the clear part...

Also ready to go under the knife are the inner and outer frames for the clear parts. Strangely (or perhaps not considering the erratic design philosophy in some parts of the model), there is no interior green part of the inside of the turret - but there is untold detail for the lower part of the turret that would never be seen!
Two hours of Coro tonight and cutting will commence during that...
Please critique my posts honestly i.e. say what you think so I can learn and improve...
The World According To Me
The World According To Me
-
SJPONeill
- Modelling Gent and Scholar
- Posts: 3525
- Joined: May 1st, 2011, 12:01 am
- Location: Near the Spiral, NZ.
- Contact:
Re: Simon's Affichage En Papier

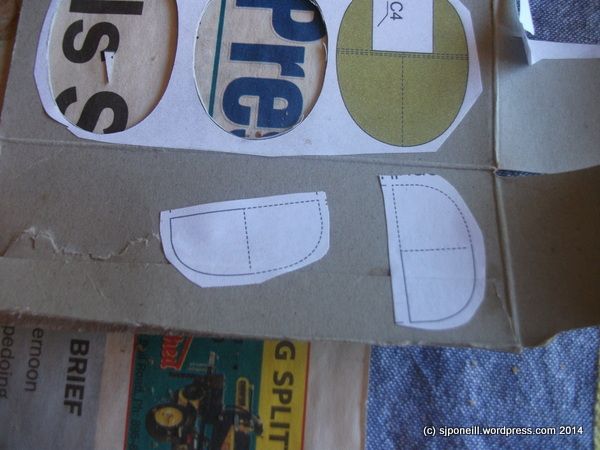
Cutting out the clear parts was easier than I expected as the clear part was so thin...

...even the complex shape of the turret presented no problems in the cutting...I didn't even have to soak these parts in water to remove the paper template as they just peeled away. They still need to have any remaining residue washed off before being dipped in Future/Kleer to protect them during the assembly process...
The problem now is to determine exactly how to construct the clear turret part. I have spent many hours looking at it every which way trying to work this out: part of the problem is the sheer thinness of the part as it is quite fragile and also quite 'springy'...

My first idea was to construct a circular bases of the same circumference as the base of the turret and to slowly attach the lower edge of the clear part to this. The problem here was that there was no internal structure against which to shape the clear part...

...so I added the single turret former provided in the 'kit'...when this was not enough, I added more...and more...and the latest plan is to now fill this into a solid plug over which the clear part can be shaped...or - a more likely outcome - a single piece part can be smash-molded...

In the meantime, while cogitating all this, I cut out the much simpler parts arrangement for the cockpit canopy...irritatingly, there also are no interior green inner pieces here as well...but the interior green pieces here are for the inner surface of the movable fairing between the cockpit and the turret - surfaces which are not as likely to be visible as the interior of the cockpit or the turret...
Please critique my posts honestly i.e. say what you think so I can learn and improve...
The World According To Me
The World According To Me
-
Molly-new

- Modelling Gent and Scholar
- Posts: 2355
- Joined: May 4th, 2011, 8:42 pm
- Location: Stoke-on-Trent, England
Re: Simon's Affichage En Papier
With all these tips, ideas and problem areas to look out for that you have highlighted the upcoming GB should be a doddle for us taking part. Keep up the good work.
Airfix WWII Aircraft Of The Aces.
Completed - 10
Building -
Pending -4
Completed - 10
Building -
Pending -4
-
SJPONeill
- Modelling Gent and Scholar
- Posts: 3525
- Joined: May 1st, 2011, 12:01 am
- Location: Near the Spiral, NZ.
- Contact:
Re: Simon's Affichage En Papier
Oh well, at least I finished a GB last year....I am going to have to mark this one as DNF...I underestimated the work required to complete even one paper cockpit (so much for my vision of completing three or four!!) and so I was a bit lax in not leaping away from the start line as soon as the GB was open...
Final progress shots for the GB thread:
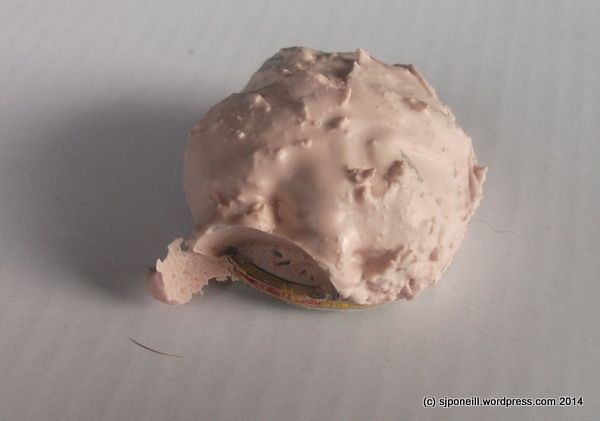
No, not amateur hour in the kitchen. I have gooped body filler over the framework for the turret plug...the indent seen is off my thumb where I was holding it and where we became a little attached for a while - only later did I discover that a small Tamiya paint bottle is the perfect size to mount the plug on...this filler is quite sensitive: not enough hardener and it takes for ever to set and tends to ooze and run everywhere; too much and it has set before you even touch spatula to it. The trick for this part was to get it just starting to set as I applied it so that it would fill the framework without oozing out the sides. "Oh, but couldn't you have taped the sides to make temporary walls?" you cry...yep, only thought of that later...
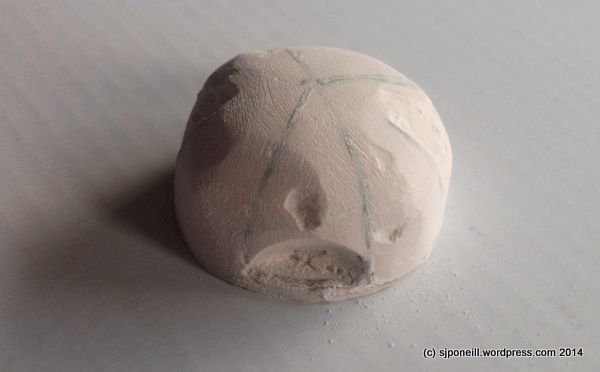
Here's the framework emerging from the set filler...it was a perfectly stiller night last night and I must have looked a bit odd (if we had neighbours) as I wandered aimlessly up and down the driveway to make my own breeze to carry the sanding dust away...
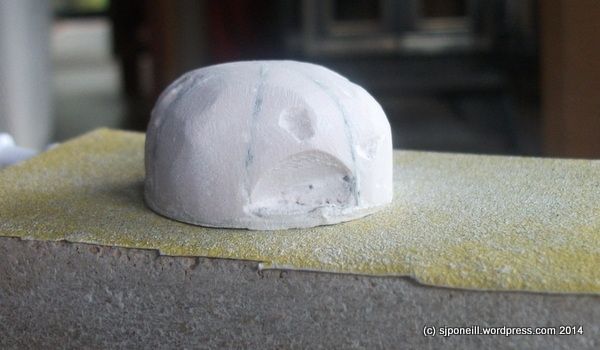
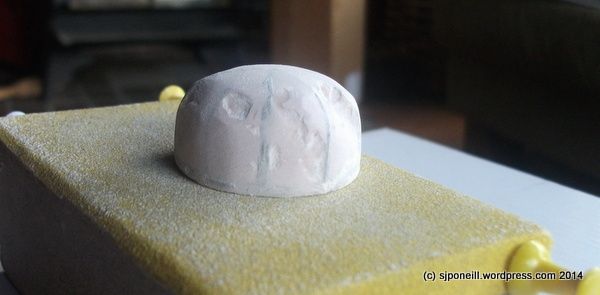
I will fill the nicks and dents tonight and hopefully have a vac-able shape ready to go...just have to find some thicker flat clear sheet for the vacforming experiment...
This build is continued here: http://uamf.org.uk/viewtopic.php?f=98&t=8768
Although I DNF'd for the GB, I am happy that it has kindled more interest in our community in paper modelling and also that it has helped restore my paper modelling skills which had sadly atrophied since my build for the small scale armour GB this time last year...
My thanks to David for the idea and being a top GBL, all the inspiration I got from the other builds in the GB and the support from the community for my build..
Please critique my posts honestly i.e. say what you think so I can learn and improve...
The World According To Me
The World According To Me

Re: Simon's Affichage En Papier **DNF**
Love the first picture. Was grabbibng for my coffee cup. Yum Nummy.
Besting 60 years of mediocre building of average kits in the stand off scale
-
lancfan

- Avro's Rivet Rhapsodizer
- Posts: 8763
- Joined: May 2nd, 2011, 3:55 pm
- Location: Nelson, Lancashire
Re: Simon's Affichage En Papier **DNF**
This has been really interesting, while you may not have finished, your build has been an inspiration to the rest of us for the Paper Models GB later this year.
David.
David.
David.
If you forget the past, you may lose the future.
If you forget the past, you may lose the future.