Simon's Big Bird ***DNF*** :(
-
SJPONeill

- Modelling Gent and Scholar
- Posts: 3525
- Joined: May 1st, 2011, 12:01 am
- Location: Near the Spiral, NZ.
- Contact:
Re: Simon's Big Bird
A bit of a disaster night last night...got a bit confused and spent most of the evening very carefully adding a former to the wrong end of the skin...reprinted new parts this morning and hopefully normal services will be resumed this evening...
Please critique my posts honestly i.e. say what you think so I can learn and improve...
The World According To Me
The World According To Me
-
SJPONeill
- Modelling Gent and Scholar
- Posts: 3525
- Joined: May 1st, 2011, 12:01 am
- Location: Near the Spiral, NZ.
- Contact:
Re: Simon's Big Bird

In looking at next stages, in particular how the wings fit, I noticed that there are not actually any strutural supports for the wings in the fuselage. The double dotted lines you see are meant to be cut out for the wing spars to fit in but there is nothing solid around them so I am assuming that the weight of the completed wing is mant to be spread over the whole of the upper fuselage area..?

I was a bit 'over' skinning last night so diverted into some other areas. This is, as you can see, part 5g, the lower horizontal former that strengthens the area around the nose gear. Although the instructions show the nose gear bay as central on this part, it is actually more towards the rear - a potential trap for young players if it was put in backwards as there are no indications of the parts as to which other parts they connect up with...

The completed former assembly for the nose gear area...

Same again with the formers for the intake cones...

...and the pilot's cockpit which was not too hard to figure out although at least one pic of the completed interior would have been helpful...
Please critique my posts honestly i.e. say what you think so I can learn and improve...
The World According To Me
The World According To Me
-
TimJ

- Modelling Gent and Scholar
- Posts: 4290
- Joined: May 1st, 2011, 12:54 am
- Location: Oldbury, West Midlands
Re: Simon's Big Bird
Nice work. I don't think I'd fancy tackling one of those.
2020 A:35 B:18. 2021 A: 51 B:25 C:21 2022 A:63 B:23 C:11 2024 A:9 B:4 C:15
-
SJPONeill
- Modelling Gent and Scholar
- Posts: 3525
- Joined: May 1st, 2011, 12:01 am
- Location: Near the Spiral, NZ.
- Contact:
Re: Simon's Big Bird
Thanks, Tim, I think that I'm making this look a lot harder than it needs to be. I've realised that I have bitten off a little too much after so long building a large paper aircraft like this, and also while significantly distracted by real life issues...although the flip side of that is that wresting with this is a welcome distraction from those issues. I have approached this model rather complacently and am thus finding it more of a struggle than if I had been more prepared and practised...TimJ wrote:Nice work. I don't think I'd fancy tackling one of those.
Lessons so far:
This woodworking PVA is da bomb for paper models as it gives you a minute or so for adjusting a part and then sets like rock in about five minutes.
Pre-rolling curved parts is essential for a good fit...to not do so when one knows better is rather lazy...
IMHO, it is easier to assemble the fuselage sections as complete units and then assemble them together in. the key to this is cutting out two of each former to shape each end of each fuselage section so that they butt smoothly together. I have never liked this 'nesting' form of assembly.
Use a sharp but rigid blade for cutting thick card parts. I am finding now that the surgical blades that I have been using are too flexible and when cutting through the 1mm card have flexed so that the edge of the cut is canted or or out enough to through the fit off.
Make sure you have all the right tools before starting. About half my paper-working tools are 'somewhere' and I have been trying to brute force my way through: more than plastic modelling, I think that modelling in paper needs finesse.
Personally, I would like to see at least one solid longitudinal former to help lines all the fuselage sections up (and keep them that way).
Please critique my posts honestly i.e. say what you think so I can learn and improve...
The World According To Me
The World According To Me
-
SJPONeill
- Modelling Gent and Scholar
- Posts: 3525
- Joined: May 1st, 2011, 12:01 am
- Location: Near the Spiral, NZ.
- Contact:
Re: Simon's Big Bird
This build is not more of a test build for an eventual 'real' build as time is running down and I am behind where I need to be. Also the errors to date and wrestling with the fuselage have rendered it like a Dodgem TSR.2 variant. But I am learning from the build and those lessons will make a later build easier (it may not be that much later as this is one of my all-time favourite aircraft).
Onwards...
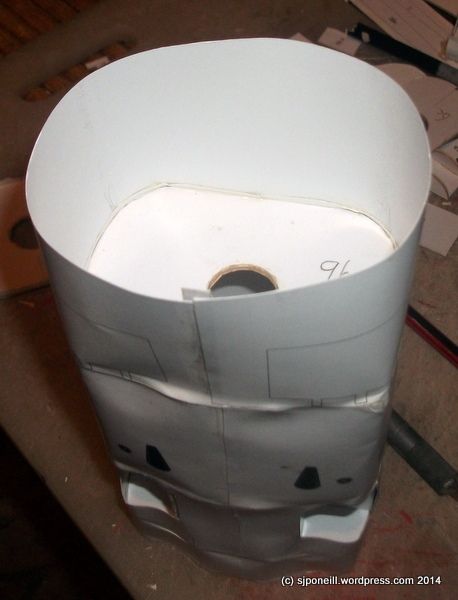
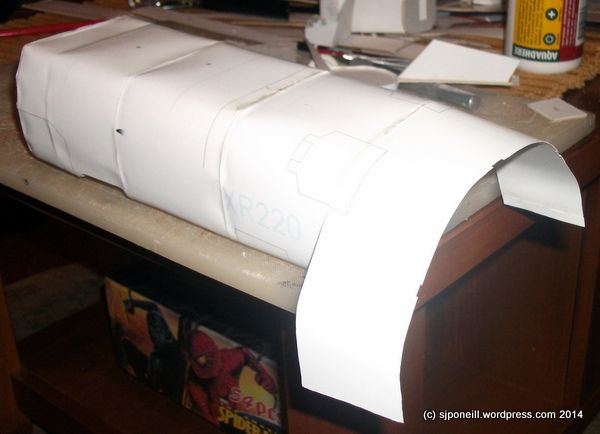
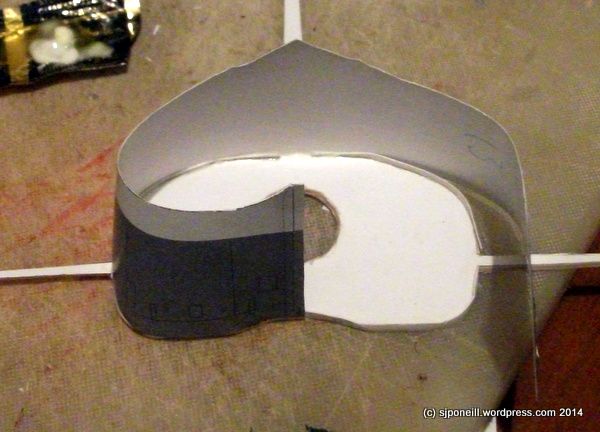
The skin looks a tad shapeless only attached at one end...
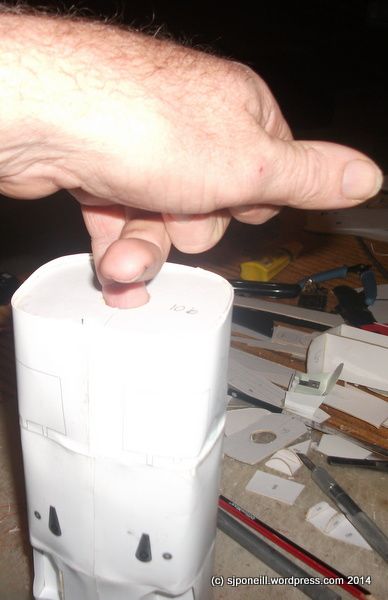
Using the finger hole to manouevre the former up so that half the joining strip is exposed for the next former to attach to. The fit of the former is quite tight and draws the shape of the skin into line. The trick is to get it just so against the edge of the skin so that it does not pop out and to get it there before the glues brushed around the edge of the skin starts to cure...much cursing at this stage does not really help practically but makes me feel better...
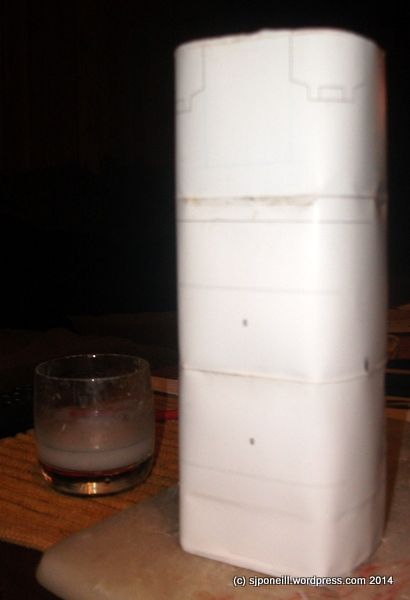
Assembling the tower...It was only now that I started to get a feel for just how long this thing will be...
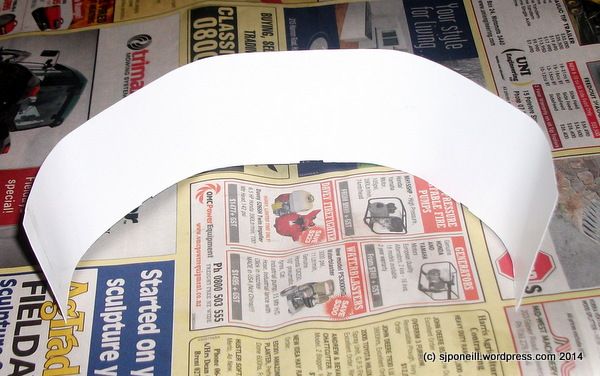
The next section towards the rear prerolled and ready to be fixed in place...
Letting the top edge cure before working around the rest of the join...
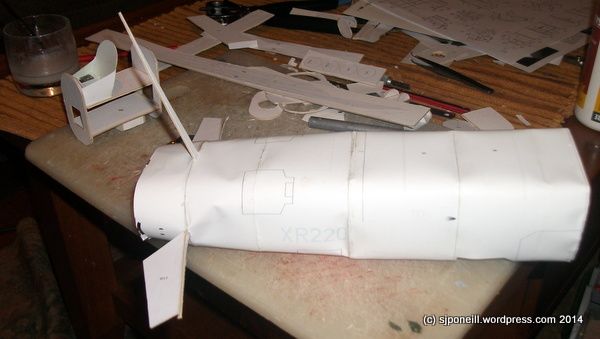
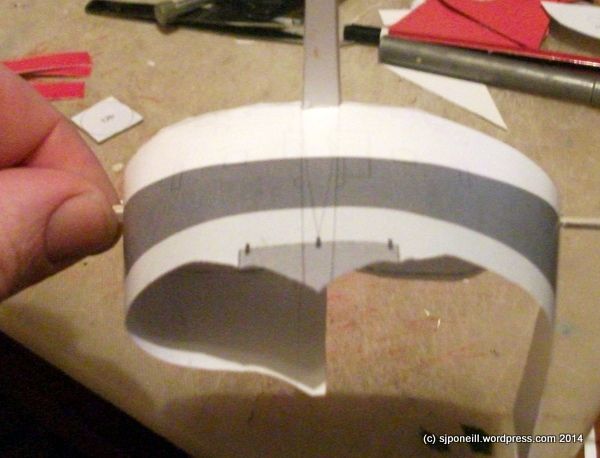
...and the section after that attached as well. there are indents in the forward edge of that rearmost skin to fit around the vertical and horizontal spars and fitting the skinn around them was not too much of a battle...

The real battle last night was trying to fit the next former in place. Because it also has spars for the elevators and rudder, you can drop it into the cavity in its edge and then straighten it and manouevre it into position using the finger hole as with the other formers further forward. I gave up last night but most of those dents are from trying the wrestle that former into position...it rearmost edge looks pretty ugly now and the only solution I can think of is to make up a same size/shape former as the current one but less the spars and use that to shape the skin before butt-joining the former with the spars to it...that possible solution is contingent on my finding some more 1mm card to make a new former...
Onwards...

The skin looks a tad shapeless only attached at one end...

Using the finger hole to manouevre the former up so that half the joining strip is exposed for the next former to attach to. The fit of the former is quite tight and draws the shape of the skin into line. The trick is to get it just so against the edge of the skin so that it does not pop out and to get it there before the glues brushed around the edge of the skin starts to cure...much cursing at this stage does not really help practically but makes me feel better...

Assembling the tower...It was only now that I started to get a feel for just how long this thing will be...

The next section towards the rear prerolled and ready to be fixed in place...

Letting the top edge cure before working around the rest of the join...

...and the section after that attached as well. there are indents in the forward edge of that rearmost skin to fit around the vertical and horizontal spars and fitting the skinn around them was not too much of a battle...

The real battle last night was trying to fit the next former in place. Because it also has spars for the elevators and rudder, you can drop it into the cavity in its edge and then straighten it and manouevre it into position using the finger hole as with the other formers further forward. I gave up last night but most of those dents are from trying the wrestle that former into position...it rearmost edge looks pretty ugly now and the only solution I can think of is to make up a same size/shape former as the current one but less the spars and use that to shape the skin before butt-joining the former with the spars to it...that possible solution is contingent on my finding some more 1mm card to make a new former...
Please critique my posts honestly i.e. say what you think so I can learn and improve...
The World According To Me
The World According To Me
-
iggie

- Modelling Gent and Scholar
- Posts: 23435
- Joined: July 31st, 2013, 11:04 am
- Location: North Somercotes, Lincolnshire
- Contact:
Re: Simon's Big Bird
I remain in awe of your determination, and patience Simon! 
I can't ever imagine my temper letting me attempt something like this; I wallpapered last night, 5 short drops, no plug sockets, windows, or corners to deal with and yet I still lost my temper and tore 3 drops off again as I wasn't happy
I can't ever imagine my temper letting me attempt something like this; I wallpapered last night, 5 short drops, no plug sockets, windows, or corners to deal with and yet I still lost my temper and tore 3 drops off again as I wasn't happy
Best wishes
Jim
If you can walk away from a landing, it's a good landing. If you use the airplane the next day, it's an outstanding landing
"Never put off till tomorrow, what you can do the day after tomorrow"
Jim
If you can walk away from a landing, it's a good landing. If you use the airplane the next day, it's an outstanding landing
"Never put off till tomorrow, what you can do the day after tomorrow"
-
SJPONeill
- Modelling Gent and Scholar
- Posts: 3525
- Joined: May 1st, 2011, 12:01 am
- Location: Near the Spiral, NZ.
- Contact:
Re: Simon's Big Bird
I was like that with wallpapering, Iggie, and that was just stripping the damn stuff off!!! Got a professional in for the new stuff...
PS. This is not too say that there hasn't been a tanty or seventeen in this build but I have to calm down in order to be able to use the keyboard...if I was youtoobing my build, the image of my cool calm demeanour would be shattered forever...
PS. This is not too say that there hasn't been a tanty or seventeen in this build but I have to calm down in order to be able to use the keyboard...if I was youtoobing my build, the image of my cool calm demeanour would be shattered forever...
Please critique my posts honestly i.e. say what you think so I can learn and improve...
The World According To Me
The World According To Me
-
SJPONeill
- Modelling Gent and Scholar
- Posts: 3525
- Joined: May 1st, 2011, 12:01 am
- Location: Near the Spiral, NZ.
- Contact:
Re: Simon's Big Bird
No progress last night...a period of pause and reflection on what to do next and how...
I did however watch a great piece of Doctor Who fan fiction which brought back many memories of wobbly BBC sets, hiding behind the sofa, and watching through my fingers...
I did however watch a great piece of Doctor Who fan fiction which brought back many memories of wobbly BBC sets, hiding behind the sofa, and watching through my fingers...
Please critique my posts honestly i.e. say what you think so I can learn and improve...
The World According To Me
The World According To Me
-
SJPONeill
- Modelling Gent and Scholar
- Posts: 3525
- Joined: May 1st, 2011, 12:01 am
- Location: Near the Spiral, NZ.
- Contact:
Re: Simon's Big Bird
The buildis horriblis continues...this is definitely a test/exploratory build, often not a bad idea with paper models if you are able to reproduce the parts for retests...
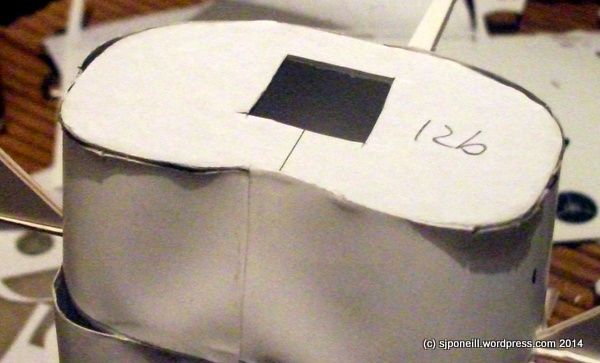
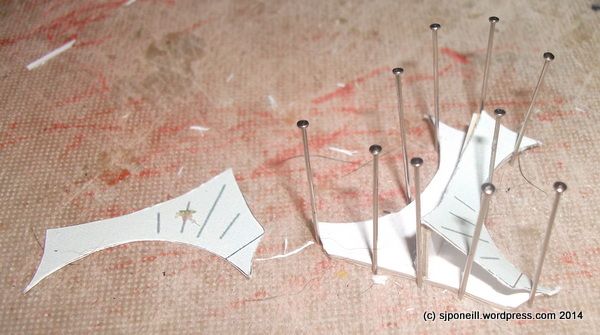
I made a new 12b former to shape the skin around the rearmost spars for the fin and elevators...you will see that I am using Splash's idea with the square finger holes to manoeuvre the former into place...in fact, I find myself referring to them as 'Splash holes' now...I fairly butchered the edge of the skin trying the wrestle the full former with the spars on it into place so the fit of the new one was a bit loose. Once I had it sitting in place, I carefully worked around it to fix it place...
I precurved the rearmost skin to assist its fit around the formers and cut out some small detents to accommodate the horizontal and vertical spars...
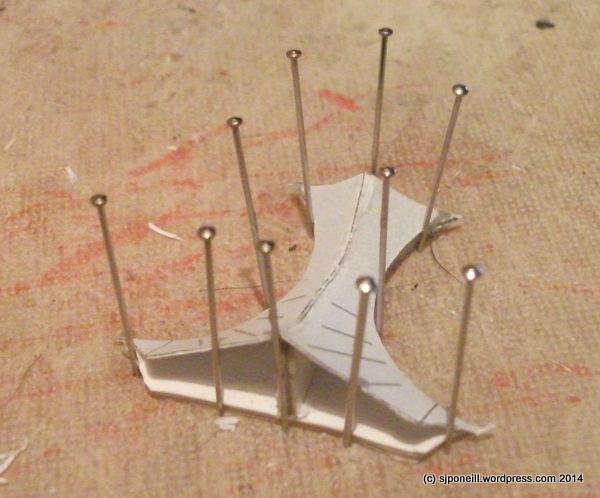
I then carefully (one might wonder why bother now but it's all practice) worked my way around the skin joining it onto the former...
Quite a good fit...it wish that I had done it this way from the start...

Just a little gap at the seam but you can see how the coloured joining strip helps conceal this. All the handling of the former may have just deformed it enough that the skin doesn't fit as intended...If I had built the fuselage as a series of individual sub-assemblies instead of the nesting approach in the instructions, I would now have a set of individual fuselage sections that I could then join together...lesson well and truly RElearned on that one!!
I have started on the parts for the jet pipes and rear fuselage cap and hope to fit those tonight before starting the forward fuselage...
Apologies for such an ugly build...hope I am not scaring anyone off from the paper model GB at the end of the year...it really isn't has difficult as you might think from this 'build'...

I made a new 12b former to shape the skin around the rearmost spars for the fin and elevators...you will see that I am using Splash's idea with the square finger holes to manoeuvre the former into place...in fact, I find myself referring to them as 'Splash holes' now...I fairly butchered the edge of the skin trying the wrestle the full former with the spars on it into place so the fit of the new one was a bit loose. Once I had it sitting in place, I carefully worked around it to fix it place...

I precurved the rearmost skin to assist its fit around the formers and cut out some small detents to accommodate the horizontal and vertical spars...

I then carefully (one might wonder why bother now but it's all practice) worked my way around the skin joining it onto the former...

Quite a good fit...it wish that I had done it this way from the start...

Just a little gap at the seam but you can see how the coloured joining strip helps conceal this. All the handling of the former may have just deformed it enough that the skin doesn't fit as intended...If I had built the fuselage as a series of individual sub-assemblies instead of the nesting approach in the instructions, I would now have a set of individual fuselage sections that I could then join together...lesson well and truly RElearned on that one!!
I have started on the parts for the jet pipes and rear fuselage cap and hope to fit those tonight before starting the forward fuselage...
Apologies for such an ugly build...hope I am not scaring anyone off from the paper model GB at the end of the year...it really isn't has difficult as you might think from this 'build'...
Please critique my posts honestly i.e. say what you think so I can learn and improve...
The World According To Me
The World According To Me
-
splash

- Senior Service Rotorhead
- Posts: 13828
- Joined: May 1st, 2011, 11:02 am
- Location: Somerset England
Re: Simon's Big Bird
That's the first time I have had a hole named after meSJPONeill wrote: I find myself referring to them as 'Splash holes'
It's great to see the pitfalls and the way you handle them, I'm starting to look forward to the Paper model GB.SJPONeill wrote:Apologies for such an ugly build...hope I am not scaring anyone off from the paper model GB at the end of the year...it really isn't has difficult as you might think from this 'build'...
Regards Splash
My work bench is starting to look like Portsmouth Naval Dockyard.
-
Molly-new

- Modelling Gent and Scholar
- Posts: 2355
- Joined: May 4th, 2011, 8:42 pm
- Location: Stoke-on-Trent, England
Re: Simon's Big Bird
Agreed wholeheartedly, great work and an informative thread that I will be referring back to for the Paper Model GB.splash wrote: It's great to see the pitfalls and the way you handle them, I'm starting to look forward to the Paper model GB.
Airfix WWII Aircraft Of The Aces.
Completed - 10
Building -
Pending -4
Completed - 10
Building -
Pending -4
-
SJPONeill
- Modelling Gent and Scholar
- Posts: 3525
- Joined: May 1st, 2011, 12:01 am
- Location: Near the Spiral, NZ.
- Contact:
Re: Simon's Big Bird
Thanks for the moral support, chaps, well and truly needed at the moment...
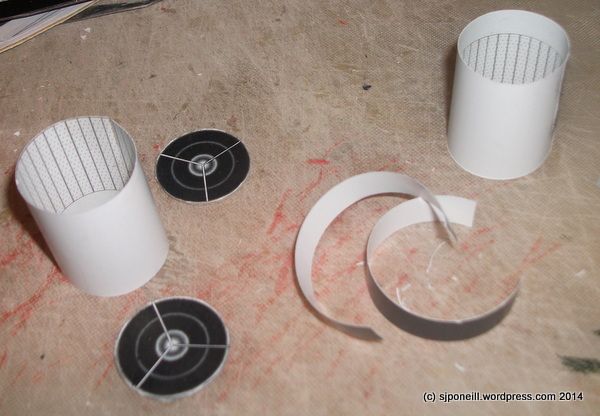
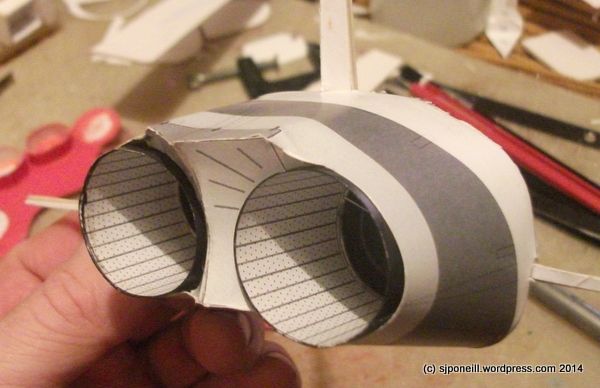
Engine parts ready to go...the dark strips are meant to wrap around the exposed end of the jetpipe but being separate parts means that the edges will have to be coloured...if it was down to me I would be adding the dark strip to the jet pipe part and then folding it back so that the coloured side is on the outside of the pipe before rolling it...
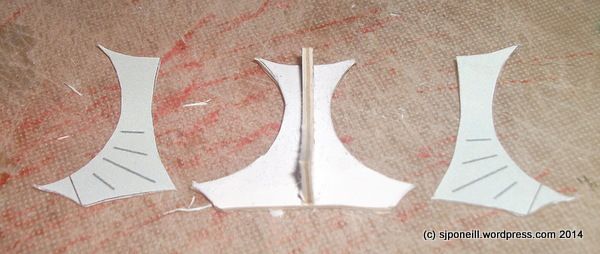
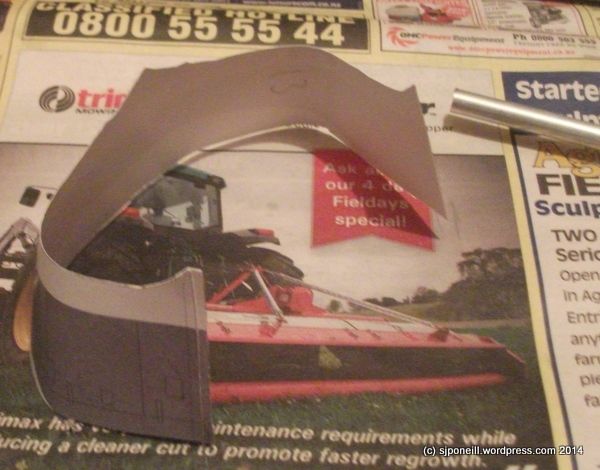
The parts for the bit between the jet pipes...
I made up this little jig to help hold and shape this part...
...and it worked really well...
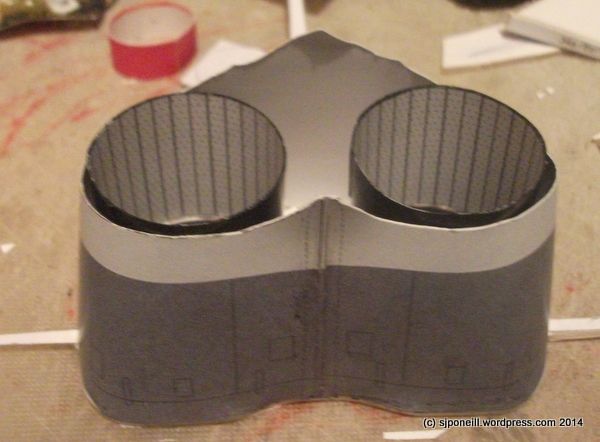
Testing the jet pipes for fit...
Attaching the bottom of the in-betweeny bit...
In-betweeny bit in place...this went together really well and is a credit to the design skill applied to this model...the jet pipes are just sitting in lace at the moment, just in case I need to access the interior...
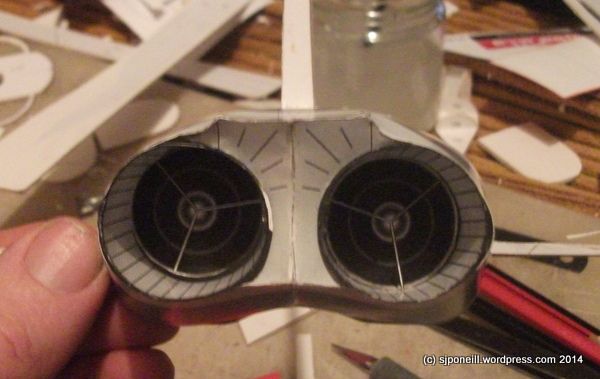
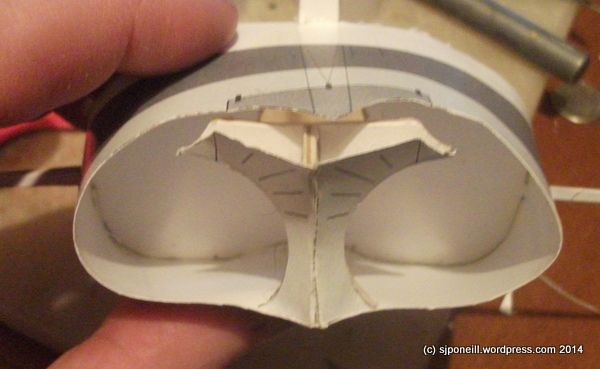
An up-the-pipes look at the completed subassembly. You can see that the fit around the outside of the pipes isn't quite perfect and next time I think that I'll leave the skin loose til last so that any surplus can be sliced off at the seam underneath...
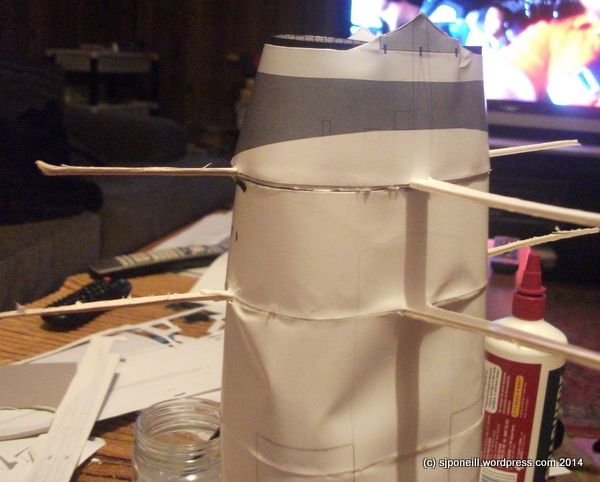
The rearmost subassembly mounted in the rest of the fuselage...sharp-eyed readers may have noticed that I have had to tale of the spacers from the elevator spars. This was becasue I had not allowed space for the elevator former that runs along the fuselage between the spacer and the fuselage skin itself...pix tomorrow will make it all clear...
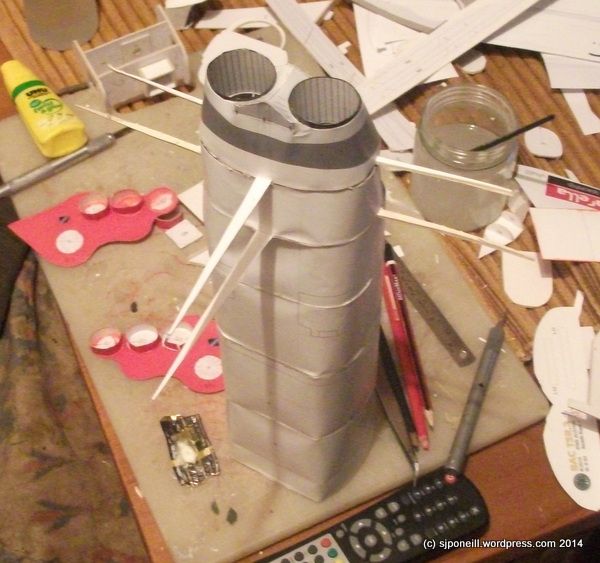
The tower continues to grow...

Engine parts ready to go...the dark strips are meant to wrap around the exposed end of the jetpipe but being separate parts means that the edges will have to be coloured...if it was down to me I would be adding the dark strip to the jet pipe part and then folding it back so that the coloured side is on the outside of the pipe before rolling it...

The parts for the bit between the jet pipes...

I made up this little jig to help hold and shape this part...

...and it worked really well...

Testing the jet pipes for fit...

Attaching the bottom of the in-betweeny bit...

In-betweeny bit in place...this went together really well and is a credit to the design skill applied to this model...the jet pipes are just sitting in lace at the moment, just in case I need to access the interior...

An up-the-pipes look at the completed subassembly. You can see that the fit around the outside of the pipes isn't quite perfect and next time I think that I'll leave the skin loose til last so that any surplus can be sliced off at the seam underneath...

The rearmost subassembly mounted in the rest of the fuselage...sharp-eyed readers may have noticed that I have had to tale of the spacers from the elevator spars. This was becasue I had not allowed space for the elevator former that runs along the fuselage between the spacer and the fuselage skin itself...pix tomorrow will make it all clear...

The tower continues to grow...
Please critique my posts honestly i.e. say what you think so I can learn and improve...
The World According To Me
The World According To Me
-
JamesPerrin

- Looks like his avatar
- Posts: 13682
- Joined: April 5th, 2011, 8:09 pm
- Location: W. Yorkshire
- Contact:
Re: Simon's Big Bird
Certainly a most challenging build. There seems to be a lot more than one way of joining and skinning the fuselage parts. As you've decided this is trail run just keep experimenting until you find the best solution.
I wonder of mounting and aligning the fuselage frames on a piece of square dowling would have helped utilizing the square Splash holes.
I wonder of mounting and aligning the fuselage frames on a piece of square dowling would have helped utilizing the square Splash holes.
Classic British Kits SIG Leader Better to fettle than to fill
(2024 A:B 5:2) (2023 13:8:7) (2022 21:11) (2021 15:8) (2020 8:4:4)
(2024 A:B 5:2) (2023 13:8:7) (2022 21:11) (2021 15:8) (2020 8:4:4)
-
JohnRatzenberger

- Why is he so confused ?
- Posts: 15733
- Joined: April 5th, 2011, 3:42 pm
- Location: Living on a sandbar - Nags Head, NC.
Re: Simon's Big Bird
The exhaust section is well done.
John Ratzenberger 
It's my model and I'll do what I want with it.
It's my model and I'll do what I want with it.
-
iggie
- Modelling Gent and Scholar
- Posts: 23435
- Joined: July 31st, 2013, 11:04 am
- Location: North Somercotes, Lincolnshire
- Contact:
Re: Simon's Big Bird
I'm still in awe...... 
Best wishes
Jim
If you can walk away from a landing, it's a good landing. If you use the airplane the next day, it's an outstanding landing
"Never put off till tomorrow, what you can do the day after tomorrow"
Jim
If you can walk away from a landing, it's a good landing. If you use the airplane the next day, it's an outstanding landing
"Never put off till tomorrow, what you can do the day after tomorrow"