Dazzled's Whippet...Whip'd it!!

A World War One GB - any subject, any scale, 1914-1918 - this is not a 1914-specific GB.
Runs 6 weeks, July 28th to September 8th, to allow plenty of time for biplanes, rigging, and holidays.
Your GBL is Chris, assisted by jRatz.
User avatar
AndrewR
In the basement lab
Posts: 24110
Joined: April 5th, 2011, 4:13 pm
Location: Ottawa, Ontario, The Great White North
Contact:

Re: Dazzled's Whippet

Post by AndrewR »

VickersVandal wrote:Yes, are you using this one by any chance?

http://www.brewdog.com/product/punk-ipa;

Easily the worst I've ever tasted. Caustic enough to dissolve filler.....or granite.....
"Description
This 5.6% trans-atlantic fusion IPA is light golden in colour with tropical fruits and light caramel on the nose. The palate soon becomes assertive and resinous with the New Zealand hops balanced by the biscuit malt. The finish is aggressive and dry with the hops emerging over the warming alcohol."

I hope they realise that NZ isn't in the Atlantic :omg
Up in the Great White North
User avatar
Dazzled
Modelling Gent and Scholar
Posts: 9592
Joined: October 1st, 2011, 11:08 pm
Location: Mid Glamorgan, South Wales
Contact:

Re: Dazzled's Whippet

Post by Dazzled »

The stuff I'm using is rather more like that used for swabbing skin prior to an injection. Drinking it is definitely not advisable :roll: .

Anyhow, on with the Whippet. What I thought was going to be a window of opportunity for modelling seems to have turned into a window of opportunity for DIY :frown: and anything else anybody can think of to eat into my time. But I have, at least managed a modicum of progress.

The track assemblies progress apace.

Image


With most of the fit problems overcome only a couple of rivet heads needed replacing and those just down to a careless swipe of the sanding stick.

Image


The guns were cleaned up, the barrels drilled out and a coat of gunmetal (what else?) applied.

Image


I've also been addressing the issue of the rear plate. The pictures Toby posted clearly show that the plate was, in fact a boxed in section. This is how Emhar represent it.

Image


It's more a plate held away from the tank's hull by some spacer rods. To counter this some thick styrene section was added around the sides and bottom.

Image

This has all been boxed in now and has been put aside to dry overnight. The turndown piece will provide the lid after everything has been trimmed and cleaned up.

More progress soon.
COLD WAR S.I.G. LEADER

Wherever there's danger, wherever there's trouble, wherever there's important work to be done....I'll be somewhere else building a model!
User avatar
Stuart
Raider of the Lost Ark Royal
Posts: 19451
Joined: February 25th, 2013, 4:55 pm
Location: North Wales
Contact:

Re: Dazzled's Whippet

Post by Stuart »

Looking good! What size drill did tyou use to drill out 1/72 guns!?!
Stuart Templeton I may not be good but I'm slow...

My Blog: https://stuartsscalemodels.blogspot.com/
User avatar
Dazzled
Modelling Gent and Scholar
Posts: 9592
Joined: October 1st, 2011, 11:08 pm
Location: Mid Glamorgan, South Wales
Contact:

Re: Dazzled's Whippet

Post by Dazzled »

Sir T wrote:Looking good! What size drill did tyou use to drill out 1/72 guns!?!
Thank you Stu. I ended up with a 0.65mm drill but I reckon 0.3mm would be closer to 1/35th scale. I'm afraid that the guns in the kit are a bit chunky.
COLD WAR S.I.G. LEADER

Wherever there's danger, wherever there's trouble, wherever there's important work to be done....I'll be somewhere else building a model!
User avatar
Dazzled
Modelling Gent and Scholar
Posts: 9592
Joined: October 1st, 2011, 11:08 pm
Location: Mid Glamorgan, South Wales
Contact:

Re: Dazzled's Whippet

Post by Dazzled »

Just a short update of some of what's been going on with the Whippet. I've been fighting a rather nasty bout of flu so all activities have been seriously limited for the past week. I still feel pretty lousy but I am on the mend.

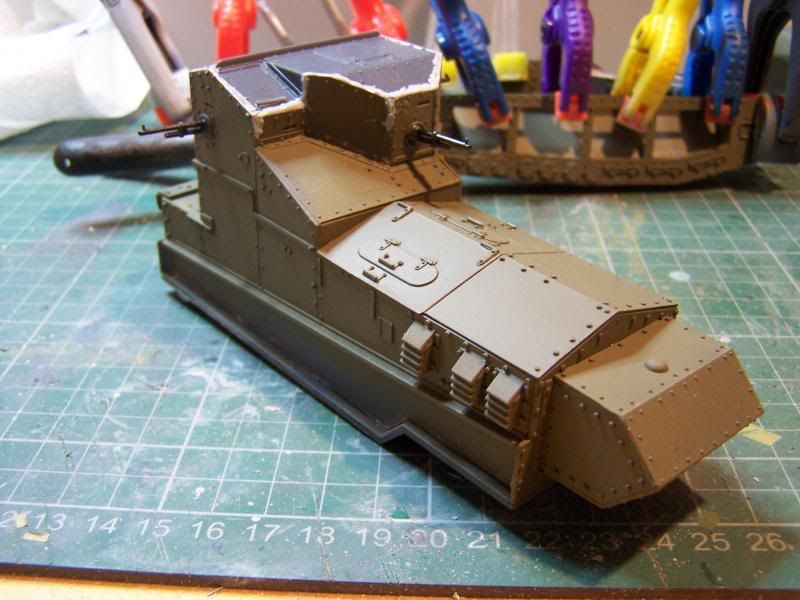
A coat of Tamiya XF-49 (khaki) was applied all over the model. Partly to get the insides of the track sponsons covered before they were joined together and partly to show up any further filling that may be necessary. Predictably, more filling was needed but this was not too onerous as dry-fitting had shown up that this would be required arpound the roof edges too.

So, I fitted the guns and put the roof on.

Image

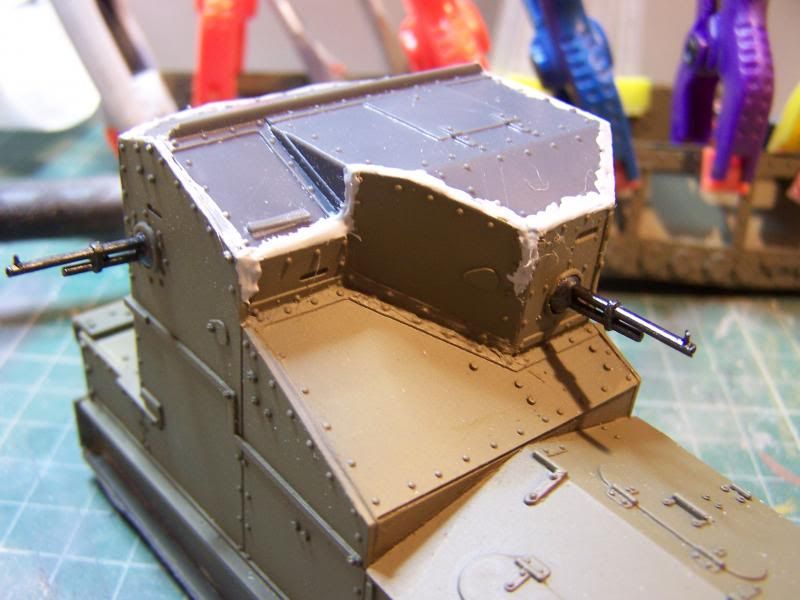
I tackled the additional filling with more Mr Surfacer.

Image

And, while I was at the bench and could find something else to do while the cement dried, I used Liquid Poly to finish the assembly of the sponsons.

Image

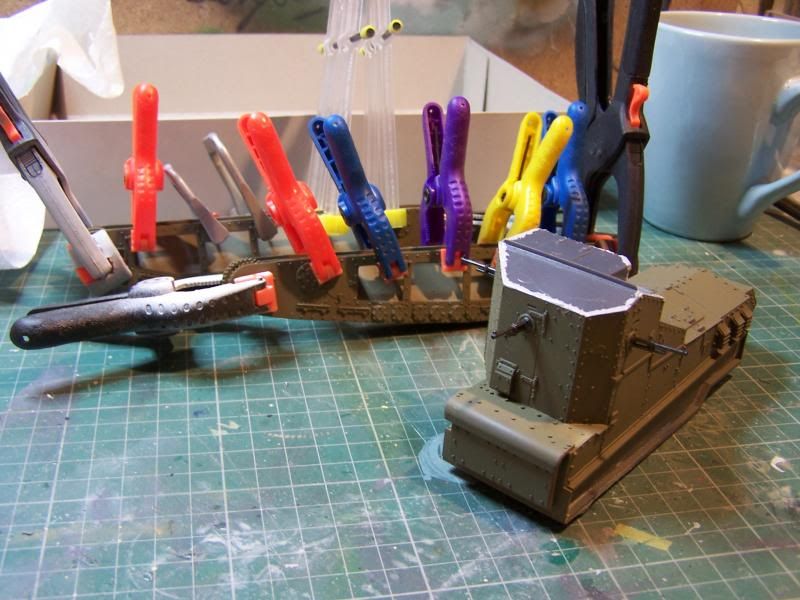
Using every clamp I could find. They do keep going walkabout in the house. :frown: .

While everything was drying I set about reducing the filler in the joins. This is a no-sanding method which is perfect for a model with a lot of easily destroyed surface detail.

First, fill the joins with Mr Surfacer. This may well require 2 applications or, perhaps a base of white glue in the seam to stop the Mr Surfacer from falling through.

When there is enough Mr Surfacer to cover the joint get some isopropanol (AKA, isopropyl alcohol or ipa) and some cotton buds (AKA Q-tips) and begin to rub away at the Mr Surfacer. Keep changing the buds frequently. The Mr Surfacer will dissolve gradually in the isopropanol, leaving a smooth seam and undamaged styrene detail.

Image

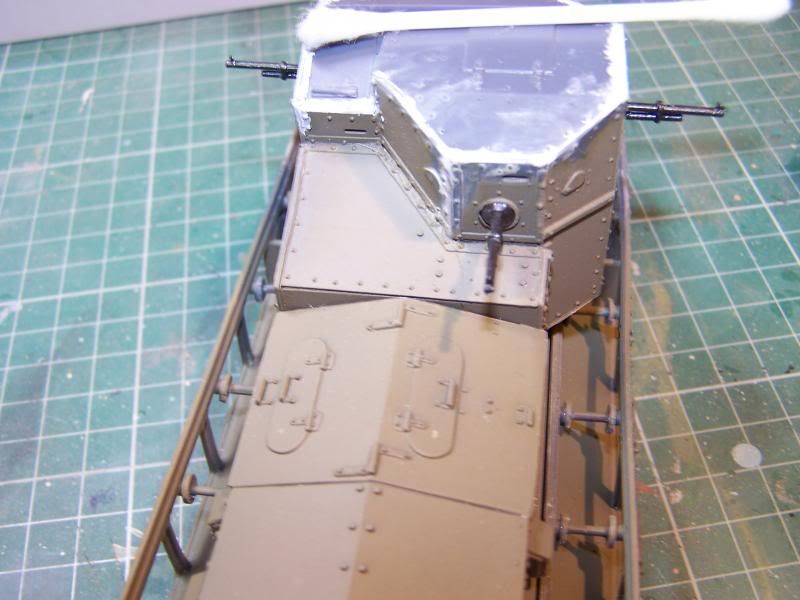
It takes a bit of patience but the results are well worth the effort.

Just visible in the last picture are the attached sponsons. Now it's really starting to look like a Whippet 8-) .

There is more ongoing progress and, when I can muster the energy, that will be shown in my next update.

Darryl
COLD WAR S.I.G. LEADER

Wherever there's danger, wherever there's trouble, wherever there's important work to be done....I'll be somewhere else building a model!
User avatar
Stuart
Raider of the Lost Ark Royal
Posts: 19451
Joined: February 25th, 2013, 4:55 pm
Location: North Wales
Contact:

Re: Dazzled's Whippet

Post by Stuart »

Thats looking really good!
Stuart Templeton I may not be good but I'm slow...

My Blog: https://stuartsscalemodels.blogspot.com/
User avatar
Dazzled
Modelling Gent and Scholar
Posts: 9592
Joined: October 1st, 2011, 11:08 pm
Location: Mid Glamorgan, South Wales
Contact:

Re: Dazzled's Whippet

Post by Dazzled »

And there's more.

I haven't been totally idle over the last few days.

I finished the khaki paint job. I'm not sure about whether khaki is the correct colour but after much reading of heated discussions on the web, I decided that it was about as correct as anybody could agree (or disagree) on :roll: .

With that done I turned to thoughts of what markings to use. "Firefly" is the popular option for this kit so, naturally, I decided to go for a different set of markings. To be honest "Fanny Adams" gave me the giggles :ha: so that was that. The problem was the red and white identification markings. As the pictures I've posted show, the model is very well textured, rivets, hinges and joints everywhere and, frankly, I had no faith that the decals would conform to this surface detail and give that painted on look we all seek.

So, I decided to paint them on.

Image

After a bit of masking it's had a couple of coats of Tamiya XF-2 from the Aztek. At the moment it's been masked and sprayed with the red too (pictures to follow). I'm going to give that overnight before I decide if it needs any more.

While I was at the bench I also had a look at the tracks.

Image

They were glued together using superglue (fingers crossed it'll hold :roll: ) before being pegged up and sprayed with Tamiya XF-56 (metallic grey) which I always find makes a nice undercoat for armour tracks.

More updates soon, I hope :)
COLD WAR S.I.G. LEADER

Wherever there's danger, wherever there's trouble, wherever there's important work to be done....I'll be somewhere else building a model!
User avatar
Dazzled
Modelling Gent and Scholar
Posts: 9592
Joined: October 1st, 2011, 11:08 pm
Location: Mid Glamorgan, South Wales
Contact:

Re: Dazzled's Whippet

Post by Dazzled »

Just to prove I'm still alive and modelling here's a little update on the Whippet.

As I mentioned in my last update, I painted on the red and white ID markings as I had no faith that the decals would go down over the rivets and bumps on the model.

Only minor touching up was required post painting and this is how it looks now.

Image

Image

As you can see I've also fitted the tracks. They're a quite nice fit although hiding the joint at the top is going to require a bit of thought.

Also evident is the exhausts and those "guard bars" at each end of the tracks. The exhausts required a fair amount of cleaning up and trial and error to fit but they went on with the help of a little patience.

I've just applied some Klear at the appropriate places for the decals, all four of them :) . I've built aeroplanes with more decals on the undercarriage. It does make a nice change.

After the decals it'll be time for a little weathering. I'm rather looking forward to it ;-) .
COLD WAR S.I.G. LEADER

Wherever there's danger, wherever there's trouble, wherever there's important work to be done....I'll be somewhere else building a model!
User avatar
PaulBradley
Staring out the window
Posts: 21219
Joined: April 6th, 2011, 3:08 pm
Location: Flagstaff, AZ

Re: Dazzled's Whippet

Post by PaulBradley »

Whippet, Whippet good......
Paul

За демократію і незалежний Україну

"For Democracy and a Free Ukraine"
User avatar
Dazzled
Modelling Gent and Scholar
Posts: 9592
Joined: October 1st, 2011, 11:08 pm
Location: Mid Glamorgan, South Wales
Contact:

Re: Dazzled's Whippet

Post by Dazzled »

Whipped it real good!

I do love weathering tanks :)

After an attack with the pastels, craft glue, graphite, dry brush and other general forms of adding gooey goodness to the Whippet, I'm calling this one done.

Image

Image

Image

Image

Image

Image

It looks nice next to the Mark IV in the cabinet. Perhaps I should make a base for it?
COLD WAR S.I.G. LEADER

Wherever there's danger, wherever there's trouble, wherever there's important work to be done....I'll be somewhere else building a model!
User avatar
PaulBradley
Staring out the window
Posts: 21219
Joined: April 6th, 2011, 3:08 pm
Location: Flagstaff, AZ

Re: Dazzled's Whippet...Whip'd it!!

Post by PaulBradley »

That's a sweet Fanny Adams!
Paul

За демократію і незалежний Україну

"For Democracy and a Free Ukraine"
User avatar
TobyC
Modelling Gent and Scholar
Posts: 5540
Joined: January 15th, 2013, 2:13 pm
Location: Cobham, Surrey. Blighty

Re: Dazzled's Whippet...Whip'd it!!

Post by TobyC »

That's a goodun
Enjoyment over accuracy. That's my motto
User avatar
JohnRatzenberger
Why is he so confused ?
Posts: 15734
Joined: April 5th, 2011, 3:42 pm
Location: Living on a sandbar - Nags Head, NC.

Re: Dazzled's Whippet...Whip'd it!!

Post by JohnRatzenberger »

Very good, you ought to get some of that mud and crud on the white paint ....
John Ratzenberger :???:
It's my model and I'll do what I want with it.
User avatar
Clashcityrocker
Modelling Gent and Scholar
Posts: 10823
Joined: May 1st, 2011, 12:31 am
Location: Adelaide. South Australia

Re: Dazzled's Whippet...Whip'd it!!

Post by Clashcityrocker »

Looks real good.

Nigel
User avatar
TimJ
Modelling Gent and Scholar
Posts: 4292
Joined: May 1st, 2011, 12:54 am
Location: Oldbury, West Midlands

Re: Dazzled's Whippet...Whip'd it!!

Post by TimJ »

Great build.
2020 A:35 B:18. 2021 A: 51 B:25 C:21 2022 A:63 B:23 C:11 2024 A:9 B:4 C:15
Locked

Return to “The Guns of August”