Any Excuse...For a Built Mig.
-
Stuart

- Raider of the Lost Ark Royal
- Posts: 19417
- Joined: February 25th, 2013, 4:55 pm
- Location: North Wales
- Contact:
Re: Any Excuse...
Very good work on that U/C - it's coming along really nicely!
Stuart Templeton I may not be good but I'm slow...
My Blog: https://stuartsscalemodels.blogspot.com/
My Blog: https://stuartsscalemodels.blogspot.com/
-
Dazzled

- Modelling Gent and Scholar
- Posts: 9592
- Joined: October 1st, 2011, 11:08 pm
- Location: Mid Glamorgan, South Wales
- Contact:
Re: Any Excuse...
Time for another round in my wrestling match with the Mig 
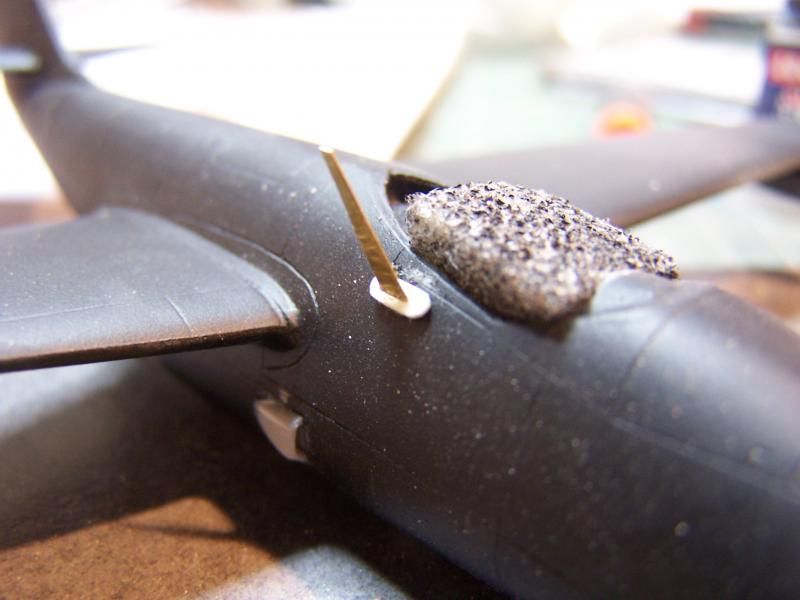
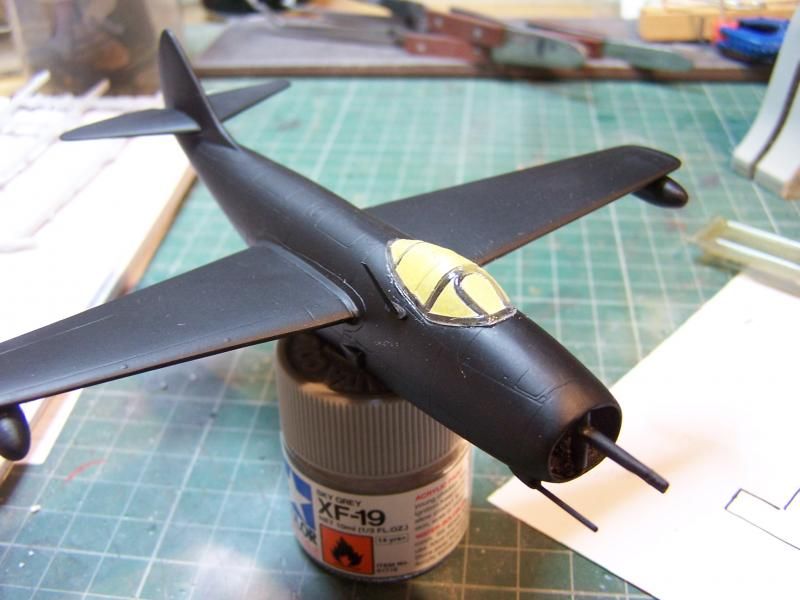
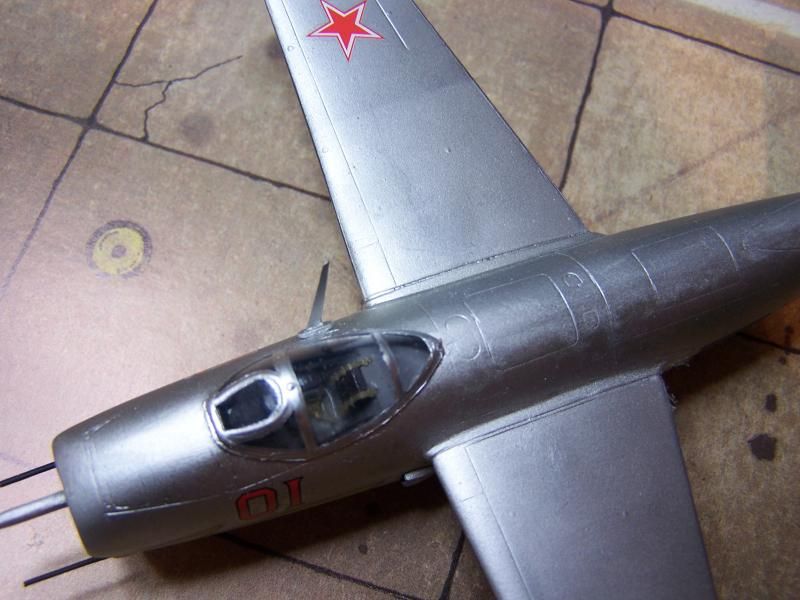
In my last update I mentioned that I was working on a gunsight. I was really surprised that this was left out considering the high level of detail in the cockpit. I suppose you can't have everything.
To make something that looked at least representative of the correct gunsight I started with a rectangular section styrene rod. About 4mm from one end I filed in a square notch. This was to be the forward face and would allow me to work on the gunsight while keeping it attached to a handle.
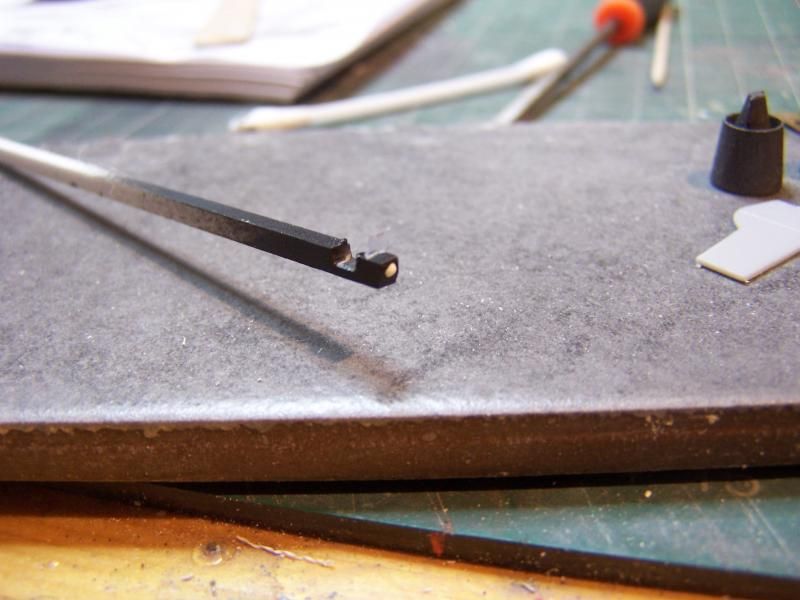
The end was sprayed matt black. After this dried a spot of gloss white was added to the rear face. Then I cut out a small rectangle of clear styrene from the left over edging from the vac form canopy. This was then glued into a small slot on the top. When everything had dried I cut the gunsight off the end of the rod and, post tidying up, glued it in place.
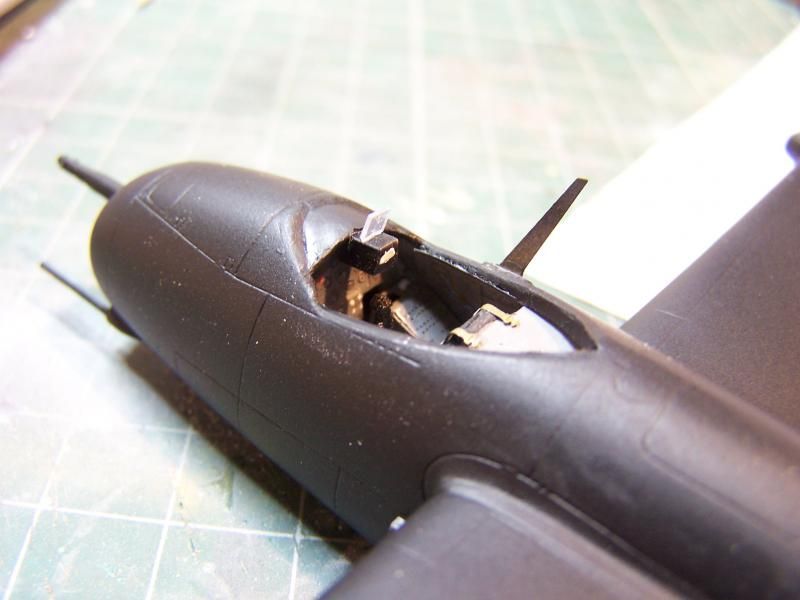
Also visible in the picture is the aerial mast. Again, this is inaccurate and needed some reworking.
As it comes, it looks like this.
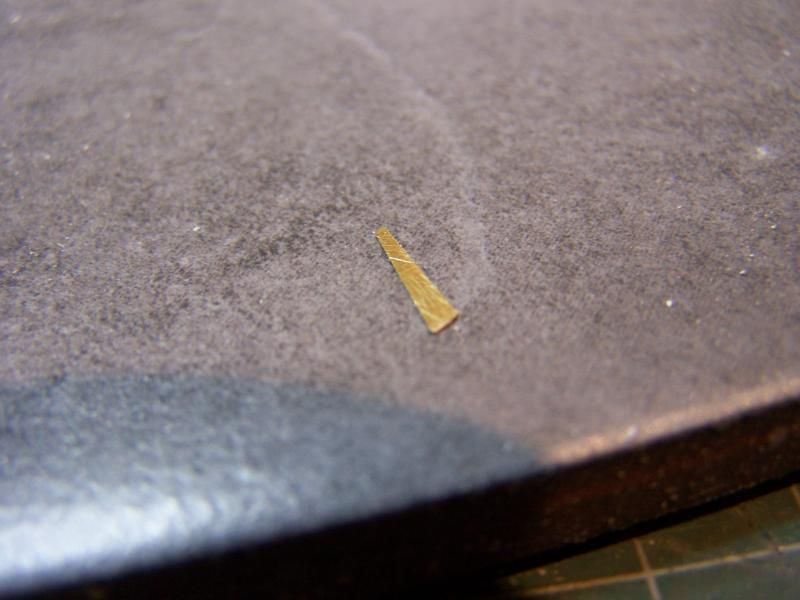
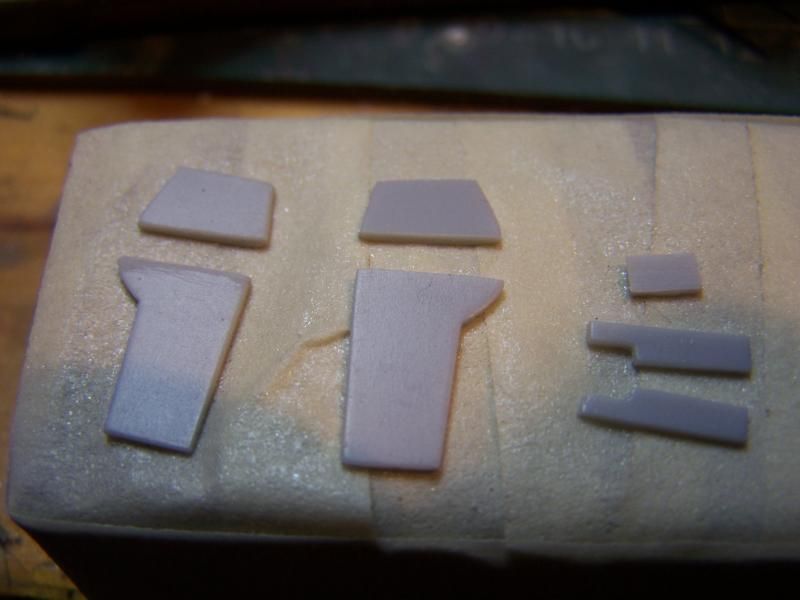
It's quite a nice, delicate piece of etched brass. Unfortunately that's all it is. On the Mig-9 this mast had a quite prominent base plate so it was out with the styrene again.
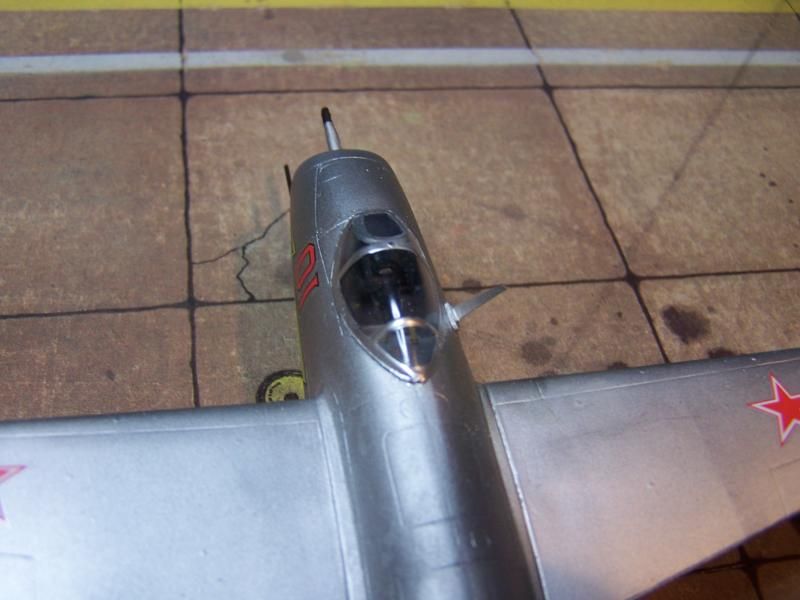
Some flat strip was pressed into service this time.
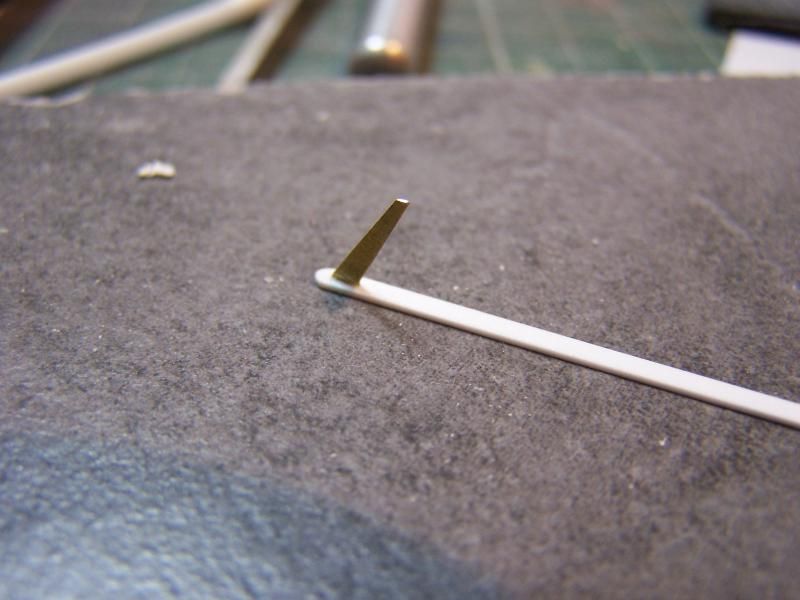
A small groove was made in the strip to take the mast and this was duly glued in place. Then the end was rounded off, after which the other side was given similar treatment.
Then the whole assembly was attached in the appropriate place on the fuselage adjacent to the cockpit.
This carried the added advantage of a much stronger attachment point. I think that may be a real boon during the painting stage
Another item I mentioned before was the lack of a pitot tube. A few days ago I snapped my 0.35mm drill bit while poking around at the 23mm cannon. The remaining shank looked like a likely candidate for a pitot tube.
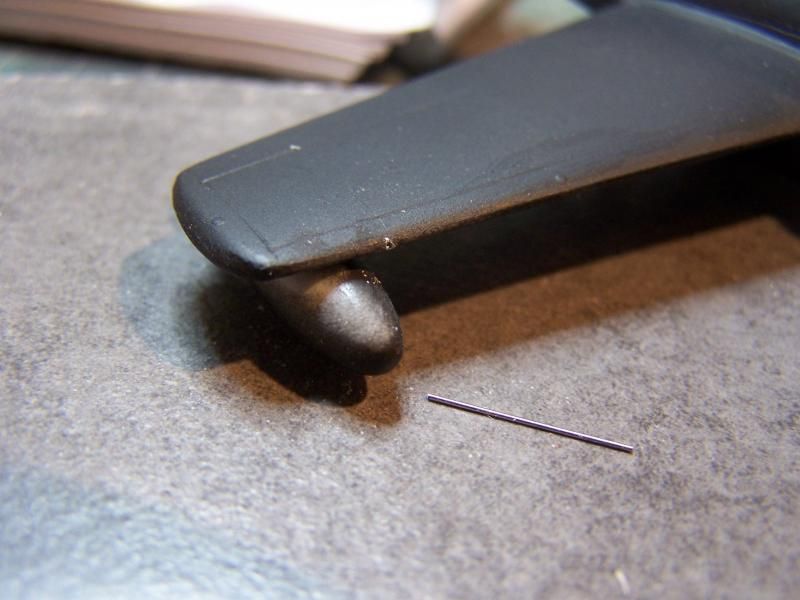
A reference drawing was used to determine the correct position on the starboard wing and a 0.3mm hole was drilled in the leading edge. The drill shank was reduced in length slightly to make it closer to scale length. I'll attach this after painting as I think that it'll look nice left in it's natural colour.
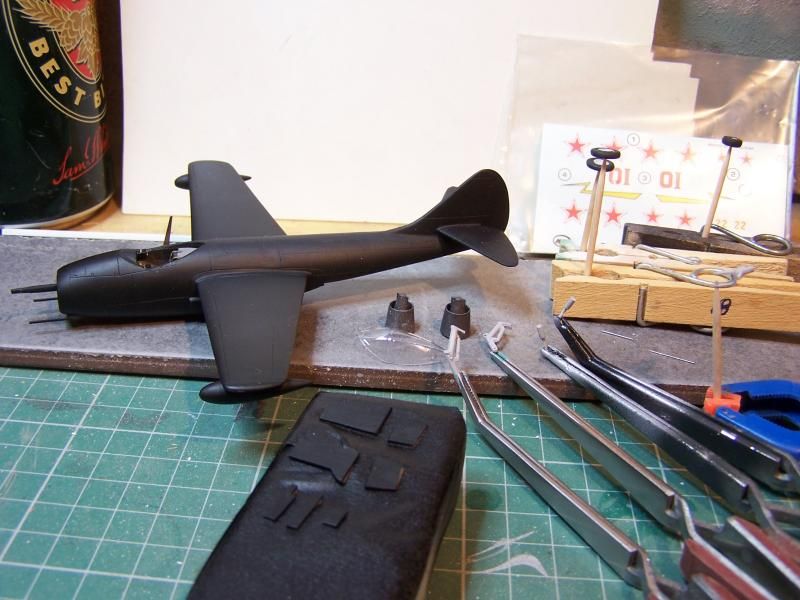
Then I moved on to the undercarriage. Well they were the only bits left to sort out.
First the doors. The main doors are one piece and have to be cut in two along a moulded in demarcation line.

After cutting with a razor saw and a bit of tidying up everything was attached to a wooden slat covered in tape ready for a coat of matt black undercoat.
And that's it for the last couple of days. At the moment everything is together and moving rapidly towards painting.
The undercarriage legs have had a coat of light grey in line with the real thing and ram pistons will be picked out in chrome later. The tyres have had a coat of Tamiya NATO Black and everything that should be is covered in black primer.
My next task will be to pre-mask the canopy and attach it.
Hopefully I'll get a bit of time before the end of the week
In my last update I mentioned that I was working on a gunsight. I was really surprised that this was left out considering the high level of detail in the cockpit. I suppose you can't have everything.
To make something that looked at least representative of the correct gunsight I started with a rectangular section styrene rod. About 4mm from one end I filed in a square notch. This was to be the forward face and would allow me to work on the gunsight while keeping it attached to a handle.

The end was sprayed matt black. After this dried a spot of gloss white was added to the rear face. Then I cut out a small rectangle of clear styrene from the left over edging from the vac form canopy. This was then glued into a small slot on the top. When everything had dried I cut the gunsight off the end of the rod and, post tidying up, glued it in place.

Also visible in the picture is the aerial mast. Again, this is inaccurate and needed some reworking.
As it comes, it looks like this.

It's quite a nice, delicate piece of etched brass. Unfortunately that's all it is. On the Mig-9 this mast had a quite prominent base plate so it was out with the styrene again.
Some flat strip was pressed into service this time.

A small groove was made in the strip to take the mast and this was duly glued in place. Then the end was rounded off, after which the other side was given similar treatment.
Then the whole assembly was attached in the appropriate place on the fuselage adjacent to the cockpit.

This carried the added advantage of a much stronger attachment point. I think that may be a real boon during the painting stage
Another item I mentioned before was the lack of a pitot tube. A few days ago I snapped my 0.35mm drill bit while poking around at the 23mm cannon. The remaining shank looked like a likely candidate for a pitot tube.

A reference drawing was used to determine the correct position on the starboard wing and a 0.3mm hole was drilled in the leading edge. The drill shank was reduced in length slightly to make it closer to scale length. I'll attach this after painting as I think that it'll look nice left in it's natural colour.
Then I moved on to the undercarriage. Well they were the only bits left to sort out.
First the doors. The main doors are one piece and have to be cut in two along a moulded in demarcation line.

After cutting with a razor saw and a bit of tidying up everything was attached to a wooden slat covered in tape ready for a coat of matt black undercoat.

And that's it for the last couple of days. At the moment everything is together and moving rapidly towards painting.

The undercarriage legs have had a coat of light grey in line with the real thing and ram pistons will be picked out in chrome later. The tyres have had a coat of Tamiya NATO Black and everything that should be is covered in black primer.
My next task will be to pre-mask the canopy and attach it.
Hopefully I'll get a bit of time before the end of the week
COLD WAR S.I.G. LEADER
Wherever there's danger, wherever there's trouble, wherever there's important work to be done....I'll be somewhere else building a model!
Wherever there's danger, wherever there's trouble, wherever there's important work to be done....I'll be somewhere else building a model!
-
TobyC

- Modelling Gent and Scholar
- Posts: 5540
- Joined: January 15th, 2013, 2:13 pm
- Location: Cobham, Surrey. Blighty
Re: Any Excuse...
Some excellent scratch building there. Starting to take shape.
Enjoyment over accuracy. That's my motto
-
Clashcityrocker

- Modelling Gent and Scholar
- Posts: 10806
- Joined: May 1st, 2011, 12:31 am
- Location: Adelaide. South Australia
Re: Any Excuse...
Doing some good work on this.
Nigel
Nigel
-
ShaunW
- NOT the sheep
- Posts: 26180
- Joined: November 26th, 2011, 6:11 pm
- Location: Pontefract West Yorkshire
Re: Any Excuse...
Excellent, you are doing some really great work with this 
Doing - Tamiya 1/35th Universal Carrier.
Work is the curse of the modelling classes!
IPMS#12300
Work is the curse of the modelling classes!
IPMS#12300
-
fearless frankie
- Active Participant
- Posts: 810
- Joined: January 18th, 2012, 1:10 am
Re: Any Excuse...
Looking at the pictures on the walkaround,I think the 1/1 scale needs its undercarriage beefing up! especially the nose wheel. http://www.albionalloys.co.uk/; Found their stuff fantastic for undercarriages. Always a selfish satisfaction once you've done an early MPM kit,keep up the great work
-
Dazzled
- Modelling Gent and Scholar
- Posts: 9592
- Joined: October 1st, 2011, 11:08 pm
- Location: Mid Glamorgan, South Wales
- Contact:
Re: Any Excuse...
At last another update  .
.
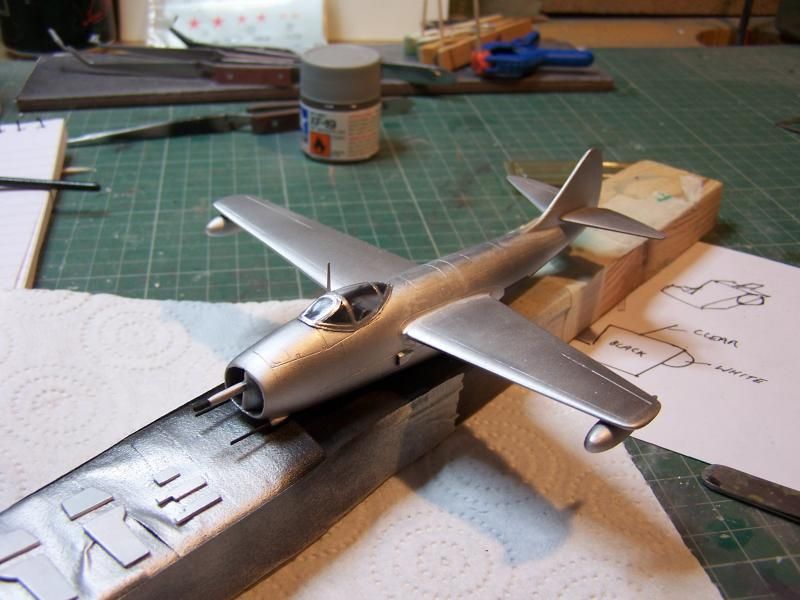
After the dose of black primer I attached the engines.
Naturally there were some issues
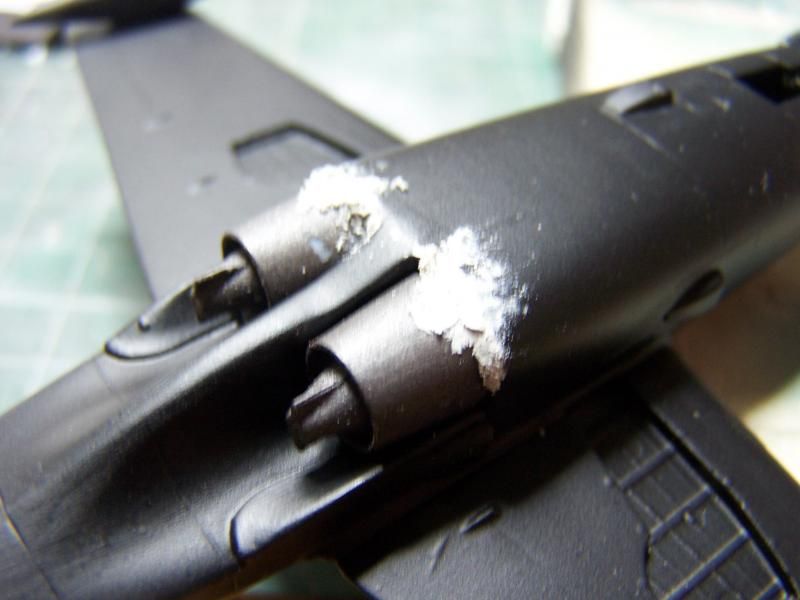
So, some filling, masking and repainting was in order.
Then I moved on to prep for painting.
The canopy was pre-masked then attached using Clearfix.
Clearfix doesn't set all that quickly so I left the model overnight to make sure the canopy didn't drop back off while I was handling it.
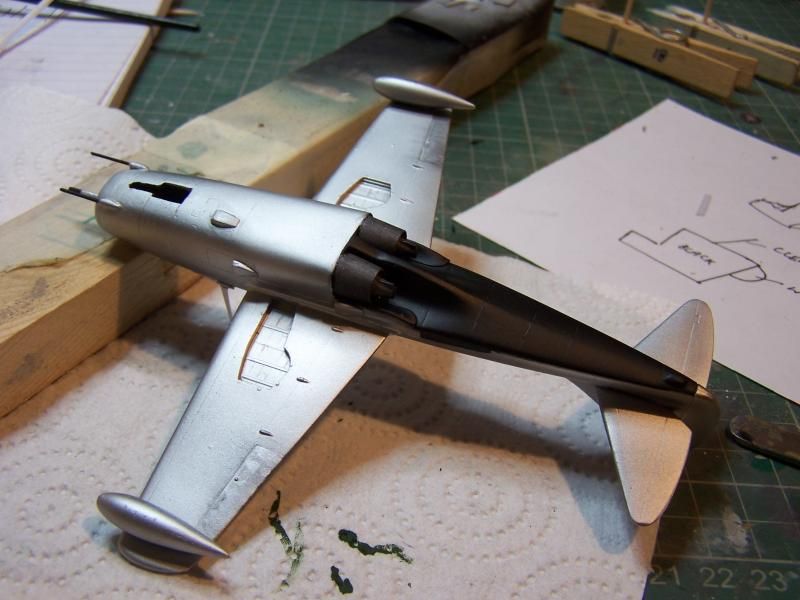
The next day I continued with the masking. I realised that I'd have to get creative if I wanted to be able to hold the model while painting it. I used an old paintbrush handle taped to the protected area behind the engines.
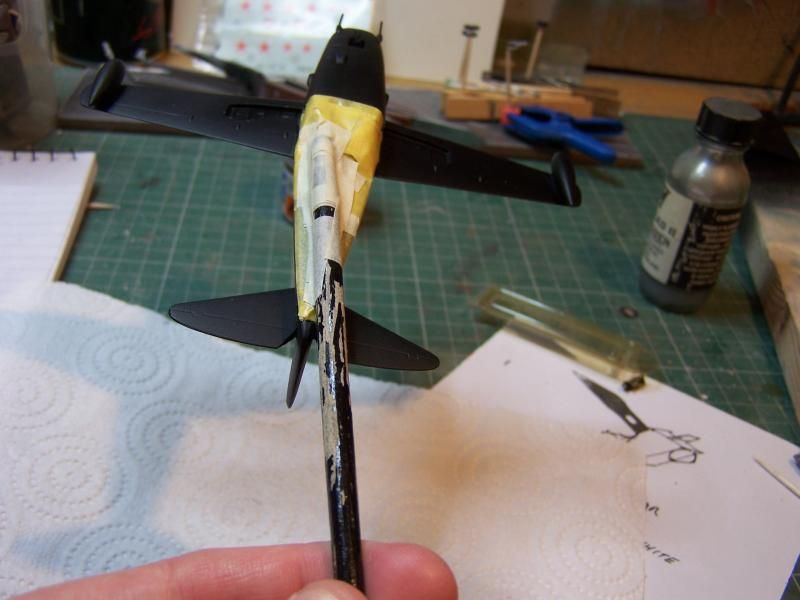
Then the guns got a bit of masking too.
I decided to paint the Mig using Alclad lacquer but, because the fumes are so nasty, I couldn't spray it in the house. So I hauled my compressor and spray gear out to the garage/workshop and sprayed it there.
Anything for brownie points with Mrs Dazzled .
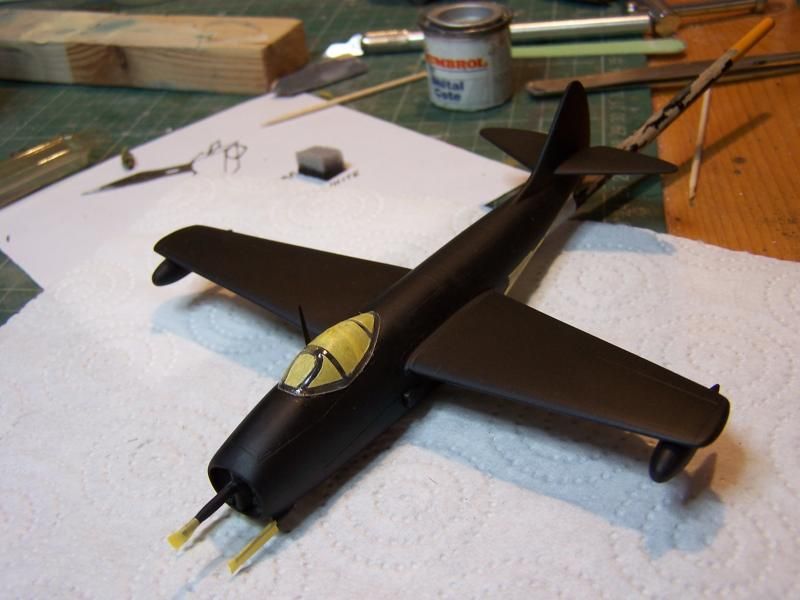
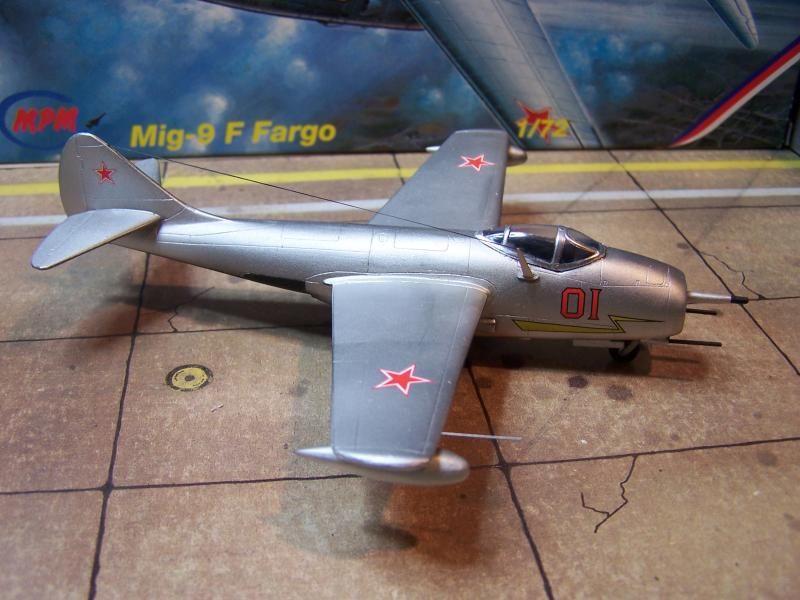
At least the Alclad was worth the effort.
And, because Alclad dries very quickly to a decal ready finish I was able to do a bit more today.
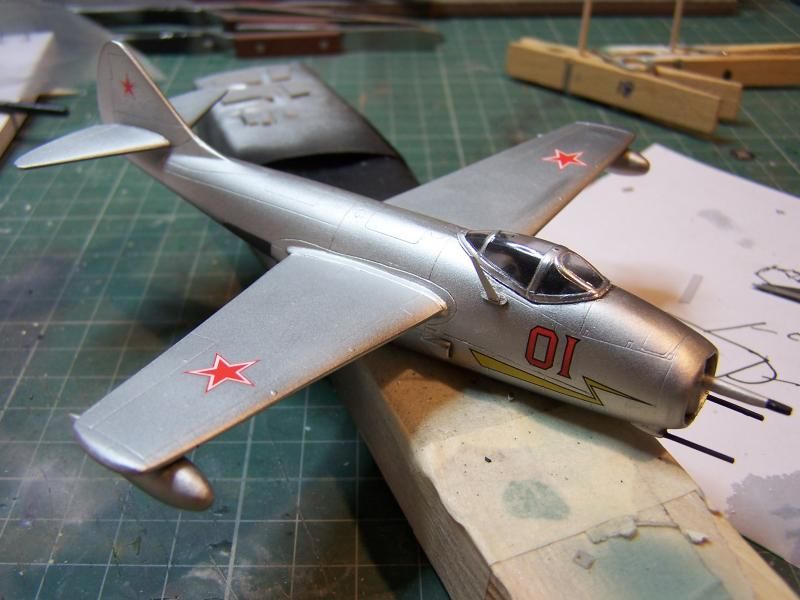
The Propagteam decals were pretty good, if a little slow to come away from the backing paper. I got my initial assessment of the decal options wrong. After a more careful look at the instructions I found that there is a second option. I still went with the box front aircraft though as the alternative looked rather boring.
I'm currently getting the u/c and doors sorted ready to fit.
I feel that this one is on the home straight now.
After the dose of black primer I attached the engines.
Naturally there were some issues

So, some filling, masking and repainting was in order.
Then I moved on to prep for painting.
The canopy was pre-masked then attached using Clearfix.

Clearfix doesn't set all that quickly so I left the model overnight to make sure the canopy didn't drop back off while I was handling it.
The next day I continued with the masking. I realised that I'd have to get creative if I wanted to be able to hold the model while painting it. I used an old paintbrush handle taped to the protected area behind the engines.

Then the guns got a bit of masking too.

I decided to paint the Mig using Alclad lacquer but, because the fumes are so nasty, I couldn't spray it in the house. So I hauled my compressor and spray gear out to the garage/workshop and sprayed it there.
Anything for brownie points with Mrs Dazzled
At least the Alclad was worth the effort.


And, because Alclad dries very quickly to a decal ready finish I was able to do a bit more today.

The Propagteam decals were pretty good, if a little slow to come away from the backing paper. I got my initial assessment of the decal options wrong. After a more careful look at the instructions I found that there is a second option. I still went with the box front aircraft though as the alternative looked rather boring.
I'm currently getting the u/c and doors sorted ready to fit.
I feel that this one is on the home straight now.
COLD WAR S.I.G. LEADER
Wherever there's danger, wherever there's trouble, wherever there's important work to be done....I'll be somewhere else building a model!
Wherever there's danger, wherever there's trouble, wherever there's important work to be done....I'll be somewhere else building a model!
-
Stuart
- Raider of the Lost Ark Royal
- Posts: 19417
- Joined: February 25th, 2013, 4:55 pm
- Location: North Wales
- Contact:
Re: Any Excuse...
That looks totally Awesome - Really worth all your hard work!
Can't wait to see it finished
Can't wait to see it finished
Stuart Templeton I may not be good but I'm slow...
My Blog: https://stuartsscalemodels.blogspot.com/
My Blog: https://stuartsscalemodels.blogspot.com/
-
Dazzled
- Modelling Gent and Scholar
- Posts: 9592
- Joined: October 1st, 2011, 11:08 pm
- Location: Mid Glamorgan, South Wales
- Contact:
Re: Any Excuse...
Thank you Stu.
Your wish is my command.
I couldn't really get into my studies tonight so, buoyed by current progress, I opted for another bout at the bench instead.
I got the undercarriage finished and assembled and had an "interesting" hour fitting them. Everything is butt jointed with little indication as to where things actually go and the main doors .....the less said about those the better . Again, research material proved invaluable.
I also found out the hard way that Alclad doesn't like cyano accelerator. That resulted in some emergency masking and another trip to the workshop for a quick burst of spraying .
With that little crisis over I set about fitting the main u/c rams. They didn't fit without a fight and a fair bit of trimming .
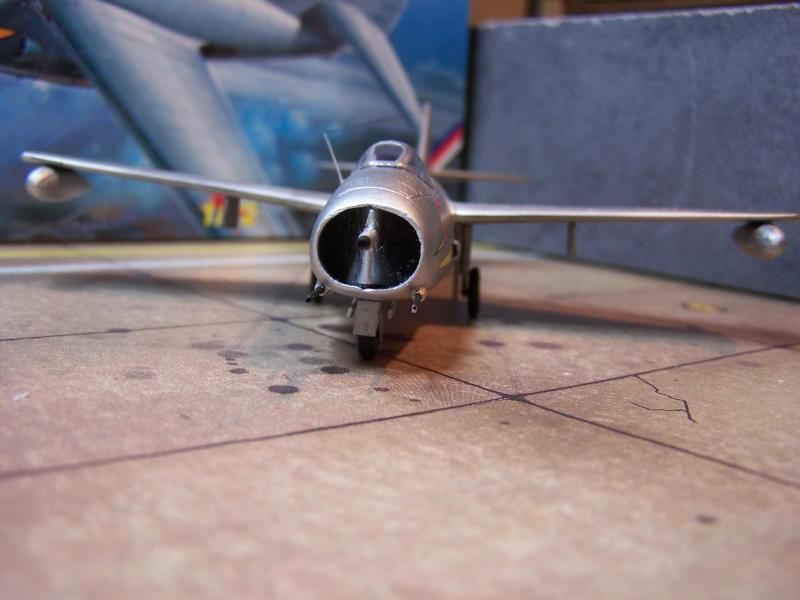
The noseleg, happily, went together and in quite smoothly. Then I fitted the rest of the undercarriage doors and gave myself an inadvertent injection pressing the metal pitot tube into place.
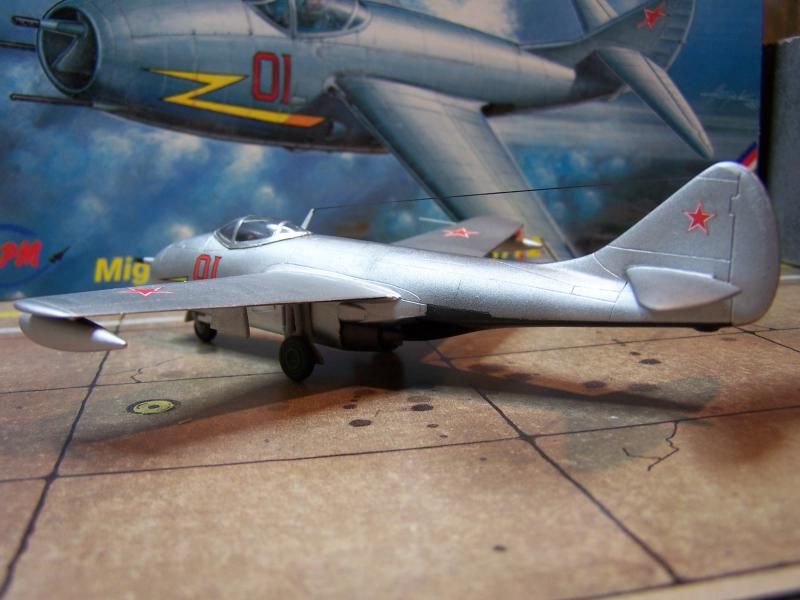
Finally, I drilled a 0.3mm hole in the fin and added an aerial wire using EZ line.
And, after all that, I'm calling this one done.
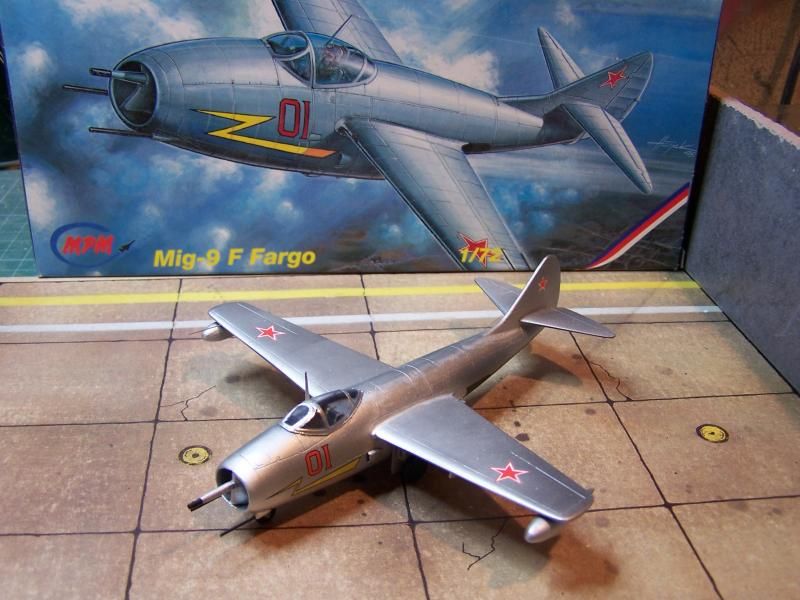
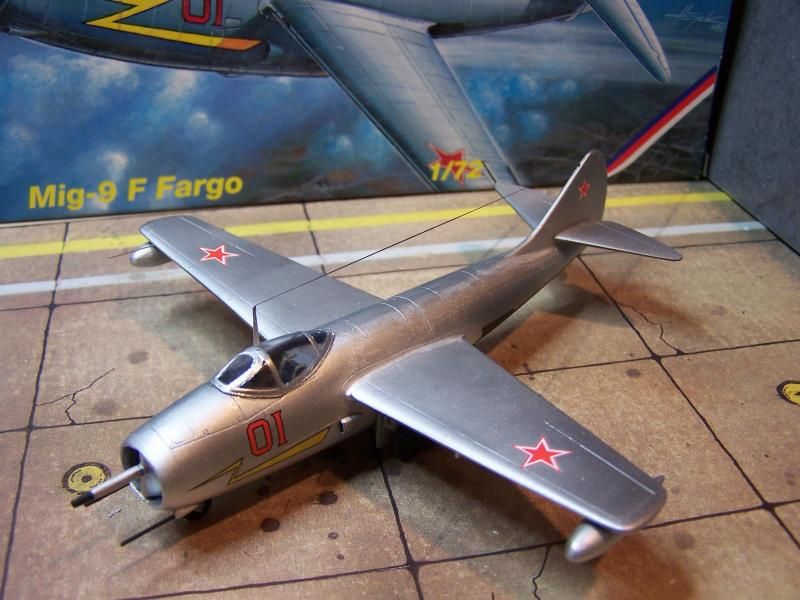
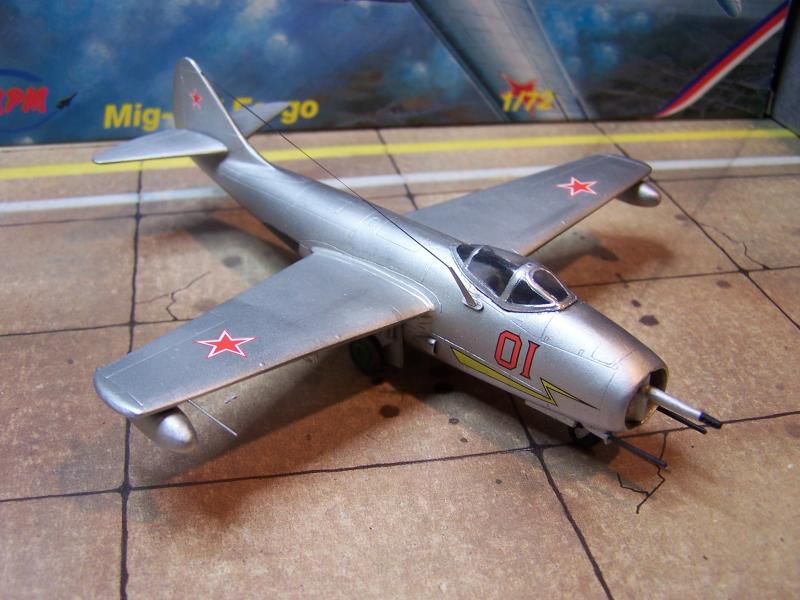
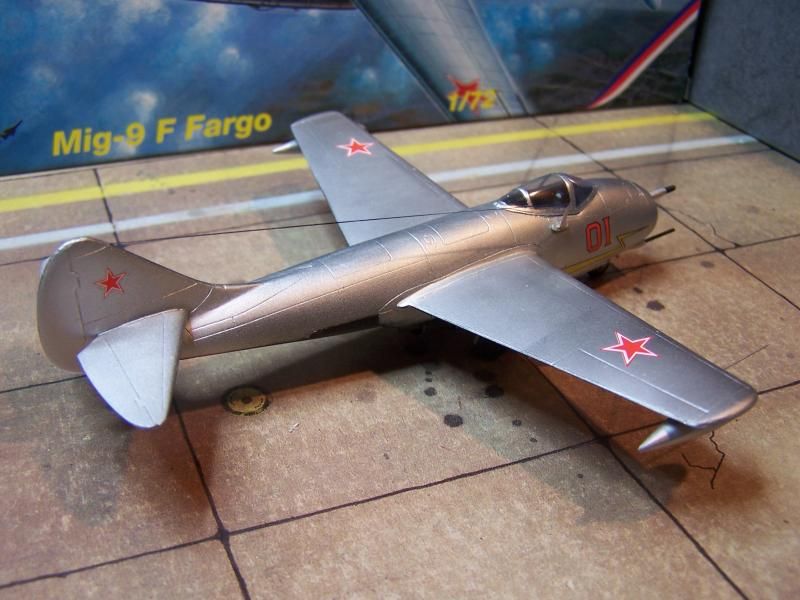
I can't say that this kit has been a joyride (it's certainly not a kit for beginners!) but I'm glad I built it. It's an important aircraft, the first in the Mig jet lineage. and it's largely overlooked by model manufacturers. it's currently sat in my cabinet in it's rightful place between a Mig-3 and a Mig-15.
Your wish is my command.
I couldn't really get into my studies tonight so, buoyed by current progress, I opted for another bout at the bench instead.
I got the undercarriage finished and assembled and had an "interesting" hour fitting them. Everything is butt jointed with little indication as to where things actually go and the main doors .....the less said about those the better
I also found out the hard way that Alclad doesn't like cyano accelerator. That resulted in some emergency masking and another trip to the workshop for a quick burst of spraying
With that little crisis over I set about fitting the main u/c rams. They didn't fit without a fight and a fair bit of trimming
The noseleg, happily, went together and in quite smoothly. Then I fitted the rest of the undercarriage doors and gave myself an inadvertent injection pressing the metal pitot tube into place.
Finally, I drilled a 0.3mm hole in the fin and added an aerial wire using EZ line.
And, after all that, I'm calling this one done.


I can't say that this kit has been a joyride (it's certainly not a kit for beginners!) but I'm glad I built it. It's an important aircraft, the first in the Mig jet lineage. and it's largely overlooked by model manufacturers. it's currently sat in my cabinet in it's rightful place between a Mig-3 and a Mig-15.
COLD WAR S.I.G. LEADER
Wherever there's danger, wherever there's trouble, wherever there's important work to be done....I'll be somewhere else building a model!
Wherever there's danger, wherever there's trouble, wherever there's important work to be done....I'll be somewhere else building a model!
-
Clashcityrocker
- Modelling Gent and Scholar
- Posts: 10806
- Joined: May 1st, 2011, 12:31 am
- Location: Adelaide. South Australia
Re: Any Excuse...For a Built Mig.
Interesting looking aircraft. Nicely finished.
Nigel
Nigel
-
Stuart
- Raider of the Lost Ark Royal
- Posts: 19417
- Joined: February 25th, 2013, 4:55 pm
- Location: North Wales
- Contact:
Re: Any Excuse...For a Built Mig.
Its certainly a Strange looking beast! It's hard to believe that they went from that to the Mig-15.
Congrats on the finish! All your hard work paid off as it looks brilliant. I'd be proud of that.
Cheers
Stuart
Congrats on the finish! All your hard work paid off as it looks brilliant. I'd be proud of that.
Cheers
Stuart
Stuart Templeton I may not be good but I'm slow...
My Blog: https://stuartsscalemodels.blogspot.com/
My Blog: https://stuartsscalemodels.blogspot.com/
-
ShaunW
- NOT the sheep
- Posts: 26180
- Joined: November 26th, 2011, 6:11 pm
- Location: Pontefract West Yorkshire
Re: Any Excuse...For a Built Mig.
Excellent finish Darryl and a very informative build thread. It certainly is a quirky looking machine!
Doing - Tamiya 1/35th Universal Carrier.
Work is the curse of the modelling classes!
IPMS#12300
Work is the curse of the modelling classes!
IPMS#12300

Re: Any Excuse...For a Built Mig.
Very nice, and a good job getting it to the finish.
Hoping to return to modelling sometime this year!! 
Owner of Marky's Model Emporium since 2013!.
Owner of Marky's Model Emporium since 2013!.
Re: Any Excuse...For a Built Mig.
I love how that model came out for you. It was obviously a very intense build and this thread will be one of those that serve as a guide to others who struggle with this kit in years to come. The Mig-9 was a great looking aircraft and you must be happy to have it on the shelf at last.
August
August
A good model is any model you can walk away from.
-
shangos70
- Modelling Gent and Scholar
- Posts: 4421
- Joined: May 1st, 2011, 11:14 am
- Location: Doncaster, Socialist Republic of South Yorkshire.
Re: Any Excuse...For a Built Mig.
Sterling work and some great problem solving. Ten team points for you!