Any Excuse...For a Built Mig.

Classic Jets are pre-1970, both the aircraft and the markings.
Runs 1st to 30th September.
Your GBL is Sir T.
User avatar
Dazzled
Modelling Gent and Scholar
Posts: 9592
Joined: October 1st, 2011, 11:08 pm
Location: Mid Glamorgan, South Wales
Contact:

Re: Any Excuse...

Post by Dazzled »

mjatx wrote:
Dazzled wrote:
Image

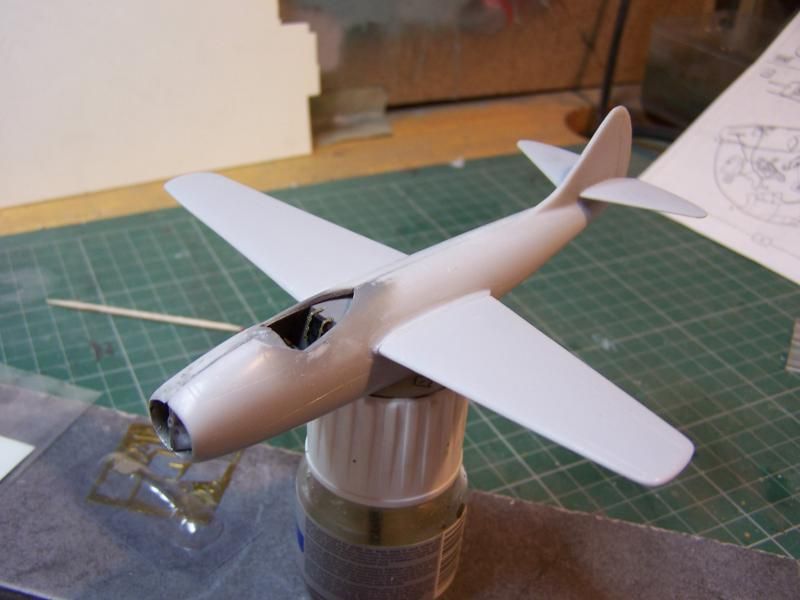
I love this bit of a build. The first time it actually looks like an aeroplane.
I know what you mean...now you realistically start flying it around the bench making strafing runs on other projects, or just practicing your acrobatic flying!

;-)

It's really looking great! Nice work on the cockpit and tail pipes.

Shhh, don't tell everybody.

Dat dat dat dat dat ;-)

Chip: I use a Kodak Z740 digital camera for my photographs. It's quite old, I've had it about 8 or 9 years now, and only 5Mp. I think it takes decent pictures more because I'm so used to it than anything else. :roll: .


On with today's progress.

Yesterday, I applied some Mr Surfacer in the hope of an easy seam filling job.

It was worth a try (shrugs) but, after a rub down with isopropanol and a coat of black from a rattle can there's no option but to resort back to filler.
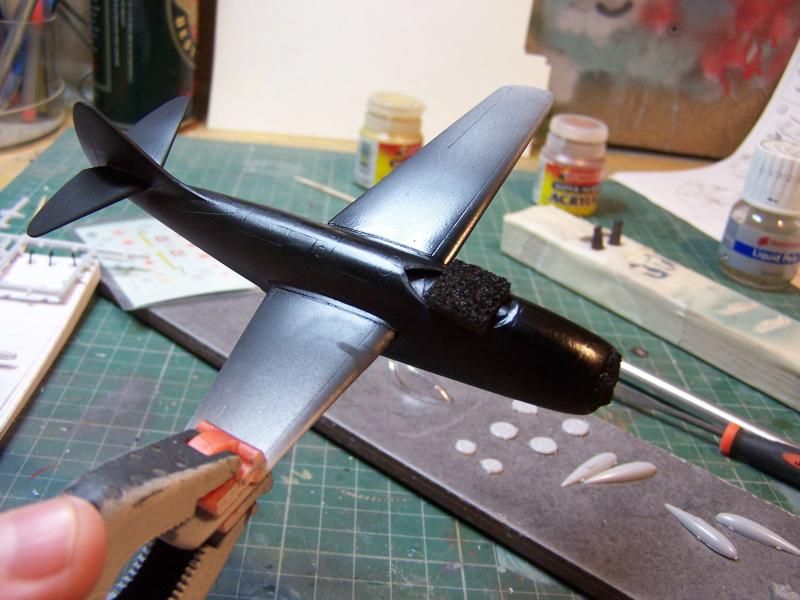
Image

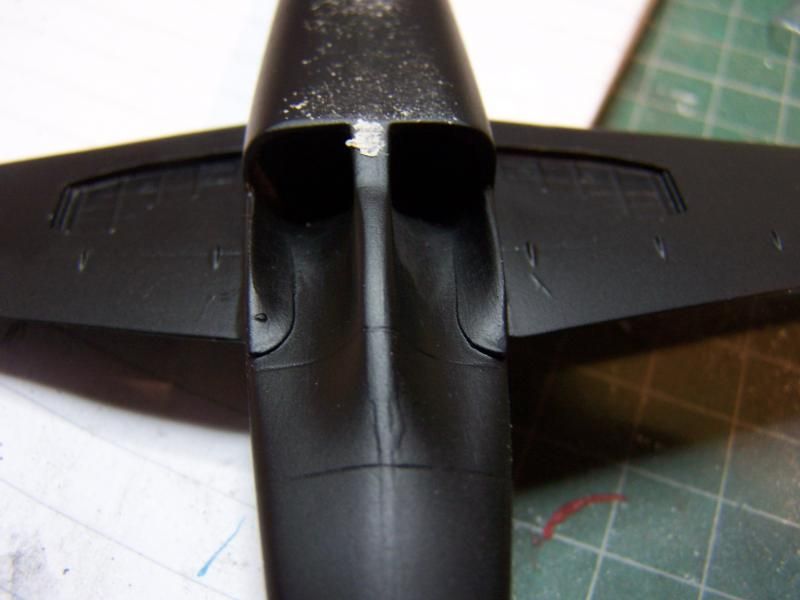
The underside is even worse.

I also mentioned the engines yesterday. The Mig-9 used a pair of engines based directly on captured BMW 003 engines as used in the He162. These stuck out of the back underneath the fuselage and are represented in the kit quite nicely.

The centre cone is styrene, which cleans up quite nicely, coupled with an etched turbine fan.
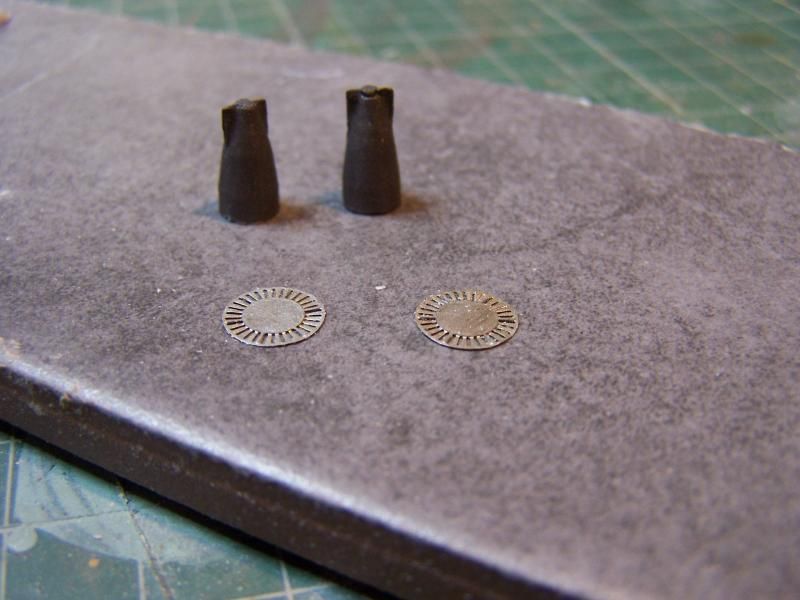
Image

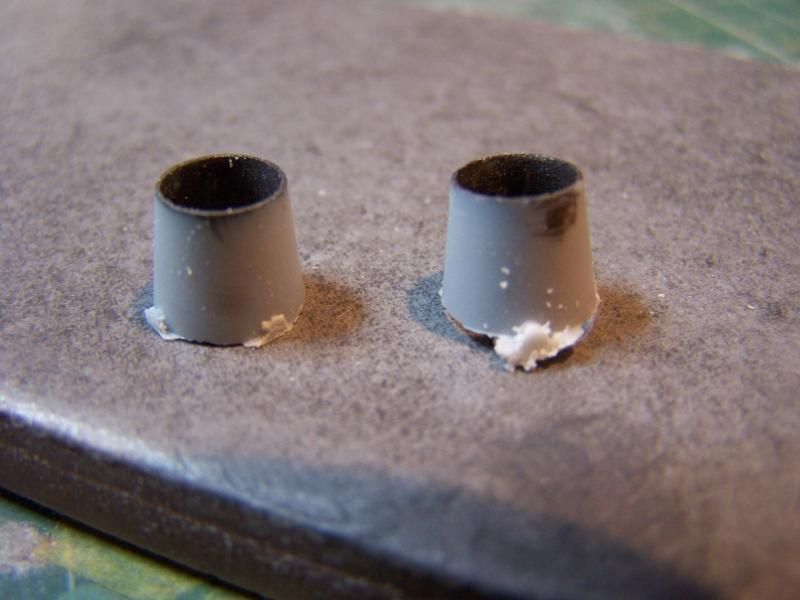
The jetpipes, as previously introduced, were thinned on the sprue. However, removing them revealed another issue.
Image

That's not a mould gate for boys. That's a real man's mould gate complete with hairy chest and dustbin lid medallion :shock: .

It was also a real pig to clean up so the one jetpipe is a bit raggedy around the edge.
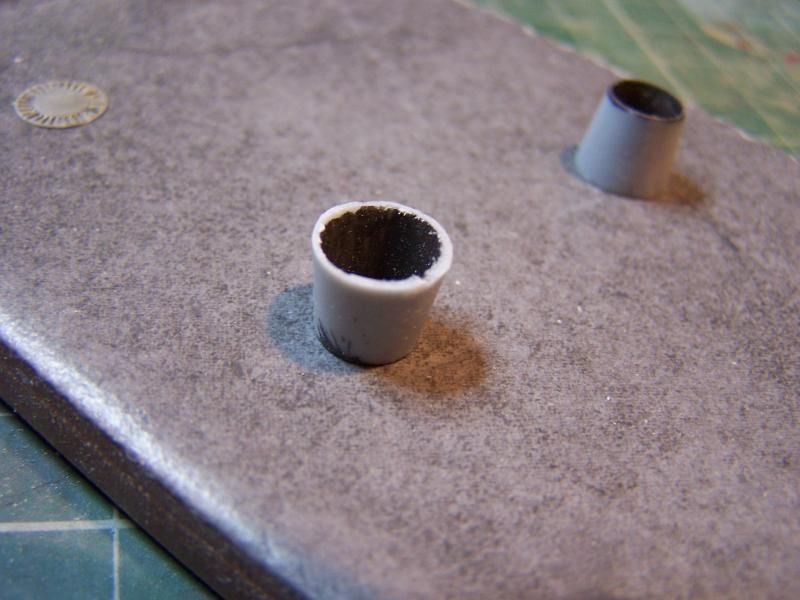
Image

I shall just have to be a little crafty when positioning it.

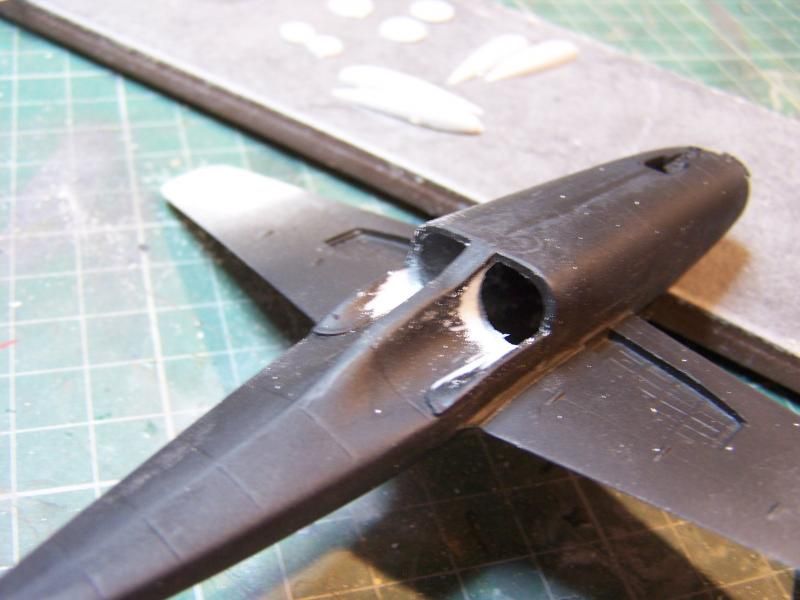
And, speaking of positioning it, it was at this point that I had a look at how well these would fit into their openings.

I won't comment on the quality of the fit as this is a family forum and the colour of my language at the time really doesn't bear repeating!!!

So, a "little" styrene had to be removed from each side.
Image

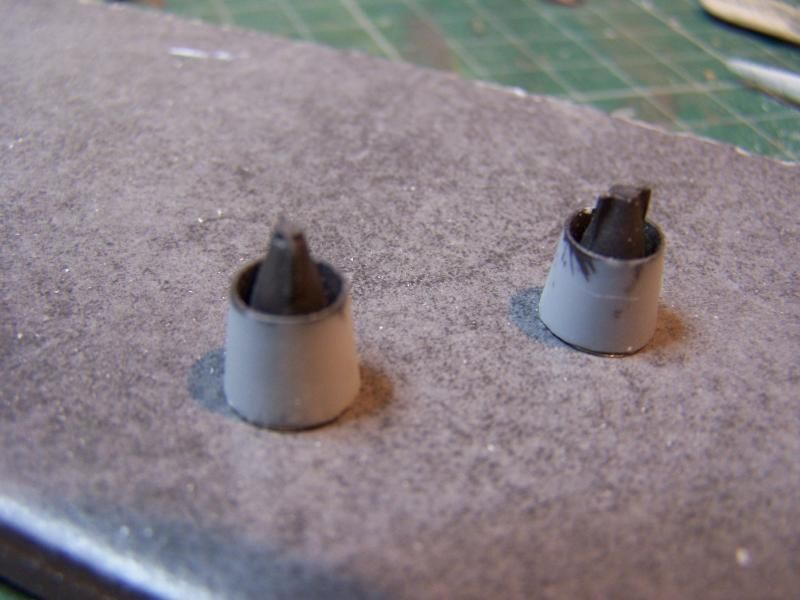
When I was happy that they were close to being a good fit I assembled the engine parts.
Image

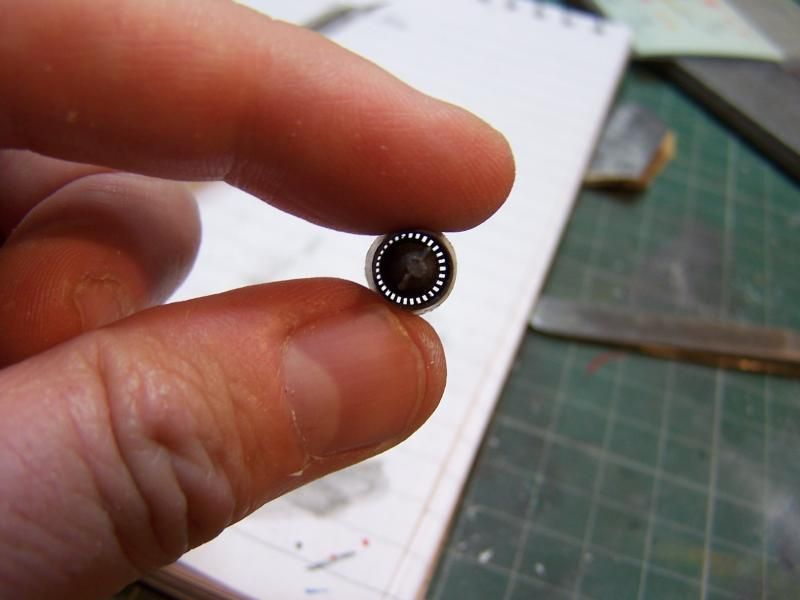
They're not at all bad when assembled. There's a little more clean up required to balance them out but there is a nice looking view down the pipe.
Image

Not bad for 1/72nd. It's just a shame that it only opens into a black hole inside the fuselage.

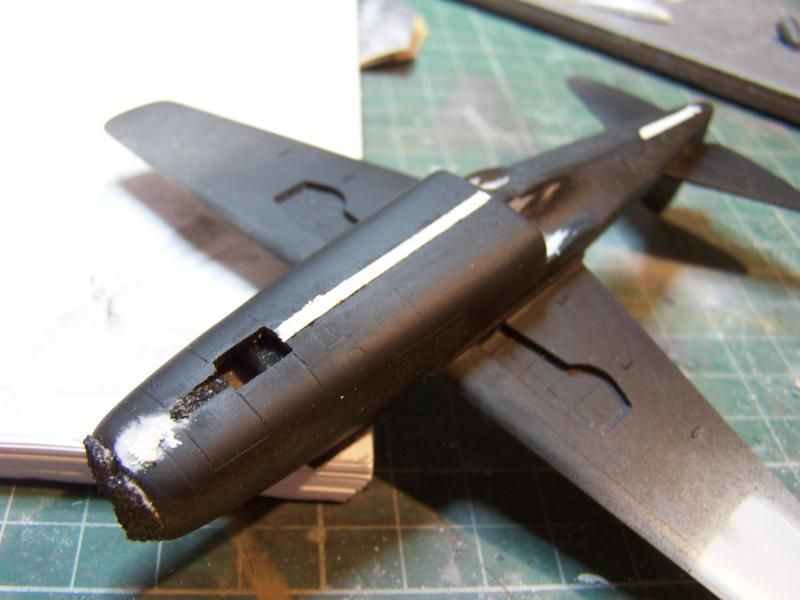
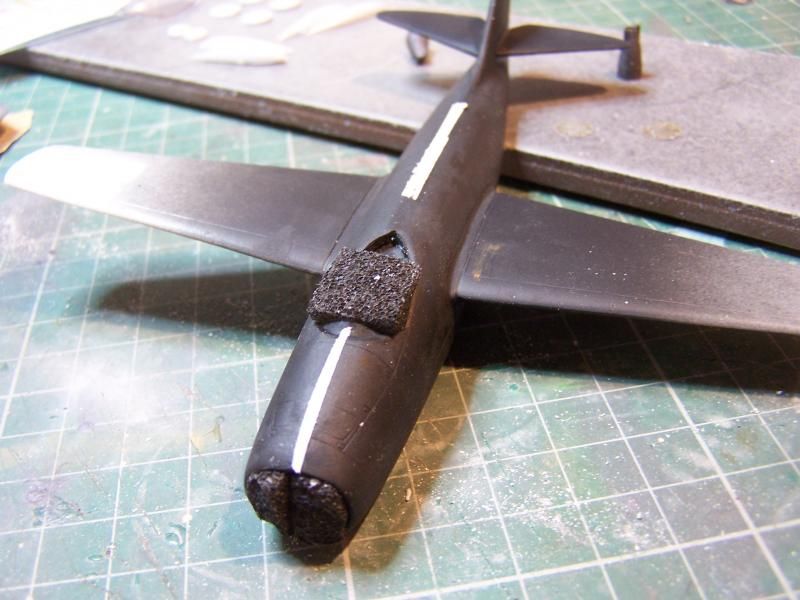
After I'd finished manhandling the model it was time to redo the filler.
Image

Image

Extravagant devil that I am, I opened a new tube of Squadron White Putty and applied thin beads where needed. This will have overnight to set before I give it a gentle sanding.

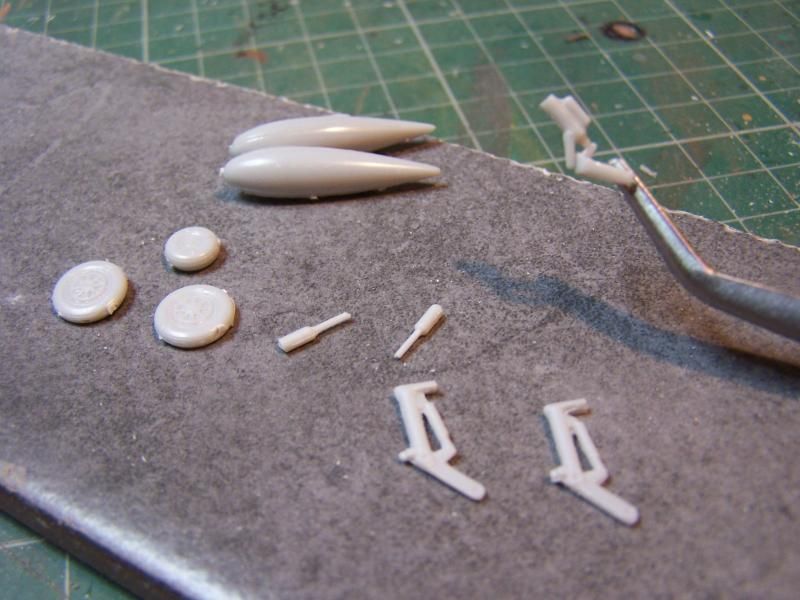
With nothing else to do I turned to some of the remaining parts, the undercarriage and drop tanks. Might as well get these ready.
Image

Interestingly (?) the noseleg was in two pieces. I'm not sure why but it was :???: .

And that was today's progress although I have noted that the kit doesn't include a pitot tube or a gunsight. Neither is a huge problem, particularly the pitot, but I must say that given the level of detail provided for the cockpit I'm quite surprised that such a prominent feature has been omitted.

Oh well, such are the joys of limited run kits :roll: .
COLD WAR S.I.G. LEADER

Wherever there's danger, wherever there's trouble, wherever there's important work to be done....I'll be somewhere else building a model!
ShaunW
NOT the sheep
Posts: 26188
Joined: November 26th, 2011, 6:11 pm
Location: Pontefract West Yorkshire

Re: Any Excuse...

Post by ShaunW »

Great work with this Darryl and it certainly is not a shake and bake kit. The PE really enhances the engines.
Doing - Tamiya 1/35th Universal Carrier.

Work is the curse of the modelling classes!
IPMS#12300
User avatar
Stuart
Raider of the Lost Ark Royal
Posts: 19446
Joined: February 25th, 2013, 4:55 pm
Location: North Wales
Contact:

Re: Any Excuse...

Post by Stuart »

Brilliant work so far Darryl!
Stuart Templeton I may not be good but I'm slow...

My Blog: https://stuartsscalemodels.blogspot.com/
User avatar
Dazzled
Modelling Gent and Scholar
Posts: 9592
Joined: October 1st, 2011, 11:08 pm
Location: Mid Glamorgan, South Wales
Contact:

Re: Any Excuse...

Post by Dazzled »

Well the last couple of days have been a bit busier than I'd have liked, despite the hospital advising me to take it easy, but I did squeeze in a bit of bench time in fits and starts.

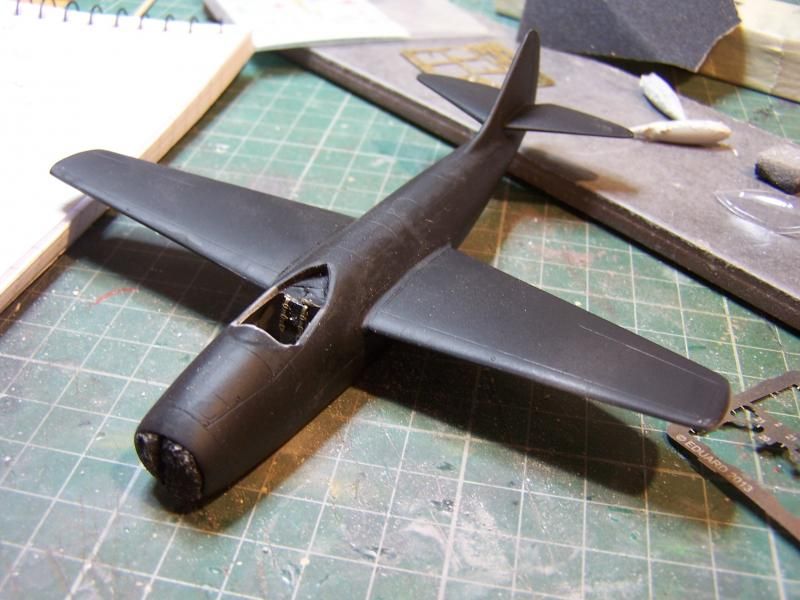
I've been having lots of fun with the openings for the engine exhausts. Basically, they're way too small for the pipes so rather a lot of sanding was called for. Happily, it seems to be done now.

Image

Sorry for the dark photo but black is a bit of a nightmare to photograph. Visible in the picture is the last little spot of filler which I'll sand back later.

Apart from that minor bump in the road, I've sorted the seams and restored the panel lines with the help of an old etched sprue. It bends nicely around a fuselage and gives a nice straight guide for scribing to. Also visible in the picture are the tip-tanks tat needed a "bit" of filler in their seams.

Image

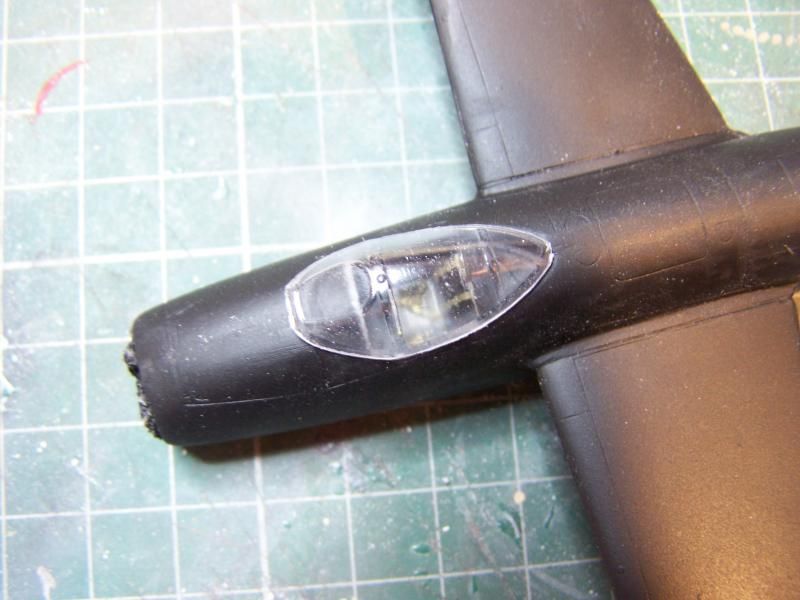
And finally, I took my courage in both shaky hands and removed the canopy from it's sheet. It wasn't too difficult removing most of it with sharp scissors then sneaking up on the final line with sanding sticks.

It fits quite nicely.

Image

Just balanced there at the moment. It's quite clear already but a dip in Klear will make even more of the cockpit detail visible.

More progress soon.
COLD WAR S.I.G. LEADER

Wherever there's danger, wherever there's trouble, wherever there's important work to be done....I'll be somewhere else building a model!
User avatar
Old_Tonto
Modelling Gent and Scholar
Posts: 8063
Joined: May 1st, 2011, 7:41 pm
Location: Middlesbrough, Peoples Republic of Teesside.

Re: Any Excuse...

Post by Old_Tonto »

That's great work Daz. Those engines look very nice.
2023 - A:0 B:0 C:0
Current Projects:
East German Air Force (1956-90)
South African Air Force (1958-93)
User avatar
Dazzled
Modelling Gent and Scholar
Posts: 9592
Joined: October 1st, 2011, 11:08 pm
Location: Mid Glamorgan, South Wales
Contact:

Re: Any Excuse...

Post by Dazzled »

Thanks OT :) .

Updates eh. nothing for 3 days and then 2 come along at once.

Tonight presented the opportunity of a couple of hours at the bench which I grabbed with enthusiasm.

The canopy was first, dipped in Klear and hung up to dry overnight.

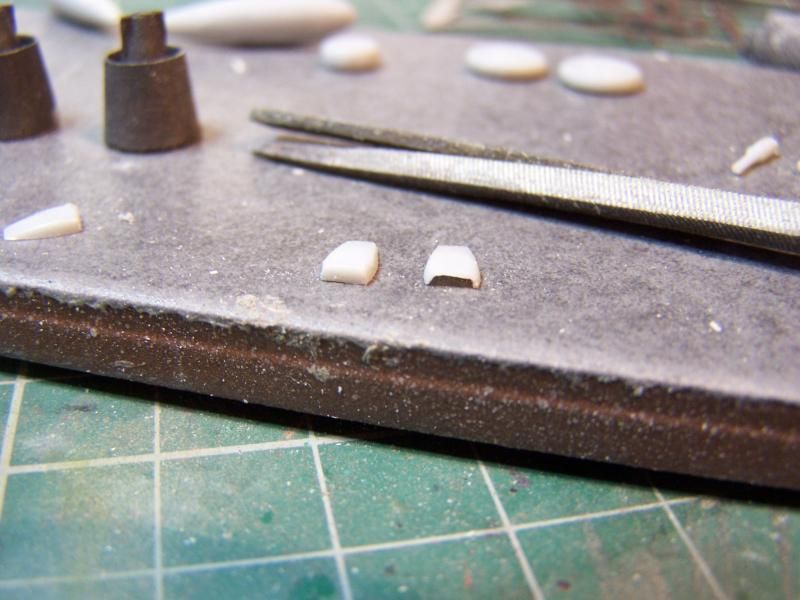
Then I started on some of the small details. In typical limited run kit format the ducts and vents are separate items (mind you, this also appears to be a feature of KP kits :roll: ).
In this case there are only 5 ducts to add. The trouble is that they're not strictly what one would call "ducts". They're more like solid plastic wedges with no openings in them at all.

I couldn't let this pass so I decided to open them up.

Image

The picture shows a before and after shot of 2 of them. The actual filing out wasn't too difficult but they were a bit tricky to hold while doing it.

However, the result was well worth the effort.

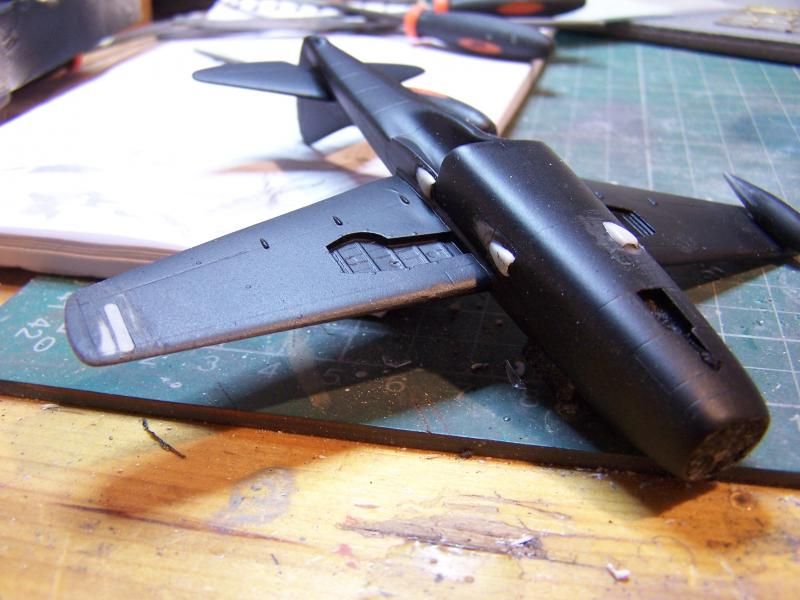
Image

As you can see, I'm also in the process of getting the tip tanks on. I sanded/scraped the paint away to give a better bond for the Liquid Poly. There isn't much in the way of locators for the tanks so the extended "wiggle" time possible with liquid cement was a bonus here.

With the tanks in place I decided to move on to the armament. the weaponry fitted to the Mig-9 was quite interesting for 2 reasons. First it was what became a standard Soviet weapons fit of a single 37mm and two 23mm cannon. This was fitted to the -15,-17 and -19 later on but the -9 had it first. Secondly, the unusual forward mounting led to engine problems when the guns were fired due to gun gas ingestion. Not a good thing for a fighter to have your engines pack up if you fired your guns :shock:

There was another problem with the guns, well the 37mm anyway. It was a bit of a misshapen lump. OK, not a problem for Mig but it did leave me to do some head scratching

Image

There was a big misalignment step on both sides and it was just, to be frank, pug ugly, so a little more remedial work was in order. Some filing and sanding and a little play with a set of drills and a pin vise made it look a bit better.

Image

Of course I had to drill out the hole to attach it to the intake splitter but I was expecting that anyway. I've still got the 23mm's to do.

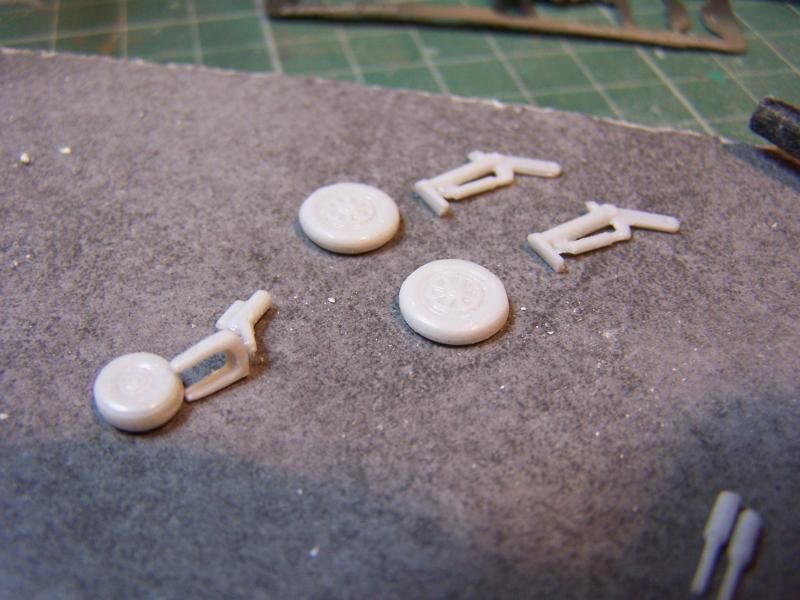
My next task will be to make the undercarriage a practical proposition. Can you spot the problem?

Image

Yep, there are no axle pins or mounting holes. Furthermore, the nosewheel doesn't fit into the leg fork.

I think a little more fettling will be in order :roll: .
COLD WAR S.I.G. LEADER

Wherever there's danger, wherever there's trouble, wherever there's important work to be done....I'll be somewhere else building a model!
User avatar
Clashcityrocker
Modelling Gent and Scholar
Posts: 10816
Joined: May 1st, 2011, 12:31 am
Location: Adelaide. South Australia

Re: Any Excuse...

Post by Clashcityrocker »

Wheels up in flight?

Nigel
User avatar
Stuart
Raider of the Lost Ark Royal
Posts: 19446
Joined: February 25th, 2013, 4:55 pm
Location: North Wales
Contact:

Re: Any Excuse...

Post by Stuart »

I took a look at that U/C photo and my first thought was 'EEEK!' But I'm sure you'll knock them into shape.

Nice work on the rest of the kit so far, its a cool looking little beast.

Cheers

Stuart
Stuart Templeton I may not be good but I'm slow...

My Blog: https://stuartsscalemodels.blogspot.com/
User avatar
TimJ
Modelling Gent and Scholar
Posts: 4290
Joined: May 1st, 2011, 12:54 am
Location: Oldbury, West Midlands

Re: Any Excuse...

Post by TimJ »

Coming along well. I'm sure you'll be able to sort the undercarriage out.
2020 A:35 B:18. 2021 A: 51 B:25 C:21 2022 A:63 B:23 C:11 2024 A:9 B:4 C:15
User avatar
novokits
Active Participant
Posts: 924
Joined: May 1st, 2011, 9:58 am
Location: Moscow
Contact:

Re: Any Excuse...

Post by novokits »

Wow!
Great job! I remember my Amodel build - it's a nightmare.
User avatar
JamesPerrin
Looks like his avatar
Posts: 13682
Joined: April 5th, 2011, 8:09 pm
Location: W. Yorkshire
Contact:

Re: Any Excuse...

Post by JamesPerrin »

Really like what you are doing with this Daz. I've got the Amodel kit which aspires to have similar amounts of flash.
Classic British Kits SIG Leader Better to fettle than to fill
(2024 A:B 5:2) (2023 13:8:7) (2022 21:11) (2021 15:8) (2020 8:4:4)
User avatar
TobyC
Modelling Gent and Scholar
Posts: 5540
Joined: January 15th, 2013, 2:13 pm
Location: Cobham, Surrey. Blighty

Re: Any Excuse...

Post by TobyC »

Very impressed with your attention to detail especially in the cockpit. Very nice
Enjoyment over accuracy. That's my motto
ShaunW
NOT the sheep
Posts: 26188
Joined: November 26th, 2011, 6:11 pm
Location: Pontefract West Yorkshire

Re: Any Excuse...

Post by ShaunW »

Excellent inspirational work Darryl. Opening vents is almost always worth the effort IMHO and the cannon looks much better drilled out 8-)
Doing - Tamiya 1/35th Universal Carrier.

Work is the curse of the modelling classes!
IPMS#12300
User avatar
Dazzled
Modelling Gent and Scholar
Posts: 9592
Joined: October 1st, 2011, 11:08 pm
Location: Mid Glamorgan, South Wales
Contact:

Re: Any Excuse...

Post by Dazzled »

Thanks for all the kind comments chaps. Much appreciated. :grin:

Modelling time has been a bit scarce of late but most of what I have done has been centred around those pesky undercarriage legs.

As you may recall, there was no way of mounting the wheels to the legs. Luckily (?) I've encountered this issue before when I built the Intech Mig-21UM with it's mix and match undercarriage parts so I employed a similar method here.

First the noseleg.

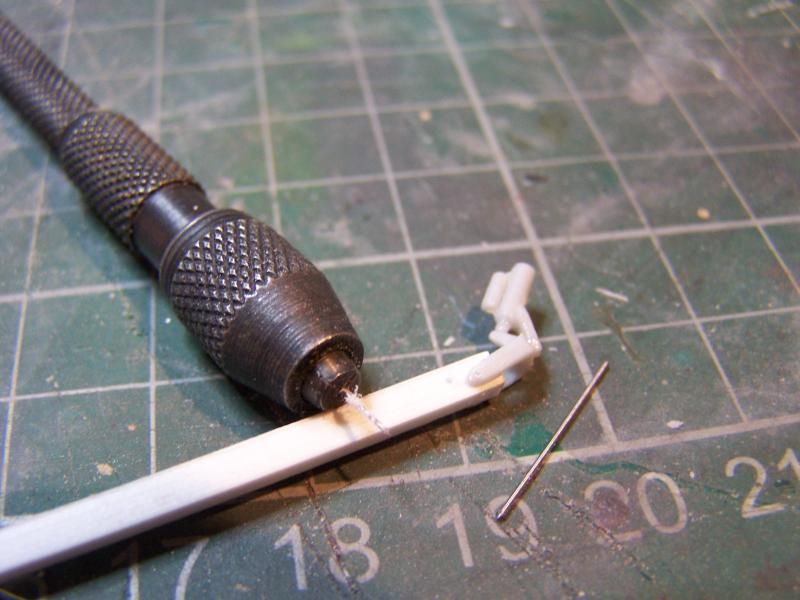
I drilled a 0.4mm hole in either side at the point where the real axle would have been located.

Image

The purpose of this is to mount a stiff steel wire axle. The square plastic section was placed in the middle of the fork to give the thing some stability while I drilled it.

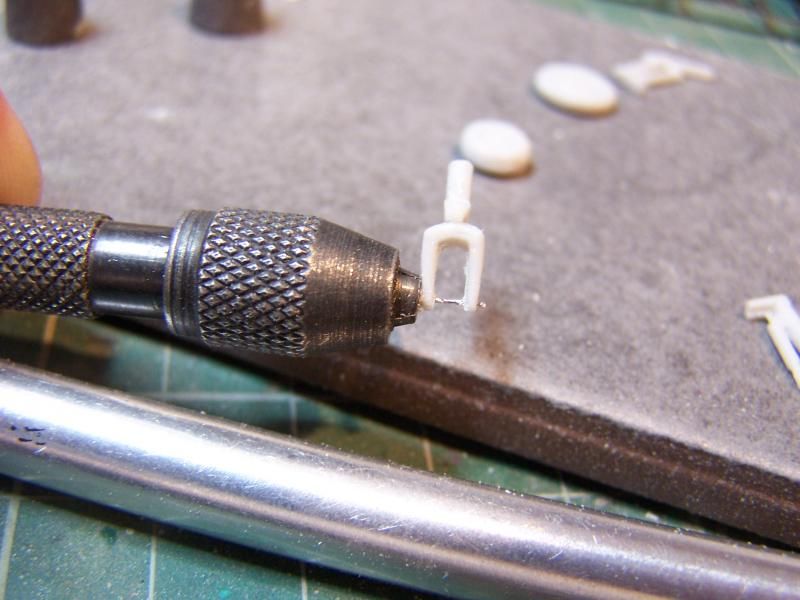
When it was through and level I could move on to the next stage.

Image

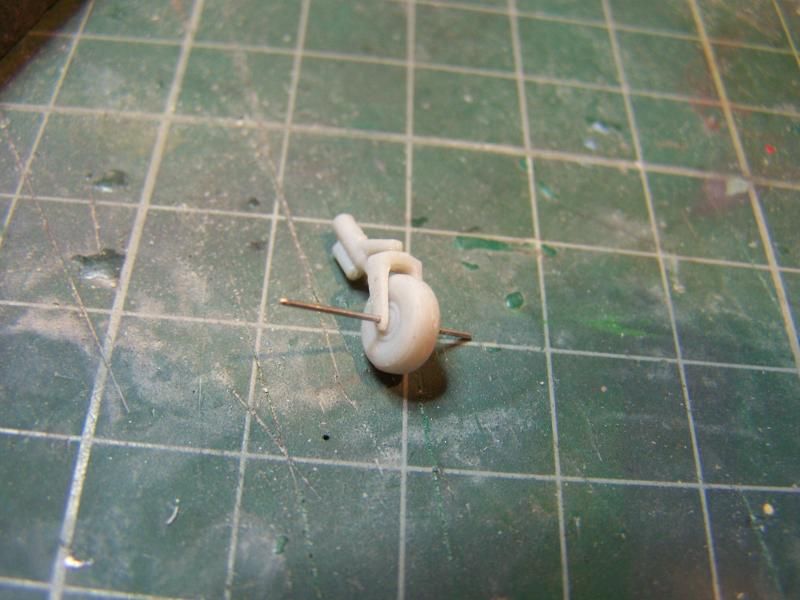
This involved first thinning the tyre a little and then carefully filing material from the inside of the fork, trial fitting constantly until the wheel went in. When enough material was removed the fork was tidied up with fine wet and dry and the assembly was dry fitted.

Image

On final assembly I'll trim the axle to size, secure the ends with cyano glue, tidy them up and paint to finish.

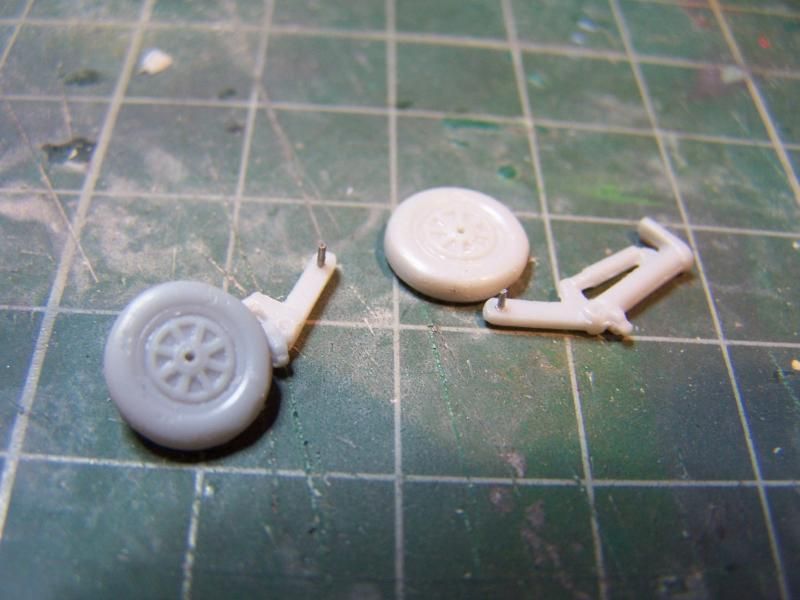
The main legs were somewhat easier. These just needed a hole at the axle point with some short steel wire stubs glued in place. Matching holes in the wheel hubs allow them to be fitted securely.

Image

An interesting point here is the fixing direction of the wheels. The hubs have two differently patterned faces. The fancy spoked pattern seen in the picture is the one that MPM recommend as the outer facing hub. However my research, both online and from the book OKB Mig: A History of the Design Bureau and it's Aircraft, showed that it was more likely that the more plain pattern should face this way. As I have pictures of the actual aircraft I'm modelling in both references I went for the plain option and drilled the holes in the spoked sides so they'll face inwards when assembled.

Don't you just love research :roll:

After the wheels I moved back to the guns, knowing that the 23mm cannon would need to be attached and suspecting that they may require a little fettling to achieve a good fit.

I suspected right :frown:

Image

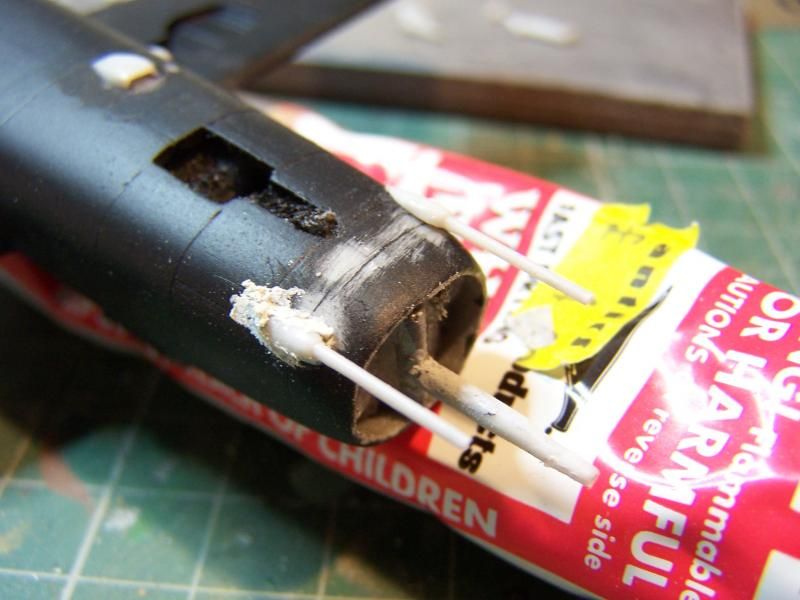
Test fitting the parts as they came off the sprue indicated that, when attached, the guns would point upwards at about 30 degrees. Probably great in a turning dogfight but otherwise pretty useless as they were aimed in a completely different direction to the 37mmm. So, predictably, a little reshaping of the mounting was undertaken followed by some blending work with the Squadron White putty. The picture shows one filled and one unfilled to give an idea of how far out these were. Their both filled now and waiting for me to find some more bench time to sand them to a final shape.

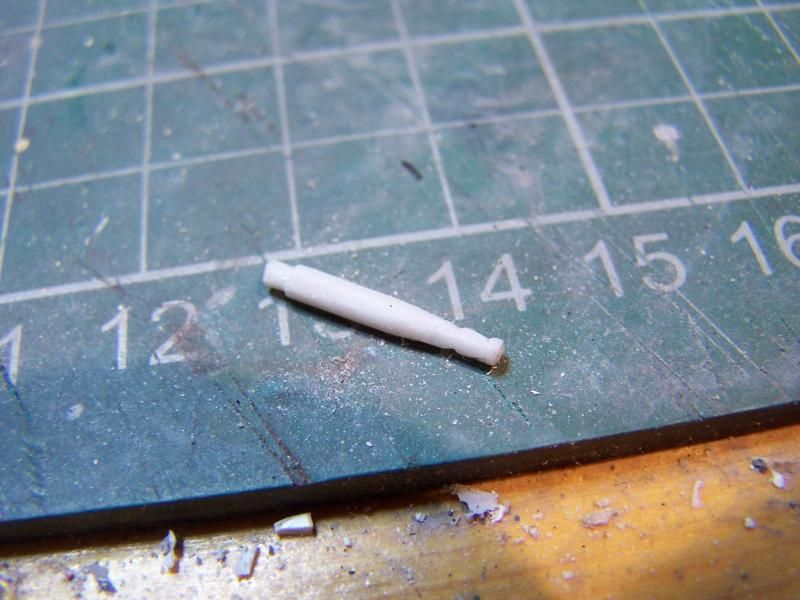
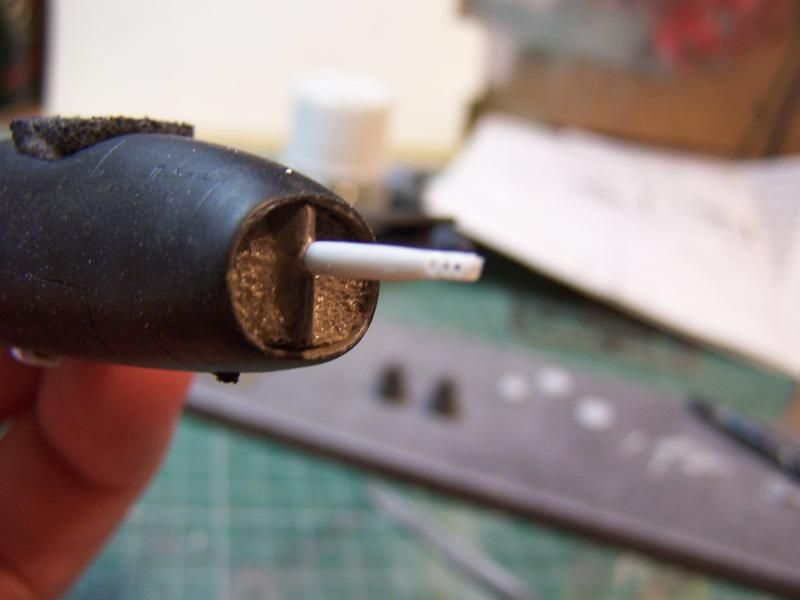
I have done a little more work, notably on scratchbuilding a representative gunsight. I'll elaborate on that in my next update. 8-)
COLD WAR S.I.G. LEADER

Wherever there's danger, wherever there's trouble, wherever there's important work to be done....I'll be somewhere else building a model!
User avatar
splash
Senior Service Rotorhead
Posts: 13828
Joined: May 1st, 2011, 11:02 am
Location: Somerset England

Re: Any Excuse...

Post by splash »

Cheers for showing us your work on the u/c it's very informative and a handy reference for other kits.

Regards Splash
My work bench is starting to look like Portsmouth Naval Dockyard.
Locked

Return to “Classic Jets”