Any Excuse...For a Built Mig.

Classic Jets are pre-1970, both the aircraft and the markings.
Runs 1st to 30th September.
Your GBL is Sir T.
User avatar
Dazzled
Modelling Gent and Scholar
Posts: 9592
Joined: October 1st, 2011, 11:08 pm
Location: Mid Glamorgan, South Wales
Contact:

Any Excuse...For a Built Mig.

Post by Dazzled »

...to build a Mig.

I'm in if you'll have me.

I've picked a classic Mig out of the Mig pile in the loft. It's not one of the classic jets that most would think of. In fact only 610 were produced between 1946 and 1948 and they only served with 2 air forces.

It was, however, the first jet powered fighter produced by Mikoyan Gurevich. I am, of course, talking about the Mig-9 Fargo.

A few kits of the type have been produced in 1/72nd scale, most notably by Amodel. It's not that good a kit by all accounts, in any version, so I was glad to find this MPM kit on eBay about a year ago. I've been waiting for an excuse to build it and here it is.
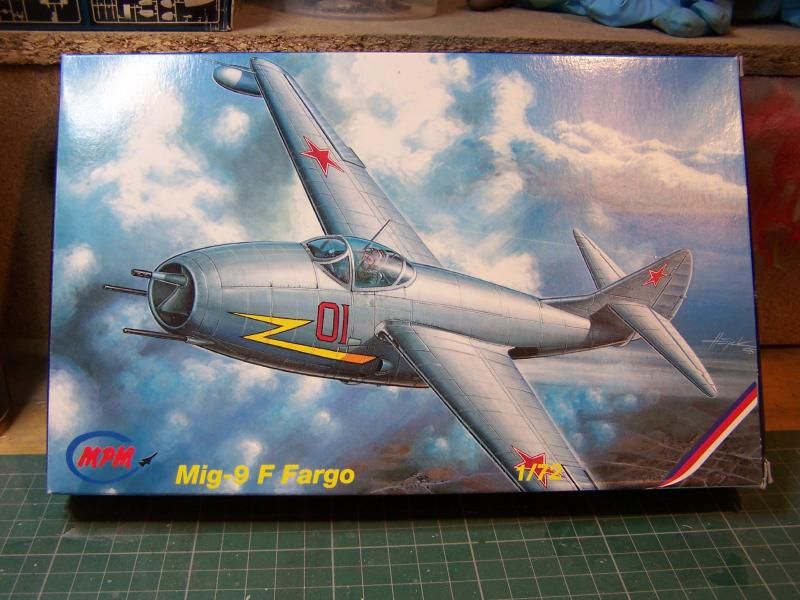
Image

It's a typical limited run model from the same stable as Special Hobby. Luckily I do have some experience of these kits and, while I appreciate that they're not everybody's cup of tea, I do rather like them. I think it's because I enjoy the construction phase of model building and these kits, while challenging, reward good, careful building.

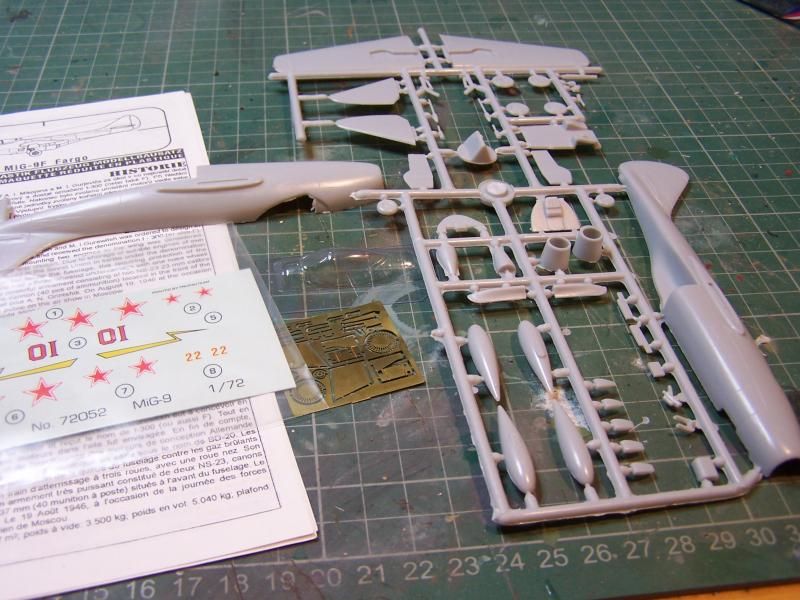
So, this is what's in the box.
Image

It's not a huge kit. There appears to be 36 soft grey styrene parts. These do have a bit of flash on them, particularly around the engine exhausts, and have typically thick mould gates. On the bright side the engraved detail is delightfully delicate. It's going to be quite a challenge to protect it during the build. There are, of course, no location pins for the fuselage halves but the flat(ish) bottom of the fuselage should make the addition of plasticard tabs quite easy.

As well as the styrene parts there's a small sheet of etched brass with cockpit parts plus undercarriage and engine turbine detail. Lastly, there's a vacuum-formed canopy which, I'm sure will provide much fun :roll: . Unfortunately, this will probably rule out an open canopy option.

Decals are provided for one aircraft of the Soviet Air Force as shown on the box. First impressions are that they look superb on the sheet. I hope they go on as nicely as they look.

So, let the model-making commence.
COLD WAR S.I.G. LEADER

Wherever there's danger, wherever there's trouble, wherever there's important work to be done....I'll be somewhere else building a model!
User avatar
Stuart
Raider of the Lost Ark Royal
Posts: 19451
Joined: February 25th, 2013, 4:55 pm
Location: North Wales
Contact:

Re: Any Excuse...

Post by Stuart »

Welcome aboard - and good choice!
Stuart Templeton I may not be good but I'm slow...

My Blog: https://stuartsscalemodels.blogspot.com/
DH-Drover
Active Participant
Posts: 653
Joined: May 1st, 2011, 7:25 am
Location: Grenfell NSW Australia

Re: Any Excuse...

Post by DH-Drover »

Re vac formed canopies. I have read somewhere (High Planes instructions?) that the vac form canopies can be cut/filed better if they are warmed before cutting. But not too hot!!

Dai

No I have not tried it myself. :roll:
Life or Death there no other options.
Indian Proverb.
User avatar
Dazzled
Modelling Gent and Scholar
Posts: 9592
Joined: October 1st, 2011, 11:08 pm
Location: Mid Glamorgan, South Wales
Contact:

Re: Any Excuse...

Post by Dazzled »

Thanks for the tip Dai. I generally fill them with Blu-Tak for rigidity and sneak up gently on the cut line ;-) .

And.....on with the Mig building. Today has been a good day, both on and off the model bench. :-D

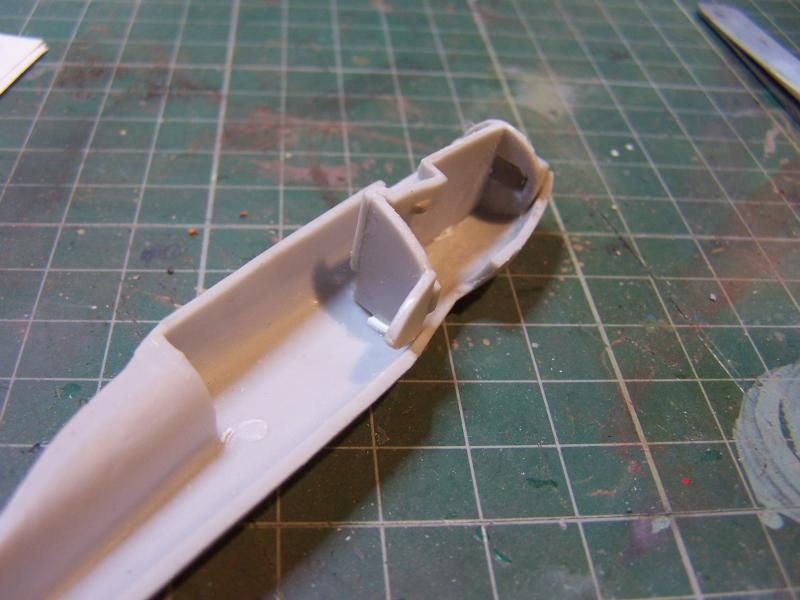
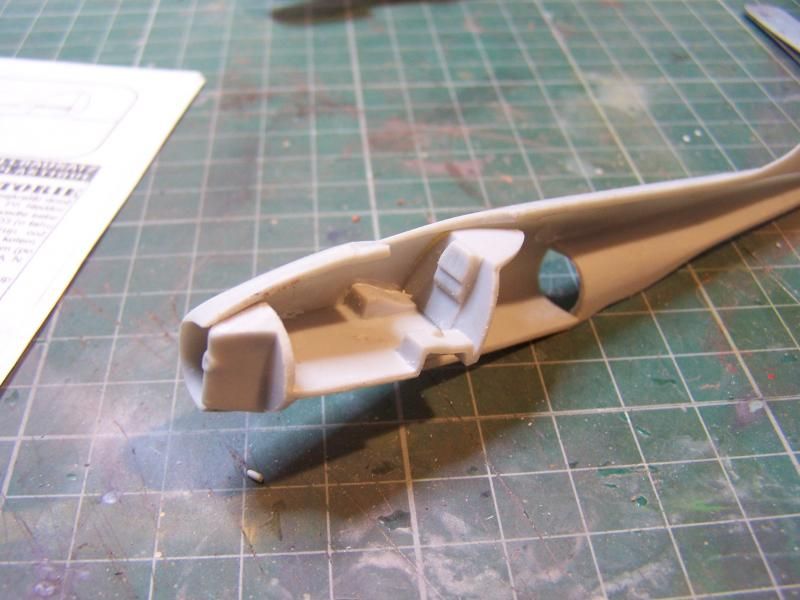
First off a bit of part removal, cleaning and checking. With limited run kits parts often fit where they touch and this one is no exception.

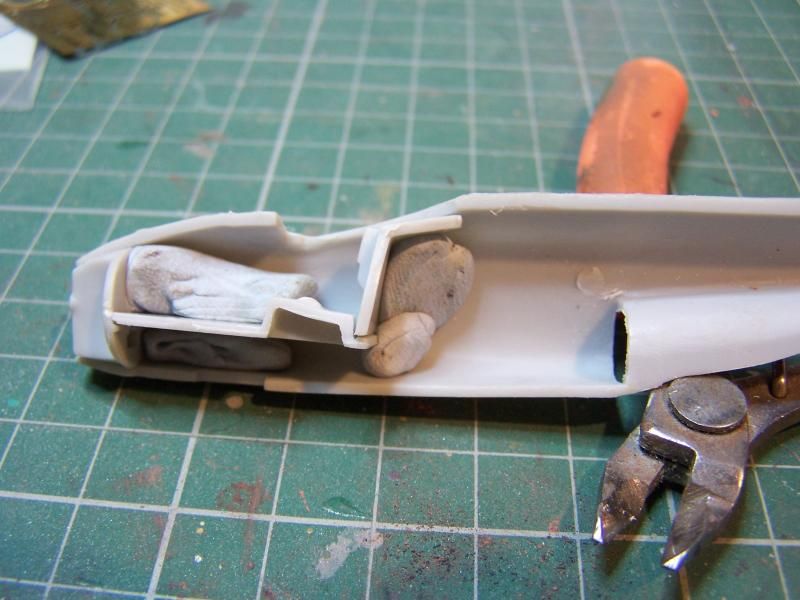
I had little faith that the interior parts would fit too well so I used Blu-Tak to hold the bits in place while I lined them up.

Image

When they were lined up they were set in place with cyano glue.

Image

Image

The rear of the cockpit was a bit twisted however, so a shim of plasticard was inserted along one side of the rear bulkhead.

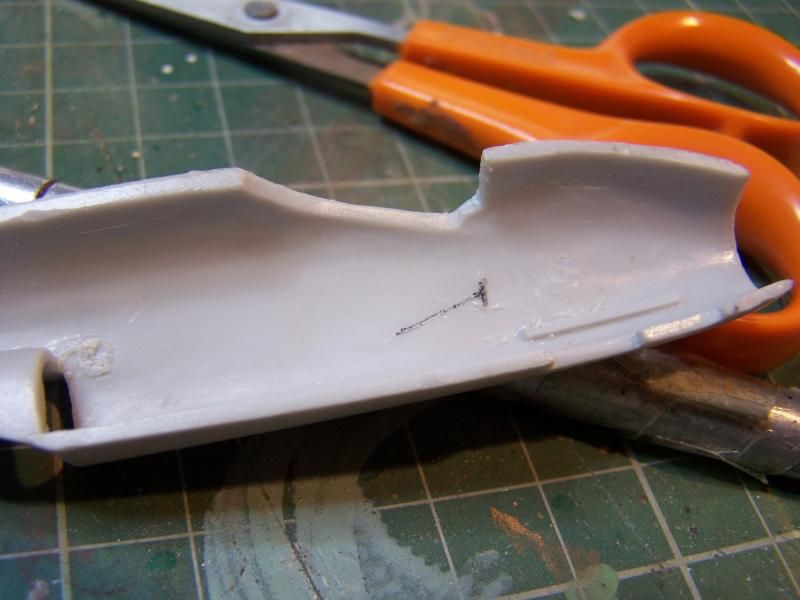
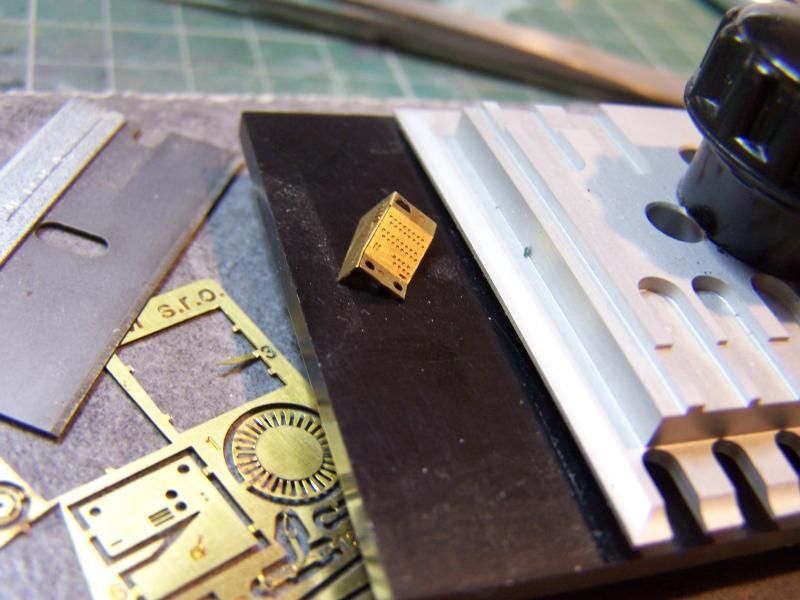
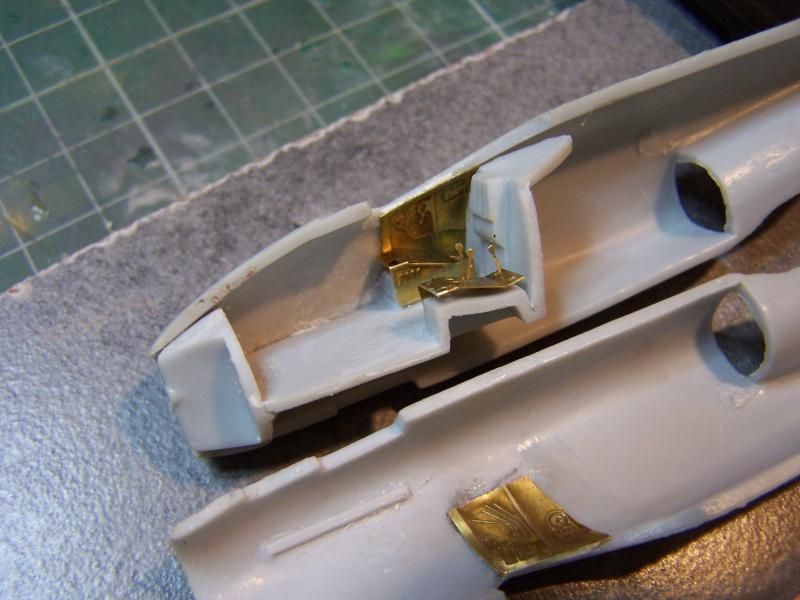
Now it was time for installing the detail parts. The photo etch was easy enough to align along the starboard side as the cockpit floor was in. In order to get the alignment right on the port side I held the fuselage halves together and marked a line along the side console with a scalpel. It's enhanced here with black marker for clarity.

Image

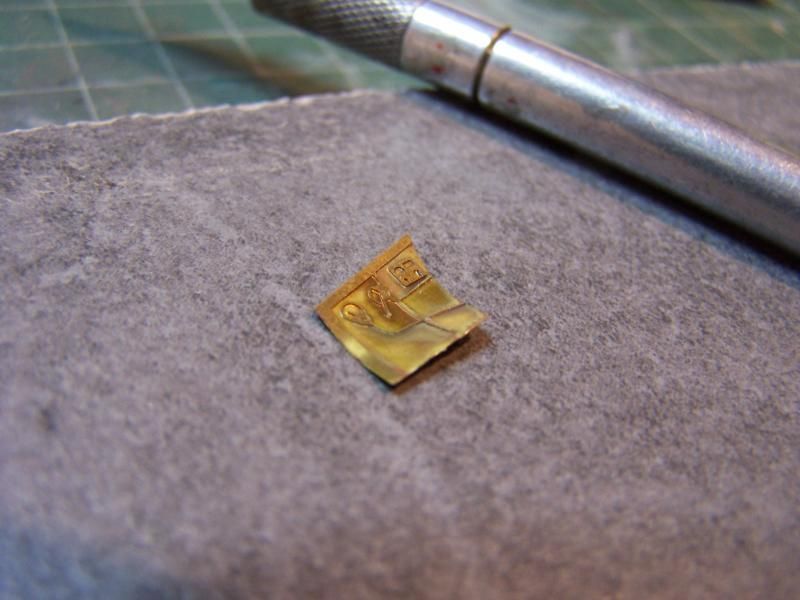
Then the etched sidewall was rolled around a scalpel handle to get it to the correct shape before installation.

Image

I folded up the side consoles.

Image

Then all the etch, including the levers were installed.

Image

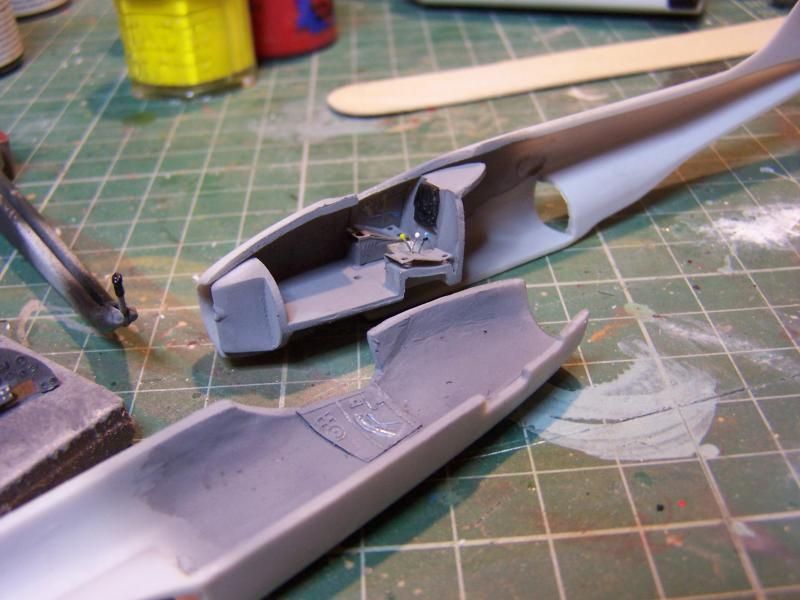
Moving along, the interior was given a coat of Tamiya XF-54.

Image

I found a couple of great walkrounds on the internet one of which, from the aircraft at Monino (Moscow), had some great shots of the cockpit interior. However, I did find the colour a bit odd. It seemed too light for a Soviet machine of the period. Then I noticed that one picture showed a lot of paint flaking from one of the consoles and, lo and behold, there was darker grey underneath. It seems those naughty people at the Monino museum have painted their Mig-9 cockpit, probably with the best intentions, in the wrong colour. It's good to have a bit of background knowledge ;-) .

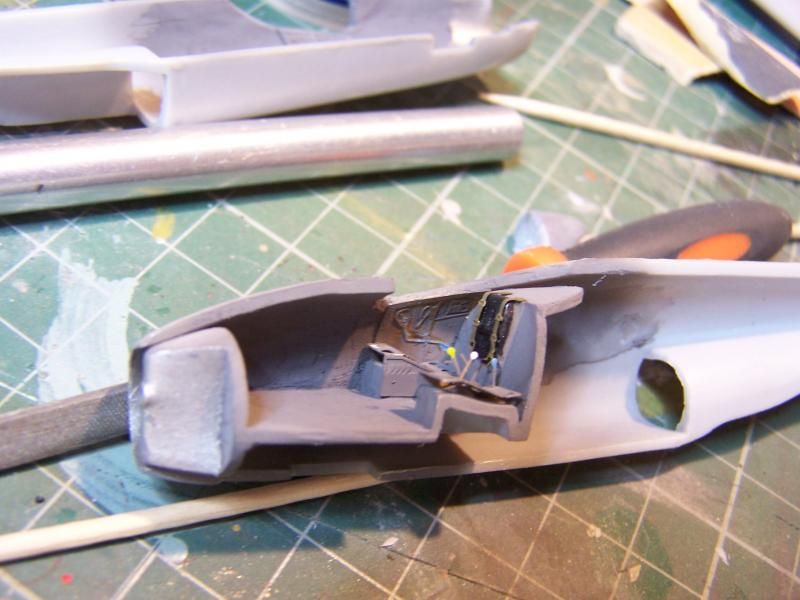
I also painted up the instrument panel plus the seat, control column and rudder pedals. Cockpit construction was now moving along apace.

Image

The seatbelts were also put in at this stage.

Next, I turned my attention to the possibility (OK - extreme likelihood :roll: ) that this model would be rather reluctant to sit squarely on it's wheels. There is a lot of aeroplane behind the main undercarriage and, while the instructions helpfully indicate (if one reads them extremely carefully) that a small square of "g" needs to be added to the front end. There's not much indication of how much "g" one actually needs so I taped up the fuselage, balanced the model roughly where the main u/c would be and started adding strips of lead on top of the nose until it tipped up.

With this amount in mind I, totally true to form, tripled it and added a bit.

Image

If I'm right this baby will nose over off the noseleg :ha: .

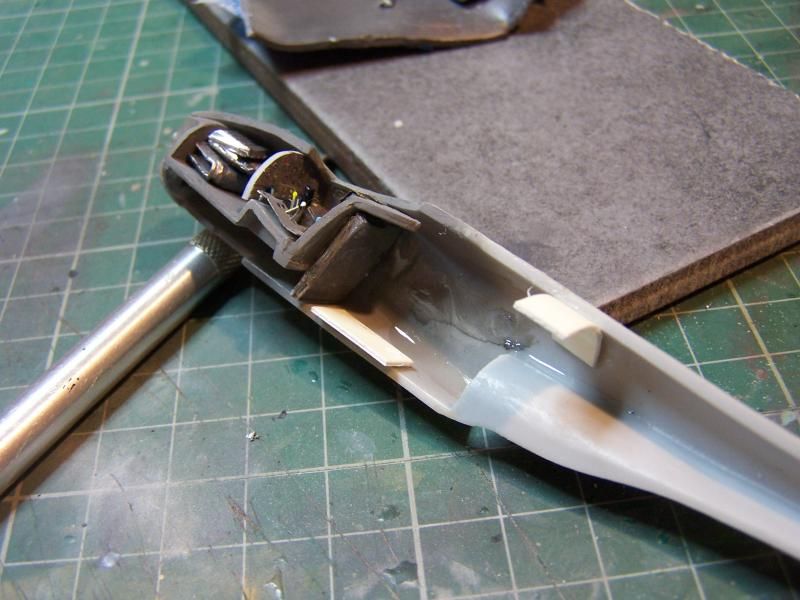
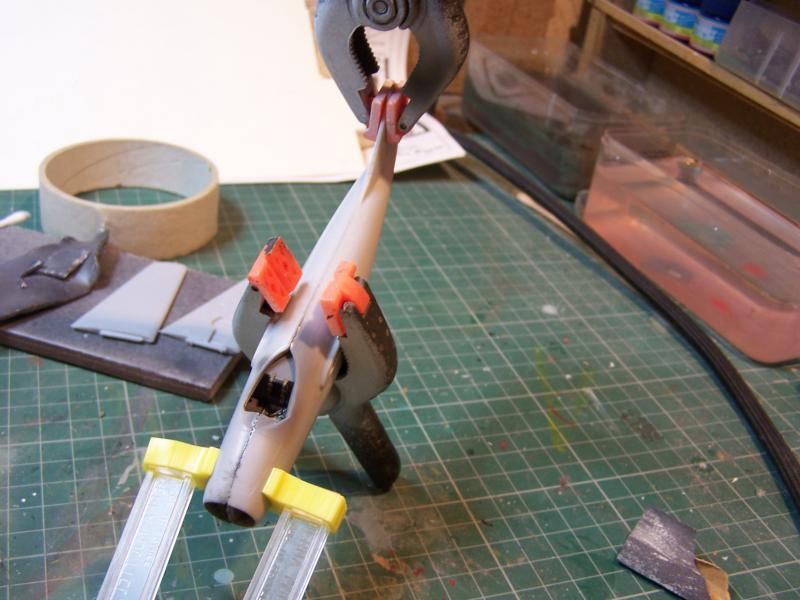
I also added a couple of strips to help align and strengthen the fuselage join so at this point, with clamps aplenty to hand, I joined the fuselage halves together.

Image

I did run a little more cement into the seam after the clamps went on but, as the fuselage was joined together with liquid cement I'll have to leave it overnight to set properly. Fingers crossed for a strong joint first time.

That's it for today. My next issue is the wing joints.

Image

MPM have provided a tab and socket joint for these but, just to add to the fun, the tabs are too big, in both length and depth to fit. That's after, of course, one has removed all the mould gates.

I am enjoying this build, honest :)
COLD WAR S.I.G. LEADER

Wherever there's danger, wherever there's trouble, wherever there's important work to be done....I'll be somewhere else building a model!
User avatar
TimJ
Modelling Gent and Scholar
Posts: 4290
Joined: May 1st, 2011, 12:54 am
Location: Oldbury, West Midlands

Re: Any Excuse...

Post by TimJ »

Nice work so far.
2020 A:35 B:18. 2021 A: 51 B:25 C:21 2022 A:63 B:23 C:11 2024 A:9 B:4 C:15
User avatar
splash
Senior Service Rotorhead
Posts: 13828
Joined: May 1st, 2011, 11:02 am
Location: Somerset England

Re: Any Excuse...

Post by splash »

Nice work, what a difference that PE makes to the Cockpit, will the canopy be open or closed?

Regards Splash
My work bench is starting to look like Portsmouth Naval Dockyard.
User avatar
Dazzled
Modelling Gent and Scholar
Posts: 9592
Joined: October 1st, 2011, 11:08 pm
Location: Mid Glamorgan, South Wales
Contact:

Re: Any Excuse...

Post by Dazzled »

This one will be canopy closed I'm afraid Splash. While the vac-form canopy is commendably thin it's not very rigid and I don't think it'll be that much better separated.

Such is life :roll:
COLD WAR S.I.G. LEADER

Wherever there's danger, wherever there's trouble, wherever there's important work to be done....I'll be somewhere else building a model!
User avatar
splash
Senior Service Rotorhead
Posts: 13828
Joined: May 1st, 2011, 11:02 am
Location: Somerset England

Re: Any Excuse...

Post by splash »

That's a shame
My work bench is starting to look like Portsmouth Naval Dockyard.
User avatar
splash
Senior Service Rotorhead
Posts: 13828
Joined: May 1st, 2011, 11:02 am
Location: Somerset England

Re: Any Excuse...

Post by splash »

Have you seen this link? http://scalemodels.ru/modules/photo/vie ... w=12&min=0

Regards Splash
My work bench is starting to look like Portsmouth Naval Dockyard.
ShaunW
NOT the sheep
Posts: 26188
Joined: November 26th, 2011, 6:11 pm
Location: Pontefract West Yorkshire

Re: Any Excuse...

Post by ShaunW »

Nice, nice, nice. Excellent work as always and the PE fret has certainly added to this kit.
Doing - Tamiya 1/35th Universal Carrier.

Work is the curse of the modelling classes!
IPMS#12300
User avatar
Dazzled
Modelling Gent and Scholar
Posts: 9592
Joined: October 1st, 2011, 11:08 pm
Location: Mid Glamorgan, South Wales
Contact:

Re: Any Excuse...

Post by Dazzled »

splash wrote:Have you seen this link? http://scalemodels.ru/modules/photo/vie ... w=12&min=0

Regards Splash
I have thanks Alan. It's the one I mentioned in my last update.

Righto then, on with today's progress.

Not so much time at the bench today. You know how it goes some days. You do nothing constructive, in this case playing a computer game and cooking for a few hours, and nobody bothers you. You sit at the model bench and you instantly become the most popular person in the neighbourhood :roll:. I juggled so many phone calls, text conversations and people coming to the door that I gave up for half an hour, before the inane drivel on TV drove me back to the bench.

Thankfully, I got left alone for a bit after that 8-) .

And here's how things turned out.

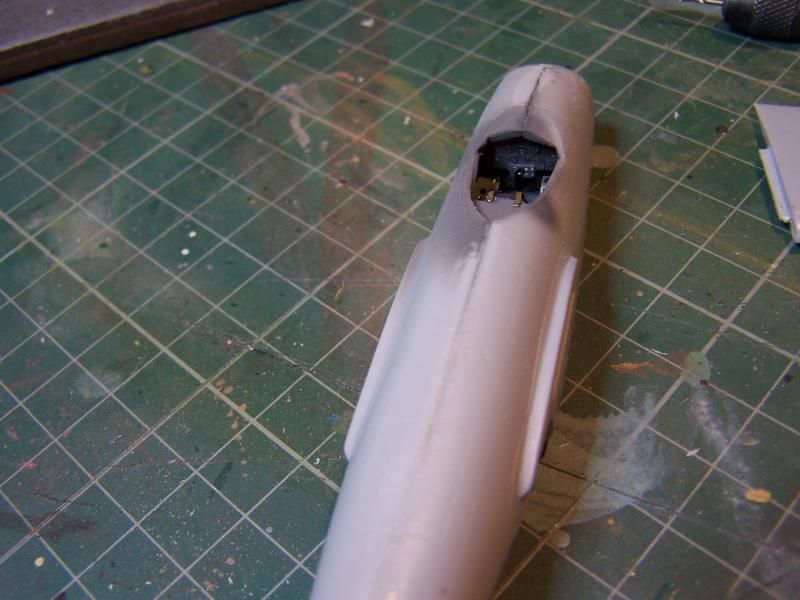
The seams came out quite nicely considering the type of kit this is.

Image

Image

Sure they'll need some work but not that much compared to some I've built.

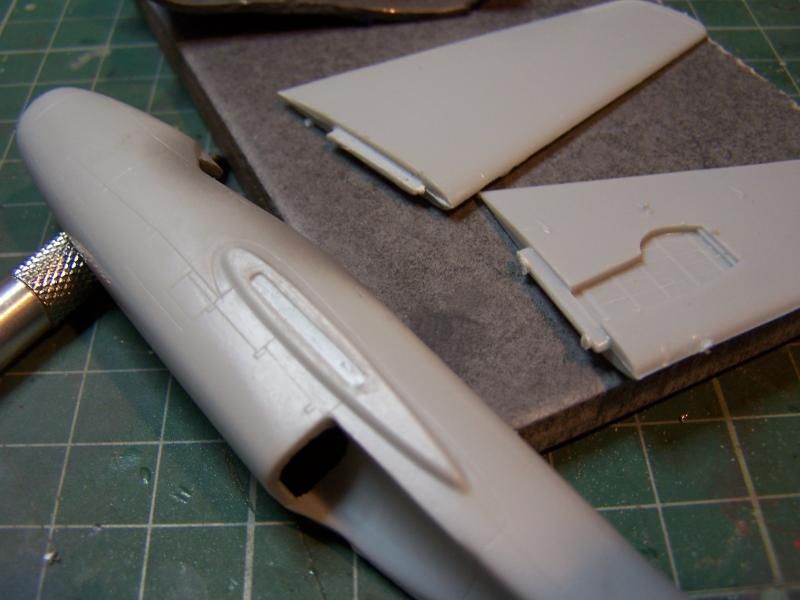
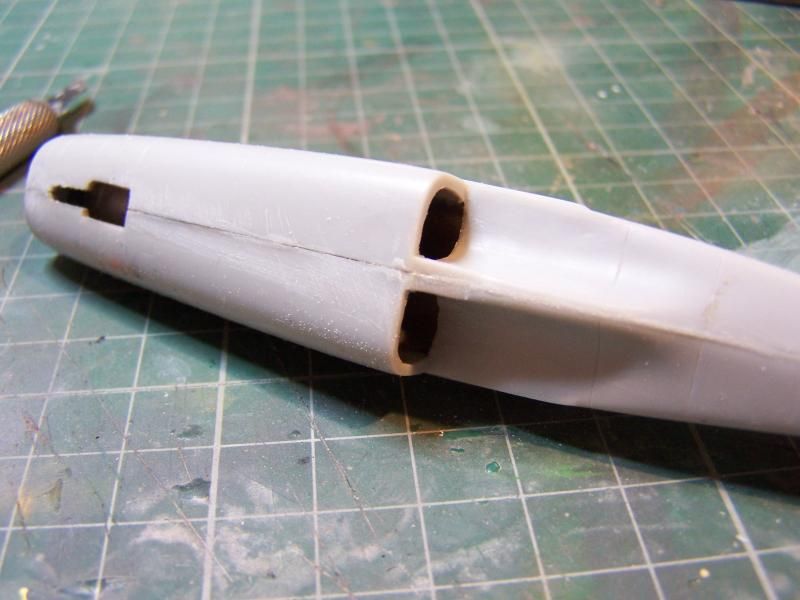
I decided that the slots for the wing tabs would be better cut through so....

Image

A bit of drill, a touch of scalpel and a flourish of file opened these out nicely.

Image

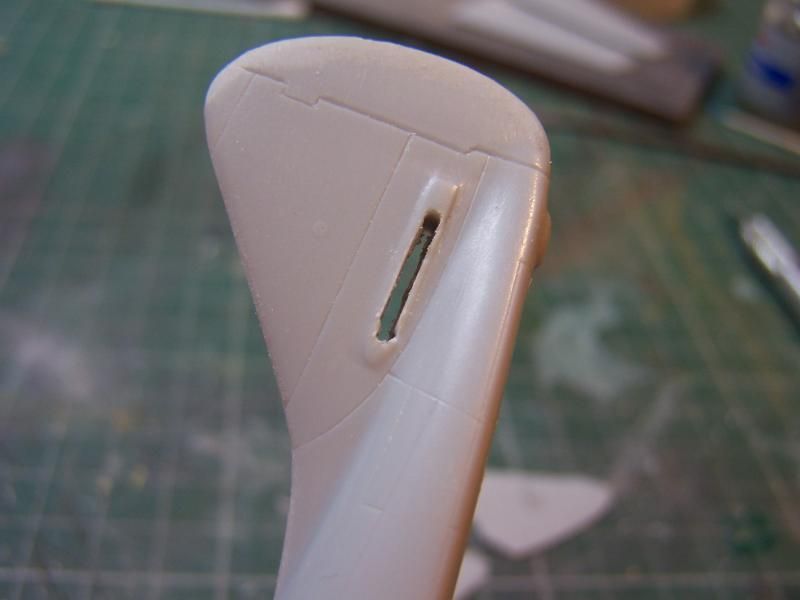
The tailplane slots needed similar treatment. They look rough but there's plenty of leeway on the tailplanes.

Image

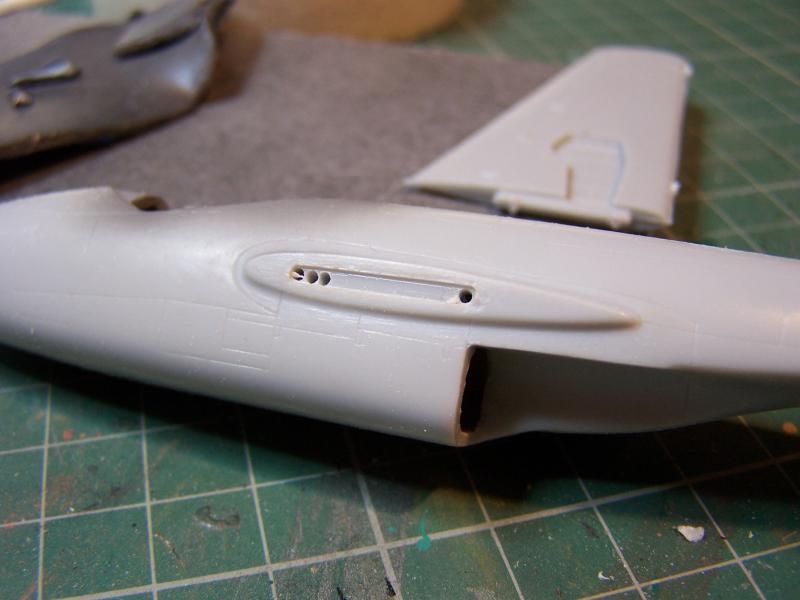
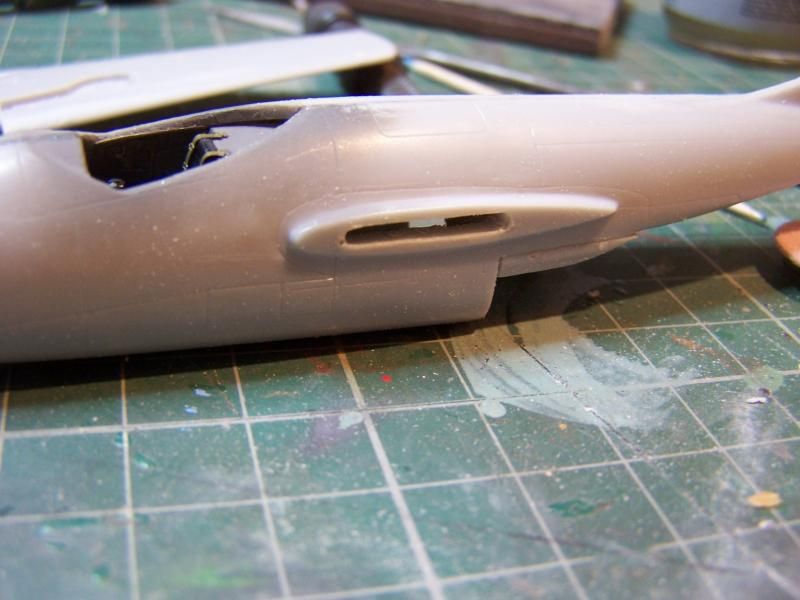
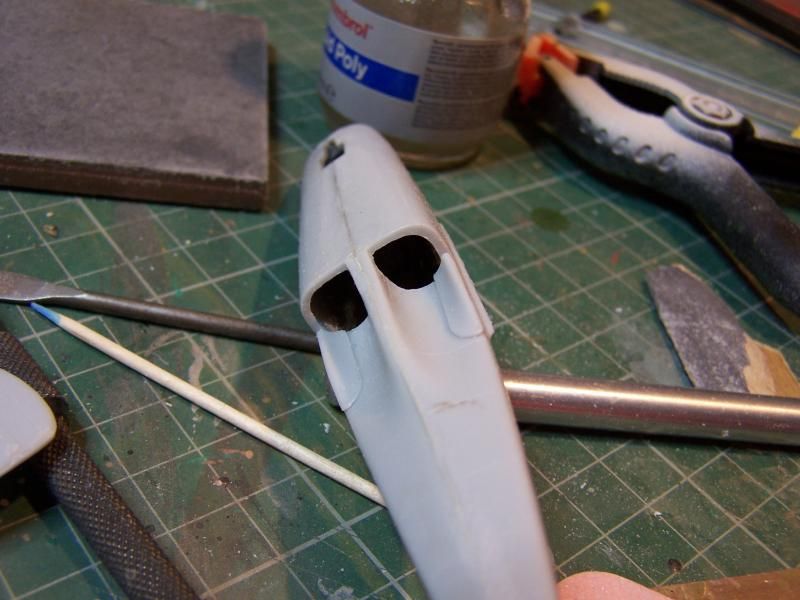
And there were a couple of wedge fairings to add to the fuselage at the rear of the engines.

Image

They required a fair bit of cleaning up as did my next challenge.

Image

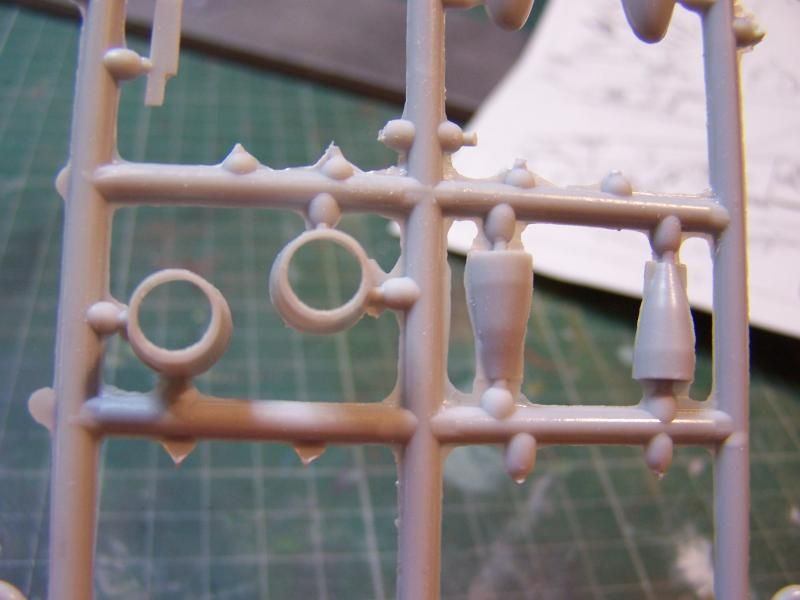
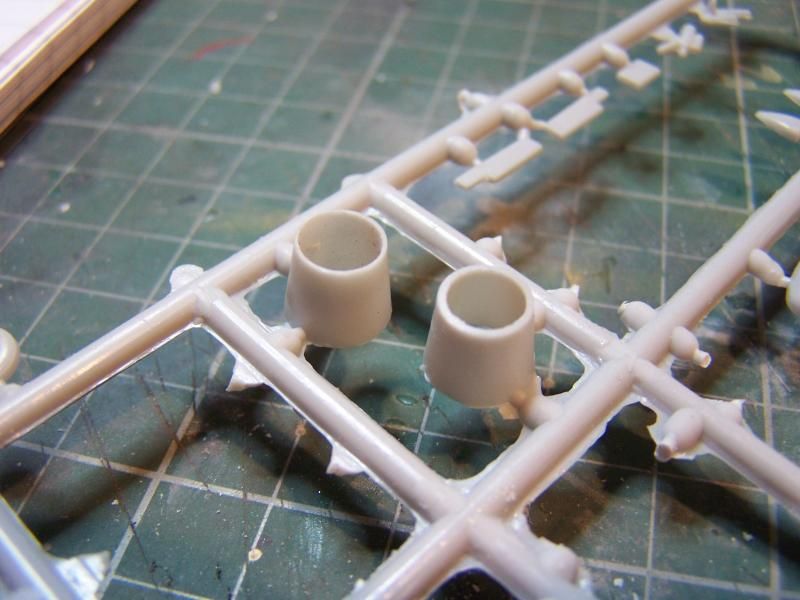
The tailpipe walls are a bit on the thick side so I though I'd thin them down a bit. The parts next to them are the centre cones, more cleaning up required :roll:

Some work with a file and some wet and dry wrapped around a brush handle thinned the pipes out nicely. The picture shows the improvement.

Image

After that I put a bit of Gunze burnt iron on some of the engine parts. I'll elaborate on this in my next update.

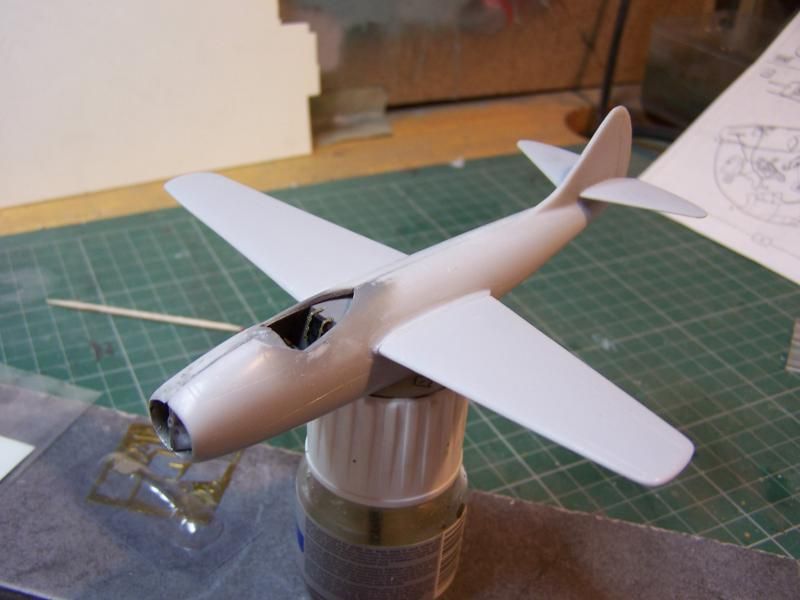
What I was most happy about today though was getting the wings and tailplanes on. :grin:

Image

I love this bit of a build. The first time it actually looks like an aeroplane.

The wing mountings are angled to provide the correct dihedral for the wings, so that made life a bit easier, and the joints are pretty good. Not perfect enough to be left unfilled but there's no need to resort to plastic shims or buckets of filler which is always nice 8-) .

At the moment all the joints and seams have received a bead of Mr Surfacer and next time I'm at the bench I'll attack this with isopropanol to smooth it down.

Hopefully it'll only take one go :roll:
COLD WAR S.I.G. LEADER

Wherever there's danger, wherever there's trouble, wherever there's important work to be done....I'll be somewhere else building a model!
User avatar
Molly-new
Modelling Gent and Scholar
Posts: 2355
Joined: May 4th, 2011, 8:42 pm
Location: Stoke-on-Trent, England

Re: Any Excuse...

Post by Molly-new »

Lovely work so far, and a very informative thread. I love the quality of the pictures, I take it you have a decent camera and not just a point and shoot job like me?
Airfix WWII Aircraft Of The Aces.
Completed - 10
Building -
Pending -4
User avatar
Ernie
The Bug Has Well And Truly Bitten
Posts: 354
Joined: May 1st, 2011, 3:09 am
Location: A small town in New Hampshire

Re: Any Excuse...

Post by Ernie »

Awesome work! The little Mig is looking great; I have the same kit, as well as the Amodel one, and this looks to be the better of the two. I am glad to see one going together, especially as you are doing such a fine job on it, inspiration for me to have a go at mine, thank you !
Ernie
ShaunW
NOT the sheep
Posts: 26188
Joined: November 26th, 2011, 6:11 pm
Location: Pontefract West Yorkshire

Re: Any Excuse...

Post by ShaunW »

Excellent work Darryl and, as always, an interesting and detailed build thread. I wonder why on earth did MPM think it a good idea to provide tabs for the wings and tailplanes and then block off the mounting slots? :???:
Doing - Tamiya 1/35th Universal Carrier.

Work is the curse of the modelling classes!
IPMS#12300
User avatar
mjatx
Modelling Gent and Scholar
Posts: 1396
Joined: April 10th, 2014, 10:13 pm
Location: Austin, Texas, USA

Re: Any Excuse...

Post by mjatx »

Dazzled wrote:
Image

I love this bit of a build. The first time it actually looks like an aeroplane.
I know what you mean...now you realistically start flying it around the bench making strafing runs on other projects, or just practicing your acrobatic flying!

;-)

It's really looking great! Nice work on the cockpit and tail pipes.
Locked

Return to “Classic Jets”