Paul's Tiger Meet F/A-18 Hornet **FINISHED**
-
PaulBradley

- Staring out the window
- Posts: 21219
- Joined: April 6th, 2011, 3:08 pm
- Location: Flagstaff, AZ
Paul's Tiger Meet F/A-18 Hornet **FINISHED**
I'll be doing a Hasegawa F/A-18 Hornet and using Syhart decals for a Tiger meet aircraft. Pics to follow. 
Paul
За демократію і незалежний Україну
"For Democracy and a Free Ukraine"
За демократію і незалежний Україну
"For Democracy and a Free Ukraine"
-
PaulBradley
- Staring out the window
- Posts: 21219
- Joined: April 6th, 2011, 3:08 pm
- Location: Flagstaff, AZ
Re: Paul's Tiger Meet F/A-18 Hornet
Boxart:

I got this earlier on the year when Hasegawa blew out some of their stuff - I think I paid $10 each for two of these, one for SAF, the other for RAAF.
Parts:
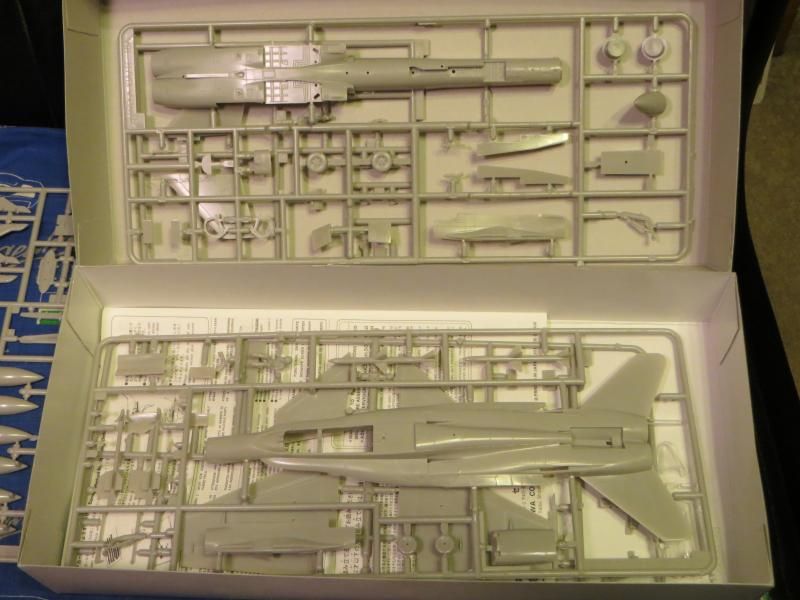
Your bog-standard Hasegawa F/A-18A kit, reasonably well regarded.
And the raison d'etre for the build, the Syhart Tiger Meet decals:
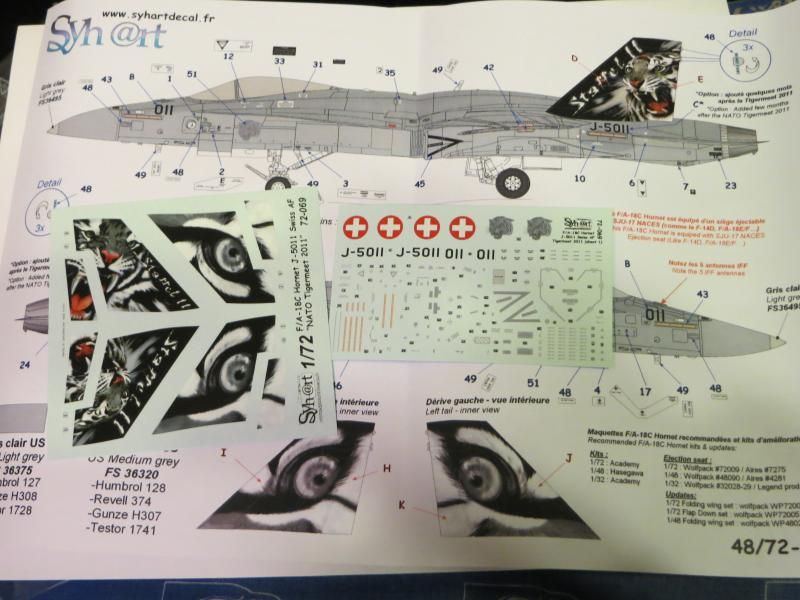
They are pretty spectacular and will make this model come alive.
Paul
За демократію і незалежний Україну
"For Democracy and a Free Ukraine"
За демократію і незалежний Україну
"For Democracy and a Free Ukraine"
-
PaulBradley
- Staring out the window
- Posts: 21219
- Joined: April 6th, 2011, 3:08 pm
- Location: Flagstaff, AZ
Re: Paul's Tiger Meet F/A-18 Hornet
Hmmm. Made a start on this, this morning, but I'm not loving this kit at all! I believe it dates from the late '80's and it shows - some light flash and soft detail, though it does have engraved panel lines.
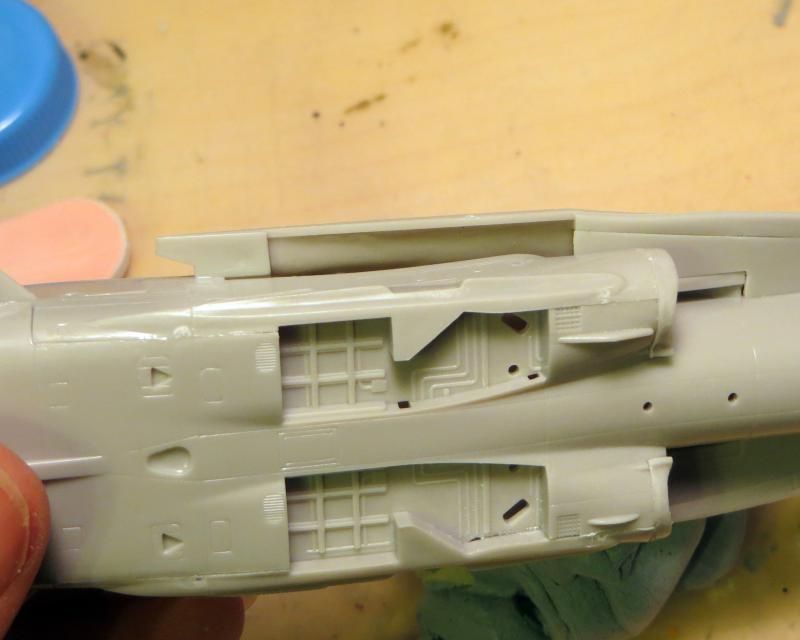
Hasegawa obviously created the moulds with multiple variants in mind, as you have to fix a new spine over the space where the second cockpit opening of the B-version is - this doesn't fit well. The engine bay fuselage side panels are separate parts - these don't fit well. The fuselage is split horizontally - these parts don't fit well......do you see a theme developing here?! Lots of dry-fitting and light fettling needed to get them approximate. The fuselage is currently drying in clamps and I expect a marathon filling and sanding session later..... Add to this the fact that the plastic is brittle and flaky and doesn't take well to sanding, and I've had a less than stellar experience so far....
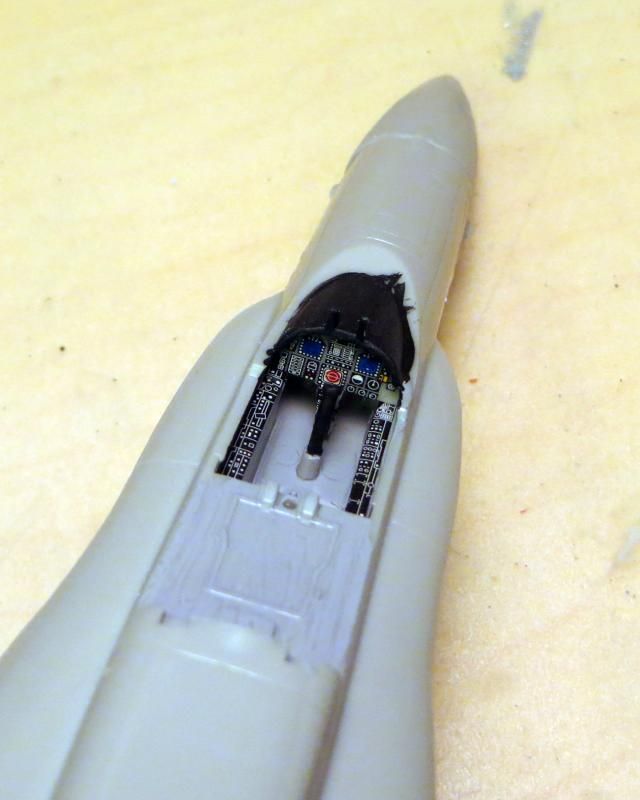
The cockpit is typical Hasegawa - very light on detail, but with nice decals for the IP and side consoles. The seat is moulded in two halves, vertically, and has a horrible seam down the middle as a result. I have a possible replacement resin seat, or I may use the pilot figure.
The best thing I can say for this kit at the moment is that it looks like an F/A-18.....
Pics later.
Hasegawa obviously created the moulds with multiple variants in mind, as you have to fix a new spine over the space where the second cockpit opening of the B-version is - this doesn't fit well. The engine bay fuselage side panels are separate parts - these don't fit well. The fuselage is split horizontally - these parts don't fit well......do you see a theme developing here?!
The cockpit is typical Hasegawa - very light on detail, but with nice decals for the IP and side consoles. The seat is moulded in two halves, vertically, and has a horrible seam down the middle as a result. I have a possible replacement resin seat, or I may use the pilot figure.
The best thing I can say for this kit at the moment is that it looks like an F/A-18.....
Pics later.
Paul
За демократію і незалежний Україну
"For Democracy and a Free Ukraine"
За демократію і незалежний Україну
"For Democracy and a Free Ukraine"
-
Jagewa

- Modelling Gent and Scholar
- Posts: 2752
- Joined: April 6th, 2011, 2:18 am
- Location: Christchurch, New Zealand
- Contact:
Re: Paul's Tiger Meet F/A-18 Hornet
Hmm I was wondering if it was the old kit, I've got one in the and the sprues looked very similar. To me it looks like it was based on the early prototypes. Ignore the details, and don't look at any detailed reference photos and you'll be fine...
Those decals would distract you from any detail differences anyway, they are cracking.
Those decals would distract you from any detail differences anyway, they are cracking.
-
PaulBradley
- Staring out the window
- Posts: 21219
- Joined: April 6th, 2011, 3:08 pm
- Location: Flagstaff, AZ
Re: Paul's Tiger Meet F/A-18 Hornet
I think Hasegawa made a second, fresh attempt at the kit in the late 80's - their earlier version was based on the early production A-model. Nevertheless, it doesn't build particularly well. However, I have got rid of most of the issues, and added filler to some others. Most of the seam lines appear to mimic real-life panel lines, so once they were sanded back a bit, the look better.
And as you, rightly, point out, the decals should distract from most of the issues................he said, hopefully......
And as you, rightly, point out, the decals should distract from most of the issues................he said, hopefully......
Paul
За демократію і незалежний Україну
"For Democracy and a Free Ukraine"
За демократію і незалежний Україну
"For Democracy and a Free Ukraine"
-
PaulBradley
- Staring out the window
- Posts: 21219
- Joined: April 6th, 2011, 3:08 pm
- Location: Flagstaff, AZ
Re: Paul's Tiger Meet F/A-18 Hornet
OK, some photos of the build so far - as they say on the Underground - Mind The Gap!
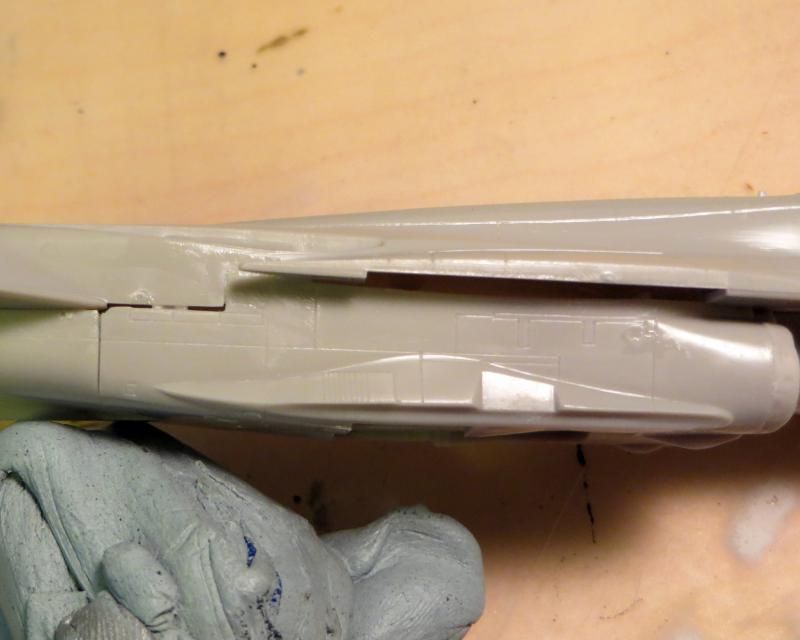
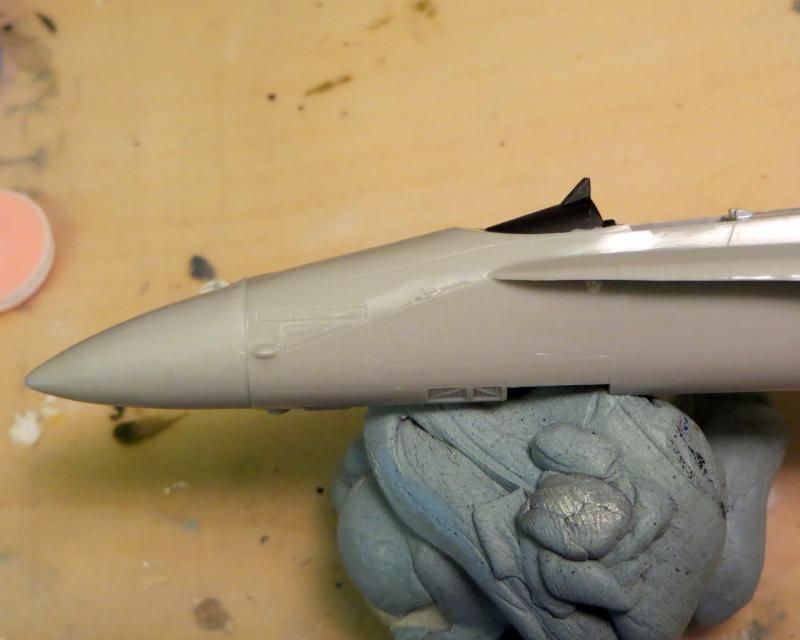
That nasty diagonal seam line on the nose means that not only do I lose all the fine panel lines up front, but I also had to trim off some lumps that are supposed to be there....!


That nasty diagonal seam line on the nose means that not only do I lose all the fine panel lines up front, but I also had to trim off some lumps that are supposed to be there....!
Paul
За демократію і незалежний Україну
"For Democracy and a Free Ukraine"
За демократію і незалежний Україну
"For Democracy and a Free Ukraine"
-
PaulBradley
- Staring out the window
- Posts: 21219
- Joined: April 6th, 2011, 3:08 pm
- Location: Flagstaff, AZ
Re: Paul's Tiger Meet F/A-18 Hornet
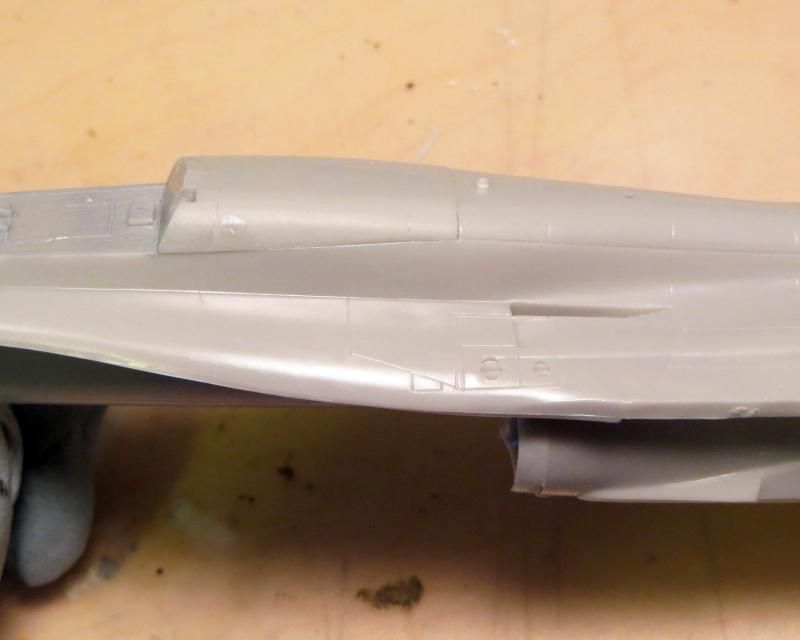
OK, filling and sanding done - doesn't look to bad in the light of a new day...!
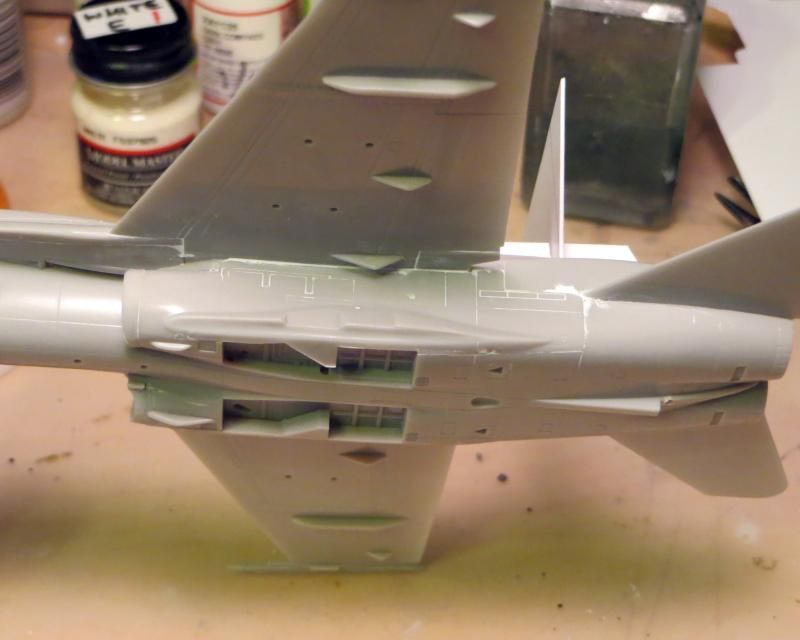
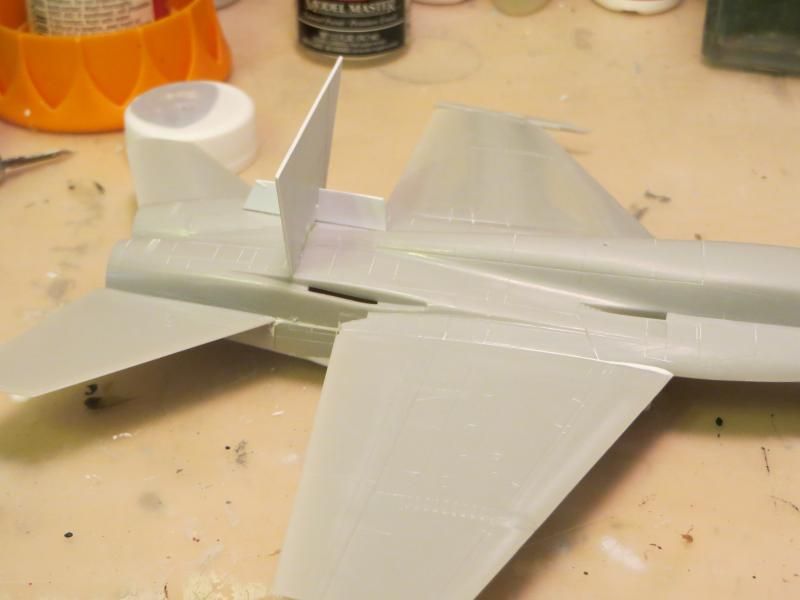
Next step was to add the vertical tailplanes. These sit at a 25 degree angle, and the kit's attachment slots are a bit loose. In order to get both at the correct, and the same, angle, I made up a quick jig from plastic card, using a protractor:
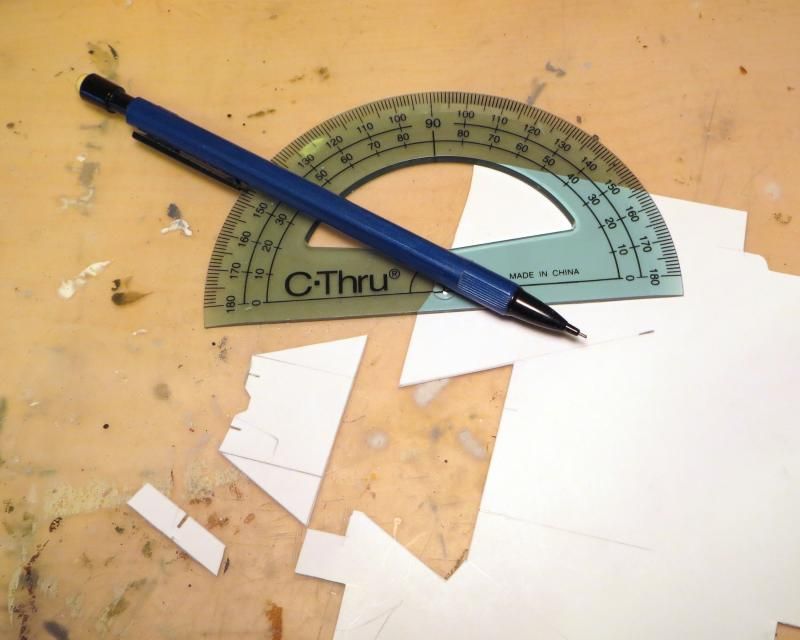
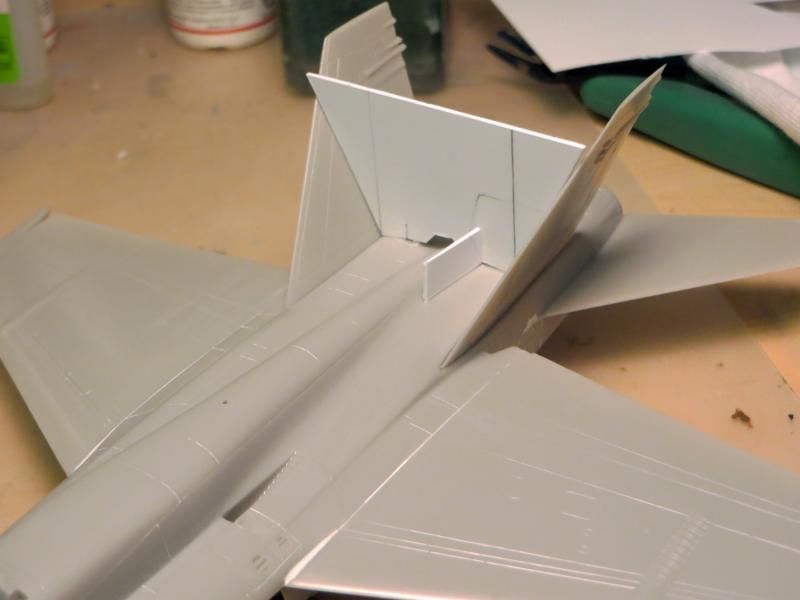
This was set in place with white glue and allowed to set overnight:
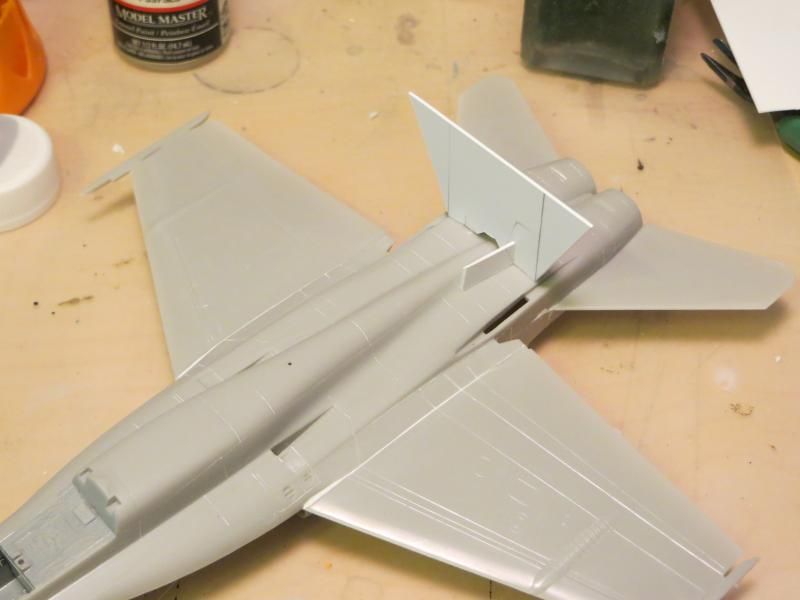
This morning, I used superglue to set the tailplanes in place, held against the jig and sprayed with accelerator - et viola:
Just need to fill some small seams with Perfect Plastic Putty (the best for this sort of app)


Next step was to add the vertical tailplanes. These sit at a 25 degree angle, and the kit's attachment slots are a bit loose. In order to get both at the correct, and the same, angle, I made up a quick jig from plastic card, using a protractor:

This was set in place with white glue and allowed to set overnight:

This morning, I used superglue to set the tailplanes in place, held against the jig and sprayed with accelerator - et viola:

Just need to fill some small seams with Perfect Plastic Putty (the best for this sort of app)
Paul
За демократію і незалежний Україну
"For Democracy and a Free Ukraine"
За демократію і незалежний Україну
"For Democracy and a Free Ukraine"

Re: Paul's Tiger Meet F/A-18 Hornet
Alright, stop showing off!!, a protractor indeed!!!. 
Hoping to return to modelling sometime this year!! 
Owner of Marky's Model Emporium since 2013!.
Owner of Marky's Model Emporium since 2013!.
-
splash

- Senior Service Rotorhead
- Posts: 13828
- Joined: May 1st, 2011, 11:02 am
- Location: Somerset England
Re: Paul's Tiger Meet F/A-18 Hornet
That's a handy jig.
My work bench is starting to look like Portsmouth Naval Dockyard.
-
Jagewa
- Modelling Gent and Scholar
- Posts: 2752
- Joined: April 6th, 2011, 2:18 am
- Location: Christchurch, New Zealand
- Contact:
Re: Paul's Tiger Meet F/A-18 Hornet
You're just trying to make applying those tail decals as awkward as possible arn't you...
-
PaulBradley
- Staring out the window
- Posts: 21219
- Joined: April 6th, 2011, 3:08 pm
- Location: Flagstaff, AZ
Re: Paul's Tiger Meet F/A-18 Hornet
Cheers, guys.
Jim, I have a cunning plan........
The kit has two sets of vertical tails, for the A-model and the C. I've glued the C ones in place and will used the A's to trim the decals to size before application.
Jim, I have a cunning plan........
The kit has two sets of vertical tails, for the A-model and the C. I've glued the C ones in place and will used the A's to trim the decals to size before application.
Paul
За демократію і незалежний Україну
"For Democracy and a Free Ukraine"
За демократію і незалежний Україну
"For Democracy and a Free Ukraine"
-
shangos70
- Modelling Gent and Scholar
- Posts: 4422
- Joined: May 1st, 2011, 11:14 am
- Location: Doncaster, Socialist Republic of South Yorkshire.
Re: Paul's Tiger Meet F/A-18 Hornet
Looking good Paul despite Hasegawa's best attempts to thwart you. I bet you are glad you didn't pay top whack for them.
-
PaulBradley
- Staring out the window
- Posts: 21219
- Joined: April 6th, 2011, 3:08 pm
- Location: Flagstaff, AZ
Re: Paul's Tiger Meet F/A-18 Hornet
Cheers, Shane - oh, yes - I can't imagine paying $40 for this.....! 
Paul
За демократію і незалежний Україну
"For Democracy and a Free Ukraine"
За демократію і незалежний Україну
"For Democracy and a Free Ukraine"

Re: Paul's Tiger Meet F/A-18 Hornet
Great idea on the jig Paul.
Besting 60 years of mediocre building of average kits in the stand off scale
-
despondman

- Active Participant
- Posts: 773
- Joined: July 15th, 2013, 6:49 pm
- Location: Lincolnshire
Re: Paul's Tiger Meet F/A-18 Hornet
Nice work on the tailplanes, and thanks for the photo's showing how you did it. Always good to learn a new technique.
Looking forward to this as the decals are looking pretty smart.
Looking forward to this as the decals are looking pretty smart.