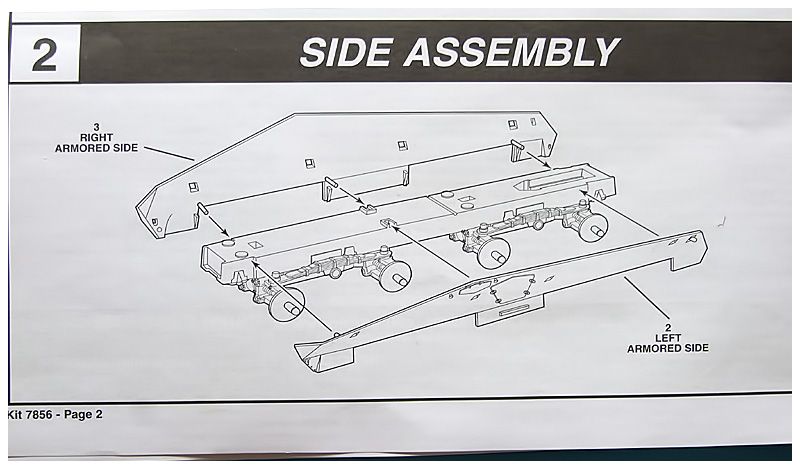
Titan's Sdkfz. 232 ***Finished***

Celebrating Monograms kits, whether in original form or not.
Runs October 4th to November 2nd. Your GBL is Sir T.
User avatar
Titan
Modelling Gent and Scholar
Posts: 1835
Joined: November 13th, 2011, 10:38 pm
Location: The windswept Isle of Cornwall

Titan's Sdkfz. 232 ***Finished***

Post by Titan »

My entry into this GB will be this kit.....and as ever the sprue shots will be up tomorrow.
Image

My original intention was to build the 1/48 Me262 but the Panzerspahwagen happened to be in the first box I came to and as there is a lack of armour in this GB so far I thought why not.
I may even attach the tarp and put it all on a base to make a dio depending on time of course.

Regards
Mark
Regards
Mark
_________________________________________
My models are never perfect, but I kinda like them.
User avatar
Stuart
Raider of the Lost Ark Royal
Posts: 19451
Joined: February 25th, 2013, 4:55 pm
Location: North Wales
Contact:

Re: Titan's Sdkfz. 232

Post by Stuart »

Hi Mark - Welcome aboard!

Wow - I didn't even know Monogram DID Armor! Good choice, and nice to have another non aircraft GB.

Cheers

Stuart
Stuart Templeton I may not be good but I'm slow...

My Blog: https://stuartsscalemodels.blogspot.com/
User avatar
MarkyM607
Modelling Gent and Scholar
Posts: 9153
Joined: January 5th, 2013, 1:16 pm
Location: Cambs

Re: Titan's Sdkfz. 232

Post by MarkyM607 »

A non aircraft build, why it's witchcraft I say!! :lol: :ha:
Hoping to return to modelling sometime this year!! :lol:
Owner of Marky's Model Emporium since 2013!.
User avatar
Titan
Modelling Gent and Scholar
Posts: 1835
Joined: November 13th, 2011, 10:38 pm
Location: The windswept Isle of Cornwall

Re: Titan's Sdkfz. 232

Post by Titan »

Oh no witchcraft here Marky, the only magic used will be in seeing if I can make those figures look half decent.... :-D

Sprue shots.
Just a little flash here and there and the detail is soft in places.
Image
Image
Image
Image

Image

The decals were printed in 2011 the kit though was molded in 1974...
Image

I'm looking forward to this, I will probably build it with everything opened up and maybe stick it on a base if time permits.

Regards
Mark
Regards
Mark
_________________________________________
My models are never perfect, but I kinda like them.
User avatar
TimJ
Modelling Gent and Scholar
Posts: 4292
Joined: May 1st, 2011, 12:54 am
Location: Oldbury, West Midlands

Re: Titan's Sdkfz. 232

Post by TimJ »

Looks interesting. I'll be watching this one.
2020 A:35 B:18. 2021 A: 51 B:25 C:21 2022 A:63 B:23 C:11 2024 A:9 B:4 C:15
User avatar
Clashcityrocker
Modelling Gent and Scholar
Posts: 10823
Joined: May 1st, 2011, 12:31 am
Location: Adelaide. South Australia

Re: Titan's Sdkfz. 232

Post by Clashcityrocker »

I remember building the Monogram Weasel way back before the world had internet. Think it was one of Shep Paines builds as there was some info on the instructions about the diorama used to display the finished build.
I notice the swastikas in the Afrika Korps symbols are back to front :???:

Nigel
User avatar
Titan
Modelling Gent and Scholar
Posts: 1835
Joined: November 13th, 2011, 10:38 pm
Location: The windswept Isle of Cornwall

Re: Titan's Sdkfz. 232

Post by Titan »

I completely missed that Nigel...well spotted.
I took a look at the instructions and guess what they are the wrong way around on those as well. :shock:
Image
Image
Very strange indeed, oh well I will see what I can fudge when the decals have to be applied maybe I have something suitable to cover them with, or maybe if I am lucky they can be turned over...

Well I started to put this together and have finished step one...no problems there, in actual fact everything has its own particular shaped slot so you can't insert the pieces into the incorrect positions.....unless you are ham fisted of course....
Image
Image

Regards
Mark
Regards
Mark
_________________________________________
My models are never perfect, but I kinda like them.
User avatar
Titan
Modelling Gent and Scholar
Posts: 1835
Joined: November 13th, 2011, 10:38 pm
Location: The windswept Isle of Cornwall

Re: Titan's Sdkfz. 232

Post by Titan »

Step two completed.
Image
Image
Image

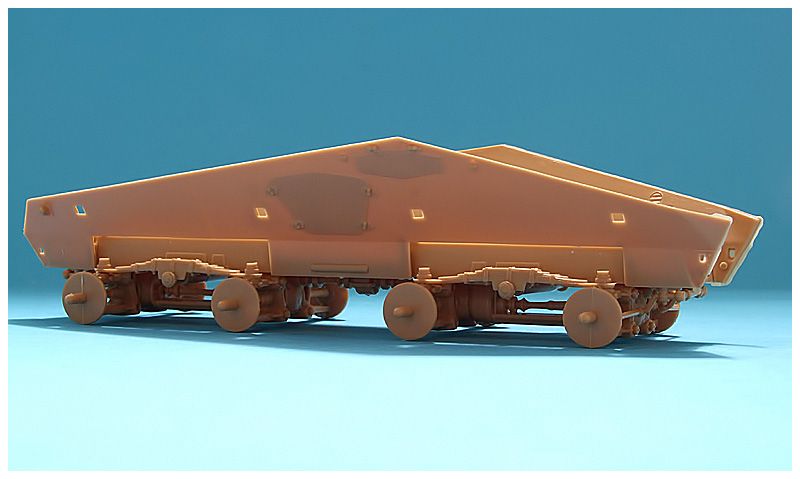
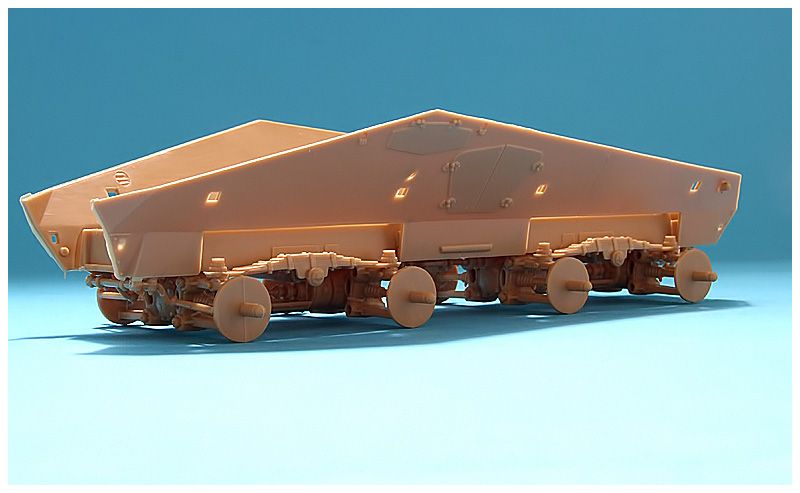
All wheels touching down.

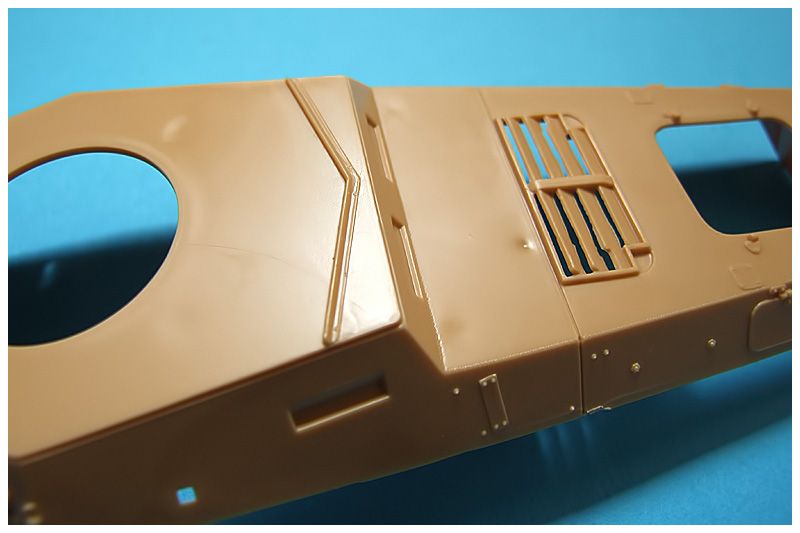
Had a look at the top deck and there a couple of sink marks that will need addressing so will be filled with some Mr Surfacer and then sanded.
Image

Then I will start on the engine bay and see how it comes out, I'm hoping that even though the detail is soft that a bit of dry brushing will be enough to bring what there is in terms of detail out but if not then I could always leave the engine bay doors closed.
So best get that compressor fired up and start spraying.

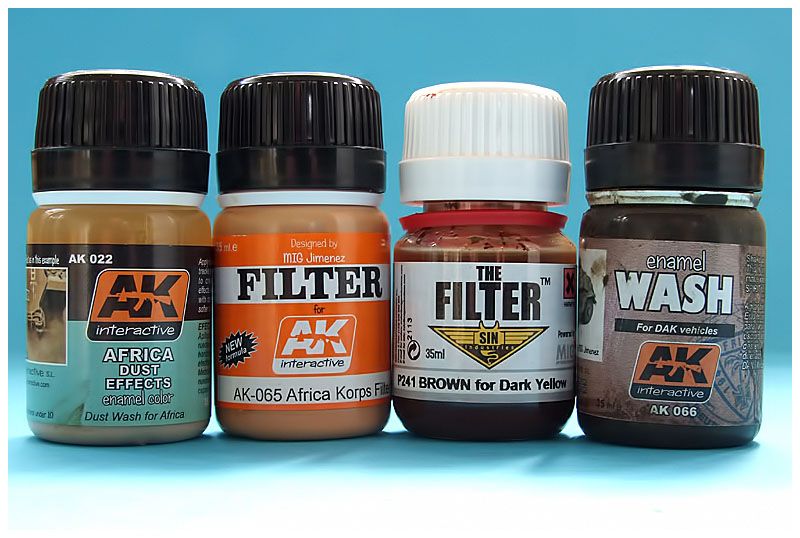
I guess I better show you the paints/washes and pigments that I will be using throughout this build.

Xtracrylics....I know some of you don't get on with this stuff but I have to say that now I don't have a problem with it, it sprays well and has quite a smooth and tough finish, I use it's own brand of thinners.
Image

Washes and filters
These are great and really help to bring the model to life as it were, depending on how this build goes will dictate how much time/effort I am willing to put into the weathering.
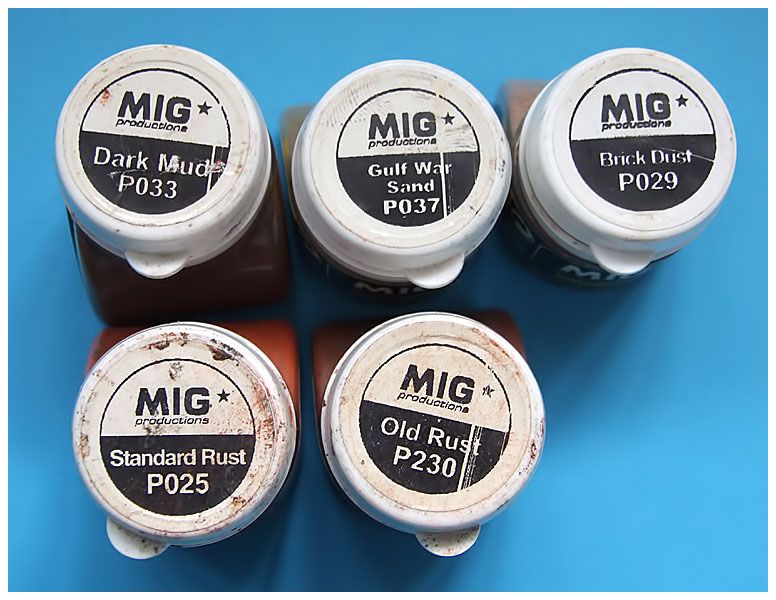
Image

Pigments.
Use these all the time for armour, around the wheels, tracks and under tray but not just there will use these on top of the vehicle for dust and mud effects with the rust being used on mufflers and exhausts.
Image

Other paints will be used but these are the main weapons of choice.

Regards
Mark
Regards
Mark
_________________________________________
My models are never perfect, but I kinda like them.
User avatar
Titan
Modelling Gent and Scholar
Posts: 1835
Joined: November 13th, 2011, 10:38 pm
Location: The windswept Isle of Cornwall

Re: Titan's Sdkfz. 232

Post by Titan »

On to step three.
Image

I've painted the engine bay and gunged it up with a bit of wash and added some dings and scratches here and there. Now whilst not very accurate it will be passable for this build.
Image

Then it was glued into place and the top hull then glued to the base.
Image

The sink marks on top of the hull have now been filled with Mr Surfacer and will be sanded smooth once it has time to cure.
The seams where the top joins the base will also get a clean up.
Image

Regards
Mark
Regards
Mark
_________________________________________
My models are never perfect, but I kinda like them.
User avatar
Stuart
Raider of the Lost Ark Royal
Posts: 19451
Joined: February 25th, 2013, 4:55 pm
Location: North Wales
Contact:

Re: Titan's Sdkfz. 232

Post by Stuart »

Great work! At this rate you'll have it finished by the end of the week and you'll be able to do that 262!

I love that engine!

Cheers

Stuart
Stuart Templeton I may not be good but I'm slow...

My Blog: https://stuartsscalemodels.blogspot.com/
User avatar
Titan
Modelling Gent and Scholar
Posts: 1835
Joined: November 13th, 2011, 10:38 pm
Location: The windswept Isle of Cornwall

Re: Titan's Sdkfz. 232

Post by Titan »

I find that it's the painting that takes the longest Stuart, the actual building usually I find the quickest part of the process more so wheeled vehicles than tracked.
I plan on drilling out the air horns as they are just a lump of plastic as is and see if I can use some crystal gems for light lenses tomorrow but that will be all I will have time for unfortunately.

Regards
Mark
Regards
Mark
_________________________________________
My models are never perfect, but I kinda like them.
User avatar
Clashcityrocker
Modelling Gent and Scholar
Posts: 10823
Joined: May 1st, 2011, 12:31 am
Location: Adelaide. South Australia

Re: Titan's Sdkfz. 232

Post by Clashcityrocker »

It's looking very nice. Gotta love some of these German armour designs.

Nigel
User avatar
Titan
Modelling Gent and Scholar
Posts: 1835
Joined: November 13th, 2011, 10:38 pm
Location: The windswept Isle of Cornwall

Re: Titan's Sdkfz. 232

Post by Titan »

They certainly did have some strange and wonderful designs that's for sure Nigel.
I managed to get more done this morning than I anticipated.

Steps 4 and 5.
Image
Image

I will leave off the mufflers and shovel untill the main bulk of the painting is over as I don't want to be knocking them of during the weathering phase.
I dry fitted the fenders and found that I needed to open up the locating holes along the holes to facilitate the correct fit. These will get a sanding along the edges where they were attached to the sprue.
Image
Image

As I said in the above post the air horns were lumps of plastic that needed to be drilled out.
Image

And now afterwards they are lumps of plastic with holes in them....lol
Image

I found some suitable crystals for the lenses, they fit ok and I think these will be good enough to use.
Image

Step 6
Image

These were a quick five minute job to test fit and were attached just to see how it sits on the tyres, these will be removed and left of the model until the painting/weathering is completed as I want to get inbehind them with some pigments.
Image
Image

Regards
Mark
Regards
Mark
_________________________________________
My models are never perfect, but I kinda like them.
User avatar
Titan
Modelling Gent and Scholar
Posts: 1835
Joined: November 13th, 2011, 10:38 pm
Location: The windswept Isle of Cornwall

Re: Titan's Sdkfz. 232

Post by Titan »

Moving along swiftly......
I've given the main parts a light coat of matt black and just attached the turret temporarily as it will be painted and weathered separately.
The gun barrels have been drilled out and everything else that could be attached without fear of being knocked off later have been....well attached. The sink marks have now disappeared thanks to Mr Surfacer and some sanding.
Image
Image
Image

And you may note also that the flare boxes have now been turned the correct way around and glued.

Regards
Mark
Regards
Mark
_________________________________________
My models are never perfect, but I kinda like them.
User avatar
TimJ
Modelling Gent and Scholar
Posts: 4292
Joined: May 1st, 2011, 12:54 am
Location: Oldbury, West Midlands

Re: Titan's Sdkfz. 232

Post by TimJ »

Quick work. It looks like a good kit, despite it's age.
2020 A:35 B:18. 2021 A: 51 B:25 C:21 2022 A:63 B:23 C:11 2024 A:9 B:4 C:15
Locked

Return to “Monogram Kit GB”