A rail car interior ** Finished **
-
JohnRatzenberger

- Why is he so confused ?
- Posts: 15728
- Joined: April 5th, 2011, 3:42 pm
- Location: Living on a sandbar - Nags Head, NC.
Re: A rail car interior
Yes, while of two different periods, I think my wood panel idea sound enough. I must stop my self before I get into lighting - my excuse will be that the bulbs might ignite the cardboard 
John Ratzenberger 
It's my model and I'll do what I want with it.
It's my model and I'll do what I want with it.
-
iggie

- Modelling Gent and Scholar
- Posts: 23424
- Joined: July 31st, 2013, 11:04 am
- Location: North Somercotes, Lincolnshire
- Contact:
Re: A rail car interior
LEDs won't.......
Best wishes
Jim
If you can walk away from a landing, it's a good landing. If you use the airplane the next day, it's an outstanding landing
"Never put off till tomorrow, what you can do the day after tomorrow"
Jim
If you can walk away from a landing, it's a good landing. If you use the airplane the next day, it's an outstanding landing
"Never put off till tomorrow, what you can do the day after tomorrow"
-
JohnRatzenberger
- Why is he so confused ?
- Posts: 15728
- Joined: April 5th, 2011, 3:42 pm
- Location: Living on a sandbar - Nags Head, NC.
Re: A rail car interior
I know, see word "excuse", didn't say "good excuse"
John Ratzenberger
It's my model and I'll do what I want with it.
It's my model and I'll do what I want with it.
-
splash

- Senior Service Rotorhead
- Posts: 13828
- Joined: May 1st, 2011, 11:02 am
- Location: Somerset England
Re: A rail car interior
will it have little No Smoking triangle stickers on the windows?
My work bench is starting to look like Portsmouth Naval Dockyard.
-
JohnRatzenberger
- Why is he so confused ?
- Posts: 15728
- Joined: April 5th, 2011, 3:42 pm
- Location: Living on a sandbar - Nags Head, NC.
Re: A rail car interior
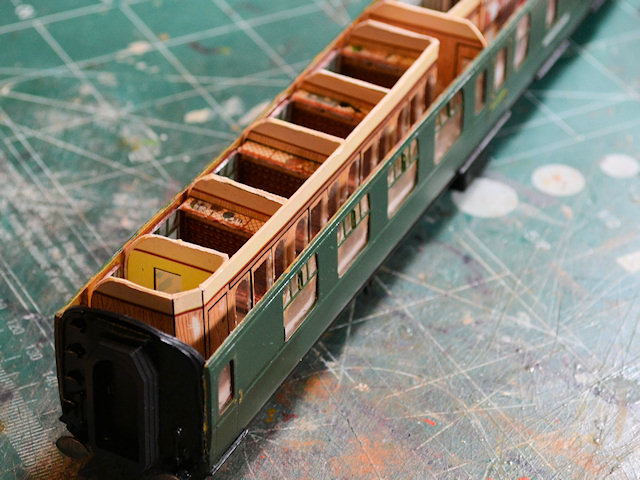
Here we are, with both major compartment walls up.

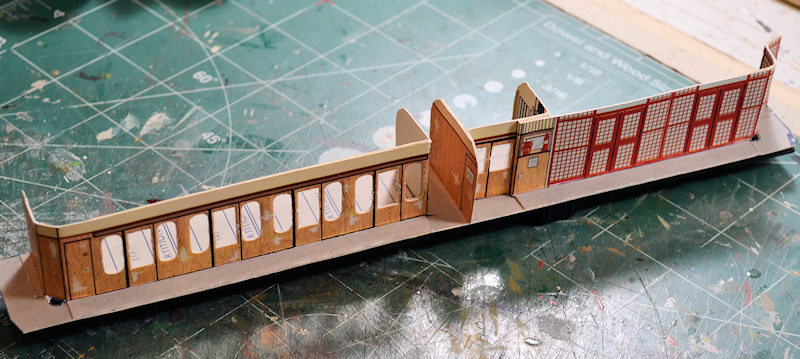
I am still futzing with paint on the car walls, not very organized or efficient, but I can start the interior detail and will.
I am still futzing with paint on the car walls, not very organized or efficient, but I can start the interior detail and will.
John Ratzenberger
It's my model and I'll do what I want with it.
It's my model and I'll do what I want with it.
-
SJPONeill

- Modelling Gent and Scholar
- Posts: 3525
- Joined: May 1st, 2011, 12:01 am
- Location: Near the Spiral, NZ.
- Contact:
Re: A rail car interior
That's coming along nicely, John, I'm glad that you opted to bring this one into the GB...
Please critique my posts honestly i.e. say what you think so I can learn and improve...
The World According To Me
The World According To Me
-
JohnRatzenberger
- Why is he so confused ?
- Posts: 15728
- Joined: April 5th, 2011, 3:42 pm
- Location: Living on a sandbar - Nags Head, NC.
Re: A rail car interior
Yeah, me too - again, another "test run" as I didn't fully look at related things, like painting the car interior, that needed to be done. Now the preprinted wood finish on the card has caused me to forget about everything I knew about same on plastic and I've been screwing around with it for days 
John Ratzenberger
It's my model and I'll do what I want with it.
It's my model and I'll do what I want with it.
-
JohnRatzenberger
- Why is he so confused ?
- Posts: 15728
- Joined: April 5th, 2011, 3:42 pm
- Location: Living on a sandbar - Nags Head, NC.
Re: A rail car interior
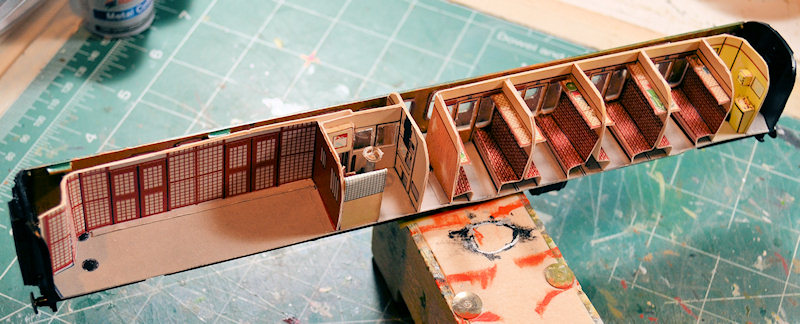
The four compartments and the toilet are in. I didn't read the instructions when cutting the compartments and made 4 individual one - turned out it should have been two pairs, so I dutifully fixed that up .... then by the time I got done installing them, I'm not sure why it mattered.

I have some pushing and pulling to get the seats a bit more uniform and comfortable, but now we're on to details.
I had painted wood walls for the car then framed the windows with paint, then forum the glass overlapped all that - and didn't fit well - so after a couple days futzing I think all that is done .... Oops, forgot the frames & bars ... but anyway I can soon get one side & both ends glued to the floor and be ready to fit the interior properly.
Much of this has been exploratory, not being used to the kits individually or together, and we'll treat the outcome as "lessons learned" for when I get them out and do them for real ...
John Ratzenberger
It's my model and I'll do what I want with it.
It's my model and I'll do what I want with it.
-
JohnRatzenberger
- Why is he so confused ?
- Posts: 15728
- Joined: April 5th, 2011, 3:42 pm
- Location: Living on a sandbar - Nags Head, NC.
Re: A rail car interior
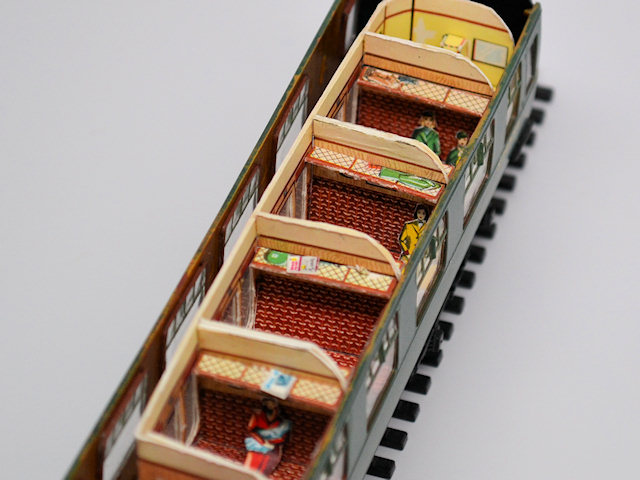
I have finished the car body itself. The guard's compartment is done. The toilet is done. The compartments have luggage racks. The interior is not glued in yet.
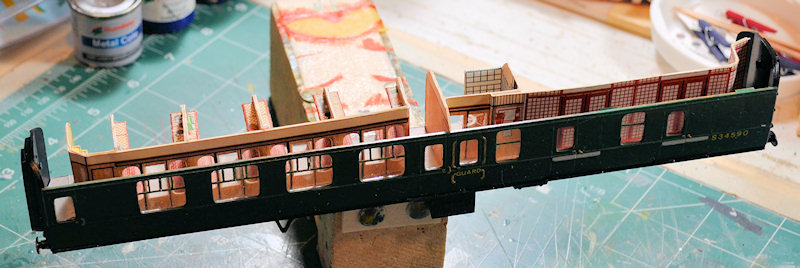
The instructions allow you to stop once the walls and compartments are up. The rest of the detail is optional.
All I have left is some goods for that compartment, some magazines & newspapers, and some people. And of course glue on the other car wall and the underside.
I should have no problem finishing this by the deadline, in fact the sooner I can, the more time I can spend on SS Olympic. I haven't been real careful as I've gone and need to get in there with some water color or color pencil and decorate some of the edges.
John Ratzenberger
It's my model and I'll do what I want with it.
It's my model and I'll do what I want with it.
-
Molly-new

- Modelling Gent and Scholar
- Posts: 2355
- Joined: May 4th, 2011, 8:42 pm
- Location: Stoke-on-Trent, England
Re: A rail car interior
What a fascinating kit, I am glad you decided to include it.
Airfix WWII Aircraft Of The Aces.
Completed - 10
Building -
Pending -4
Completed - 10
Building -
Pending -4
-
JohnRatzenberger
- Why is he so confused ?
- Posts: 15728
- Joined: April 5th, 2011, 3:42 pm
- Location: Living on a sandbar - Nags Head, NC.
Re: A rail car interior
Here we are - YAY !!
The passenger & goods compartment walls running the length of the car developed a curve in them. The goods car is as good as it'll get unless I'm more careful next time, but I see a way to cure the passenger compartment when I glue the other car wall on. I put lots of glue on the open end of the seats and then forced them to push against the car wall. And it pretty well worked.
Here's all the people, baggage, and various reading material. A remark was made about flat people, but note they can be rounded lengthwise, then bent at the knees and waist - it's slcose enough as you'll see.
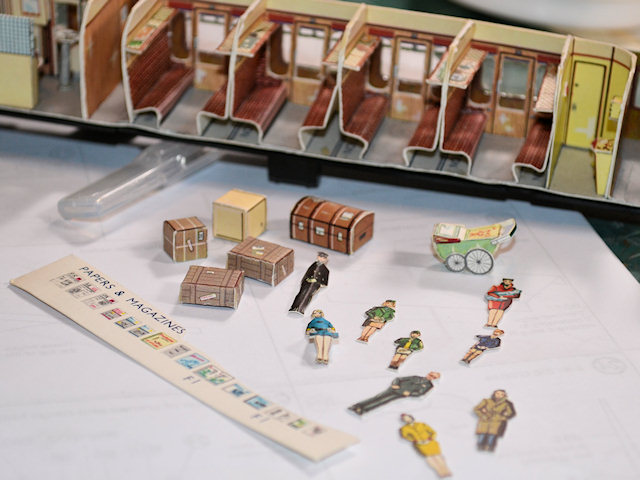
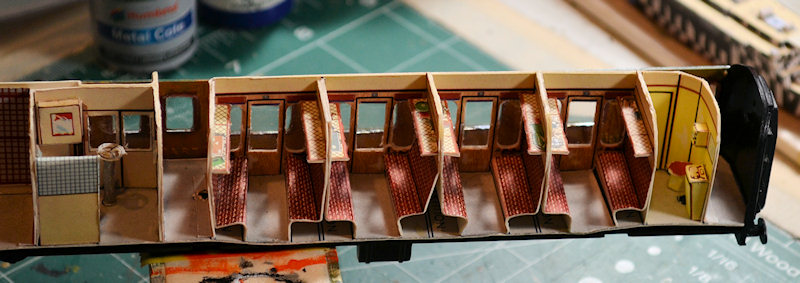
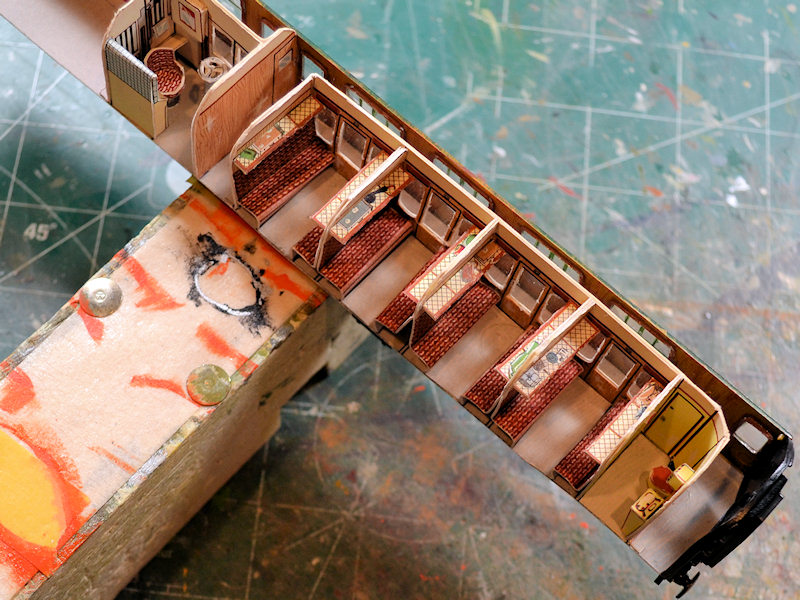
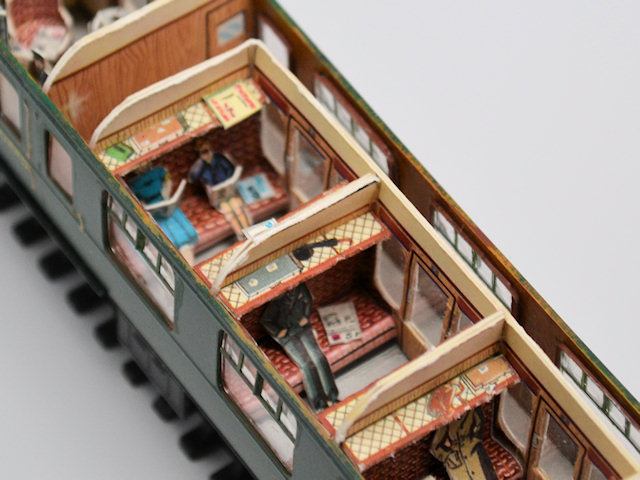
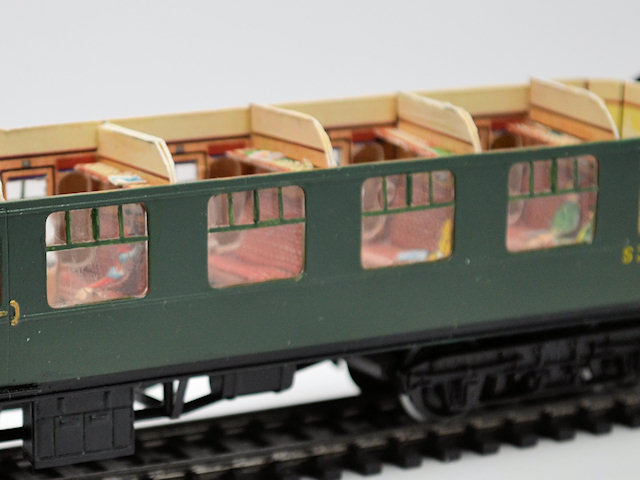
And here we are - the passenger compartment. I scattered people around -- looks like a mom with her son, pair of school kids, business woman, older dude, several others. There are papers & magazines scattered about - the mom & son are reading.

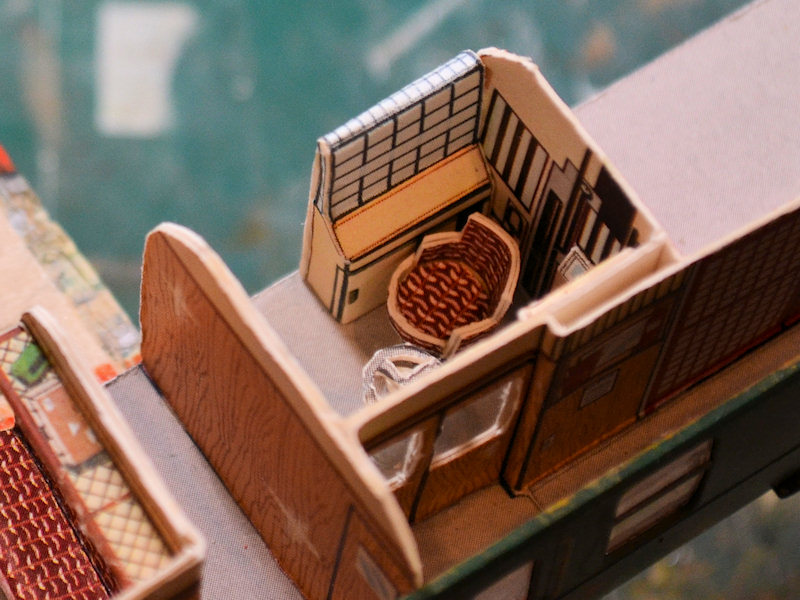
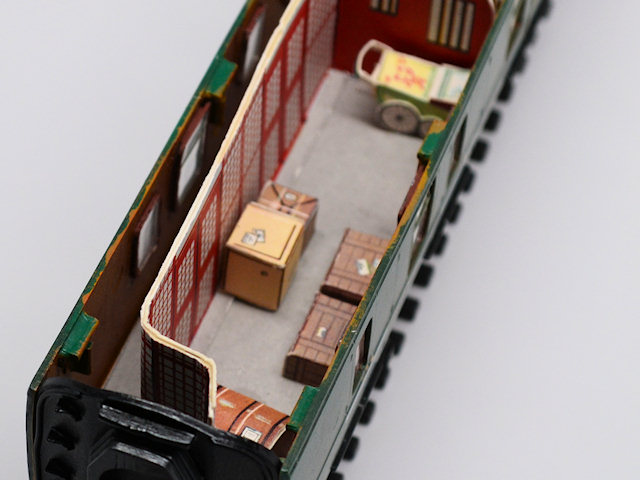
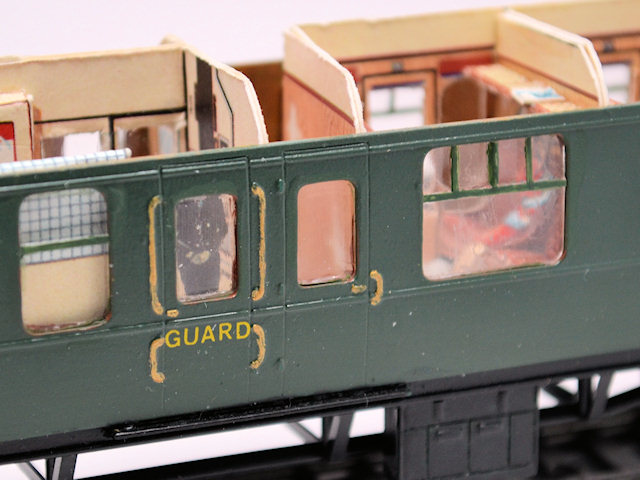
And here's the goods compartment. If you saw the mother with baby in the passenger compartment, you'll see her pram stored here for the journey. A trunk, tea chest, and a few boxes & parcels. The guard is standing in his station looking out the window.

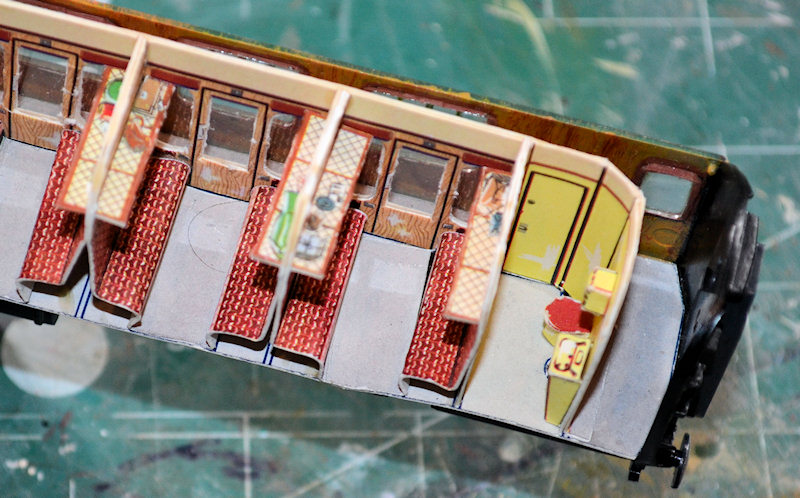
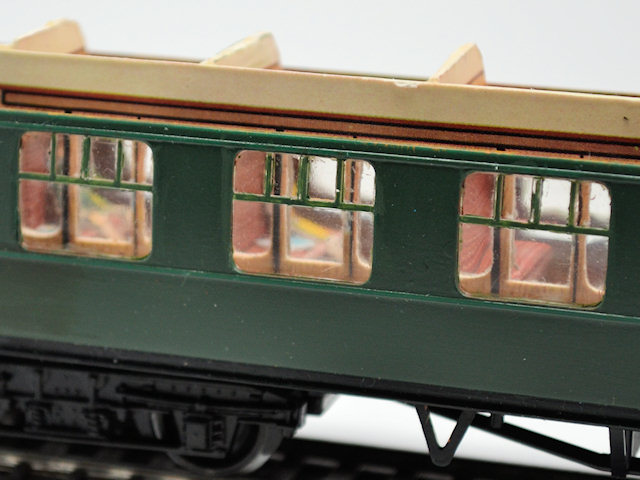
Here's the view from outside - you can see what all the detail is somewhat wasted unless you do some serious work on the windows - and have light. The last picture shows what you see with the roof on.
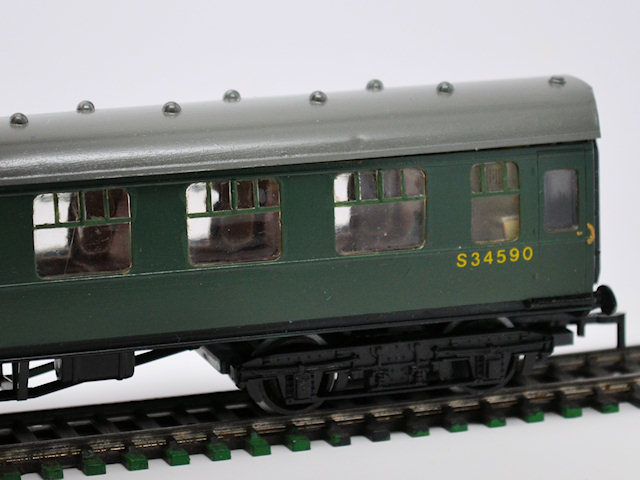
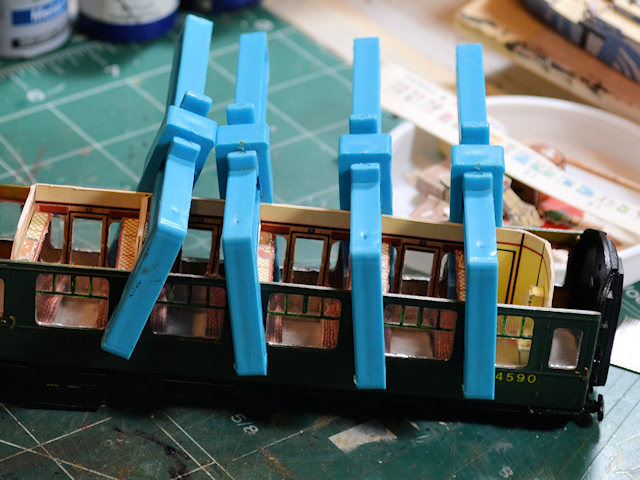
It's done for now. I had problems with the roof (slight curve up in the middle) and it won't lay neatly (my out-of-picture finger is holding it). I suspect a combo of gently bending and trimming the top of the card corridors and walls is needed, but not now. I do want to think about a few LEDs to light it on display.
I have enjoyed this very much - it has been on my "to-do" list for quite a while and Simon and Beany have got me busy and done. This is not a very good effort, but I learned a tremendous amount about the Kitmaster car and the Peco interior that will help me with my other ones. My two-three lessons learned are:
-- trim and fit all the car windows early on.
-- test fit the roof right after putting the corridor walls and compartments in.
-- don't mess about with various paints & varnishes; I have no idea what I was thinking.
-- put the Peco card into a copier and spit it out on 65lb & 20lb paper; it will be a lot easier to work with.
And, BTW, I will shamelessly take credit for a CBK in the process, two if you count the interior.
Again, great GB .... now off to the Olympic !
The passenger & goods compartment walls running the length of the car developed a curve in them. The goods car is as good as it'll get unless I'm more careful next time, but I see a way to cure the passenger compartment when I glue the other car wall on. I put lots of glue on the open end of the seats and then forced them to push against the car wall. And it pretty well worked.
Here's all the people, baggage, and various reading material. A remark was made about flat people, but note they can be rounded lengthwise, then bent at the knees and waist - it's slcose enough as you'll see.
And here we are - the passenger compartment. I scattered people around -- looks like a mom with her son, pair of school kids, business woman, older dude, several others. There are papers & magazines scattered about - the mom & son are reading.
And here's the goods compartment. If you saw the mother with baby in the passenger compartment, you'll see her pram stored here for the journey. A trunk, tea chest, and a few boxes & parcels. The guard is standing in his station looking out the window.
Here's the view from outside - you can see what all the detail is somewhat wasted unless you do some serious work on the windows - and have light. The last picture shows what you see with the roof on.
It's done for now. I had problems with the roof (slight curve up in the middle) and it won't lay neatly (my out-of-picture finger is holding it). I suspect a combo of gently bending and trimming the top of the card corridors and walls is needed, but not now. I do want to think about a few LEDs to light it on display.
I have enjoyed this very much - it has been on my "to-do" list for quite a while and Simon and Beany have got me busy and done. This is not a very good effort, but I learned a tremendous amount about the Kitmaster car and the Peco interior that will help me with my other ones. My two-three lessons learned are:
-- trim and fit all the car windows early on.
-- test fit the roof right after putting the corridor walls and compartments in.
-- don't mess about with various paints & varnishes; I have no idea what I was thinking.
-- put the Peco card into a copier and spit it out on 65lb & 20lb paper; it will be a lot easier to work with.
And, BTW, I will shamelessly take credit for a CBK in the process, two if you count the interior.
Again, great GB .... now off to the Olympic !
John Ratzenberger
It's my model and I'll do what I want with it.
It's my model and I'll do what I want with it.
-
SJPONeill
- Modelling Gent and Scholar
- Posts: 3525
- Joined: May 1st, 2011, 12:01 am
- Location: Near the Spiral, NZ.
- Contact:
Re: A rail car interior ** Finished **
Looks great and love the 2D figures...
Please critique my posts honestly i.e. say what you think so I can learn and improve...
The World According To Me
The World According To Me
-
splash
- Senior Service Rotorhead
- Posts: 13828
- Joined: May 1st, 2011, 11:02 am
- Location: Somerset England
Re: A rail car interior ** Finished **
Well done that is brilliant, I have really enjoyed watching your build.
Regards Splash
Regards Splash
My work bench is starting to look like Portsmouth Naval Dockyard.
-
Titan

- Modelling Gent and Scholar
- Posts: 1835
- Joined: November 13th, 2011, 10:38 pm
- Location: The windswept Isle of Cornwall
Re: A rail car interior ** Finished **
Brilliant John, it's a great build well done.
Regards
Mark
Regards
Mark
Regards
Mark
_________________________________________
My models are never perfect, but I kinda like them.
Mark
_________________________________________
My models are never perfect, but I kinda like them.
-
iggie
- Modelling Gent and Scholar
- Posts: 23424
- Joined: July 31st, 2013, 11:04 am
- Location: North Somercotes, Lincolnshire
- Contact:
Re: A rail car interior ** Finished **
Looks really good!
I'm not sure we had 'Dudes' back then, even in third.....

I'm not sure we had 'Dudes' back then, even in third.....
Best wishes
Jim
If you can walk away from a landing, it's a good landing. If you use the airplane the next day, it's an outstanding landing
"Never put off till tomorrow, what you can do the day after tomorrow"
Jim
If you can walk away from a landing, it's a good landing. If you use the airplane the next day, it's an outstanding landing
"Never put off till tomorrow, what you can do the day after tomorrow"