Titan's Octopus Tiger ***FINISHED***

Re: Titan's Octopus Tiger
Everything here is Yum Nummy. Good work.
Besting 60 years of mediocre building of average kits in the stand off scale
-
Titan

- Modelling Gent and Scholar
- Posts: 1835
- Joined: November 13th, 2011, 10:38 pm
- Location: The windswept Isle of Cornwall
Re: Titan's Octopus Tiger
Thanks Jeff, I actually fell a bit behind where I wanted to be as I was doing sick cover at work but I have managed to get the day off today and so ploughed on a bit more to get me back on schedule.
The axles were added and slotted in very well.
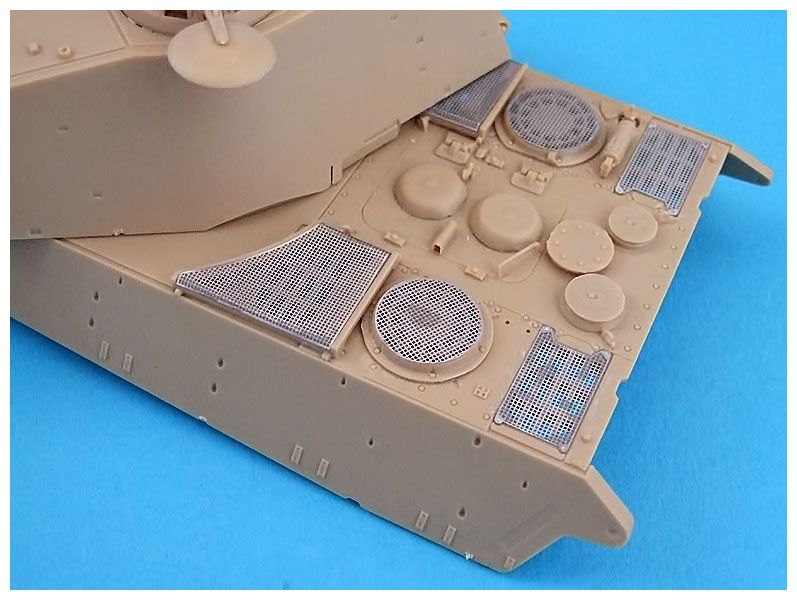
I added all the other little handles and mesh on the rear deck.
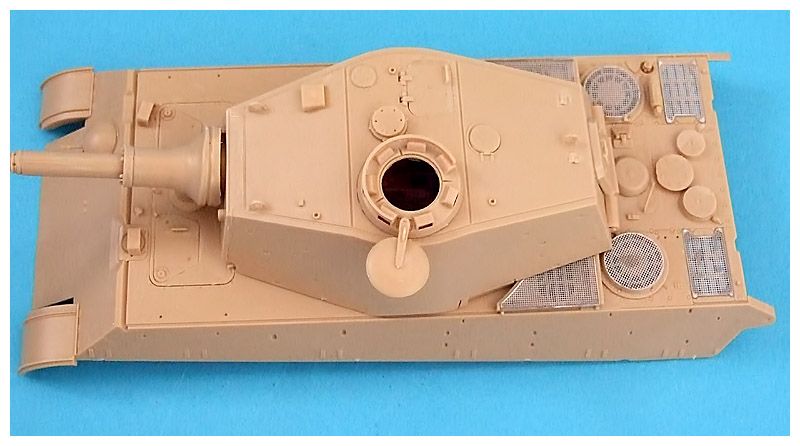
And added the rest of the cupola and MG.
Just a few bits to add to the turret to finish it and then it will be ready for a coat of primer talking of which I have sprayed the wheels and rims with primer and so the next job on those will be to give them a coat of proper paint when I can grab some time.
Regards
Mark
The axles were added and slotted in very well.


I added all the other little handles and mesh on the rear deck.

And added the rest of the cupola and MG.

Just a few bits to add to the turret to finish it and then it will be ready for a coat of primer talking of which I have sprayed the wheels and rims with primer and so the next job on those will be to give them a coat of proper paint when I can grab some time.
Regards
Mark
Regards
Mark
_________________________________________
My models are never perfect, but I kinda like them.
Mark
_________________________________________
My models are never perfect, but I kinda like them.

Re: Titan's Octopus Tiger
Looking nice, although your centipedes dead!!! 
Hoping to return to modelling sometime this year!! 
Owner of Marky's Model Emporium since 2013!.
Owner of Marky's Model Emporium since 2013!.
-
Titan
- Modelling Gent and Scholar
- Posts: 1835
- Joined: November 13th, 2011, 10:38 pm
- Location: The windswept Isle of Cornwall
Re: Titan's Octopus Tiger
Very good Marky.... 
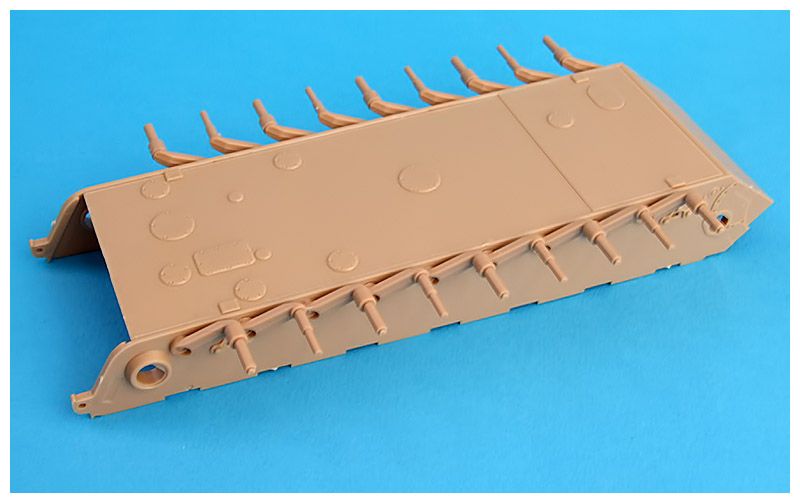
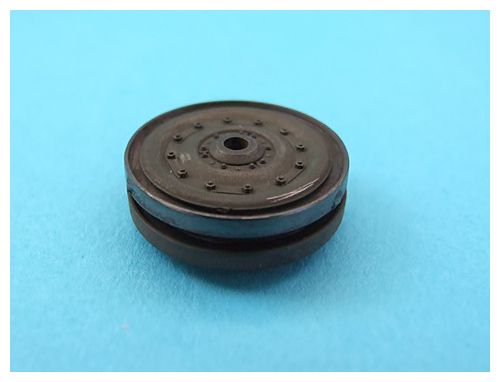
Well I've made a start on all the wheels and as these are steel rimmed road wheels they are going to have to be metalized....with a HB2 pencil.
The top wheel has had the pencil treatment whilst the lower on has not.
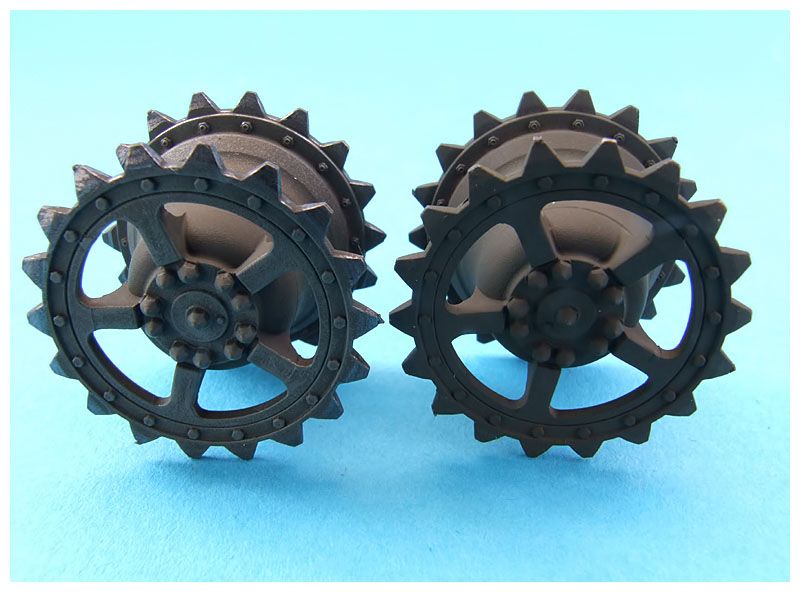
The drive wheel on the left of the next photo has also been started and some slight dry brushing shenanigans but the one on the right has not just in case you couldn't tell......
I fitted all of the wheels and drives also to see if they all touch the ground....phew they do but I still have to give them all a dry brushing which is going to take a bit of time.
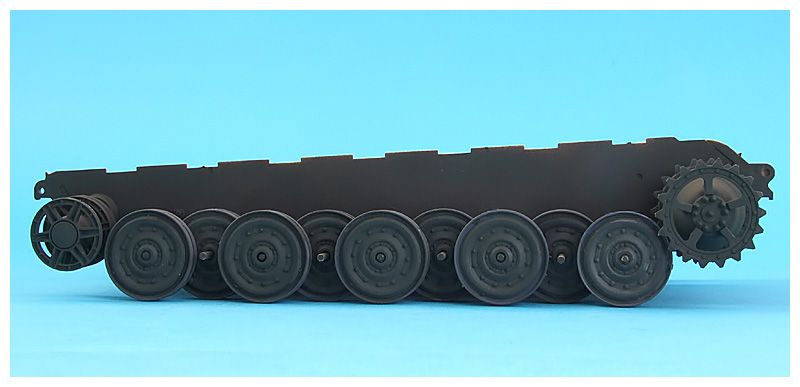
You can see some of the started rims in the first piccy and one started in the last piccy.

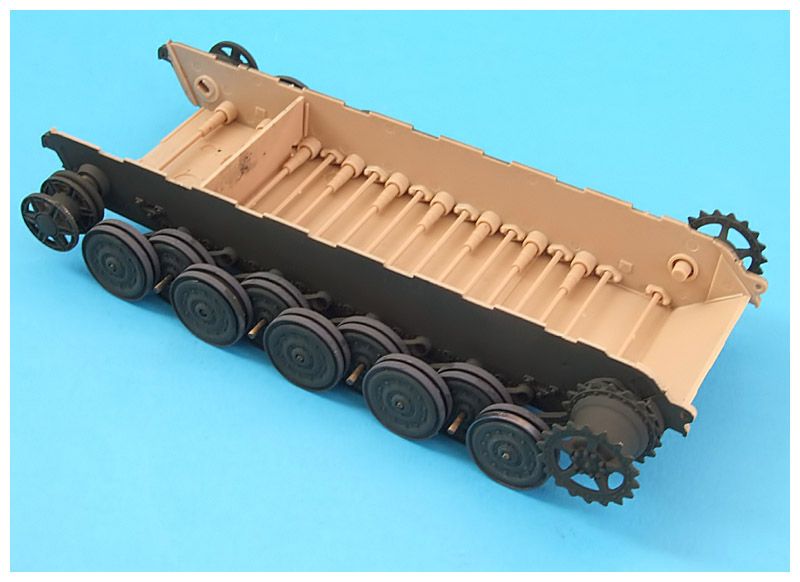
So I guess I am doing the wheels for the next few days.
Regards
Mark
Well I've made a start on all the wheels and as these are steel rimmed road wheels they are going to have to be metalized....with a HB2 pencil.
The top wheel has had the pencil treatment whilst the lower on has not.

The drive wheel on the left of the next photo has also been started and some slight dry brushing shenanigans but the one on the right has not just in case you couldn't tell......

I fitted all of the wheels and drives also to see if they all touch the ground....phew they do but I still have to give them all a dry brushing which is going to take a bit of time.


You can see some of the started rims in the first piccy and one started in the last piccy.


So I guess I am doing the wheels for the next few days.
Regards
Mark
Regards
Mark
_________________________________________
My models are never perfect, but I kinda like them.
Mark
_________________________________________
My models are never perfect, but I kinda like them.
-
TimJ

- Modelling Gent and Scholar
- Posts: 4290
- Joined: May 1st, 2011, 12:54 am
- Location: Oldbury, West Midlands
Re: Titan's Octopus Tiger
Looking good.
2020 A:35 B:18. 2021 A: 51 B:25 C:21 2022 A:63 B:23 C:11 2024 A:9 B:4 C:15
-
Titan
- Modelling Gent and Scholar
- Posts: 1835
- Joined: November 13th, 2011, 10:38 pm
- Location: The windswept Isle of Cornwall
Re: Titan's Octopus Tiger
Just a very quick update .
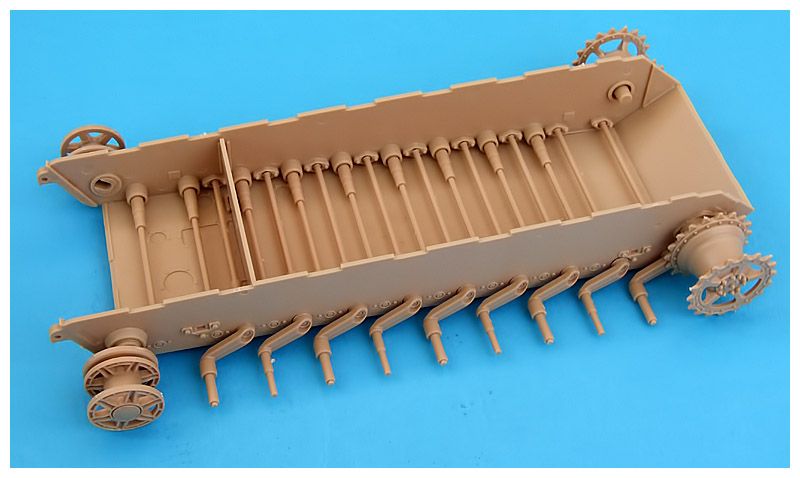
Added the rear hull plate and test fitted the hull which will need a bit of clamping when the time comes to glue it all together, the wheel nuts are finished and the intention will be to spray them with some `dust` afterwards as I don't want this tank to look too beaten up.
I'm going to start the tracks on Saturday so should have those attached by the end of the weekend...I hope.
Regards
Mark
Added the rear hull plate and test fitted the hull which will need a bit of clamping when the time comes to glue it all together, the wheel nuts are finished and the intention will be to spray them with some `dust` afterwards as I don't want this tank to look too beaten up.


I'm going to start the tracks on Saturday so should have those attached by the end of the weekend...I hope.
Regards
Mark
Regards
Mark
_________________________________________
My models are never perfect, but I kinda like them.
Mark
_________________________________________
My models are never perfect, but I kinda like them.
-
ShaunW
- NOT the sheep
- Posts: 26188
- Joined: November 26th, 2011, 6:11 pm
- Location: Pontefract West Yorkshire
Re: Titan's Octopus Tiger
Excellent work Mark. This is a great looking kit.
Doing - Tamiya 1/35th Universal Carrier.
Work is the curse of the modelling classes!
IPMS#12300
Work is the curse of the modelling classes!
IPMS#12300
-
Clashcityrocker

- Modelling Gent and Scholar
- Posts: 10817
- Joined: May 1st, 2011, 12:31 am
- Location: Adelaide. South Australia
Re: Titan's Octopus Tiger
Looks great, and nice photos too.
Nigel
Nigel
-
Titan
- Modelling Gent and Scholar
- Posts: 1835
- Joined: November 13th, 2011, 10:38 pm
- Location: The windswept Isle of Cornwall
Re: Titan's Octopus Tiger
Thanks Shaun and Nigel.
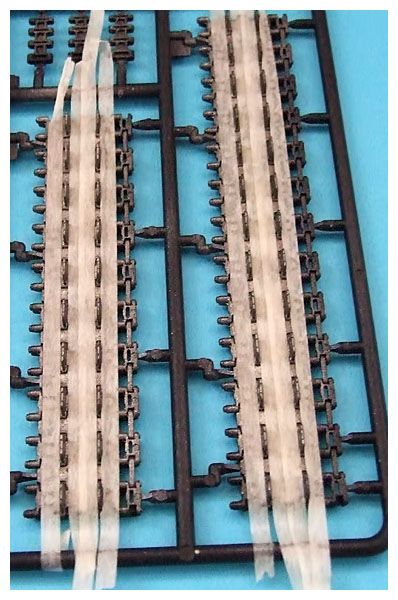
Ok onto the tracks.....here is how I paint mine.
Painting Phase.
1. Base coat.
I'm using matt black on this particular build as I don't want to over weather them, but if I was going for muddy tracks I would use hull red or red/brown.

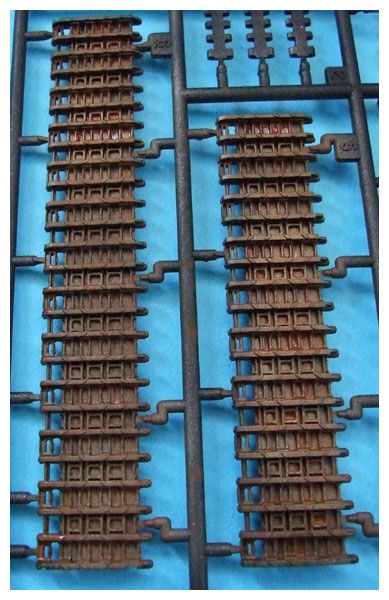
2. Metallic second coat.
I used Tamiya metallic grey for this and also thinned it quite heavily primarily on the wheel side to show wear from friction from the metal wheels but also on the road side to give the track a metallic appearance.

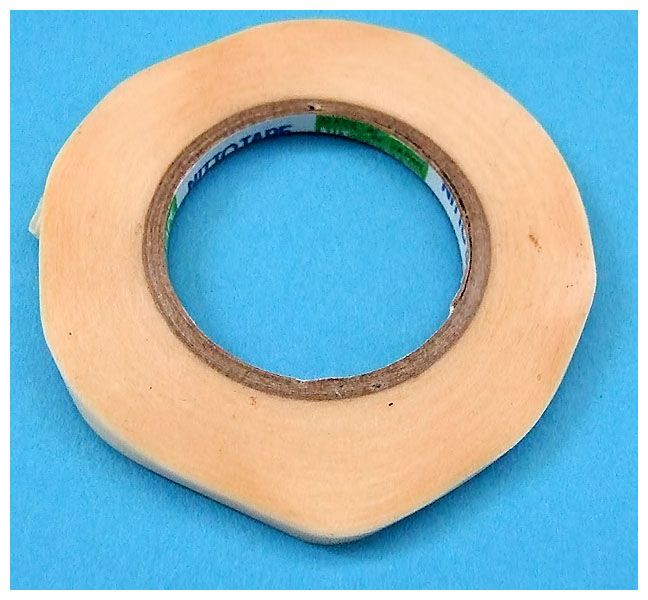
Once dried the wheel side was masked off using 3mm tape.
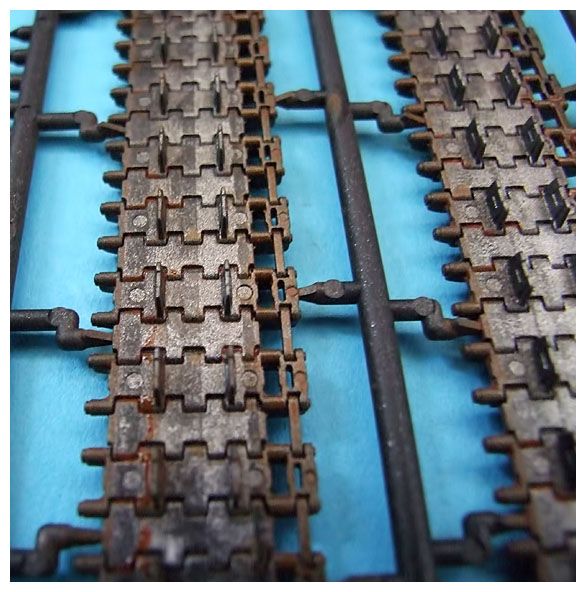
3. Final paint coat.
A highly thinned coat of Tamiya flat earth was sprayed over the tracks allowed to dry and then a slightly less thinned coat was sprayed in patches all over the tracks to give them some variation.

4. light rust wash.
because the tracks are metal they would have rusted where there was no friction with either the ground or wheels so AK light rust wash was used.

This was painted all over the tracks using a brush in an uneven manner again to give the tracks some variation in colour.
The tape was then removed from the rear of the tracks.
The next phase is the dusting and this will be done once the tracks are attached.
Regards
Mark
Ok onto the tracks.....here is how I paint mine.
Painting Phase.
1. Base coat.
I'm using matt black on this particular build as I don't want to over weather them, but if I was going for muddy tracks I would use hull red or red/brown.

2. Metallic second coat.
I used Tamiya metallic grey for this and also thinned it quite heavily primarily on the wheel side to show wear from friction from the metal wheels but also on the road side to give the track a metallic appearance.

Once dried the wheel side was masked off using 3mm tape.


3. Final paint coat.
A highly thinned coat of Tamiya flat earth was sprayed over the tracks allowed to dry and then a slightly less thinned coat was sprayed in patches all over the tracks to give them some variation.

4. light rust wash.
because the tracks are metal they would have rusted where there was no friction with either the ground or wheels so AK light rust wash was used.

This was painted all over the tracks using a brush in an uneven manner again to give the tracks some variation in colour.

The tape was then removed from the rear of the tracks.

The next phase is the dusting and this will be done once the tracks are attached.
Regards
Mark
Regards
Mark
_________________________________________
My models are never perfect, but I kinda like them.
Mark
_________________________________________
My models are never perfect, but I kinda like them.
-
DavidWomby

- Modelling Gent and Scholar
- Posts: 11760
- Joined: May 1st, 2011, 8:09 pm
- Location: Florida, USA
Re: Titan's Octopus Tiger
This is looking superb. Great result painting the tracks.
David
David
Re: Titan's Octopus Tiger
What a beautiful job on those tracks.
Besting 60 years of mediocre building of average kits in the stand off scale
-
JohnRatzenberger

- Why is he so confused ?
- Posts: 15734
- Joined: April 5th, 2011, 3:42 pm
- Location: Living on a sandbar - Nags Head, NC.
Re: Titan's Octopus Tiger
Looking very good !
John Ratzenberger 
It's my model and I'll do what I want with it.
It's my model and I'll do what I want with it.
-
iggie

- Modelling Gent and Scholar
- Posts: 23437
- Joined: July 31st, 2013, 11:04 am
- Location: North Somercotes, Lincolnshire
- Contact:
Re: Titan's Octopus Tiger
Those tracks are superb
Best wishes
Jim
If you can walk away from a landing, it's a good landing. If you use the airplane the next day, it's an outstanding landing
"Never put off till tomorrow, what you can do the day after tomorrow"
Jim
If you can walk away from a landing, it's a good landing. If you use the airplane the next day, it's an outstanding landing
"Never put off till tomorrow, what you can do the day after tomorrow"
-
Titan
- Modelling Gent and Scholar
- Posts: 1835
- Joined: November 13th, 2011, 10:38 pm
- Location: The windswept Isle of Cornwall
Re: Titan's Octopus Tiger
Thanks all.
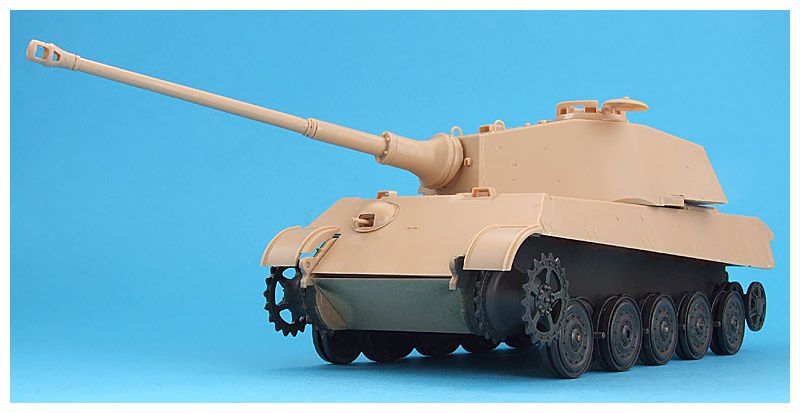
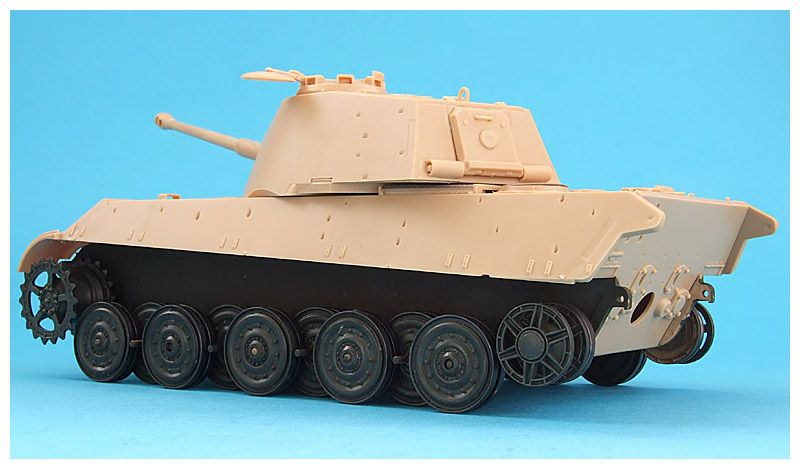
I have dirtied up the side plates not that it will be seen as the side skirts will hide it all, I used Mig pigments for this and these were dark mud, dry mud and brick dust and were fixed with pigment fixer.
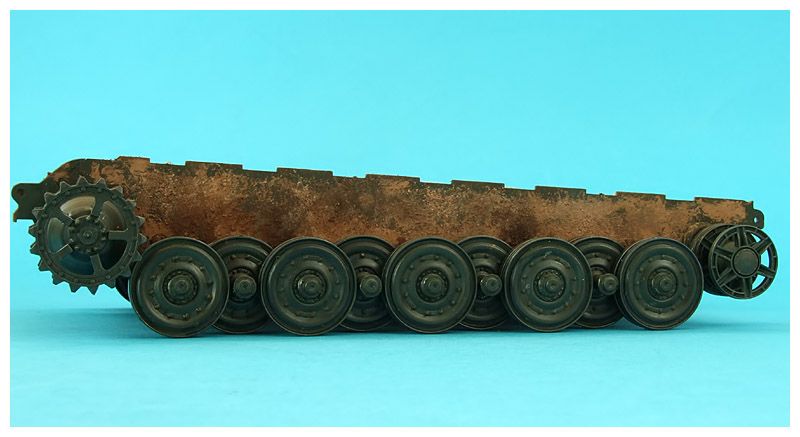
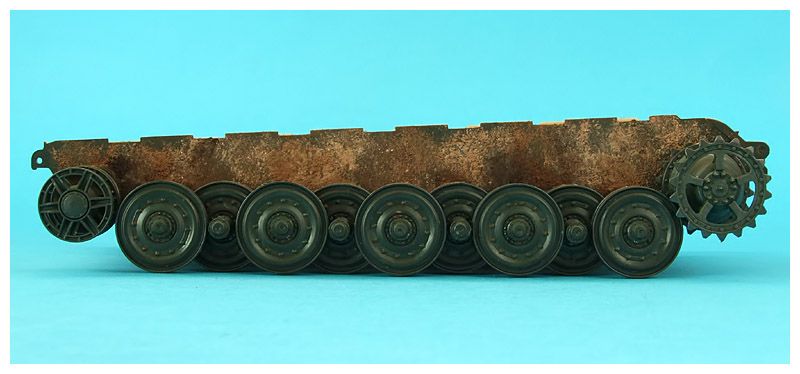
The tracks were added though I must admit they were not as easy as I first thought so progress was a tad slow.
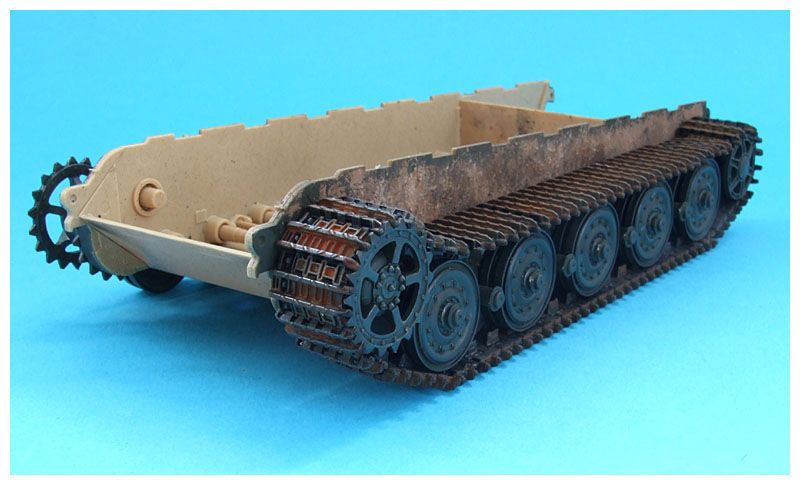
The other side was added and all that remains to be done on these will be to give them and the wheels a light dusting and then rub a HB2 pencil over the parts that touch the road to simulate wear.
You can see how much of the sides you can see with the top hull on and when the side skirts are added nothing of them will be seen.
Regards
Mark
I have dirtied up the side plates not that it will be seen as the side skirts will hide it all, I used Mig pigments for this and these were dark mud, dry mud and brick dust and were fixed with pigment fixer.


The tracks were added though I must admit they were not as easy as I first thought so progress was a tad slow.

The other side was added and all that remains to be done on these will be to give them and the wheels a light dusting and then rub a HB2 pencil over the parts that touch the road to simulate wear.
You can see how much of the sides you can see with the top hull on and when the side skirts are added nothing of them will be seen.


Regards
Mark
Regards
Mark
_________________________________________
My models are never perfect, but I kinda like them.
Mark
_________________________________________
My models are never perfect, but I kinda like them.
-
Migrant

- Happily Landed after Many Circuits and Bumps
- Posts: 2428
- Joined: April 5th, 2011, 8:33 pm
- Location: Calgary, Canada
Re: Titan's Octopus Tiger
Fantastic work Mark. How did you apply the pigments to the side plates? Looks almost like they've been sponged on.