Steve's Academy SEAC Thunderbolt 2 *FINISHED*

Any kit, scale, markings as long as it is a P-47 Thunderbolt.
Runs January 31st to March 1st. Your hosts & GBLs are Lancfan and TobyC.
Stevehnz
Active Participant
Posts: 504
Joined: April 17th, 2013, 12:41 pm
Location: Nelson, New Zealand

Steve's Academy SEAC Thunderbolt 2 *FINISHED*

Post by Stevehnz »

1st up the obligatory box & sprues shot, I'll be doing this as the one in the kit decals. KW-R "Honeysuckle Rose" of 615 sqn. The roundel colours don't look too bad at 1st look but I'll compare then to the Freightdog SEAC roundel sheet I have.
Image

The 1st job was to scratch build a new supercharger/oilcooler intake splitter housing to go in the cowl to replace to so, so wrong version that Academy provides. Its a long way from being perfect but its way better than the original. This housing is quite a complex shape, the Tamiya kit does it best, even the Hasegagwa one isn't great but at least it is on the right angle.
Image

Progress hasn't been bad today, though I'm at work for the next three so it'll be later in the week I till I get back to it, managed most of the detail painting for the interior, more done after this shot, note painted Tamiya tape on edge of tray for seat belts.
Image

Steve.
User avatar
TobyC
Modelling Gent and Scholar
Posts: 5540
Joined: January 15th, 2013, 2:13 pm
Location: Cobham, Surrey. Blighty

Re: Steve's Academy SEAC Thunderbolt 2

Post by TobyC »

That's a good start. Pleased to see lots of jugs ;-)
Enjoyment over accuracy. That's my motto
User avatar
Stuart
Raider of the Lost Ark Royal
Posts: 19417
Joined: February 25th, 2013, 4:55 pm
Location: North Wales
Contact:

Re: Steve's Academy SEAC Thunderbolt 2

Post by Stuart »

Looking good!
Stuart Templeton I may not be good but I'm slow...

My Blog: https://stuartsscalemodels.blogspot.com/
User avatar
iggie
Modelling Gent and Scholar
Posts: 23424
Joined: July 31st, 2013, 11:04 am
Location: North Somercotes, Lincolnshire
Contact:

Re: Steve's Academy SEAC Thunderbolt 2

Post by iggie »

Good start from the look of things :-D
Best wishes

Jim
If you can walk away from a landing, it's a good landing. If you use the airplane the next day, it's an outstanding landing
"Never put off till tomorrow, what you can do the day after tomorrow"
User avatar
Zee28
Modelling Gent and Scholar
Posts: 2834
Joined: March 8th, 2013, 10:21 pm
Location: South London

Re: Steve's Academy SEAC Thunderbolt 2

Post by Zee28 »

The Academy kit seems to be pretty popular here. Nice work on the interior so far Steve.

Zee
Stevehnz
Active Participant
Posts: 504
Joined: April 17th, 2013, 12:41 pm
Location: Nelson, New Zealand

Re: Steve's Academy SEAC Thunderbolt 2

Post by Stevehnz »

Time for another update, finished off the seat module with some rather too wide seatbelts :roll: plus some other detail touch ups.
Image

Time then to close it up, I do like the way these Academy kits go together, no fuss at all & very little fettling needed.
Image

A wee job, before the engine goes into place, a stub of sprue to stop the prop shaft disappearing back out of sight.
Image
Steve.
User avatar
Stuart
Raider of the Lost Ark Royal
Posts: 19417
Joined: February 25th, 2013, 4:55 pm
Location: North Wales
Contact:

Re: Steve's Academy SEAC Thunderbolt 2

Post by Stuart »

Thats looking really good - I like academy kits too - I have a crusader in the stash that I'm looking forward to building.
Stuart Templeton I may not be good but I'm slow...

My Blog: https://stuartsscalemodels.blogspot.com/
User avatar
iggie
Modelling Gent and Scholar
Posts: 23424
Joined: July 31st, 2013, 11:04 am
Location: North Somercotes, Lincolnshire
Contact:

Re: Steve's Academy SEAC Thunderbolt 2

Post by iggie »

That is looking rather tidy!
Best wishes

Jim
If you can walk away from a landing, it's a good landing. If you use the airplane the next day, it's an outstanding landing
"Never put off till tomorrow, what you can do the day after tomorrow"
User avatar
Marek
Modelling Gent and Scholar
Posts: 2455
Joined: May 1st, 2011, 8:03 am
Location: Madison, WI
Contact:

Re: Steve's Academy SEAC Thunderbolt 2

Post by Marek »

Looking good
User avatar
Kitaholic
Modelling Gent and Scholar
Posts: 3765
Joined: November 10th, 2014, 7:53 pm
Location: 5 mins from SMW

Re: Steve's Academy SEAC Thunderbolt 2

Post by Kitaholic »

nice looking work so far, love the Jug in SEAC markings
Regards

Gord

Desperately trying to find his MOJO, don't know where I left it
User avatar
Ratch
Modelling Gent and Scholar
Posts: 9942
Joined: May 1st, 2011, 9:16 am
Location: Northampton

Re: Steve's Academy SEAC Thunderbolt 2

Post by Ratch »

Going together nicely Steve :)
All models are equal. Some models are more equal than others.
Airfix Tribute Forum
Stevehnz
Active Participant
Posts: 504
Joined: April 17th, 2013, 12:41 pm
Location: Nelson, New Zealand

Re: Steve's Academy SEAC Thunderbolt 2

Post by Stevehnz »

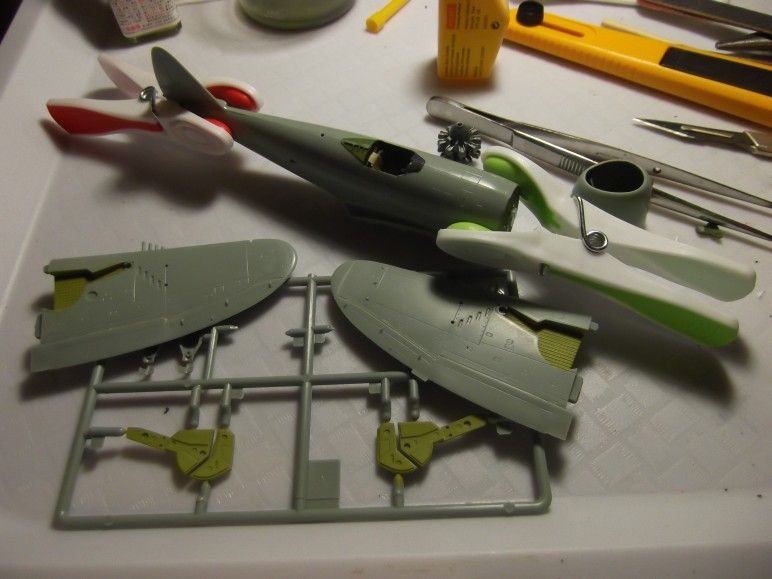
Thanks for the kind words all, hopefully this latest crop of photos will bear out your support.
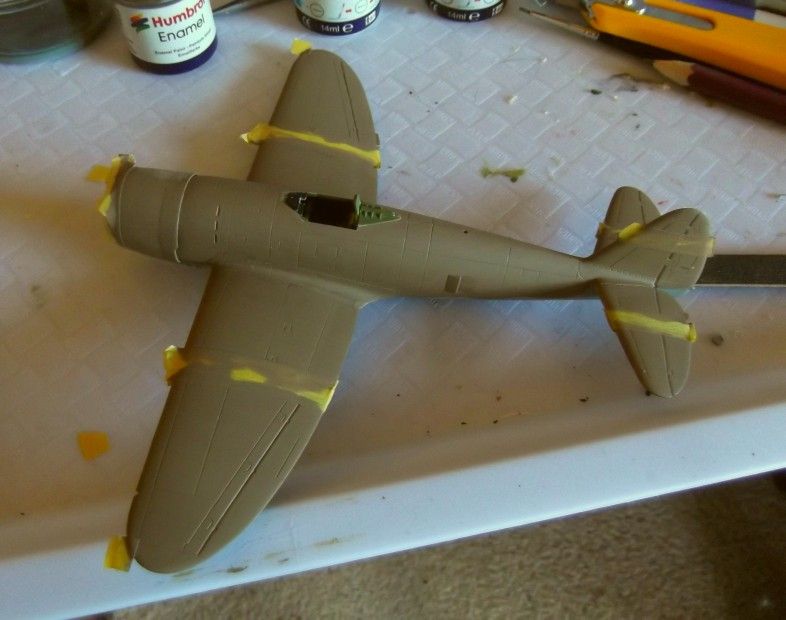
I've maybe gone about the masking a bit bass ackwards but being a hairey stick merchant, I thought it might be easier to mask off the area for the white strips & do them after, like I've done here before I applied the 1st top colour. Time will tell. :roll:
Image
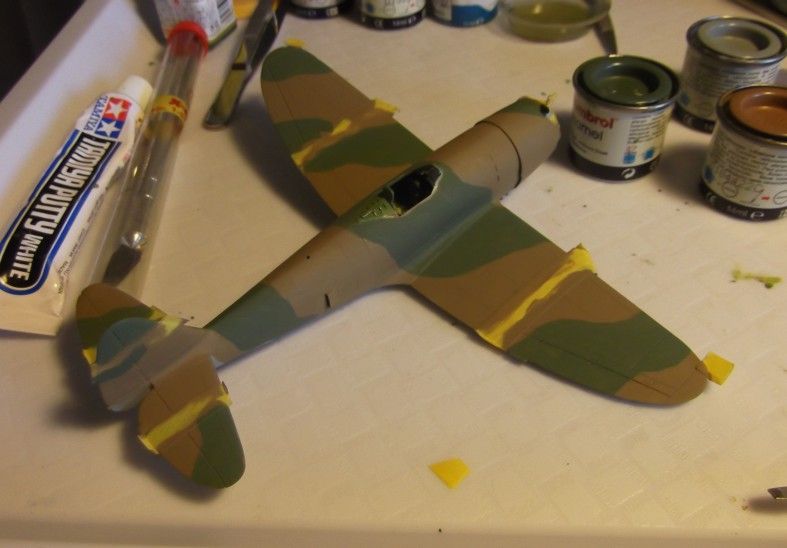
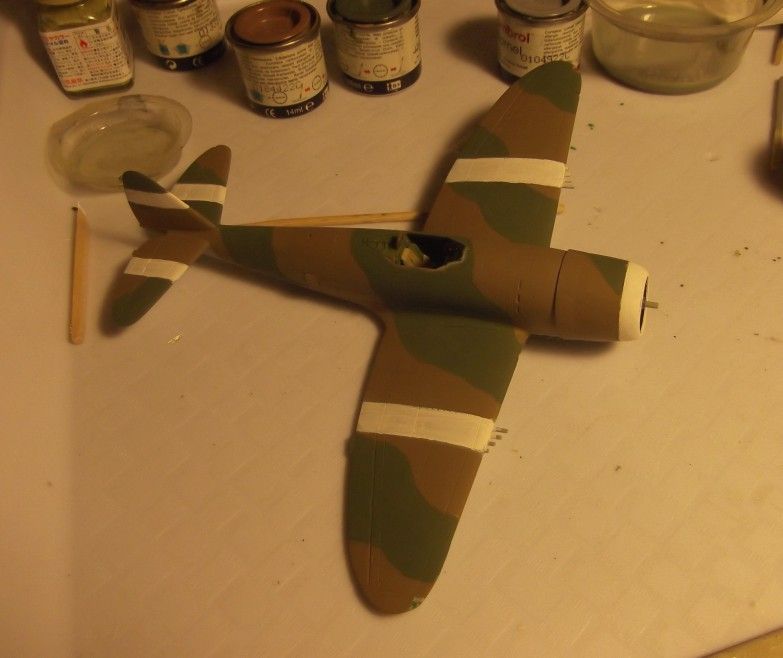
Both top colours on now, as well as the MSG undersides. I'm doing KW-R out of the box, according to my prowling around the googlesphere, it had a different camo pattern to most SEAC Thunderbolts so I'll go with the kits pattern which seems to match some bigger scale ones I saw built up. I'll also use the kit decals if they behave, the colours aren't too far off the Rising Decal & Airfix Hurricane roundels I have, a coat of matt varnish should tone them down a little. I'm not real pleased with the Freightdog SEAC decals, the center pale blue is quite a lilac colour. For the Dark Green & Dark Earth, I've used Hu102 & 110 as being slightly lighter shades of acceptable hue/tint, especially when scale effect & fading is taken into account.
Image
Some white stripes now, still needs another coat even after two so far, but I think my masking scheme is not so bad, I'm doing the stripes free hand using the camo edge as a guide. I'm OK with it, some touching up still required in a couple of areas though.
Image
More next week, I'm back at work for the next 3 days. :(
Steve.
User avatar
iggie
Modelling Gent and Scholar
Posts: 23424
Joined: July 31st, 2013, 11:04 am
Location: North Somercotes, Lincolnshire
Contact:

Re: Steve's Academy SEAC Thunderbolt 2

Post by iggie »

Good progress!

Interesting approach to the white stripes, but it looks to be working and that's the main thing!

Have you made your own wing tip lights or are they kit parts?
Best wishes

Jim
If you can walk away from a landing, it's a good landing. If you use the airplane the next day, it's an outstanding landing
"Never put off till tomorrow, what you can do the day after tomorrow"
User avatar
Marek
Modelling Gent and Scholar
Posts: 2455
Joined: May 1st, 2011, 8:03 am
Location: Madison, WI
Contact:

Re: Steve's Academy SEAC Thunderbolt 2

Post by Marek »

Unusual method but effective, with these stripes. Nice to see some off-beaten road approaches.
Stevehnz
Active Participant
Posts: 504
Joined: April 17th, 2013, 12:41 pm
Location: Nelson, New Zealand

Re: Steve's Academy SEAC Thunderbolt 2

Post by Stevehnz »

The wing tip lights are my own, I confess to being a bit pleased with the way they turned out. Cut away the molded in wing tip light positions, roughly shape some clear sprue, drill a hole, 0.8mm, in the rear & fill with red or green paint,glue in place, leave to dry over night & shape with emery stick & nail buff, the nail buff brought them nicely back to clear. First time I'd tried this having read about it before & was really pleased with the result.
Steve.
Locked

Return to “P-47 Thunderbolt”