Handley Page 42

The one you have all been waiting for - Vac(u)-formed kits. Any subject, any kit, so long as the basis of the kit is vac-form (no, you can't enter an injection airplane with a vac-canopy). Started kits are eligible, within reason - this is a learning GB to introduce members the variety of kits, what can be accomplished with them, and to overcome any reluctance to add them to your modeling repertoire.
This is an extended GB, running 4 April to 31 May, and your hosts are Lancfan, SJPONeill, and Splash.
vacant
Modelling Gent and Scholar
Posts: 3845
Joined: August 5th, 2012, 9:58 pm

Handley Page 42

Post by vacant »

I’ve been up all night building this one. It's the Contrail 1/72 kit of the HP 42.

Image

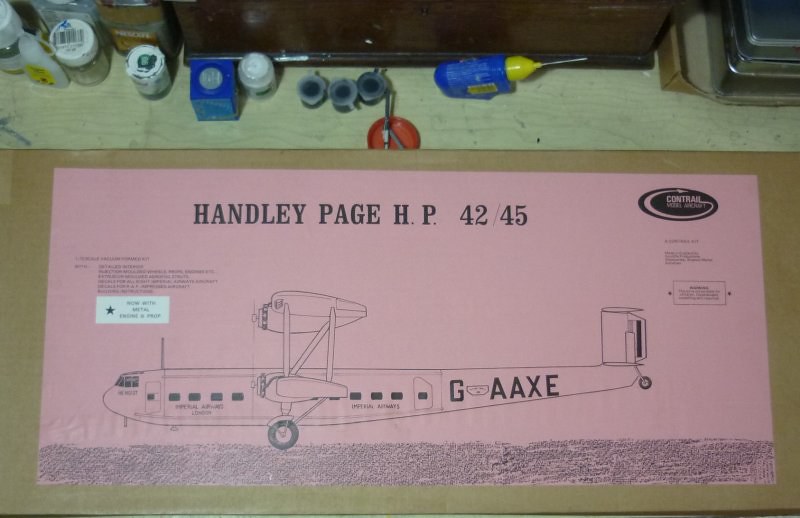
I bought it as a Christmas treat for myself in December 2014. I paid the asking price on EBay, making it the most expensive kit I have ever (and will ever) buy.

It’s big. The box is over 2 ft. long, i.e. too big to smuggle into the house without questions being asked. The box needs to be over 2 ft. long because the wing span of the upper wing is 22 inches long and it comes as one piece – well, two really, i.e., a top and bottom. Cutting the pieces out is a major operation. But then, everything to do with this model is a major operation.

Image

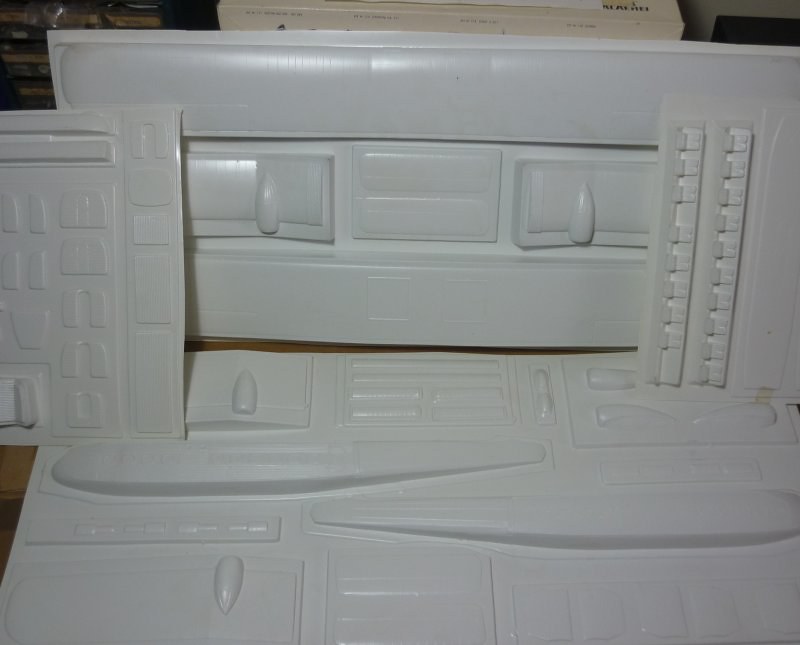
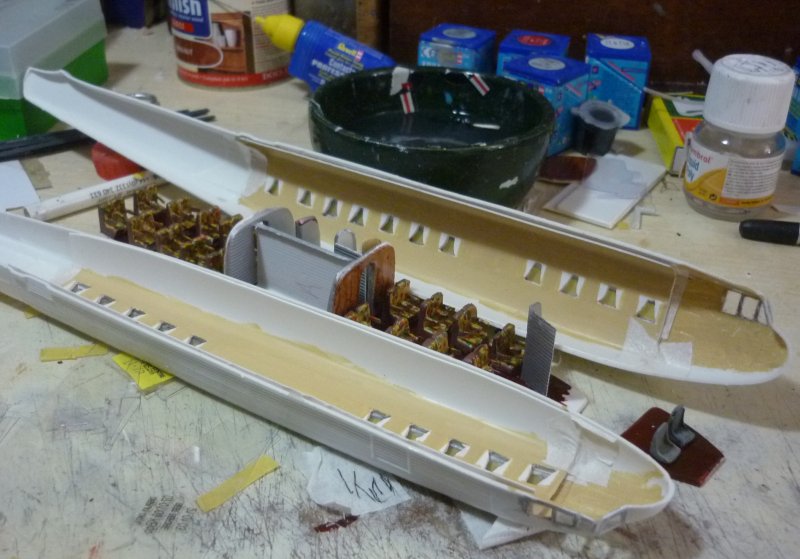
The kit has a separate shell that makes the interior. This is so that curtains can be shown inside.

Image

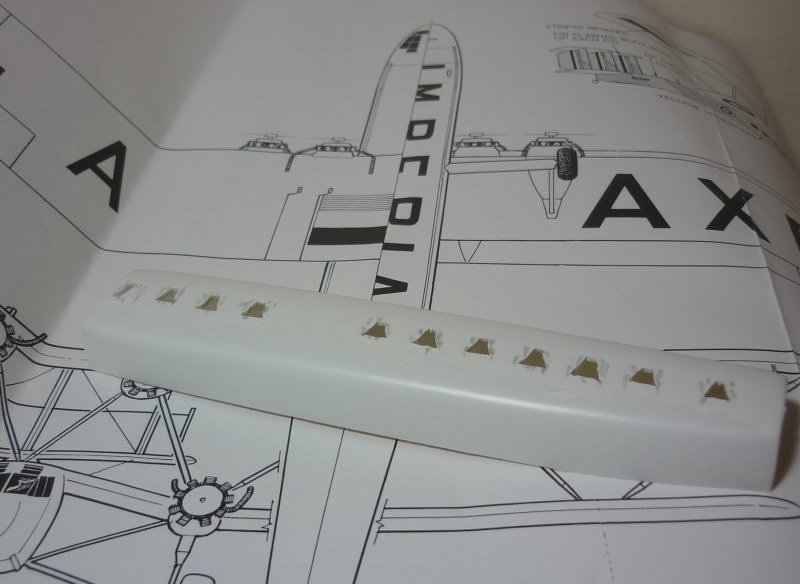
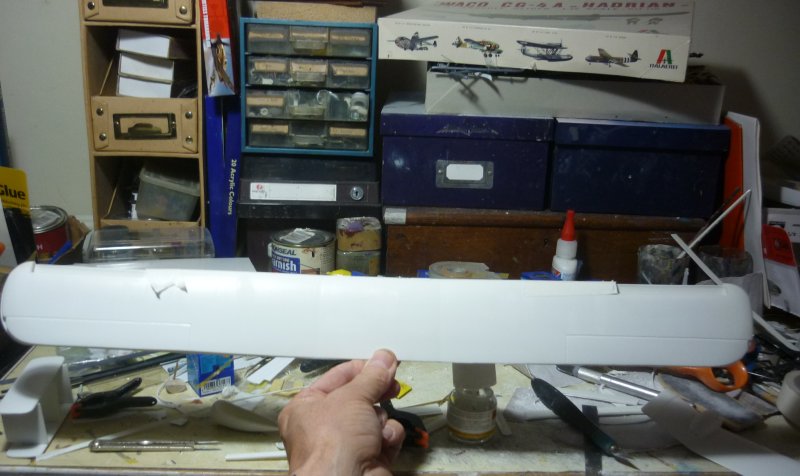
The fuselage is not much short of the wing span. There are a lot of windows to cut out. There is no separate canopy for the flight deck so the windows there have to be cut out as well.

Image

There is a detailed interior with seats and compartments. The seats on the aircraft had arm rests so I added them from scrap. They were painted in a rich floral pattern so I dabbed away with red, green and other floral colours. I did all this, knowing that almost nothing would be seen inside once the fuselage was closed up. I did not add luggage racks. I was not even tempted.

Image

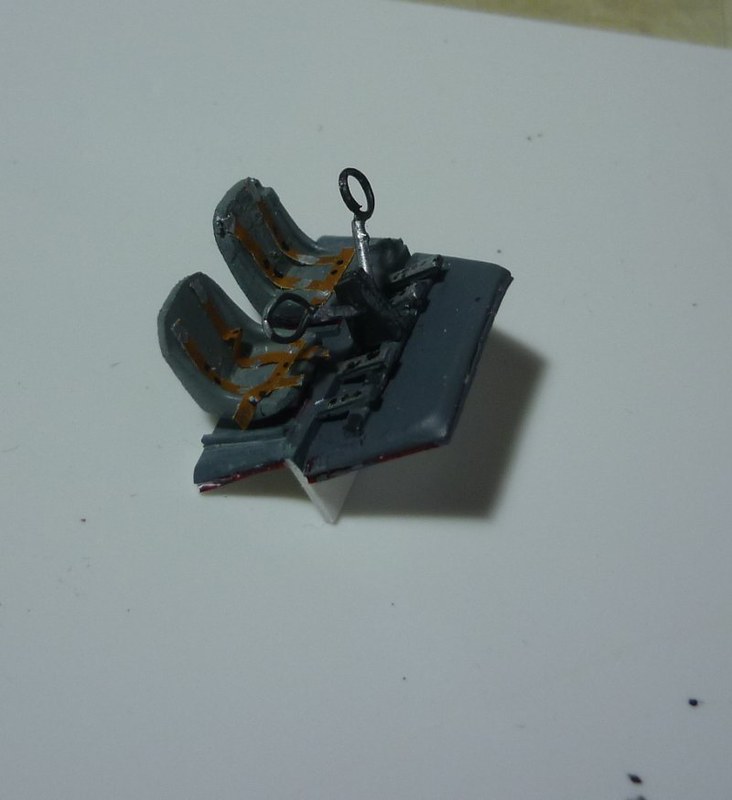
A flight deck had to be scratch built. This is a bit crude but as with other interior detail. None of this will be visible.

Image

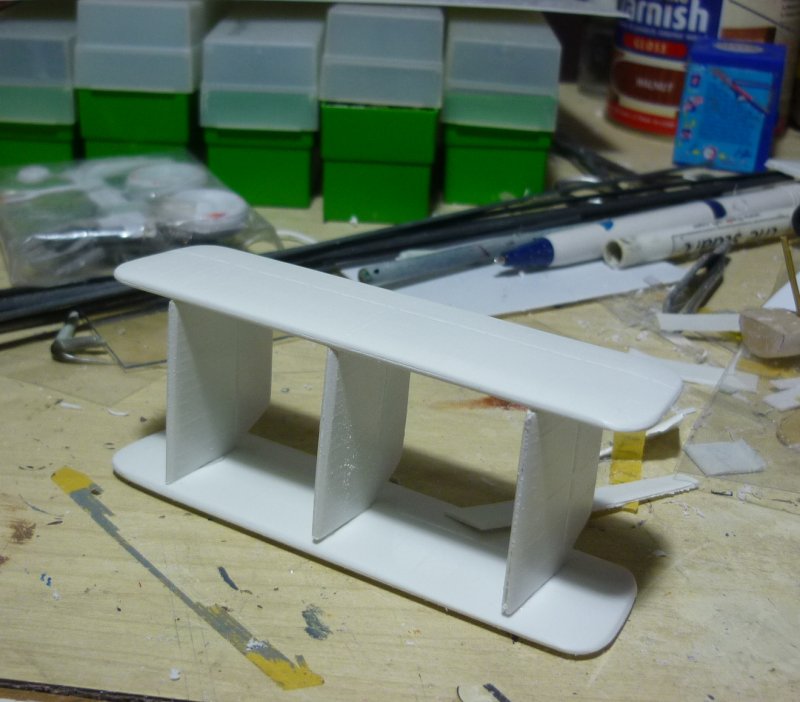
These are the tail fins and rudders, clamped and setting. Everything seems to come in multiples on thie aircraft.

Image

The tail assembly is fairly straightforward.

Image

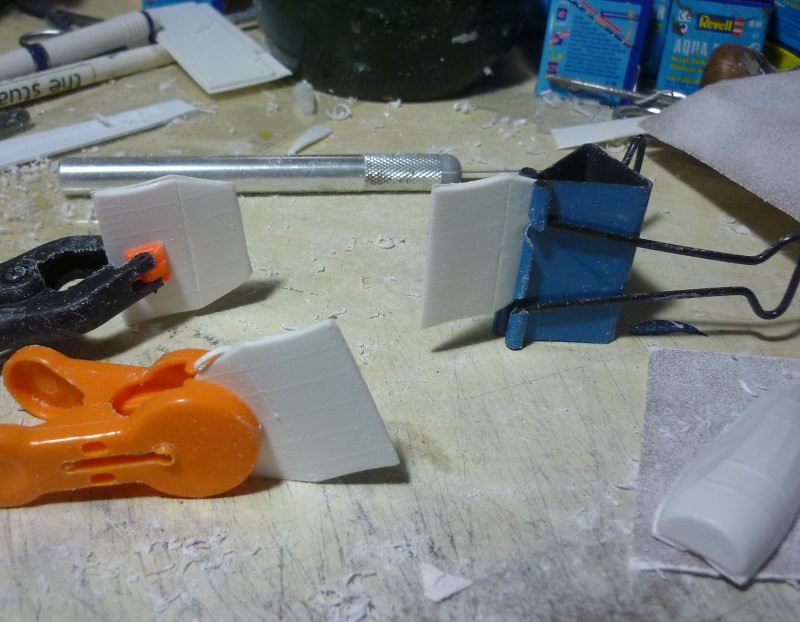
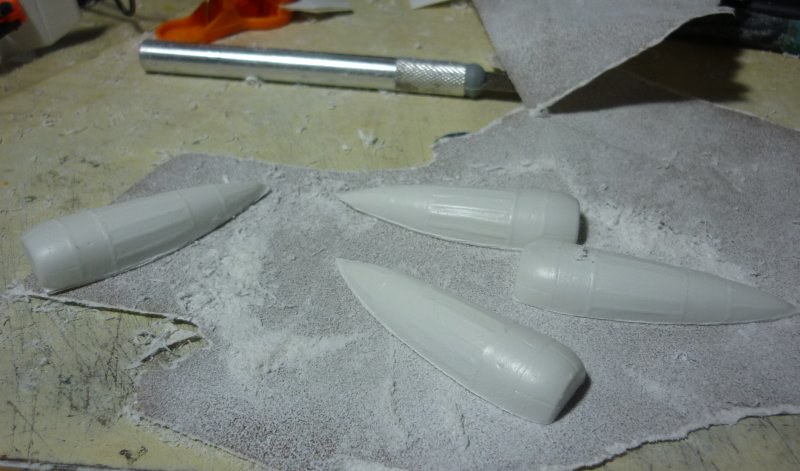
These are the engine nacelles being sanded down.

Image

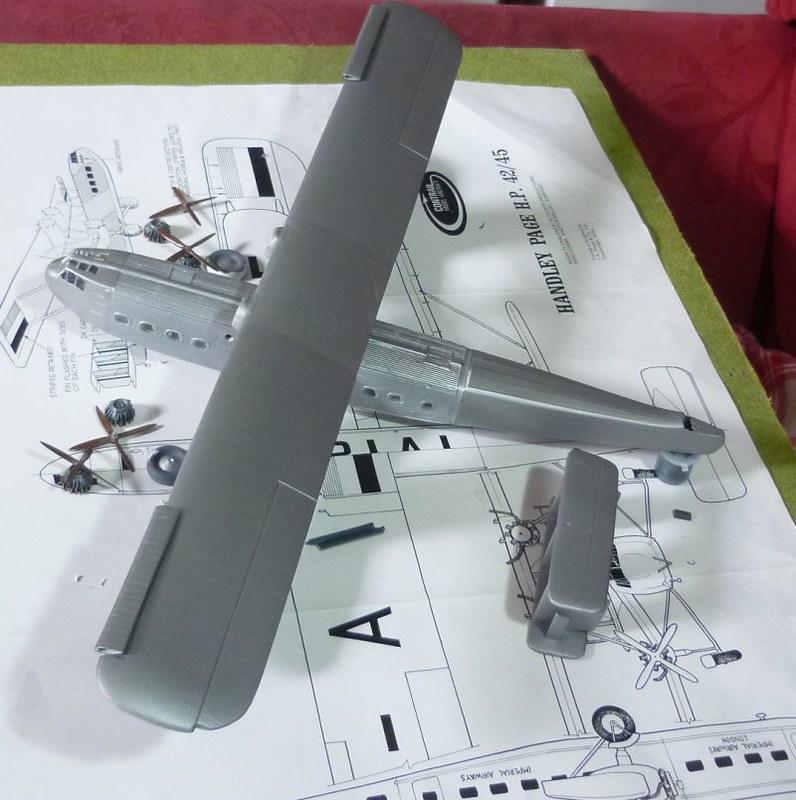
The upper wing has quite a span. There are some leading edge slats that were usually open when the aircraft was on the ground, so I cut and opened them. The top wing curves around at the leading edge, wrapping completely underneath. The lower part of the wing joins underneath.

Image

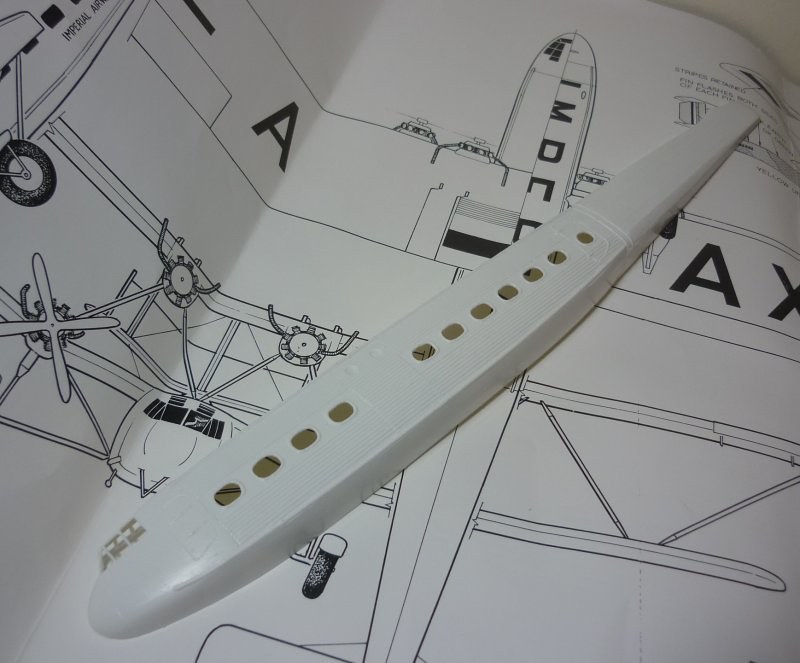
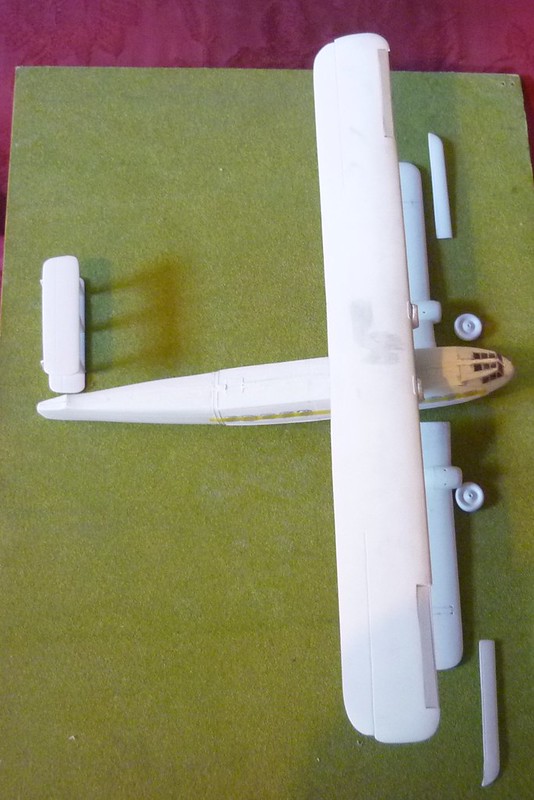
This shows the fuselage glued together with the lower wings loosely attached. By this stage, all the windows are in place, each individually cut to fit.

Image

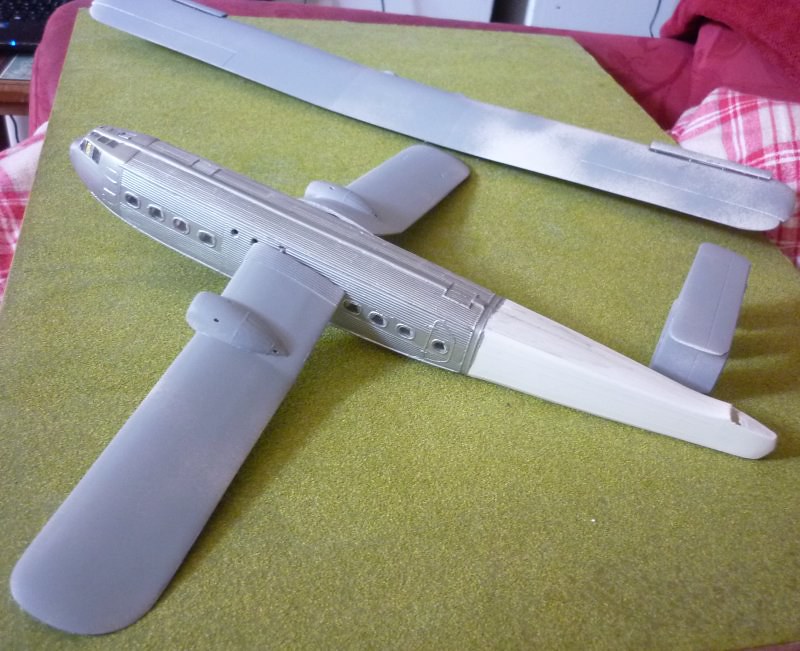
I hand painted the fuselage using Humbrol AquaColor silver. The wings were sprayed in aluminium from the Humbrol can. The fabric areas were doped linen so they need to look different. The wings are still only loosely attached. Blending them onto the corrugated fuselage was tricky, but they got there in the end.

Image

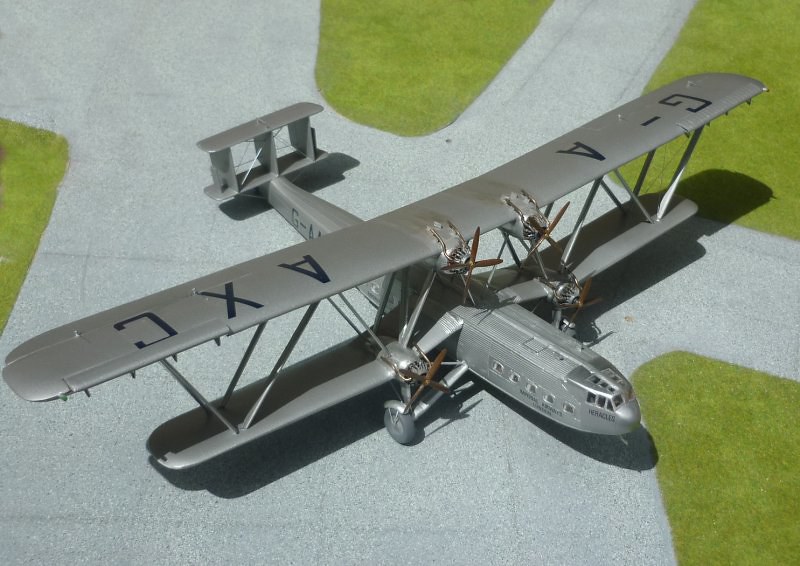
The sheer immensity of the thing created all sorts of problems when picking it up. Fitting the struts was the most difficult part of the operation. There are 24 of them for the main wing. Each has to be cut to sized from Contrail strut material, then fitted at angles of about 45 degrees. The strut material in the kit is too wide so I sanded it down a bit - but probably not enough to make it really accurate. Don’t imagine for one minute that I managed to do this without problems.

At first, I found that I had attached the lolwer wing in a way that made the dihedral of the outer parts of the lower wing too shallow. I was able to bend them to the correct angle then support them with brass rods. I found it easiest to begin by attaching the struts between the upper and lower engines. For a time, that left the upper wing supported by only four very wobbly struts. Any sudden movement and the whole thing would have come apart. I worked my way outwards until all the struts were in place. I always pre-cut holes in the wings to help make this operation easier.

Then I noticed that the undercarriage legs were at the wrong angle so they had to come off. In the end, I discarded the kit’s pieces and scratch built some new ones. If only I had learnt how to make a jig, but I never have.

Image


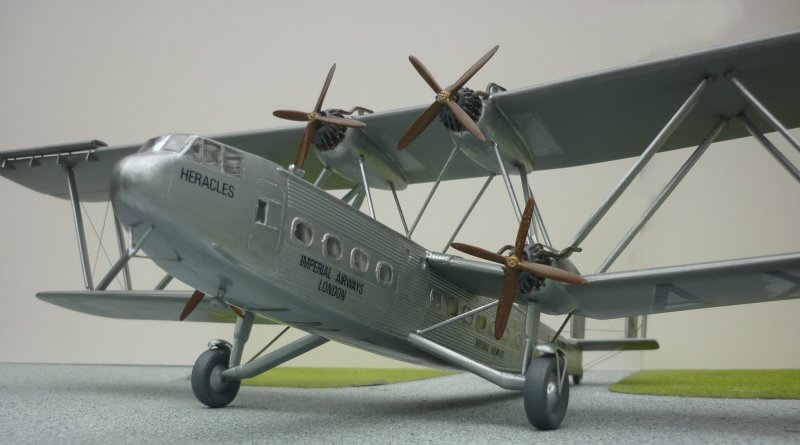
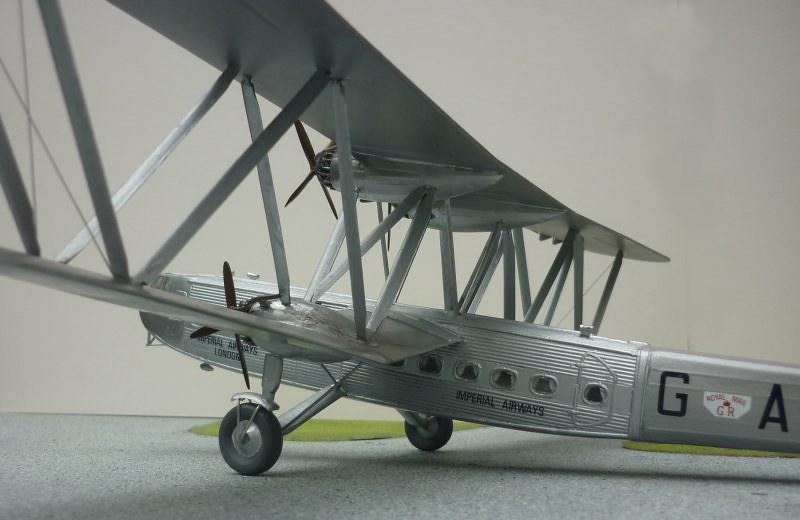
And here it is, finished. The engines and props are cast metal. They need a lot of cleaning up. I used some bendy wire for the exhausts. They are not quite right so I am thinking of replacing them when I can find something more suitable. The aircraft had almost no rigging wires. I used florists’ wire for the few bits there were, mostly on the tail.

Image

I gave it some exhaust staining on the wings.

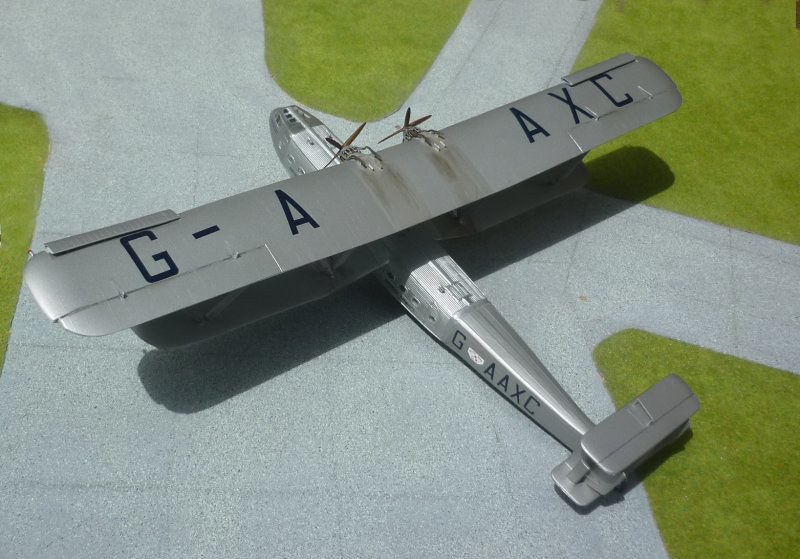
I worried about the decals because of their age, but then slid on beautifully with no rips. They even went on well over the corrugated areas of the fuselage.

Image

Image

Image

What a night that was!

P.S. Ok. so I lied about building it overnight. I have been working on it for about three weeks.
User avatar
MarkyM607
Modelling Gent and Scholar
Posts: 9153
Joined: January 5th, 2013, 1:16 pm
Location: Cambs

Re: Handley Page 42

Post by MarkyM607 »

:wow :wow
Hoping to return to modelling sometime this year!! :lol:
Owner of Marky's Model Emporium since 2013!.
User avatar
DavidWomby
Modelling Gent and Scholar
Posts: 11765
Joined: May 1st, 2011, 8:09 pm
Location: Florida, USA

Re: Handley Page 42

Post by DavidWomby »

Stupendous. This has to be one of the most impressive vacforms I have ever seen. Congratulations (and you had me going along with the one night thing for a few minutes there).

David
User avatar
JamesPerrin
Looks like his avatar
Posts: 13694
Joined: April 5th, 2011, 8:09 pm
Location: W. Yorkshire
Contact:

Re: Handley Page 42

Post by JamesPerrin »

Impressive both in size and execution.
Classic British Kits SIG Leader Better to fettle than to fill
(2024 A:B 5:2) (2023 13:8:7) (2022 21:11) (2021 15:8) (2020 8:4:4)
User avatar
SJPONeill
Modelling Gent and Scholar
Posts: 3525
Joined: May 1st, 2011, 12:01 am
Location: Near the Spiral, NZ.
Contact:

Re: Handley Page 42

Post by SJPONeill »

A most impressive build that will be a useful step by step guide for others taking on this monster. Did you use any sort of spar for the lower wing or just butt them against the fuselage? It looks like the is something from each wing penetrating the fuselage in one of your pix...
Please critique my posts honestly i.e. say what you think so I can learn and improve...
The World According To Me
User avatar
SJPONeill
Modelling Gent and Scholar
Posts: 3525
Joined: May 1st, 2011, 12:01 am
Location: Near the Spiral, NZ.
Contact:

Re: Handley Page 42

Post by SJPONeill »

Just a thought...if you ever felt like posting a tutorial on how you shape and fit the windows into that sorted of construction where no clear part(s) is provided, some of us, OK, me, would really appreciate it...I've always struggled with this but it is possibly quite simple once you know how...
Please critique my posts honestly i.e. say what you think so I can learn and improve...
The World According To Me
vacant
Modelling Gent and Scholar
Posts: 3845
Joined: August 5th, 2012, 9:58 pm

Re: Handley Page 42

Post by vacant »

There is a brass rod through the fuselage that acts as a spar. A comlication with this kit is that because of the interior shell, one has to drill holes through not only the outer surface but also the inner shell. Ideally, a model of this size should have two spars both for strength to help get the wings in the correct alignment. This is a case of do what I say, not what I do.

As for the windows, there is no simple solution or if there is, I don't know what it is. I struggle every time. On this aircraft, there is a raised rim around the windows. I just used a sharp knife to cut out the holes. I wish there was a simple solution to making and fitting the windows. I used a painstaking method of cutting out each window from a sheet of 20 thou. clear plastic card and fitting them by filing and fettling. They are fixed by pva.

The timing of fitting the windows is probably important. I fit them while the fuselage is still in two halves as it lets me push the window part into place. I hold a steel ruler on the outside of the fuselage and push from the inside. That helps get the windows flush with the outside surface. I then tape over the windows on the outside to protect them from accidental marks while I am making the kit. I sometimes use other methods, but none of them are foolproof or any easier. Perhaps others can share their own methods.
vacant
Modelling Gent and Scholar
Posts: 3845
Joined: August 5th, 2012, 9:58 pm

Re: Handley Page 42

Post by vacant »

PS For another approach to making windows, look back to Barry's description for the Stinson.
http://uamf.org.uk/viewtopic.php?f=319&t=11577;
Different methods are suitable for different types of aircraft and kit, e.g. how many windows, is the fuselage straight or curved, how thick is the plastic, what shape and size are the windows? On the Ambassador I built recently, I crash moulded each window so they could be inserted into a curved fuselage. On the Condor build, I did the same as for the HP42. If the windows are small enough, an infill of clear PVA can do the job. None of these methods give the kind of finish one can get with an injection kit and none of them are easy. It causes me grief every time.
User avatar
JohnRatzenberger
Why is he so confused ?
Posts: 15734
Joined: April 5th, 2011, 3:42 pm
Location: Living on a sandbar - Nags Head, NC.

Re: Handley Page 42

Post by JohnRatzenberger »

Good build and many hints/tips for those of us who happen to have the kit en stash as I do.

So if I understand, you mounted the lower wings to the fuselage, then built up the engine struts onto that, and then mounted the upper wing to that. The rest of the Warren truss was then "just" built up between the wings. Sound about right ?

I think when I get around to mine, I'll close the curtains :)
John Ratzenberger :???:
It's my model and I'll do what I want with it.
User avatar
lancfan
Avro's Rivet Rhapsodizer
Posts: 8763
Joined: May 2nd, 2011, 3:55 pm
Location: Nelson, Lancashire

Re: Handley Page 42

Post by lancfan »

Brilliant build Vacant.

David.
David.

If you forget the past, you may lose the future.
vacant
Modelling Gent and Scholar
Posts: 3845
Joined: August 5th, 2012, 9:58 pm

Re: Handley Page 42

Post by vacant »

Yes, the lower wings were attached. Then to attach the upperwings, I attached the inward facing struts from the lower engines to the outside of the engines on the upper wings. I did it this way in order to get a central solid base first in a generally broad rectangular shape. You have to let this dry rock solid before doing anything else, otherwise the weight of the top wing will collapse the struts underneath. They are at a 45 degree angle so any downward pressure can collapse them. The upper wings are heavier than just the plastic because I also added some solid stiffeners inside them. Then I worked outwards, first adding the struts to support the first set of struits. Then I added the outer struts and eventually, inserted the innermost struts to the fuselage. Apologies if that sounds complicated but I thought it was a pretty logical approach to take.

I have read a build of this model in which, as I understood it, the builder began with the outer struts - I can see one reason for doing that, i.e. to get the wing tips both at the same height first, but my thinking wasd that if I got a strong central base of struts first, I would be able to bend the wing tips in case the heights were a bit out - they are very bendy. That, however, was a fallback position as it is better to get everything at the right angles in the first place.
Barry
Modelling Gent and Scholar
Posts: 2612
Joined: May 1st, 2011, 1:23 am
Location: Eastvale, California, USA

Re: Handley Page 42

Post by Barry »

Well, it certainly looks the part! The reason I make windows the way I do is that I shudder at the thought of doing it your way....mostly because I'm sure that I wouldn't be able to get them to look nearly as good as you do. I like your floral seats too.
2012 A:12 B:13 C:0
User avatar
VickersVandal
Modelling Gent and Scholar
Posts: 5041
Joined: October 4th, 2012, 3:37 am
Location: Sydney, Australia

Re: Handley Page 42

Post by VickersVandal »

That is one magnificent beast.
Must.....build....ALL the Sopwith Camels!...

My Biggles Model display website: https://tinyurl.com/y74ydzae
User avatar
Old_Tonto
Modelling Gent and Scholar
Posts: 8063
Joined: May 1st, 2011, 7:41 pm
Location: Middlesbrough, Peoples Republic of Teesside.

Re: Handley Page 42

Post by Old_Tonto »

Stunning. Says it all really. :lol:
2023 - A:0 B:0 C:0
Current Projects:
East German Air Force (1956-90)
South African Air Force (1958-93)
User avatar
bobblelink
Active Participant
Posts: 627
Joined: May 6th, 2011, 2:20 pm

Re: Handley Page 42

Post by bobblelink »

An astounding and magnificent piece of work, well done!
currently on the go: Revell Blenheim I, Italeri Me210, Revell HMS victory, Revell 1/144 p-47
completions in 2012:8, completions in 2013: 13, Completions in 2014:10, Completions in 2015: 9, Completions in 2016: 8, Completions in 2017: 9, Completions in 2018: 12, completions in 2019:7, completions in 2020: 17
Locked

Return to “Vac-form Kits”