Rob's 31 *Finished*
-
- Modelling Gent and Scholar
- Posts: 3325
- Joined: November 4th, 2012, 11:28 am
- Location: The Netherlands
- Contact:
Re: Rob's 31
More blitzery today. Apart from some 'fletching' at the rear, the basic shape is complete. Now it's time for the first visit to the concreter's club, where they are already firing up the cement mixer. Although not very visible in the picture, this is going to be a large order for them...
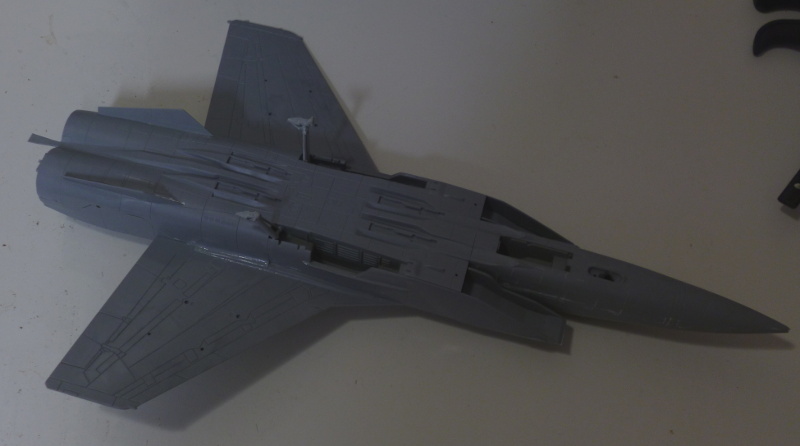
I also found out rather too late that the view through the air intakes of the very empty interior is rather excellent, which is not good. I don't think I can do much there anymore, other than make sure the interior is very deep black..
-
- Modelling Gent and Scholar
- Posts: 4385
- Joined: November 23rd, 2012, 4:20 pm
Re: Rob's 31
Nice progress Rob!
Really looking forward to seeing the end result!
-
- Modelling Gent and Scholar
- Posts: 3325
- Joined: November 4th, 2012, 11:28 am
- Location: The Netherlands
- Contact:
Re: Rob's 31
I just spent some time with the things under the wings. The fuel tanks take a lot of sanding to remove the seam between the halves, and the AA-9 missiles are frankly hopeless. The bodies are OK with a bit of work, but the cruciform tails have slightly different dimension from the rear end of the body/wings subassembly. I've lined things up on the lower, most visible side, and can only hope the rest will be sufficiently hard to see that it doesn't really matter. I might have cut off the tail fins from the centre section, and put them on separately, but I just wasn't in the mood for that. Only the AA-6 missiles were any good in this department (good thing too, since they were the reason I bought the kit..)
Oh, and a load of filler along way too many odd seams on the fuselage box, of course..
-
- Modelling Gent and Scholar
- Posts: 3325
- Joined: November 4th, 2012, 11:28 am
- Location: The Netherlands
- Contact:
Re: Rob's 31
Lots of filler got hit with lots of sanding, after which the tailfeathers went on. I think this lump of plastic is actually starting to look migish
-
- Modelling Gent and Scholar
- Posts: 3325
- Joined: November 4th, 2012, 11:28 am
- Location: The Netherlands
- Contact:
Re: Rob's 31
Meet the crew:
- Kitaholic
- Modelling Gent and Scholar
- Posts: 3765
- Joined: November 10th, 2014, 7:53 pm
- Location: 5 mins from SMW
Re: Rob's 31
That's shaping up quite well Rob
Regards
Gord
Desperately trying to find his MOJO, don't know where I left it
Gord
Desperately trying to find his MOJO, don't know where I left it
- Marek
- Modelling Gent and Scholar
- Posts: 2455
- Joined: May 1st, 2011, 8:03 am
- Location: Madison, WI
- Contact:
Re: Rob's 31
They look like a boys band doing sort of macabresque dance . Seriously though, very nice build.
Re: Rob's 31
Very well painted crew figures there, and it's certainly a big old bird isn't it!
Regards,
Steve
Regards,
Steve
-
- Modelling Gent and Scholar
- Posts: 3325
- Joined: November 4th, 2012, 11:28 am
- Location: The Netherlands
- Contact:
Re: Rob's 31
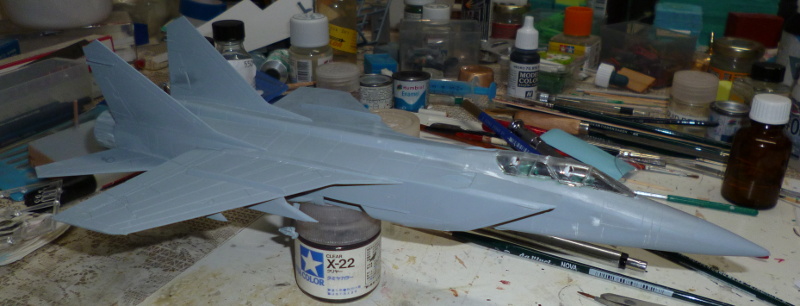
Thank you, and yes, it's big. This has been a source of rather constant amazement to me the last few years. I'd never realised just how big modern fighters, especially the Russian ones , were, until I started building Dakotas in the same scale.SteveC wrote:Very well painted crew figures there, and it's certainly a big old bird isn't it!
-
- Modelling Gent and Scholar
- Posts: 3325
- Joined: November 4th, 2012, 11:28 am
- Location: The Netherlands
- Contact:
Re: Rob's 31
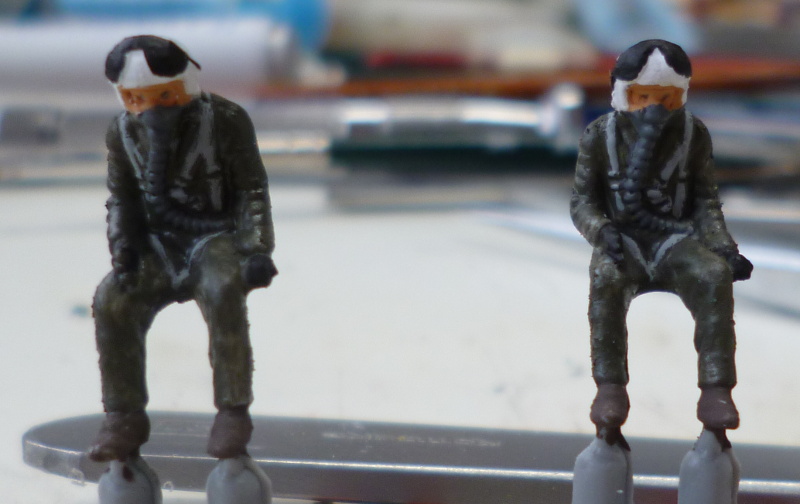
You think any other sort of dance is possible, in full flight gear including oxygen mask, under the heat of stage lighting?Marek wrote:They look like a boys band doing sort of macabresque dance .
-
- Modelling Gent and Scholar
- Posts: 4385
- Joined: November 23rd, 2012, 4:20 pm
Re: Rob's 31
Looking very nice Rob!
- Old_Tonto
- Modelling Gent and Scholar
- Posts: 8063
- Joined: May 1st, 2011, 7:41 pm
- Location: Middlesbrough, Peoples Republic of Teesside.
Re: Rob's 31
That lump of plastic is turning into a real beauty.
Keep up the good work Rob.
2023 - A:0 B:0 C:0
Current Projects:
East German Air Force (1956-90)
South African Air Force (1958-93)
Current Projects:
East German Air Force (1956-90)
South African Air Force (1958-93)
- Stuart
- Raider of the Lost Ark Royal
- Posts: 19451
- Joined: February 25th, 2013, 4:55 pm
- Location: North Wales
- Contact:
Re: Rob's 31
Great work Rob!
Stuart Templeton I may not be good but I'm slow...
My Blog: https://stuartsscalemodels.blogspot.com/
-
- Modelling Gent and Scholar
- Posts: 3325
- Joined: November 4th, 2012, 11:28 am
- Location: The Netherlands
- Contact:
Re: Rob's 31
The initial coat of primer went on today. Initial inspection shows fewer problems than I'd expected, but that still leaves a fair bit of cleanup and correction to be done.
-
- Modelling Gent and Scholar
- Posts: 3325
- Joined: November 4th, 2012, 11:28 am
- Location: The Netherlands
- Contact:
Re: Rob's 31
The work on the exterior has been mostly completed, so it was time to complete the interior and seal things up. I even remenbered to shoot some pictures of the office before closing the lid
The interior is just a coat of green and some black drybrushing; the IP are decals. Zvezda had two decals, one for each IP, but that just doesn't work for the RIO, so I had to cut the decal into the two parts it should have been all along: the main IP, and the part on the upper console. Please observe that for just this once, I didn't forget or lose the control columns
Once the interior was finished, I turned my attention to the transparencies. I'm of two minds where these are concerned. On the one hand, they're very nicely moulded, and the plastic they use was not th rock hard, brittle stuff you so often find. Instead, it was rather softer plastic, and very easy to work with. On the other hand, fit was only marginal, and because there are four parts to the canopy with next to no alignment, errors stack. It doesn't show in the picture (in part because transparencies are hard to see by design), but there will be some work there with filler before this is done.
The shape of the beast is beginning to show..