Rob's flagship
-
- Modelling Gent and Scholar
- Posts: 3325
- Joined: November 4th, 2012, 11:28 am
- Location: The Netherlands
- Contact:
Rob's flagship
I'll be turning this
into something like this: http://flagshipdetroit.org/FSD/Photos2013.html;
Unless I get carried away, and try for a DST instead
At the very least this will entail:
- scratchbuilding the passenger interior
- replacing the double door on the left with a single door on the right
- replacing the engines
- adding the seventh window on the left
- Arcwelder
- Modelling Gent and Scholar
- Posts: 1228
- Joined: July 17th, 2015, 1:56 am
- Location: Cork City, Ireland
Re: Rob's flagship
Oh, this is going to be a very interesting build...
Is this your sanderling?.
2016: A:40 B:12
2016: A:40 B:12
-
- Modelling Gent and Scholar
- Posts: 3325
- Joined: November 4th, 2012, 11:28 am
- Location: The Netherlands
- Contact:
Re: Rob's flagship
Time for my opening volley
I've sanded the inside of the left fuselage half smooth, since all that lovely detail would have been covered on a liner, and would get in the way of work. I then stuck a sheet of Evergreen to the inside, covering the double doors, and filled the 'bucket' so created with Milliput from the outside.
This looks a total mess, of course, but that's all part of the plan. The Milliput will be sanded flush with the fuselage from the outside first, and then I'll have to find some way to transfer the panel lines from the other half over in reverse. Once that is completed, the Evergreen sheet (and any Milliput that got into seams) will be sanded off from the inside. At that point, all that will bind the new panel to the original plastic will be the bond along the thin edge of the plastic. Previous experience had show that this bond is not strong enough to hold it in place, so some wiggling should break it loose cleanly, and give me a master to make copies from for a fuselage panel. The first resin copy will then be joined to the fuselage 'for real'.
-
- Modelling Gent and Scholar
- Posts: 3325
- Joined: November 4th, 2012, 11:28 am
- Location: The Netherlands
- Contact:
Re: Rob's flagship
Already hit the first self inflicted problem.. I started sanding down the door insert, and found some of the milliput had been imperfectly mixed, and so not set. Well below the surface, of course, otherwise I would have spotted it
Put on my best 'sadistic dentist' face and dug out the rot, them plastered over with filler. More sanding later..
- splash
- Senior Service Rotorhead
- Posts: 13828
- Joined: May 1st, 2011, 11:02 am
- Location: Somerset England
Re: Rob's flagship
Do you find the White miliputty is any better than the yellow/grey variety?
My work bench is starting to look like Portsmouth Naval Dockyard.
-
- Modelling Gent and Scholar
- Posts: 3325
- Joined: November 4th, 2012, 11:28 am
- Location: The Netherlands
- Contact:
Re: Rob's flagship
The fuselage insert is coming along nicely. One, maybe two visits to the 'dentist' and I'll have this completely smooth.
After that comes the job I really dread: carving the new panel lines and restoring the original ones.
-
- Modelling Gent and Scholar
- Posts: 3325
- Joined: November 4th, 2012, 11:28 am
- Location: The Netherlands
- Contact:
Re: Rob's flagship
Depends on your definition of 'better'. I find the yellow/grey the easiest to work with, however, the difference in structure between the grades, although small, is noticable, and I wanted the smoothest possible result here. This thing is supposed to become a master for casting more, after all, and a second master, this one with a door in it, will be derived from that. Best to aim for the best quality in such a case.splash wrote:Do you find the White miliputty is any better than the yellow/grey variety?
Re: Rob's flagship
Oh, yes, try for a DST instead!rob_van_riel wrote: try for a DST instead
Jim
Read my inane modeling writings at:
http://ascalecanadian.com
-
- Modelling Gent and Scholar
- Posts: 3325
- Joined: November 4th, 2012, 11:28 am
- Location: The Netherlands
- Contact:
Re: Rob's flagship
A lot will depend on the decals. I have a set for a 'normal' flagship, but it's anybody's guess how they will behave. I'll probably end up drawing a copy of those. At that point, I'll have to take a long look at what else is needed for a DST. The markings are quite similar, but I doubt I'll be able to find the rather flashy font used for the 'flagship' texts, so those would have to be drawn by hand. If that proves harder then I can handle on short notice, I'll stick with the copied markings, if not, the temptation to go all out increases.airjim wrote:Oh, yes, try for a DST instead!
Of course, if someone were to point me to a set of flagship DST markings, or a good scan of those, the odds of a DST would increase...
-
- Modelling Gent and Scholar
- Posts: 3325
- Joined: November 4th, 2012, 11:28 am
- Location: The Netherlands
- Contact:
Re: Rob's flagship
I thought I was never going to get the surface of that insert smooth
Still, this evening, I finally got there. Next, some panel lines..
Re: Rob's flagship
Looking good, Rob. Have you braved using the scribing tool?
Regards
Marrin
Regards
Marrin
-
- Modelling Gent and Scholar
- Posts: 3325
- Joined: November 4th, 2012, 11:28 am
- Location: The Netherlands
- Contact:
Re: Rob's flagship
Scribing scares me silly , but I have little choice in this case (also, little success so far). A big featureless blanking plate doesn't work. I'll just have to learn, quickly, and right nowMartin R wrote:Looking good, Rob. Have you braved using the scribing tool?
Due to the heterogenous material, I don't think I'll be able to use a normal scriber. I fear anything like a needle or those dedicated scribing tools will tear out some of those tiny bits of filler that took me so long to get right. I'll have to use one of those wicked looking diamond files I have lying around, an grind rather than cut the lines.
Re: Rob's flagship
Rob
Aye, I have my own issues with scribing. So far, though, the '335's plastic has been very smooth and is taking scribing nicely. Although clearly I'm not scribing through filler...
Regards
Martin
Aye, I have my own issues with scribing. So far, though, the '335's plastic has been very smooth and is taking scribing nicely. Although clearly I'm not scribing through filler...
Regards
Martin
-
- Modelling Gent and Scholar
- Posts: 3325
- Joined: November 4th, 2012, 11:28 am
- Location: The Netherlands
- Contact:
Re: Rob's flagship
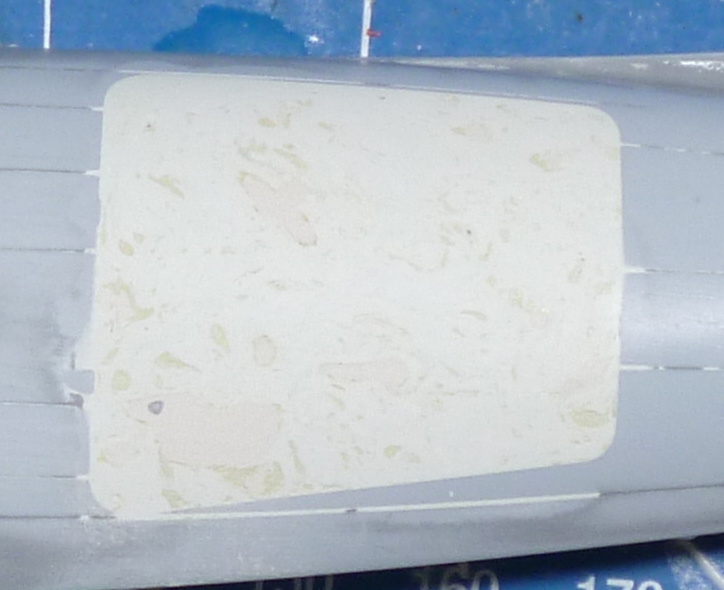
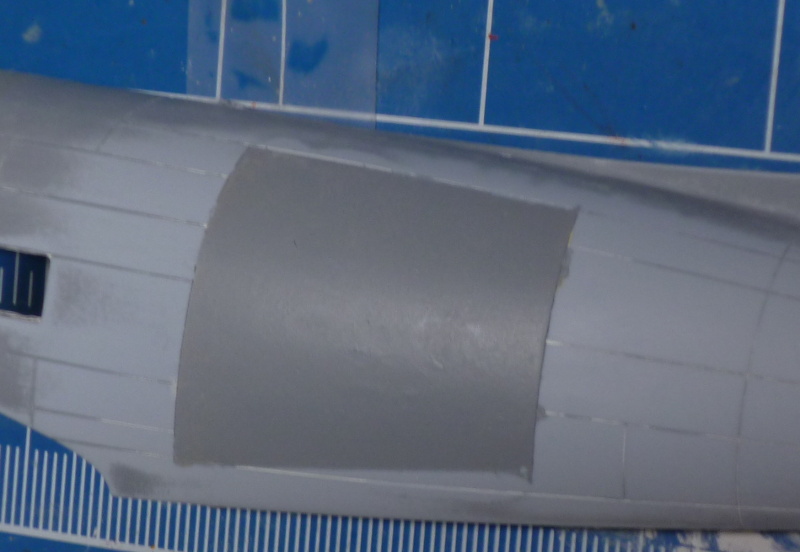
So far, the chosen tooling seems to be bearing up. I've finished the easy bits, that is, repair of the original panel lines around the door, and extension of any existing lines that simply cross the new panel.Martin R wrote:Aye, I have my own issues with scribing. So far, though, the '335's plastic has been very smooth and is taking scribing nicely. Although clearly I'm not scribing through filler...
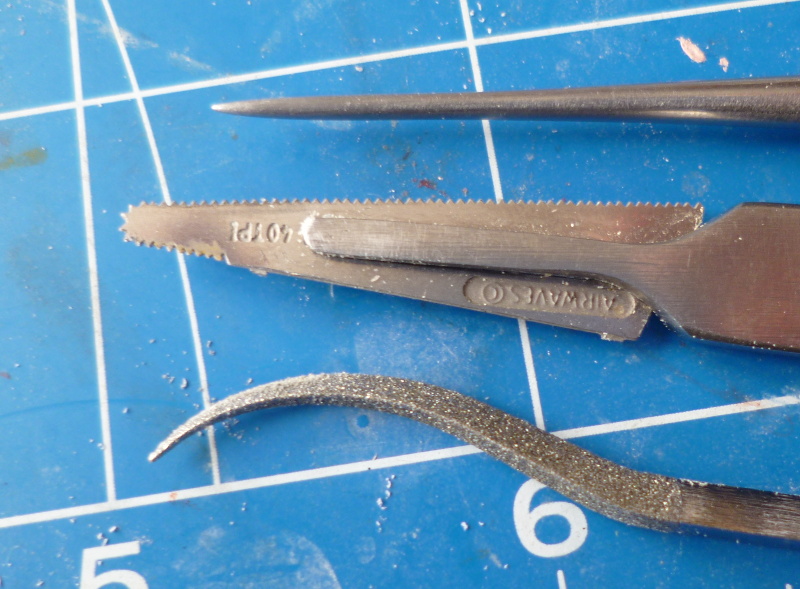
For those interested, the business ends of my scribing tools:
I'll be adding at least one extra window to the left side of the plane. Airfix have chosen to include the window frame on the transparency (good call, this will absorb any minor cracking when removing the parts from the sprues, but for this conversion, it creates a problem. For obvious reasons, there are enough windows, but no more than that. The newly created windows will therefore be different from the kit supplied ones, which will show. Obvious solution is to make 
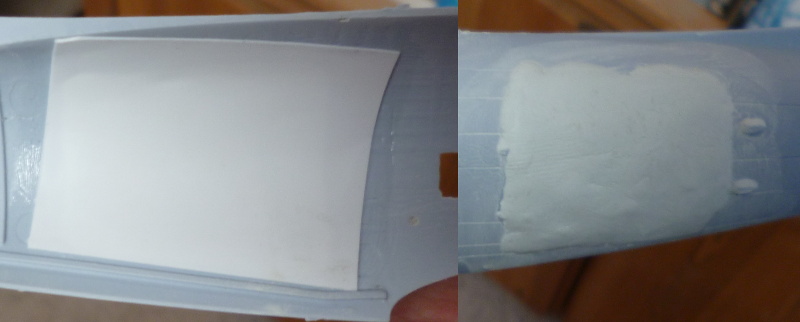
all windows the same, either from clear sheets, or from Clearfix or some such. But that in turn means I'll need the window frames in the original windows (I could simply cut the extra's a little smaller). Cutting out the window from the frame on the kit supplied parts does not appeal to me. The alternative is to make the actual window frames myself. Enter a piece of wood of the correct dimensions for the actual window, and some plastic card of appropriate thickness:
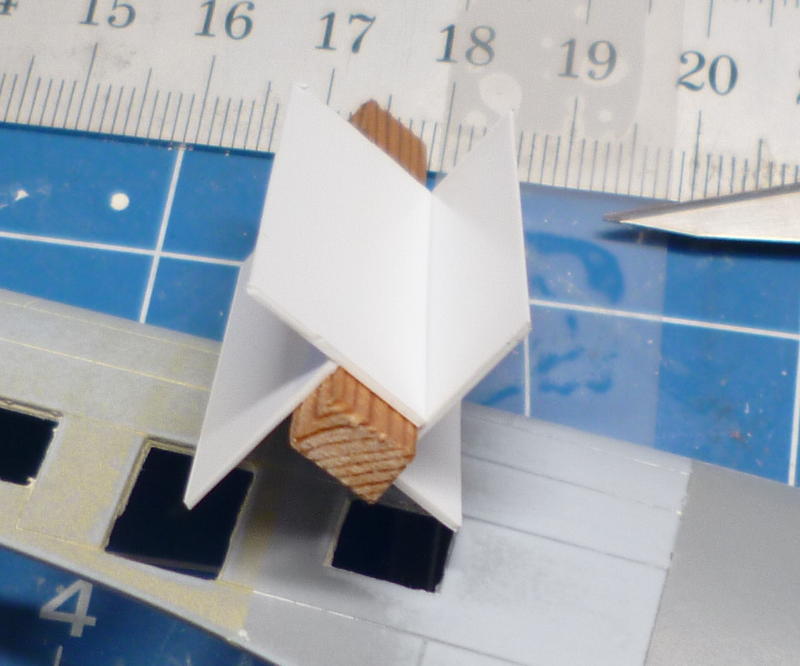
The 'wings' have by now been removed. To my relief, I got the size right; the plastic lines up nicely with the holes in the fuselage. Now, I'll have to cut thick slices from this bar, and hope I can get the wood out.
Even if this works out, it doesn't work for the emergency exits, as these are a bit wider. I'll have to cut out the window after all for those two parts.
Re: Rob's flagship
Wow! Committed modelling. I like it!
Regards
Martin
Regards
Martin
Martin R
"the 'R' stands for 'Representative'."