Enter the Huntress *** FINISHED ***
-
iggie

- Modelling Gent and Scholar
- Posts: 23437
- Joined: July 31st, 2013, 11:04 am
- Location: North Somercotes, Lincolnshire
- Contact:
Re: Enter the Huntress
Great work going on here!
Best wishes
Jim
If you can walk away from a landing, it's a good landing. If you use the airplane the next day, it's an outstanding landing
"Never put off till tomorrow, what you can do the day after tomorrow"
Jim
If you can walk away from a landing, it's a good landing. If you use the airplane the next day, it's an outstanding landing
"Never put off till tomorrow, what you can do the day after tomorrow"
-
general rocket

- Modelling Gent and Scholar
- Posts: 2791
- Joined: May 1st, 2011, 4:42 pm
- Location: Telford
Re: Enter the Huntress
Your friend is probably right about over thinking a project like this.
Anybody else here (other than me) guilty of this?
Anybody else here (other than me) guilty of this?
I wish, that I knew what was doing!
-
DavidWomby

- Modelling Gent and Scholar
- Posts: 11761
- Joined: May 1st, 2011, 8:09 pm
- Location: Florida, USA
Re: Enter the Huntress
Of course he is right but I'm not admitting that to him!
David
David
-
DavidWomby
- Modelling Gent and Scholar
- Posts: 11761
- Joined: May 1st, 2011, 8:09 pm
- Location: Florida, USA
Re: Enter the Huntress
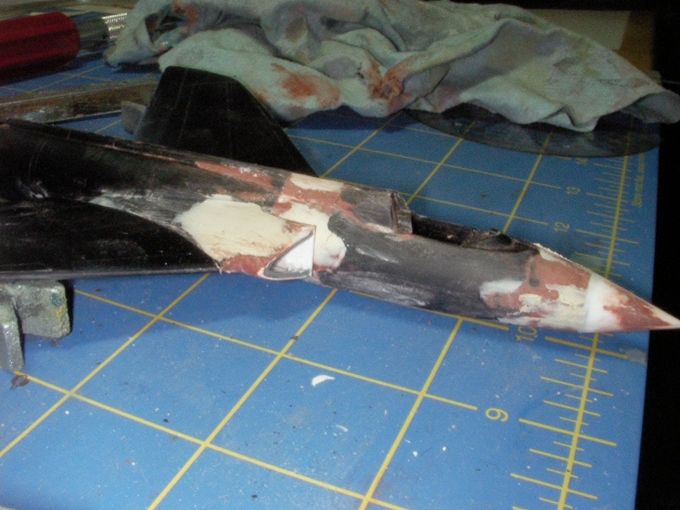
Here's how the fuselage came together. The fin is just posed for test fitting.
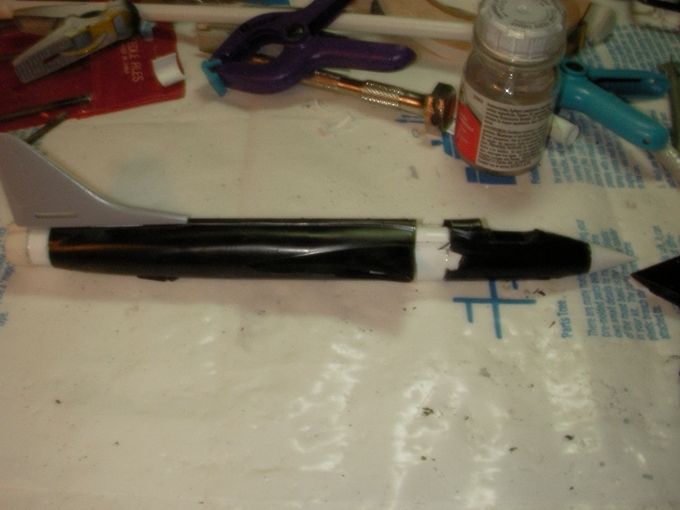
I think the radome is off an Airfix TSR2, the extension behind the cockpit is lots of plastic card and tubing, the rear has a bit of white tubing and then the tailpipe is a resin piece from a garage kit of a very obscure Australian aircraft - the CA-31.
Here it is after the first round of putty and sand.
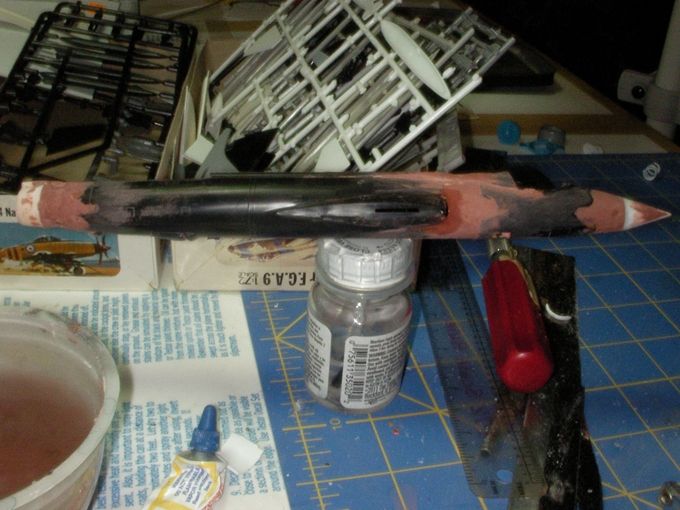
Lots more of that to come but I also need to start work on the intakes.
David
I think the radome is off an Airfix TSR2, the extension behind the cockpit is lots of plastic card and tubing, the rear has a bit of white tubing and then the tailpipe is a resin piece from a garage kit of a very obscure Australian aircraft - the CA-31.
Here it is after the first round of putty and sand.
Lots more of that to come but I also need to start work on the intakes.
David
-
TimJ

- Modelling Gent and Scholar
- Posts: 4290
- Joined: May 1st, 2011, 12:54 am
- Location: Oldbury, West Midlands
Re: Enter the Huntress
Great job on the fuselage work.
2020 A:35 B:18. 2021 A: 51 B:25 C:21 2022 A:63 B:23 C:11 2024 A:9 B:4 C:15

Re: Enter the Huntress
Cracking work so far, David.
Regards
Martin
Regards
Martin
Martin R
"the 'R' stands for 'Representative'."
"the 'R' stands for 'Representative'."
-
DavidWomby
- Modelling Gent and Scholar
- Posts: 11761
- Joined: May 1st, 2011, 8:09 pm
- Location: Florida, USA
Re: Enter the Huntress
Thanks for the kind comments.
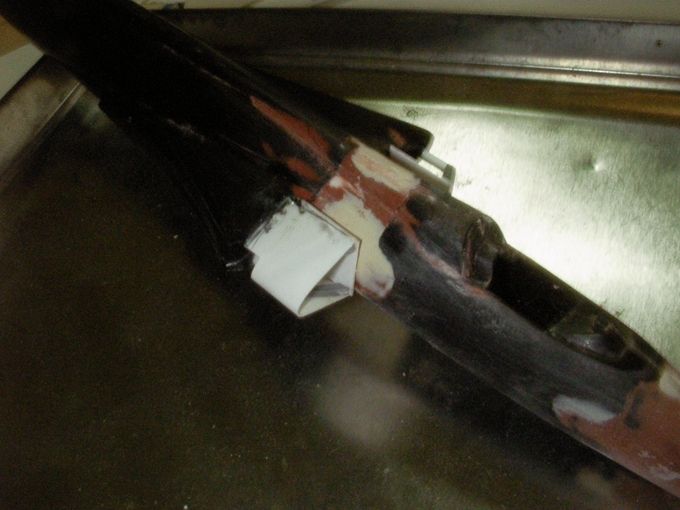
Still doing lots of PSR on the fuselage but have also made a start on the intakes.
The lip is a section cut from a spare Mirage F1 drop tank. It's glued to a plastic card splitter plate and a piece of plastic rod that acts as the outer edge of the intake side then holds it at the desired angle.
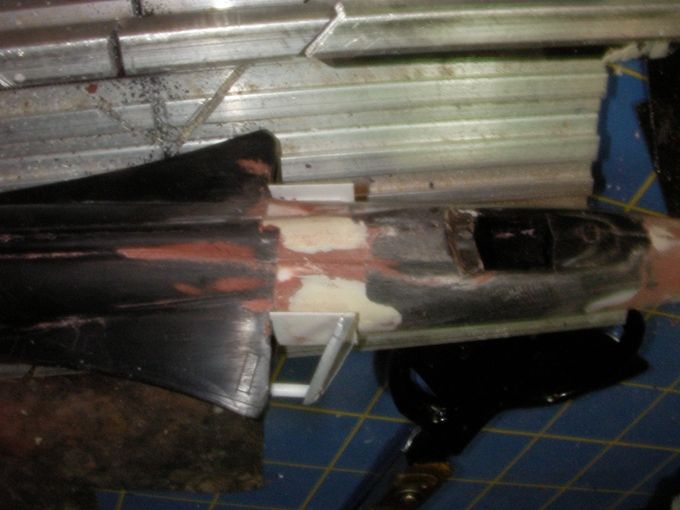
The plan is to then cover it with plastic card and then putty it to a more rounded shape faired in to the front of the old intake.
David
Still doing lots of PSR on the fuselage but have also made a start on the intakes.
The lip is a section cut from a spare Mirage F1 drop tank. It's glued to a plastic card splitter plate and a piece of plastic rod that acts as the outer edge of the intake side then holds it at the desired angle.
The plan is to then cover it with plastic card and then putty it to a more rounded shape faired in to the front of the old intake.
David
-
DavidWomby
- Modelling Gent and Scholar
- Posts: 11761
- Joined: May 1st, 2011, 8:09 pm
- Location: Florida, USA
Re: Enter the Huntress
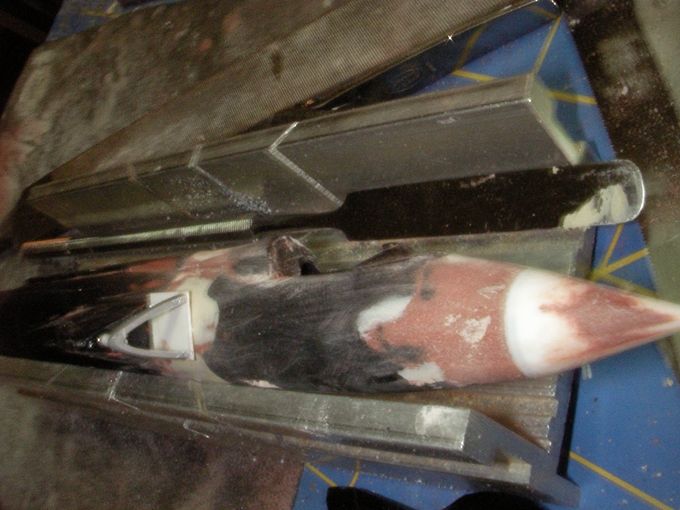
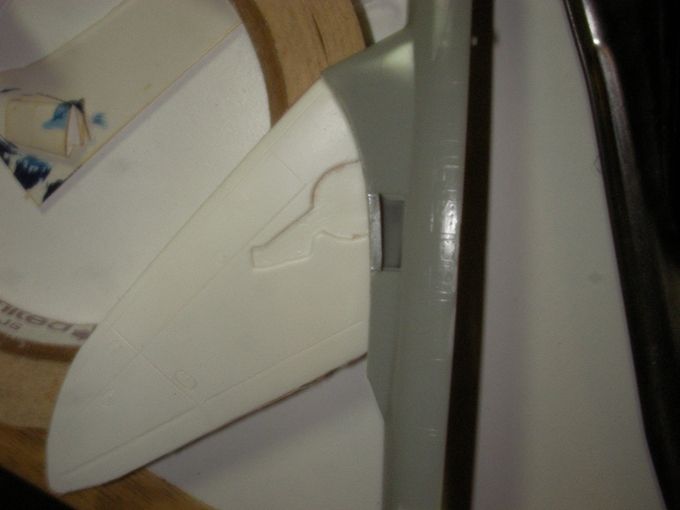
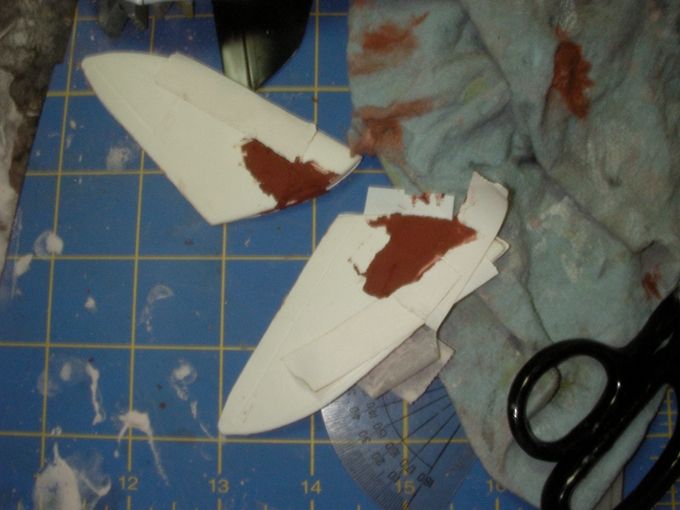
Thankfully, the plan for making the intakes seems to be working.
I covered the frames I had made with plastic card and applied superglue to tack it in place then went over it with liquid cement and held it together with clothes pegs.
This morning, I cut back the plastic card to the intake lips and started the PSR on them. (These wings may or may not be what goes on the final version.)
Why is that PSR, for me, takes so many rounds of it? It seems that, however careful I am, I always find a spot that needs more putty!!!
David
-
DavidWomby
- Modelling Gent and Scholar
- Posts: 11761
- Joined: May 1st, 2011, 8:09 pm
- Location: Florida, USA
Re: Enter the Huntress
Today has been wing (and PSR) day.
Back in the backstory: The Hawker team, having adopted the intakes off their P1090 design, also needed the greater sweep and thinner wings originally designed for the P1083 but also planned for the P1090.
The wings are from the Maintrack P1083 vacform conversion set. Fortunately, I plan to build it in flight because the wheel wells moulded in the Maintrack wing are nowhere close to aligned with the part of the wheel wells moulded in the wing roots of the Frog FGA9. I also checked them against the kit they are intended for, the Airfix FGA9, and surprise, surprise!
They don't line up on that either! Anyway, I just filled them and will used scribing or, more likely, decals to represent the main undercarriage doors.
To reinforce the wing joints, I am using brass strip and rod as spars.
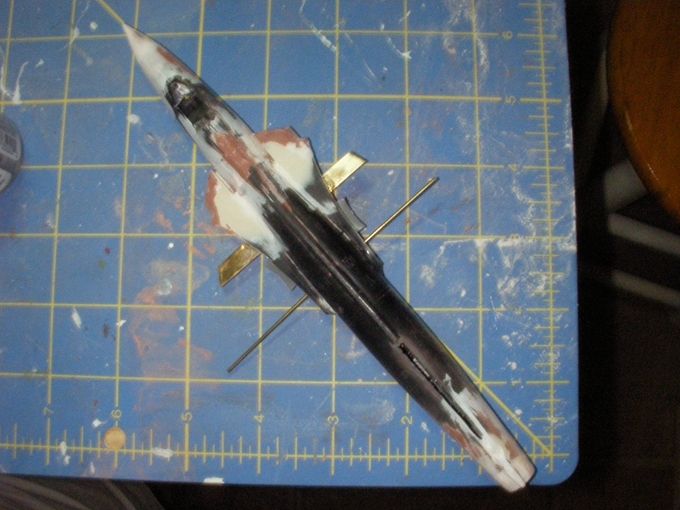
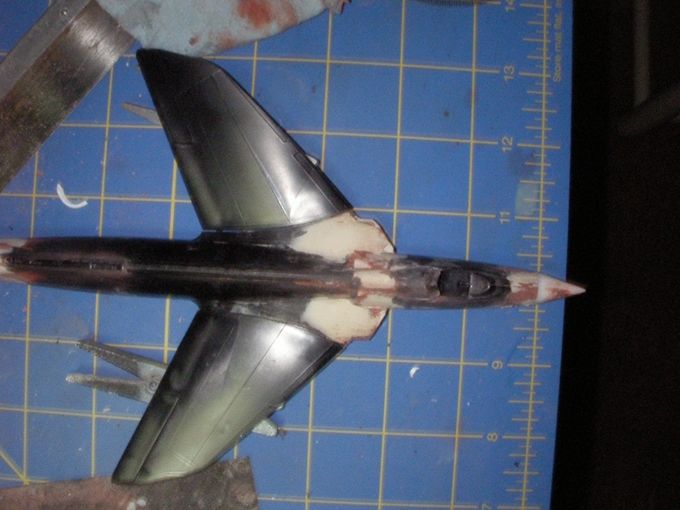
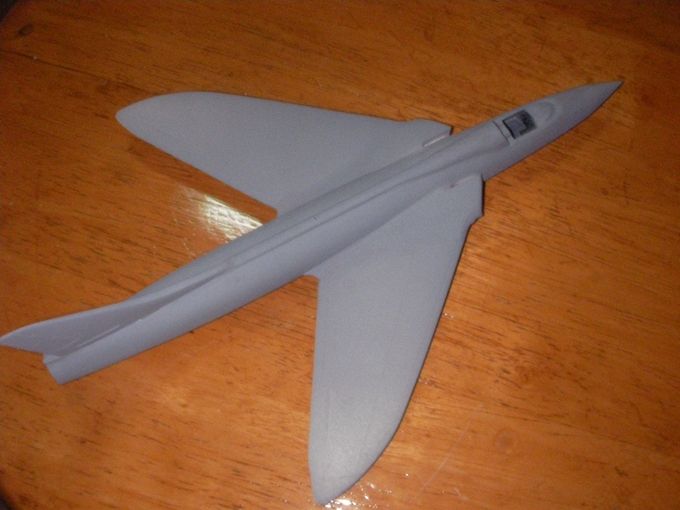
The wings aren't glued on yet but this hows the effect on the topview - quite different from the Hunter.
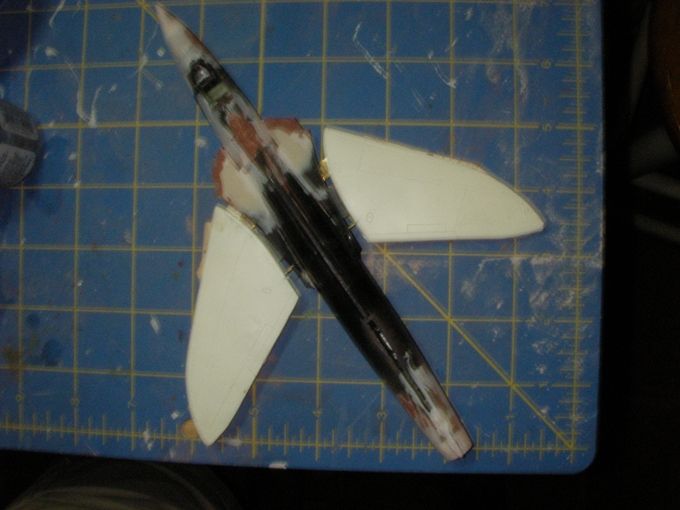
Lots of PSR on the fuselage and intakes today too and more to be done.!
David
Back in the backstory: The Hawker team, having adopted the intakes off their P1090 design, also needed the greater sweep and thinner wings originally designed for the P1083 but also planned for the P1090.
The wings are from the Maintrack P1083 vacform conversion set. Fortunately, I plan to build it in flight because the wheel wells moulded in the Maintrack wing are nowhere close to aligned with the part of the wheel wells moulded in the wing roots of the Frog FGA9. I also checked them against the kit they are intended for, the Airfix FGA9, and surprise, surprise!
They don't line up on that either! Anyway, I just filled them and will used scribing or, more likely, decals to represent the main undercarriage doors.
To reinforce the wing joints, I am using brass strip and rod as spars.
The wings aren't glued on yet but this hows the effect on the topview - quite different from the Hunter.
Lots of PSR on the fuselage and intakes today too and more to be done.!
David
-
JamesPerrin

- Looks like his avatar
- Posts: 13690
- Joined: April 5th, 2011, 8:09 pm
- Location: W. Yorkshire
- Contact:
Re: Enter the Huntress
The sept wings also look better with the extended intakes
Classic British Kits SIG Leader Better to fettle than to fill
(2024 A:B 5:2) (2023 13:8:7) (2022 21:11) (2021 15:8) (2020 8:4:4)
(2024 A:B 5:2) (2023 13:8:7) (2022 21:11) (2021 15:8) (2020 8:4:4)
-
Zen
- The Bug Has Well And Truly Bitten
- Posts: 271
- Joined: April 20th, 2016, 12:58 am
- Location: Portimão, Algarve, Portugal
Re: Enter the Huntress
I'll second that!Old_Tonto wrote:Excellent bodging Young man.
-
DavidWomby
- Modelling Gent and Scholar
- Posts: 11761
- Joined: May 1st, 2011, 8:09 pm
- Location: Florida, USA
Re: Enter the Huntress
Fin is glued on but not faired in yet. I couldn't resist a peek at the whole so here's the tailplanes taped on too.
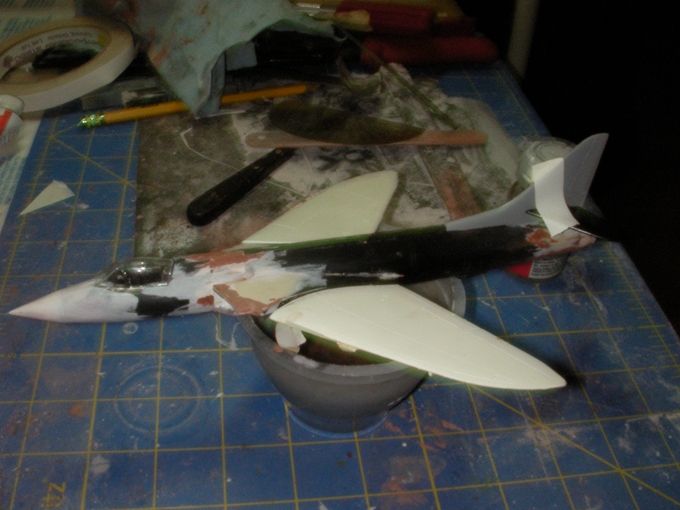
Since then, the wings have been attached but are a very poor fit - well, they were intended for the Airfix kit not this Frog one. So, lots of bits of plastic used to fill the gaps.
Now has had putty applied. Tomorrow will be more PSR (have I mentioned there's a lot of PSR on this one!)
David
Since then, the wings have been attached but are a very poor fit - well, they were intended for the Airfix kit not this Frog one. So, lots of bits of plastic used to fill the gaps.
Now has had putty applied. Tomorrow will be more PSR (have I mentioned there's a lot of PSR on this one!)
David
-
TimJ
- Modelling Gent and Scholar
- Posts: 4290
- Joined: May 1st, 2011, 12:54 am
- Location: Oldbury, West Midlands
Re: Enter the Huntress
Looking good. Rather you than me with all that PSR. 
2020 A:35 B:18. 2021 A: 51 B:25 C:21 2022 A:63 B:23 C:11 2024 A:9 B:4 C:15
-
DavidWomby
- Modelling Gent and Scholar
- Posts: 11761
- Joined: May 1st, 2011, 8:09 pm
- Location: Florida, USA
Re: Enter the Huntress
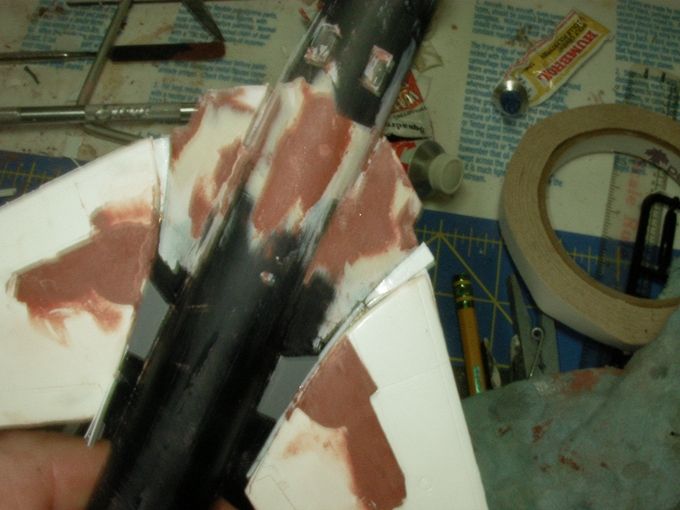
After a major sanding, I decided it was time to prime her to show up remaining flaws. Looks so much better in primer than that mix of black plastic, grey plastic, white plastic, red filler and white filler.
Needs a few minor bits of filler here and there but not bad.
David
Needs a few minor bits of filler here and there but not bad.
David
-
Old_Tonto

- Modelling Gent and Scholar
- Posts: 8063
- Joined: May 1st, 2011, 7:41 pm
- Location: Middlesbrough, Peoples Republic of Teesside.
Re: Enter the Huntress
Looks very good and you have retained the elegance of the Hunter whilst making her look like she means business.
2023 - A:0 B:0 C:0
Current Projects:
East German Air Force (1956-90)
South African Air Force (1958-93)
Current Projects:
East German Air Force (1956-90)
South African Air Force (1958-93)