Sad to see you're having this issue, David.
Sometimes, depending on the mold release agent used on resin parts, soap and water just isn't enough to properly prep for painting. With polyurethane resin's being impervious to most solvents, you might try a damp cloth wipe of alcohol on the affected areas, and then repaint. Just a suggestion that's likely too late.
I damp cloth wipe all large resin parts with a rubbing alcohol wipe prior to properly washing with warm water and Dawn dish soap.
Believe it or not, I've tested various dish soaps, and Dawn is the only one I've found that leaves no residue.
David's 'Spiteful' contribution *** Finished ***
-
DavidWomby

- Modelling Gent and Scholar
- Posts: 11764
- Joined: May 1st, 2011, 8:09 pm
- Location: Florida, USA
Re: David's 'Spiteful' contribution
Thanks. I had actually tried rubbing with IsoPropyl Alcohol early on. I don't think it's mould release agent as I didn't use any. I think it's a poor mixing ratio (although I was careful) or aged resin.
David
David
-
iggie

- Modelling Gent and Scholar
- Posts: 23438
- Joined: July 31st, 2013, 11:04 am
- Location: North Somercotes, Lincolnshire
- Contact:
Re: David's 'Spiteful' contribution
I hope your luck changes soon with this David, looking forward to seeing you triumph over adversity!
Best wishes
Jim
If you can walk away from a landing, it's a good landing. If you use the airplane the next day, it's an outstanding landing
"Never put off till tomorrow, what you can do the day after tomorrow"
Jim
If you can walk away from a landing, it's a good landing. If you use the airplane the next day, it's an outstanding landing
"Never put off till tomorrow, what you can do the day after tomorrow"
-
DavidWomby
- Modelling Gent and Scholar
- Posts: 11764
- Joined: May 1st, 2011, 8:09 pm
- Location: Florida, USA
Re: David's 'Spiteful' contribution
Thanks, Iggie.
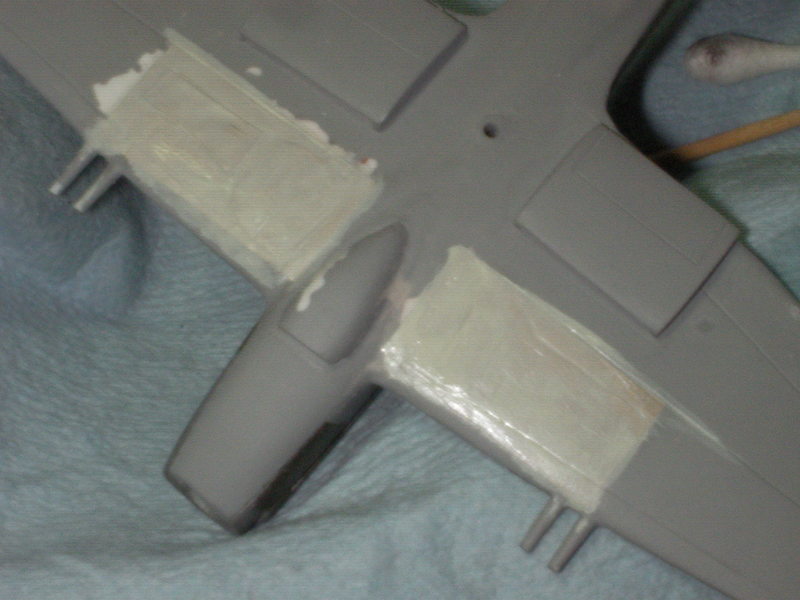
I tried to cover the resin areas with plastic card but it stood too proud of the wing undersurface. Then I tried various sticky tapes cut to the shape of the doors but was leery that there would still be seepage around the edges. So in the end I decided to just cover the whole of each area with Bare Metal foil!! Kind of like my equivalent to burying the Chernobyl reactor!
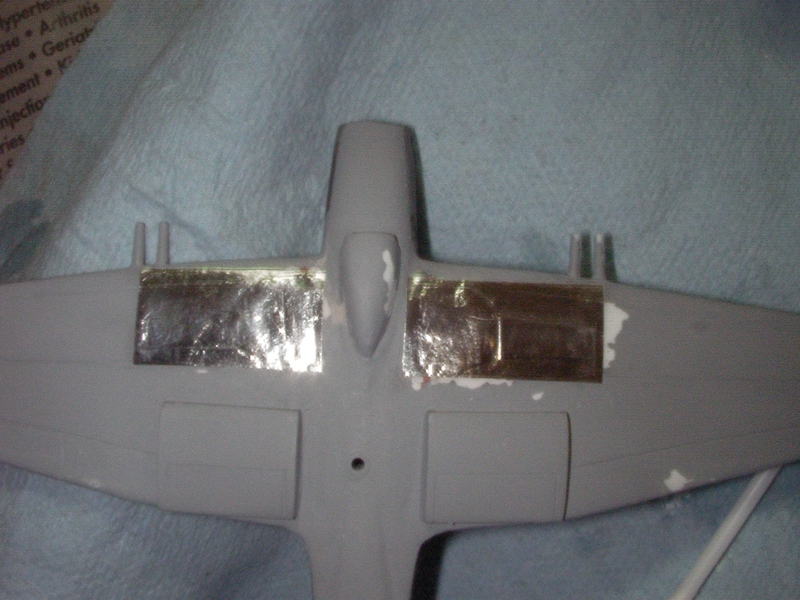
I didn't think acrylic would likely stick well painted onto the foil, so I painted it with the only tin of enamel I have - Humbrol Sky.
Tomorrow will tell how well this has worked. If it has worked, I'll probably have to do my usual trick and make some decals to represent the u/c doors. Plus, of course, repair all the damage to the MSG.
Fingers crossed, everybody, please.
David
I tried to cover the resin areas with plastic card but it stood too proud of the wing undersurface. Then I tried various sticky tapes cut to the shape of the doors but was leery that there would still be seepage around the edges. So in the end I decided to just cover the whole of each area with Bare Metal foil!! Kind of like my equivalent to burying the Chernobyl reactor!
I didn't think acrylic would likely stick well painted onto the foil, so I painted it with the only tin of enamel I have - Humbrol Sky.
Tomorrow will tell how well this has worked. If it has worked, I'll probably have to do my usual trick and make some decals to represent the u/c doors. Plus, of course, repair all the damage to the MSG.
Fingers crossed, everybody, please.
David
-
fredk

- Modelling Gent and Scholar
- Posts: 6195
- Joined: May 1st, 2012, 6:25 am
- Location: Donaghadee, N'rn Ir'n
Re: David's 'Spiteful' contribution
Rather than make door decals could you run a blunt tool around the edge of the resin doors to outline them in the foil?
Al speling misteaks aer all mi own werk..
Its not just how good your painting is, its how good the touch-ups are too.
Its not just how good your painting is, its how good the touch-ups are too.
-
splash

- Senior Service Rotorhead
- Posts: 13828
- Joined: May 1st, 2011, 11:02 am
- Location: Somerset England
Re: David's 'Spiteful' contribution
Bare metal foil, now that was thinking outside the box, well done, that deserves to work.
Regards Splash
Regards Splash
My work bench is starting to look like Portsmouth Naval Dockyard.
-
DavidWomby
- Modelling Gent and Scholar
- Posts: 11764
- Joined: May 1st, 2011, 8:09 pm
- Location: Florida, USA
Re: David's 'Spiteful' contribution
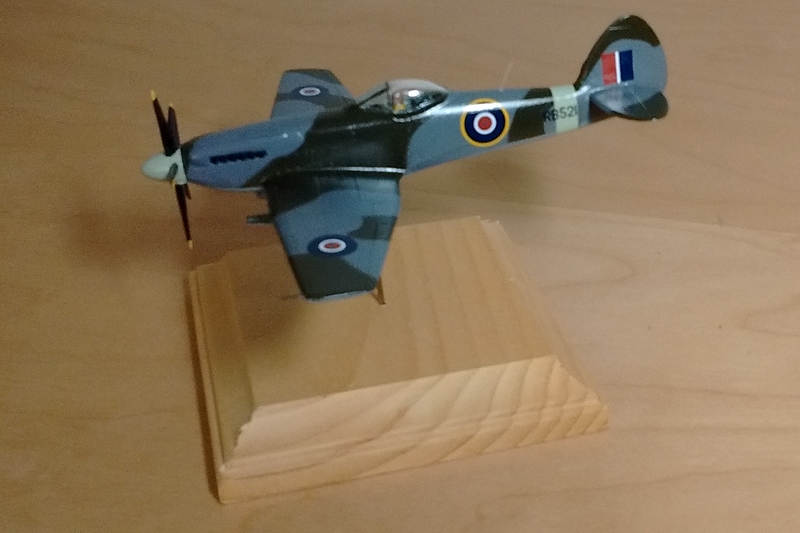
I think this will have to do.
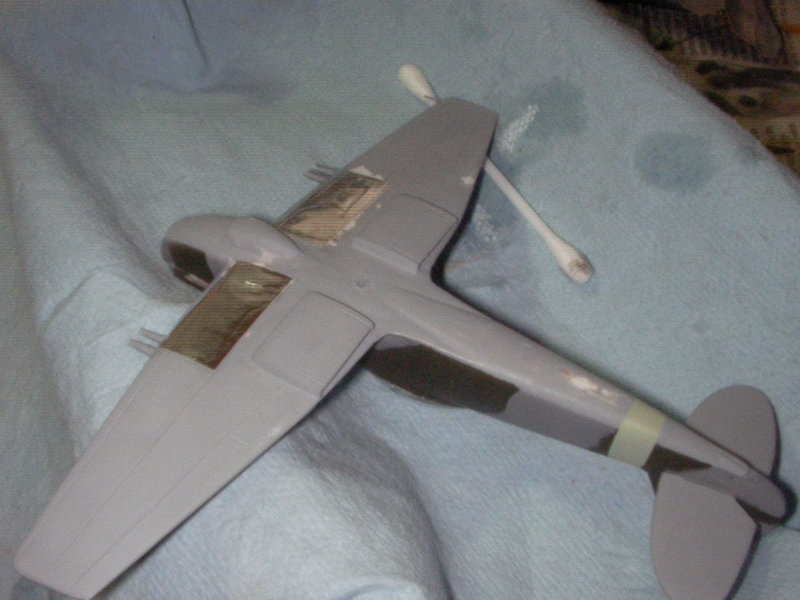
You can see the edges of the metal foil through the paint. You can just see the outline of the u/c doors but also, if you get the light on it, many gouges and roughness under the foil where I scraped off soggy paint. But looking, after 3 thin brushed on coats, somewhat OK. I'll do another thin coat but that will probably be it. At least it's underneath.
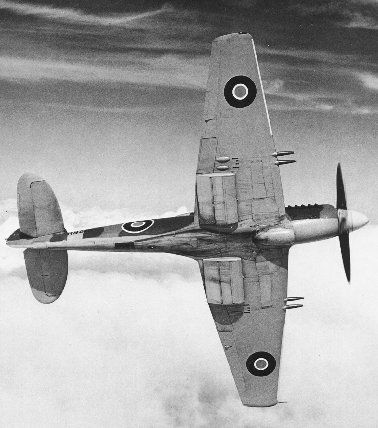
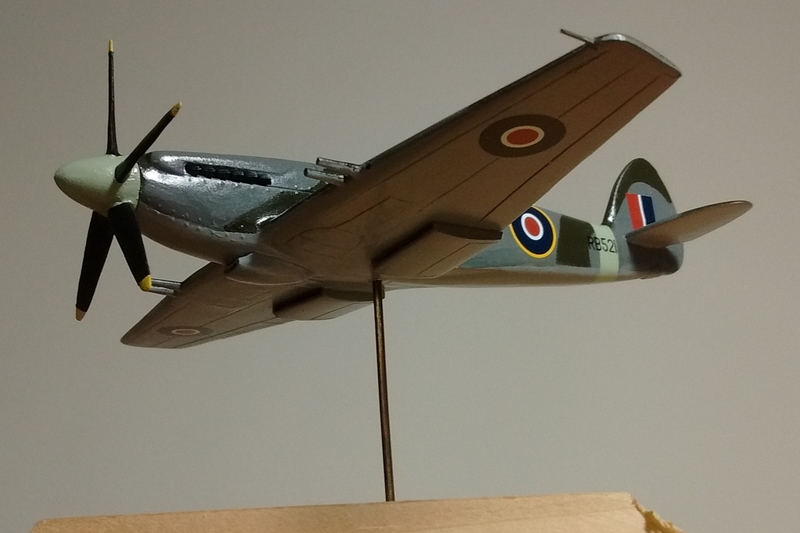
Unfortunately I now have several scratches on the upper surfaces to fix too due to so much handling over the last few days. It's a shame because as you can see from the pic in my first post, RB521 was actually pristine - perfect, shiny paint! Mine will be a bit dog-eared!
David
You can see the edges of the metal foil through the paint. You can just see the outline of the u/c doors but also, if you get the light on it, many gouges and roughness under the foil where I scraped off soggy paint. But looking, after 3 thin brushed on coats, somewhat OK. I'll do another thin coat but that will probably be it. At least it's underneath.
Unfortunately I now have several scratches on the upper surfaces to fix too due to so much handling over the last few days. It's a shame because as you can see from the pic in my first post, RB521 was actually pristine - perfect, shiny paint! Mine will be a bit dog-eared!
David
-
DavidWomby
- Modelling Gent and Scholar
- Posts: 11764
- Joined: May 1st, 2011, 8:09 pm
- Location: Florida, USA
Re: David's 'Spiteful' contribution
Mind you, although this pic isn't RB521, maybe I could portray her in this kind of state and say Eric abused her during his test flying .....................
Hmmm - just noticed there are cannon bulges under each wing just ahead of the flap hinges. Not going to add those at this stage!
David
Hmmm - just noticed there are cannon bulges under each wing just ahead of the flap hinges. Not going to add those at this stage!
David
-
Kitaholic

- Modelling Gent and Scholar
- Posts: 3765
- Joined: November 10th, 2014, 7:53 pm
- Location: 5 mins from SMW
Re: David's 'Spiteful' contribution
You've really got to look hard to see any of the issues you describe so I would class that as a good save. Filed for any future problems I may encounter
Regards
Gord
Desperately trying to find his MOJO, don't know where I left it
Gord
Desperately trying to find his MOJO, don't know where I left it
Re: David's 'Spiteful' contribution
Well done! I admire your perseverance! I would have given it to the grandson.
-
fredk
- Modelling Gent and Scholar
- Posts: 6195
- Joined: May 1st, 2012, 6:25 am
- Location: Donaghadee, N'rn Ir'n
Re: David's 'Spiteful' contribution
a. I'd not fuss about those bulges either at this stage
b. You've put the BMF on in neat panels. You know/we know why, to anyone else they just look like proper panels.
c. I'm sure you can touch up the the top side well
b. You've put the BMF on in neat panels. You know/we know why, to anyone else they just look like proper panels.
c. I'm sure you can touch up the the top side well
Al speling misteaks aer all mi own werk..
Its not just how good your painting is, its how good the touch-ups are too.
Its not just how good your painting is, its how good the touch-ups are too.
-
DavidWomby
- Modelling Gent and Scholar
- Posts: 11764
- Joined: May 1st, 2011, 8:09 pm
- Location: Florida, USA
Re: David's 'Spiteful' contribution
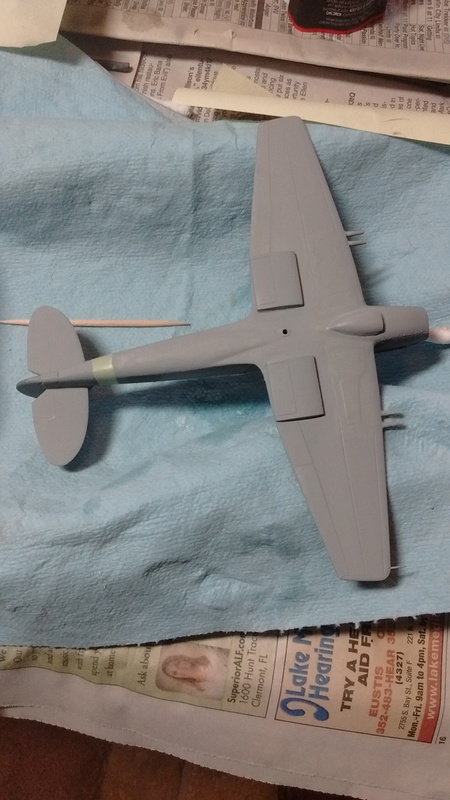
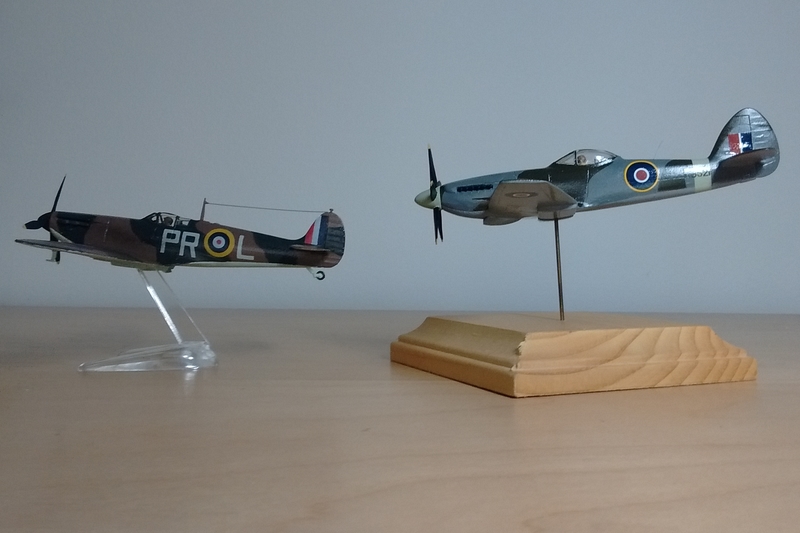
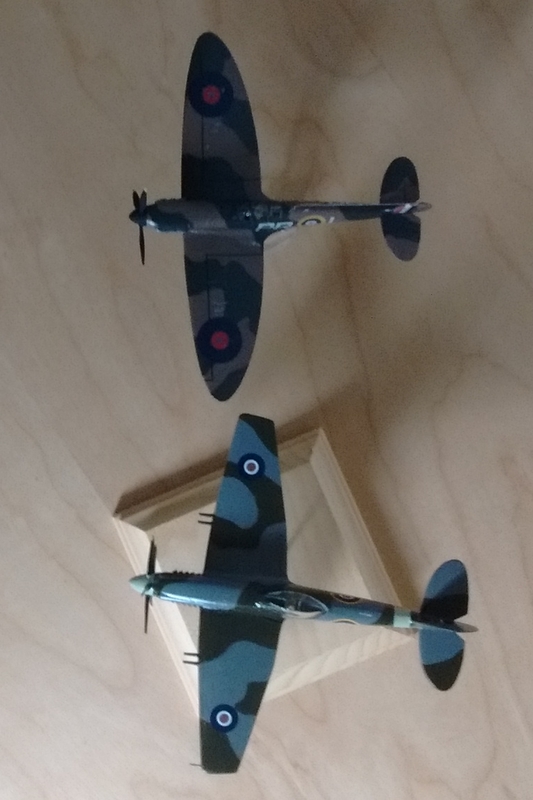
Finally! Calling this done. Mine is not quite as shiny as the real thing and the underside is marred a bit by the u/c doors but I am pretty happy with her.
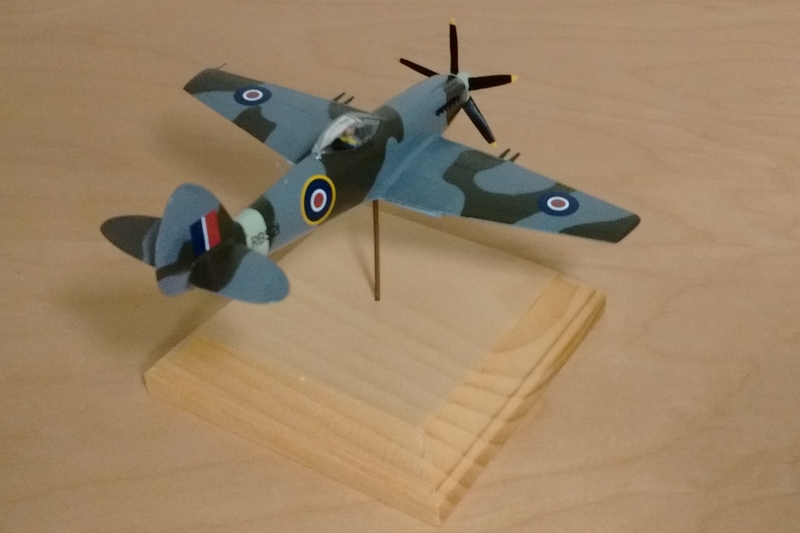

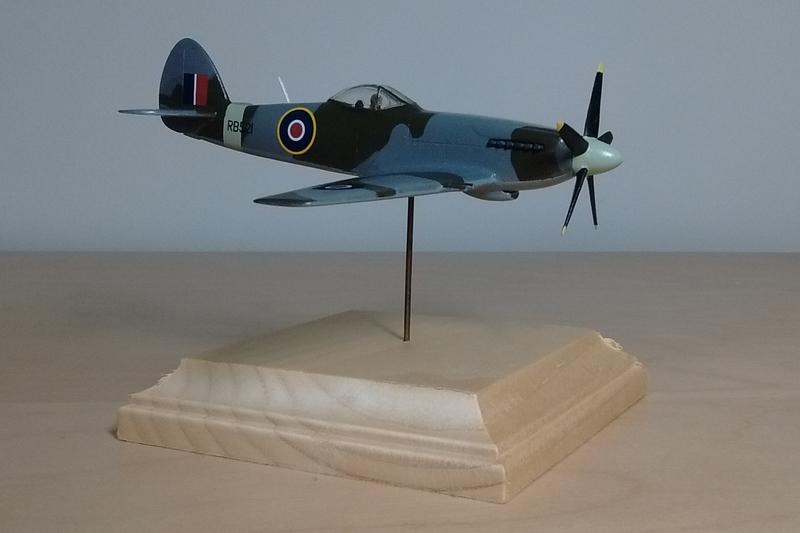
She is so different from the early Spitfire!
Thanks to everyone who gave suggestions, encouragement and moral support!!!
David
She is so different from the early Spitfire!
Thanks to everyone who gave suggestions, encouragement and moral support!!!
David
-
fredk
- Modelling Gent and Scholar
- Posts: 6195
- Joined: May 1st, 2012, 6:25 am
- Location: Donaghadee, N'rn Ir'n
Re: David's 'Spiteful' contribution *** Finished ***
That looks right good
Al speling misteaks aer all mi own werk..
Its not just how good your painting is, its how good the touch-ups are too.
Its not just how good your painting is, its how good the touch-ups are too.

Re: David's 'Spiteful' contribution *** Finished ***
Sorry, David, just seen this thread. Firstly, can I say how impressed I am on what you managed to extract from a kit that looks like a bit of a rough old dog; secondly, I was sad to hear about your resin paint troubles; thirdly and finally, nice finish!
Regards
Martin
Regards
Martin
-
Purplethistle

- Delusional Miniature Killer
- Posts: 4680
- Joined: July 10th, 2014, 1:03 am
- Location: Glasgow
Re: David's 'Spiteful' contribution *** Finished ***
Top result from a 'shambles' of a kit with all manner of difficulties to overcome! 
......very appropriate for a Winkle themed build.
......very appropriate for a Winkle themed build.
"Spits, SLUFS and Rock 'n' Roll"