Page 1 of 4
Lancfan's HP 0/400 build ***Finished ***
Posted: June 14th, 2017, 3:59 am
by lancfan
Just marking the place for my build- box and sprue shots will be added later.
David.
Re: Lancfan's HP 0/400 build
Posted: June 14th, 2017, 6:45 am
by iggie
Excellent choice David; looking forward to seeing this get started
Re: Lancfan's HP 0/400 build
Posted: June 18th, 2017, 3:16 pm
by lancfan
Pre-painting will begin this evening, here is the boxtop shot and the freshly washed sprues ready to begin.


David.
Re: Lancfan's HP 0/400 build
Posted: June 18th, 2017, 3:23 pm
by iggie
Watch out for warpage in the fuselage David; mine still looks a bit on the banana side of straight!
Re: Lancfan's HP 0/400 build
Posted: June 18th, 2017, 6:39 pm
by lancfan
Keeping the fuselage straight seems to be a common complaint with this kit iggie, I have given it some thought and will try something new, I have a cunning plan!
David.
Re: Lancfan's HP 0/400 build
Posted: June 18th, 2017, 7:32 pm
by iggie
As long as it doesn't involve a turnip then it stands a chance!
Re: Lancfan's HP 0/400 build
Posted: June 18th, 2017, 9:00 pm
by lancfan
Dratt! he guessed it.
David.
Re: Lancfan's HP 0/400 build
Posted: June 19th, 2017, 2:05 pm
by splash
I look forward to watching you do your magic on this big beast.
Regards Splash
Re: Lancfan's HP 0/400 build
Posted: June 21st, 2017, 6:38 pm
by beany
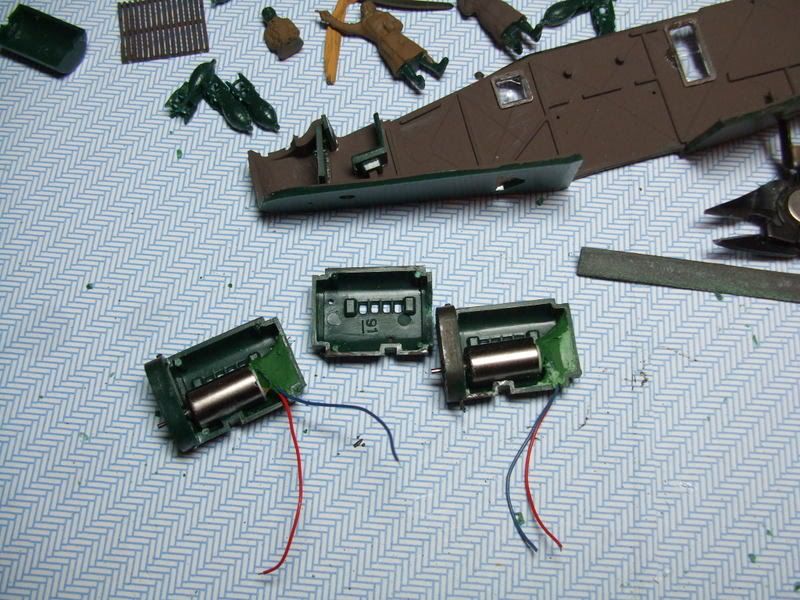
Looking forward to this build David. I thoroughly enjoyed the one I did with/for the local ATC squadron a few years ago. It was for a diorama so I motorised it with two tiny pager motors power from a battery, via a switch, housed in the fuselage.

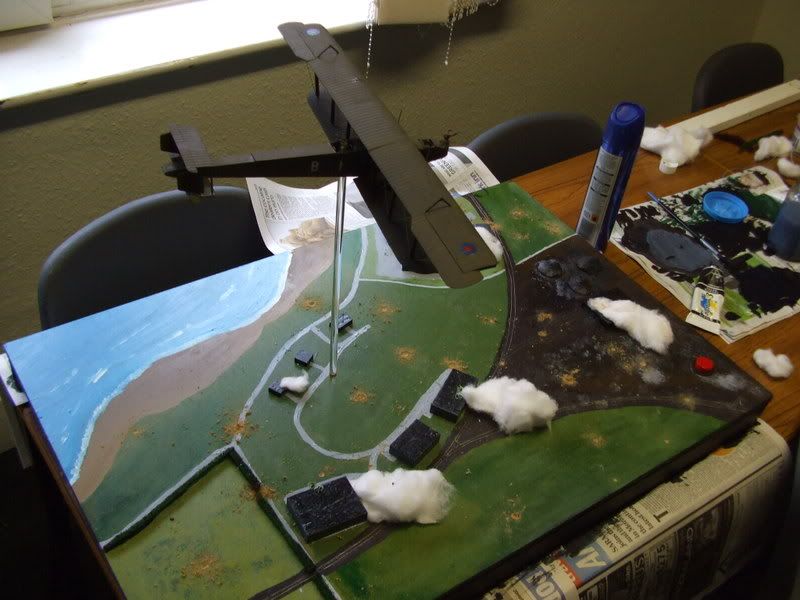
I let the cadets do the baseboard with buildings and cotton wool explosions and even some railway line, i.e. something to keep them busy while I was hogging the O/400!
Best of luck with you build. The rigging is a cinch as the holes are marked or even pre-drilled and then the wings sandwich together to hide the wires!
Hope you have as much fun as I did.
Cheers
Al.
Re: Lancfan's HP 0/400 build
Posted: June 22nd, 2017, 1:33 am
by Chuck Finley
lancfan wrote:Pre-painting will begin this evening, here is the boxtop shot and the freshly washed sprues ready to begin.


David.
Looking forward to it.
Re: Lancfan's HP 0/400 build
Posted: June 27th, 2017, 2:28 pm
by lancfan
In their efforts to include true details inside the 0/400 kit Airfix succeeded in making a fuselage that is potentially unstable when the builder tries to assemble it, the interior details were ahead of their time but the assembly sequence does seem wrong for what could be a very a wobbly structure if it is to be held true as it dries. Instead of following the kit assembly sequence I have first glued the lower panels to one side of the fuselage. the rear upper panel has been glued to the other side to ensure that they are square to the sides and this will all be left to fully dry before continuing, the interior was then pre-painted and the crew positions, fuel tanks and bomb racks installed before finally assembling the fuselage starting with the rear section.


with the rear fuselage glued up and left to dry, the nose section was next glued together.

The assembled fuselage with elastic stretched from nose to tail to show that the fuselage is straight.


David.
Re: Lancfan's HP 0/400 build
Posted: June 27th, 2017, 3:15 pm
by JohnRatzenberger
Nifty trick, filed for future use.
Re: Lancfan's HP 0/400 build
Posted: June 27th, 2017, 3:16 pm
by iggie
An excellent way in which to avoid 0/400 banana-itis!

Re: Lancfan's HP 0/400 build
Posted: June 28th, 2017, 1:26 am
by Chuck Finley
lancfan wrote:In their efforts to include true details inside the 0/400 kit Airfix succeeded in making a fuselage that is potentially unstable when the builder tries to assemble it, the interior details were ahead of their time but the assembly sequence does seem wrong for what could be a very a wobbly structure if it is to be held true as it dries. Instead of following the kit assembly sequence I have first glued the lower panels to one side of the fuselage. the rear upper panel has been glued to the other side to ensure that they are square to the sides and this will all be left to fully dry before continuing, the interior was then pre-painted and the crew positions, fuel tanks and bomb racks installed before finally assembling the fuselage starting with the rear section.


with the rear fuselage glued up and left to dry, the nose section was next glued together.

The assembled fuselage with elastic stretched from nose to tail to show that the fuselage is straight.

David.
Looking Good
Re: Lancfan's HP 0/400 build
Posted: June 29th, 2017, 4:29 pm
by ShaunW
The 0/400 has rather too many struts and rigging wires for my tastes, David, twin-bay biplanes are about the limit of my patience! It's good to see you are made of sterner stuff as these make great looking models once they are done. That is a nifty bit of work taming the fuselage.


