Page 1 of 2
Tom builds a Shackleton
Posted: July 17th, 2012, 8:16 pm
by TomW
One of the builds I signed myself up for this year is an Avro Shackleton. I've quietly been beavering away on the kit for the last week and thought it was a good idea to get a thread set up to keep everyone up to date with my (slow) progress.
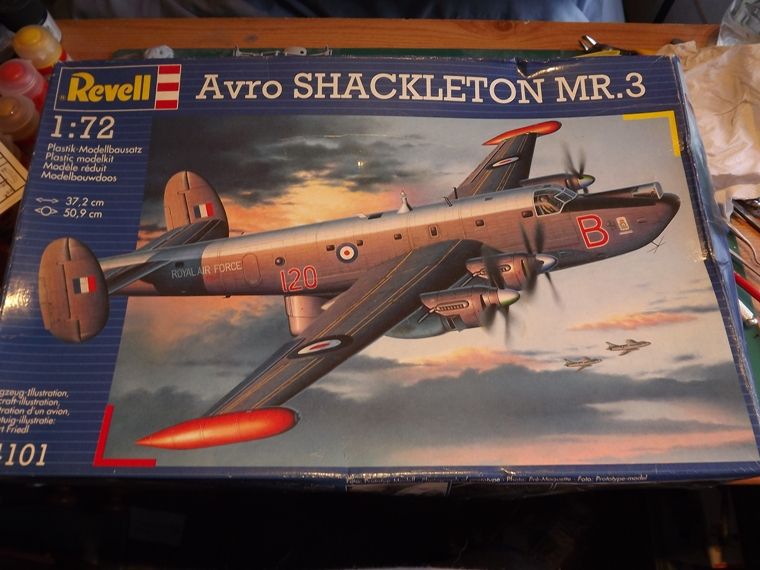
I am starting from the Revell mid 90's re-box of the classic FROG kit:
There are no sprue shots as my kit was secondhand and a lot of parts had seperated from the sprues and were rattling about in the bag, when I bought the kit the first thing I did was to strip all of the parts and put them into sealable plastic bags to keep them safe.
A lot of you are familiar with the FROG Shackleton and the considerable effort the FROG toolmakers must have put in to create its incrediable surface detail that if mishandled will strip the skin off of your fingers

, I bet you also know that the kit does have iffy fit in a couple of places and this detail just wont survive the sanding process, rather than go more insane trying to re-create it after a wet 'n' dry session I have opted to sand back the surface to leave a very faint impression of the '40000 rivets flying in close formation':
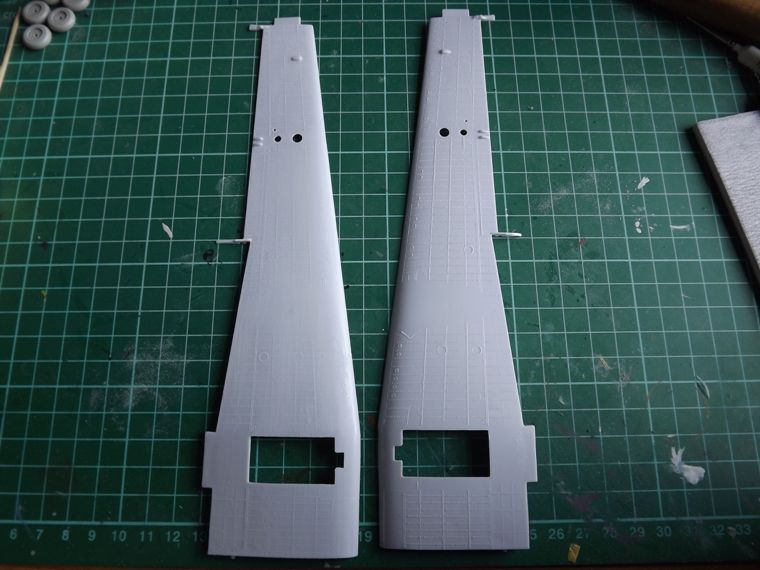
The wing on the right is straight from the box and the left has been sanded back.
But that was last weekend, this is where I am now:
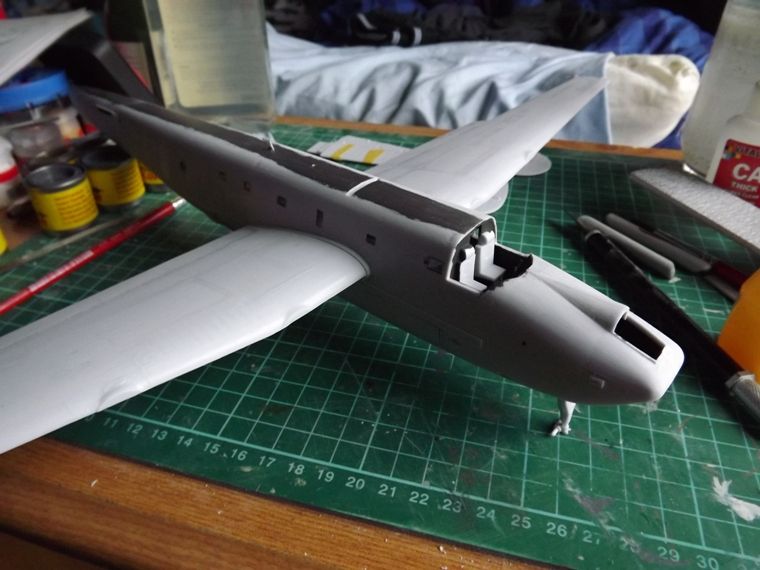

The fuselage has been painted Tamiya NATO black throughout, all the glassware has had three coats of Klear and the fuselage glazing is installed, 20 grams of lead is in the nose (more will be needed in the nacelles) the fuselage is together and has had a hefty step filled and sanded smooth.
Currently I'm removing ejector pin marks from the mating surfaces in the tail assembly than getting them together.
Regards
Tom
Re: Tom builds a Shackleton
Posted: July 17th, 2012, 9:34 pm
by JamesPerrin
'40000 rivets flying in close formation'
You've been short changed as I remember it being 80,000!

Re: Tom builds a Shackleton
Posted: July 17th, 2012, 10:23 pm
by bluesteel
JamesPerrin wrote:'40000 rivets flying in close formation'
You've been short changed as I remember it being 80,000!
Eeeeee Lads! Thou don't know thous't born! In my day it were 100,000 rivets and they weren't even flying in close formation....
Good start on the Shackleton Tom. Take your time and it'll turnout just fine.
Re: Tom builds a Shackleton
Posted: August 3rd, 2012, 2:20 pm
by TomW
Thanks for your encouragement gents

always much appreciated.
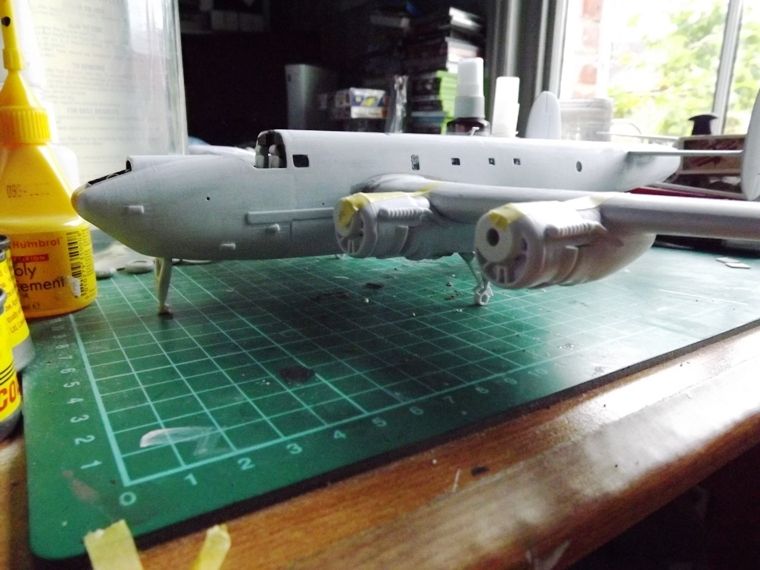
So, it's been a few weeks since I reported my progress on the Shack' and there has been a few changes.
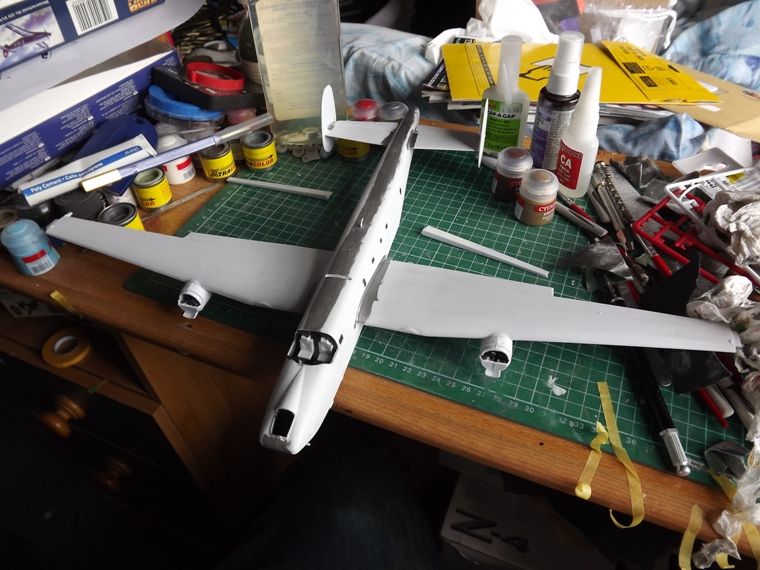
As you can see the tailplanes are on and filled, also the main wing structure is together and securely attached to the fuselage, I reverted to tube glue for this as I find it to be a darned sight stronger than the liquid poly stuff. It was a tight squeeze to get the wing main spar in place and settled but with an almighty 'CRACK' it went in and isn't coming out!
Tailplane closeup:

I'm getting through a fair ole bit of silver paint priming these joins but it should be worth it. The outboard nacelles have also been fitted to the wings after being filled with lead shot forward of the U/C line.
I'll need to do the same on the inboard nacelles as well and may even resort to adding lead into the observers station in the nose.
More soon chaps.
Regards
Tom
Re: Tom builds a Shackleton
Posted: August 4th, 2012, 7:23 pm
by did_nev
I've got one in the stash awaiting its turn... You're a brave man!

Keep on going, I'm watching this "Howto" with interest.
Re: Tom builds a Shackleton
Posted: August 4th, 2012, 7:49 pm
by Taurusboy
Hello Tom
I like this and It will keep you busy
for sometime! Our old instrument
section on Luqa was about a 100yds
from two squadrons of these old beasts.
What a racket when they ran up!!
Pete.
Re: Tom builds a Shackleton
Posted: August 10th, 2012, 7:13 pm
by TomW
Thanks for your interest gentlemen
This week has seen me participate in a delicate balancing act involving a lot of lead and superglue

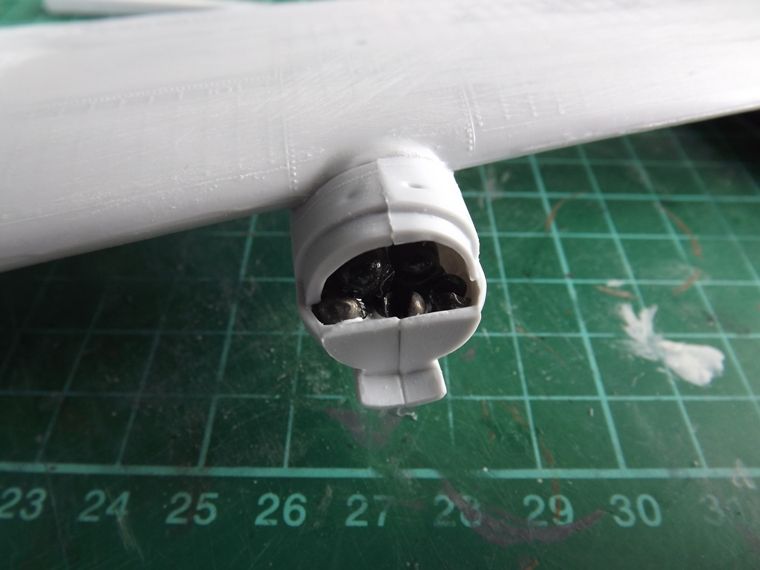
I have to date filled the following with lead shot: the nose compartment, the front gear well, the front observers station and all four of the engine nacelles
there is at last count over 60 grams of lead in this model and the results look a little like this:
SUCCESS


Of course with this much weight I shouldn't need to file the tyres to represent weight, the plane will do it all by itself

and it's hard work to hold for any length of time which should make painting interesting to say the least.
I've also run into some of that iffy fit I mentioned in the first post, check out the gaps at the rear of each inner nacelle:
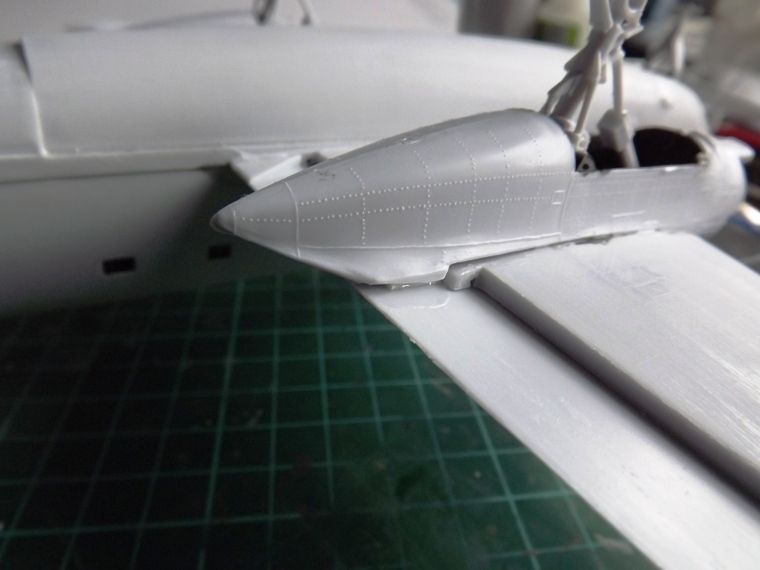
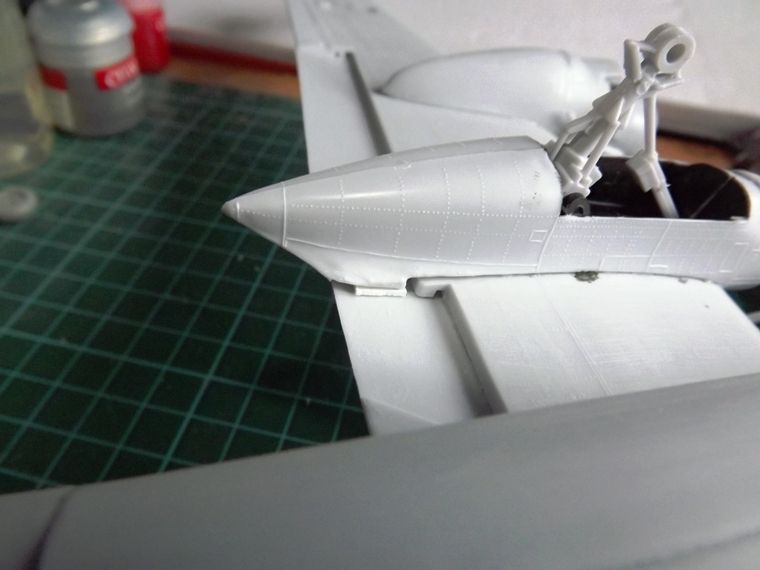
you can see where I had to use plasticard to give the nacelle something to attach to, lots of filler and sanding to come.
Regards
Tom
Re: Tom builds a Shackleton
Posted: August 23rd, 2012, 2:04 am
by Jagewa
Wow great work Tom, you are progressing really well on this. At least you won't be skinning your knuckles now the rivets are off
Cheers
Jim
Re: Tom builds a Shackleton
Posted: August 23rd, 2012, 10:45 am
by bobblelink
nice work, looking forward to seeing how this pans out
Re: Tom builds a Shackleton
Posted: August 23rd, 2012, 11:44 am
by MerlinJones
...And we know 60g is sufficient.
Regards,
Bruce
Re: Tom builds a Shackleton
Posted: August 23rd, 2012, 2:06 pm
by JohnRatzenberger
Yes, but will the display table hold it ?
Re: Tom builds a Shackleton
Posted: August 23rd, 2012, 3:10 pm
by MerlinJones
Hmmmm...I wonder if metal u/c is available?
Re: Tom builds a Shackleton
Posted: August 23rd, 2012, 8:11 pm
by JohnRatzenberger
Actually I thought about that but the best option, Scale Aircraft Conversions, does not make them ...
Re: Tom builds a Shackleton
Posted: October 3rd, 2012, 11:21 am
by TomW
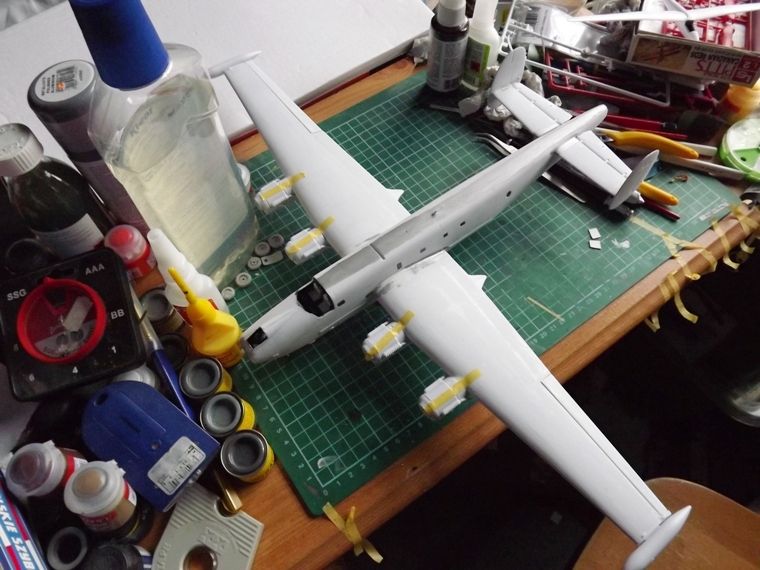
So a whole month has past without update to this build, I blame the joys of moving home and the apparent impossibility of have an internet service turned on without a 4 week wait!
Great news firstly as it appears that the undercarridge will be strong enough to hold all that weight
no collapses as of yet!
Next a current photo:
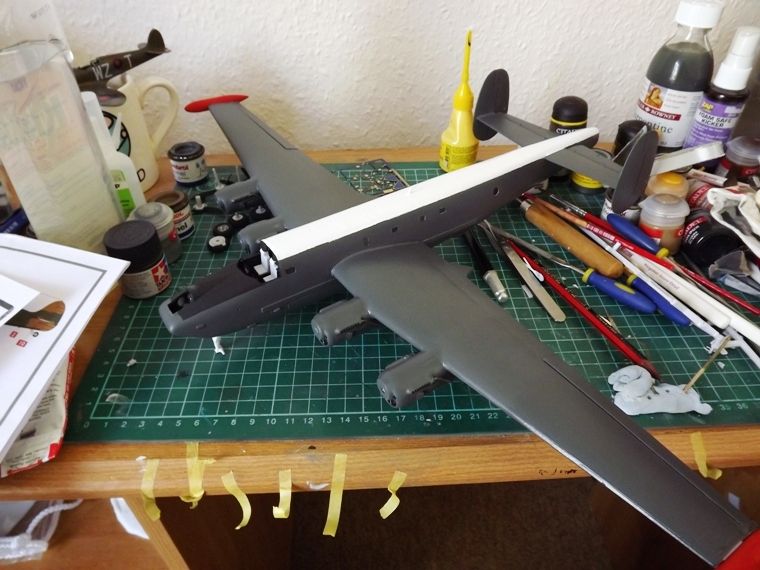
As you can see the airframe is nearly for the decalling process, just two coats of Klear to go
The end is in sight.
Regards
Tom
Re: Tom builds a Shackleton
Posted: October 3rd, 2012, 12:38 pm
by Dirkpitt289
That's looking sharp.