Page 1 of 1
Propellor Blur
Posted: November 20th, 2017, 7:14 pm
by TeeELL
Back in mid October I commented, in a thread, that I would look for the way I achieved my 'prop blur' and do a piece on it. Well, today I have found some of the files I saved and I will have a stab at creating a 'prop blur' for you to be able to try yourselves.
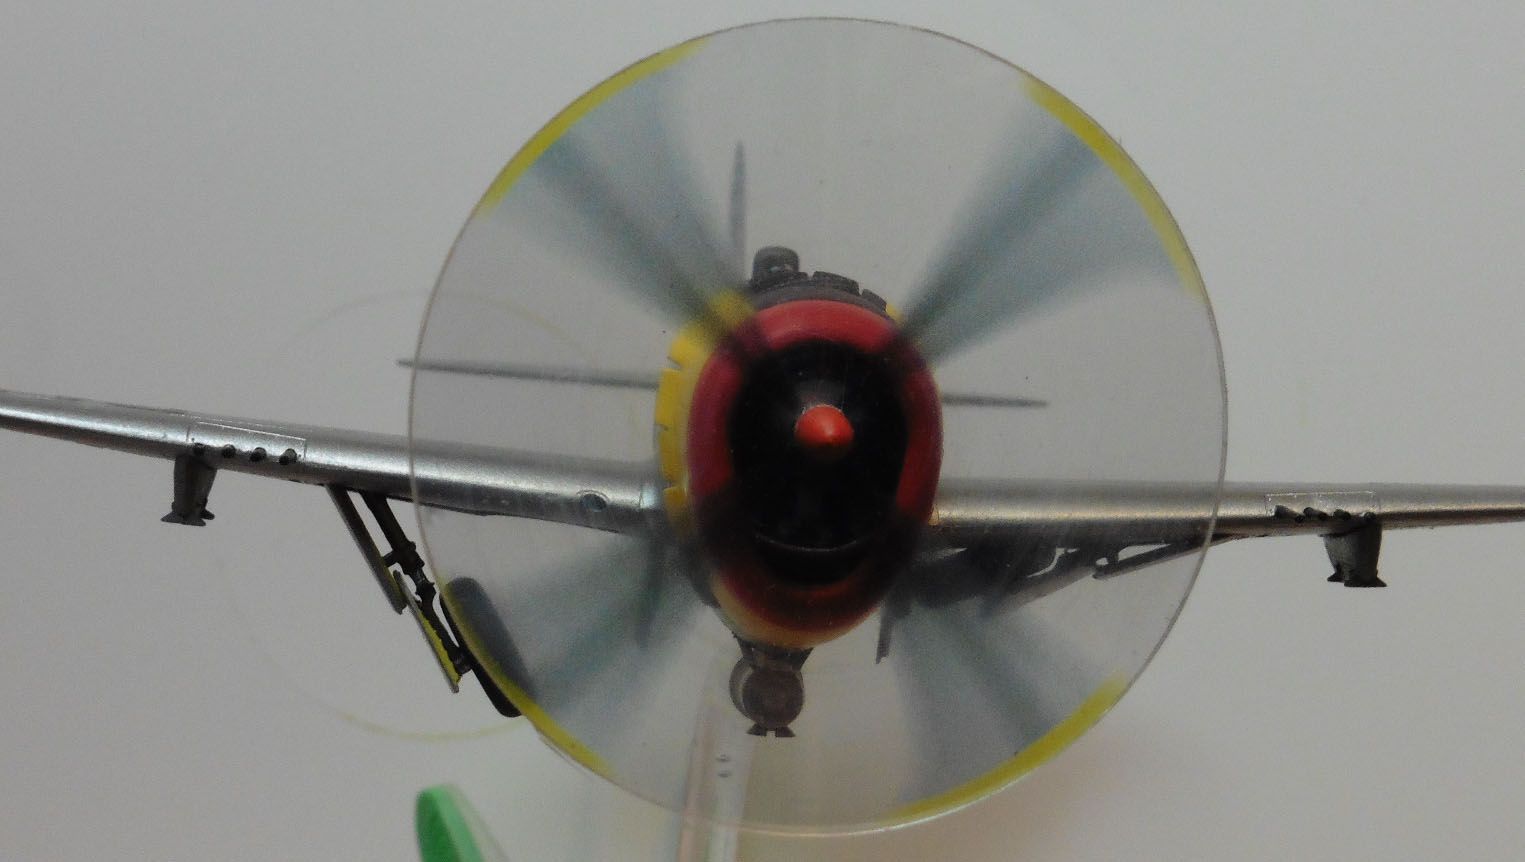
This is the 'blur' that caused such favourable comments:
Surprisingly, the first step is to find a photograph of 'the real thing' that pleases your eye. At this point, I have to confess that I cannot find the historic, colour image that I used as the 'idea image' to copy. If I do find it I will upload it. Your are going to have to decide what suits you as you will see for yourselves the 'prop blur' depends upon many, many factors. In addition, you need to know the width of any yellow prop-tips and any other items (manufacturers labels? perhaps) that can become part of the 'image'.
The software I use is CorelDraw and I think I had to use Photoshop LE for the 'movement' blur.
Re: Propellor Blur
Posted: November 22nd, 2017, 11:27 am
by Crashpilot
That looks nice!
I saw some nice chopper blur at our clubs´ last exhibition - but I didn´t take any photos of it, damn.
I think it was not self-made, but from some cottage manufacturer? There´s one geezer that has taken photos of it,
I should ask him to send me some snaps of the table where it was exhibited!
Re: Propellor Blur
Posted: November 22nd, 2017, 12:02 pm
by fredk
for a cheap alternative you can download and printout this free sheet of prop blurs from fiddlersgreen.net
http://www.fiddlersgreen.net/other/For- ... /Props.htm;
Re: Propellor Blur
Posted: November 22nd, 2017, 8:52 pm
by TeeELL
Well Fed,
Just had a look at them and I, for sure, would rather my own. I am also content that, apart from time, my 'prop blur' looks good to my eye and is inexpensive. Perhaps, I too, should offer a number of different 'prop blur' options?
Re: Propellor Blur
Posted: November 22nd, 2017, 9:00 pm
by iggie
TeeELL wrote:Well Fed,
Just had a look at them and I, for sure, would rather my own. I am also content that, apart from time, my 'prop blur' looks good to my eye and is inexpensive. Perhaps, I too, should offer a number of different 'prop blur' options?
They do helpfully point out not for use on jets though; can't be all bad!

Re: Propellor Blur
Posted: November 23rd, 2017, 1:15 pm
by TeeELL
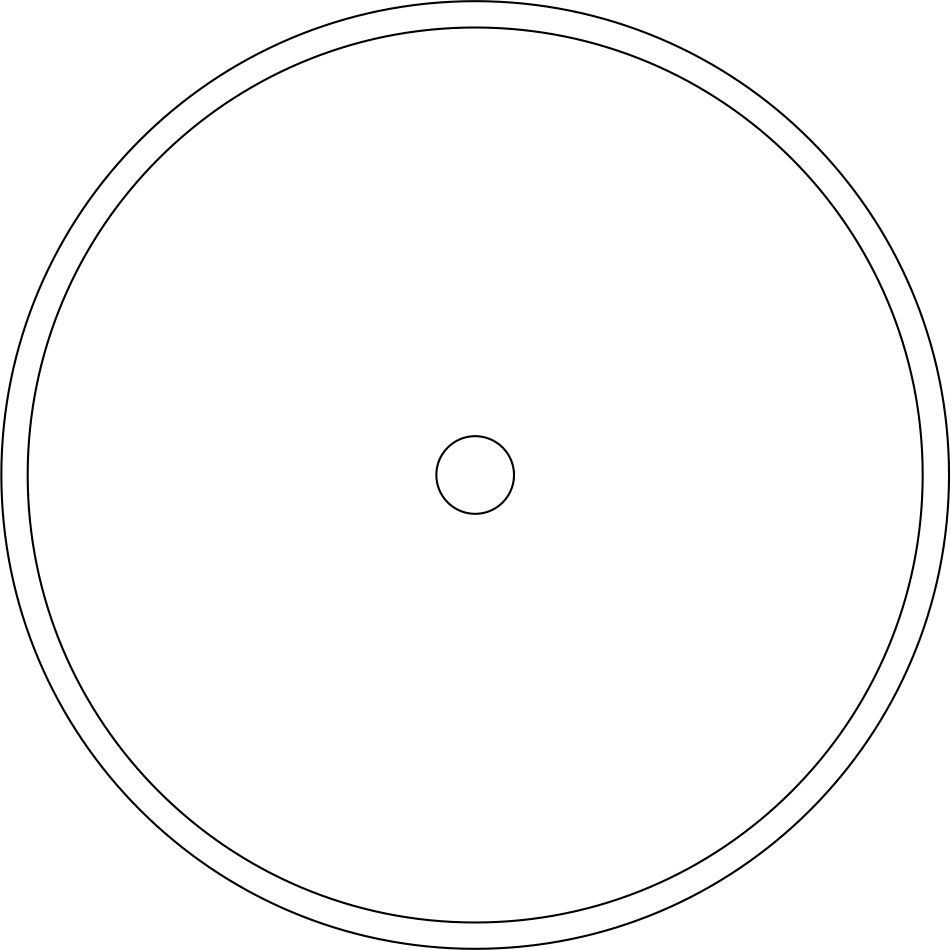
Unsurprisingly you will need the diameter of the prop disk and the hub. These are then created on CorelDraw (CD), as CD is scalable then you can create a disc twice the scale size to work on.
In this image I have also included the 'yellow tip' disc.
Still haven't found my original reference photo but in that the blades created the 'axe head' shape, so that was the next process. A triangle was drawn and the 'create curve' tool used to shape the 3 sides. In this image I have copied a single 'blur' from my P-47 disk to show where we are going with this.
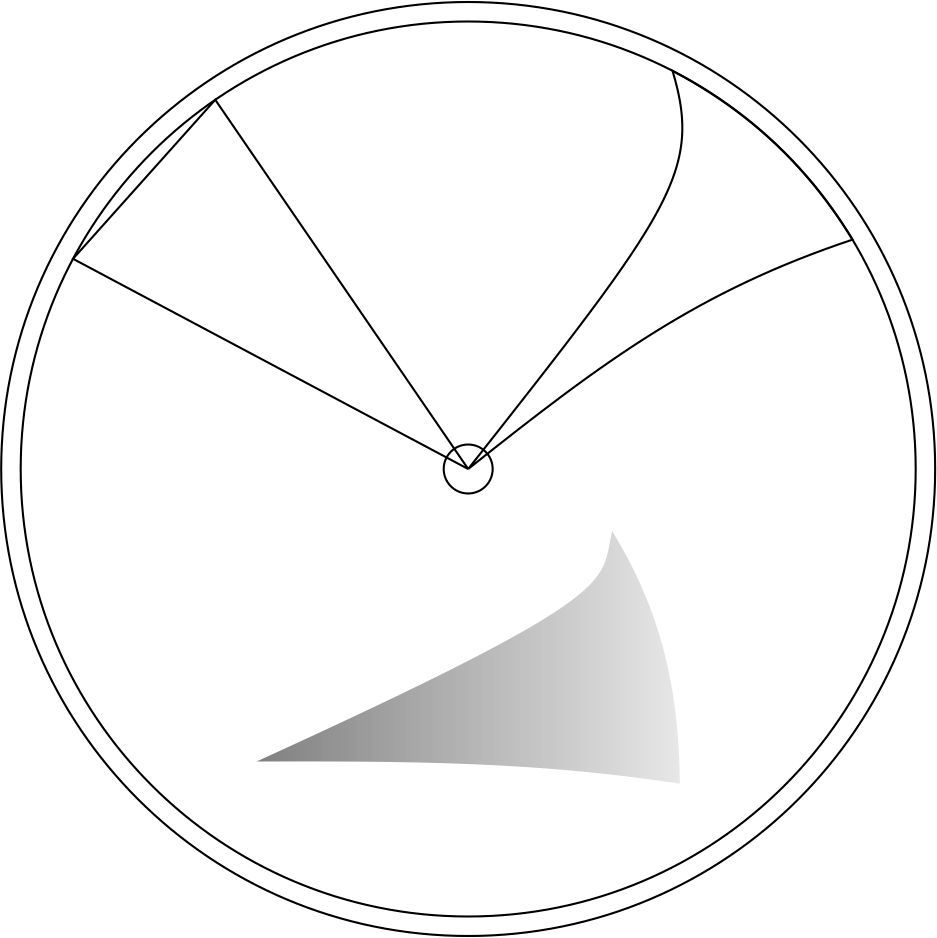
The left hand triangle is the starting shape, by using the curve tool I shaped it to fit the inner circle.
In this image I have removed the basic triangle but have now added the rectangle that will become the yellow blur.
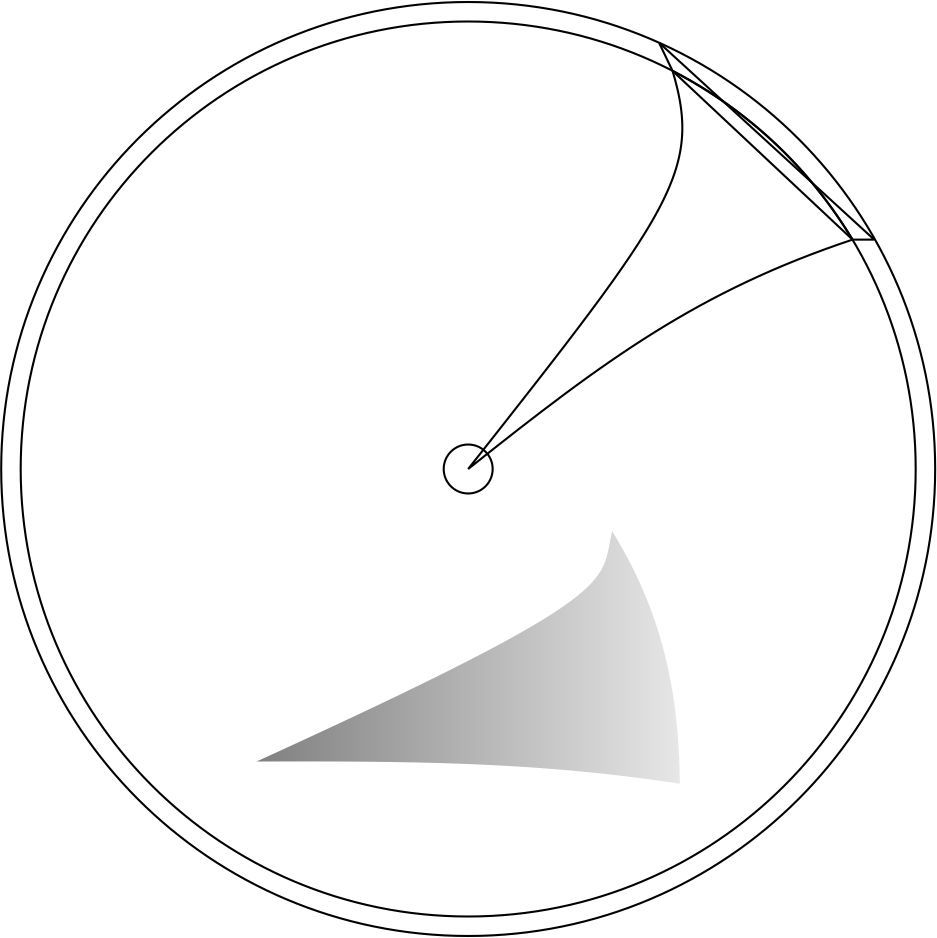
A couple of steps here. Firstly, the upper right prop shows the rectangle for the yellow shaped to match the disk diameters and shaped to follow the line of the 'axe head'.
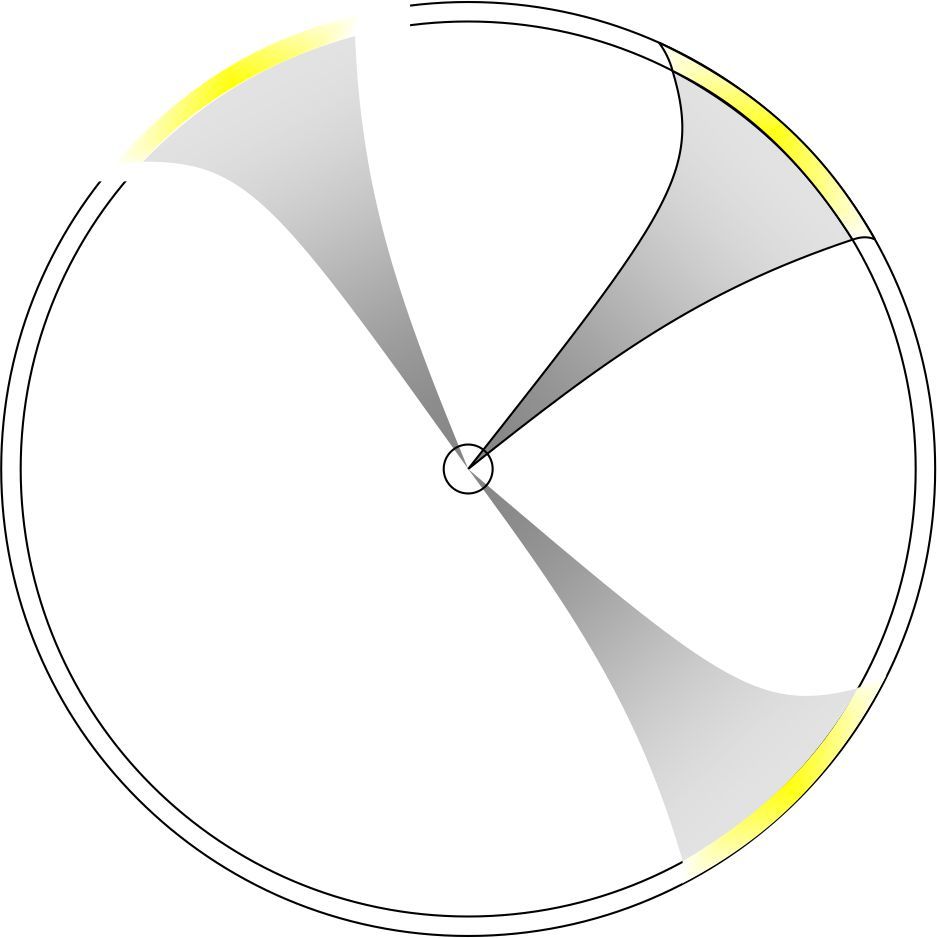
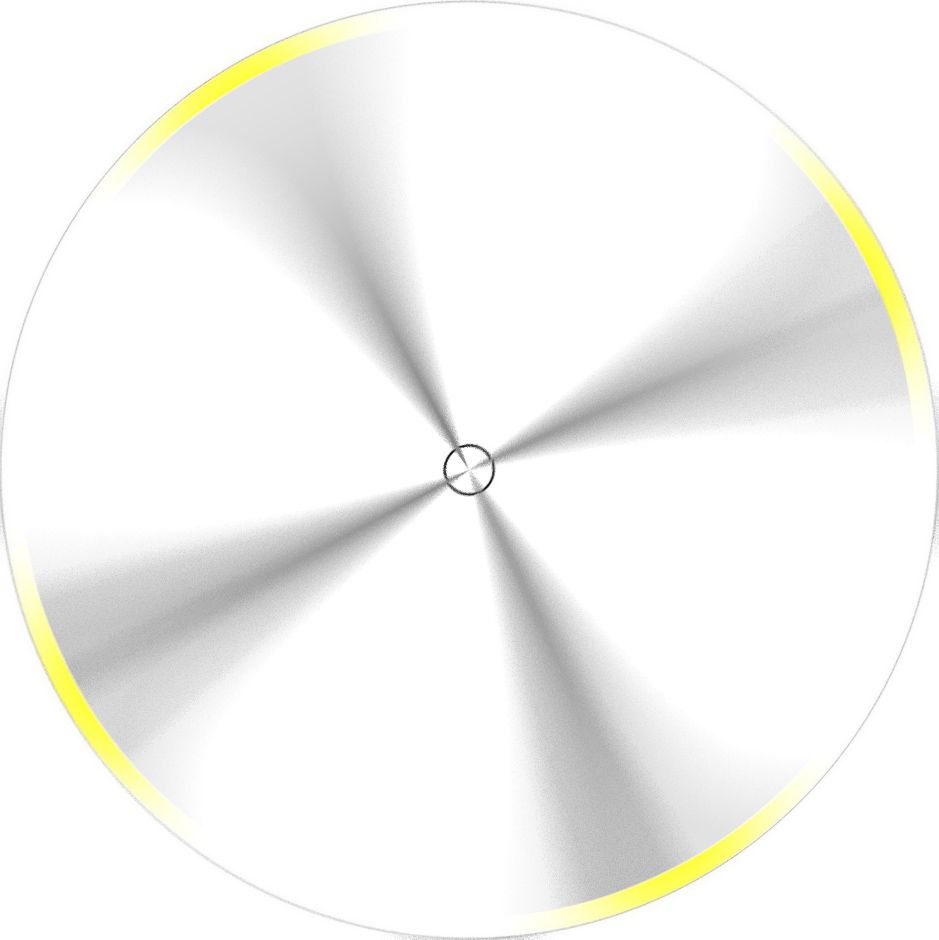
The prop has been gradient filled from a mid grey to a light grey, the darkest colour at the centre, where the prop is slowest. In addition, I have applied a gradient fill to the yellow: white- yellow - white, to produce the most dense 'yellow' near the mid point. The yellow tip has been copied and added to each 'prop'.
The lower right prop shows the effect when the outline has been removed and the top left how it would look once the outer disks have been removed.
Re: Propellor Blur
Posted: November 23rd, 2017, 3:53 pm
by JamesPerrin
Interesting construction. For mine I draw and actual prop and then applied a rotational blur.
Re: Propellor Blur
Posted: November 23rd, 2017, 4:41 pm
by JohnRatzenberger
Thanks, even I understand most of that.
Re: Propellor Blur
Posted: November 23rd, 2017, 5:21 pm
by TeeELL
Moving on then,
my missing reference photo showed 'suggestions' of the blades within the 'axe head'. I have reproduced them by adding darker grey triangles:
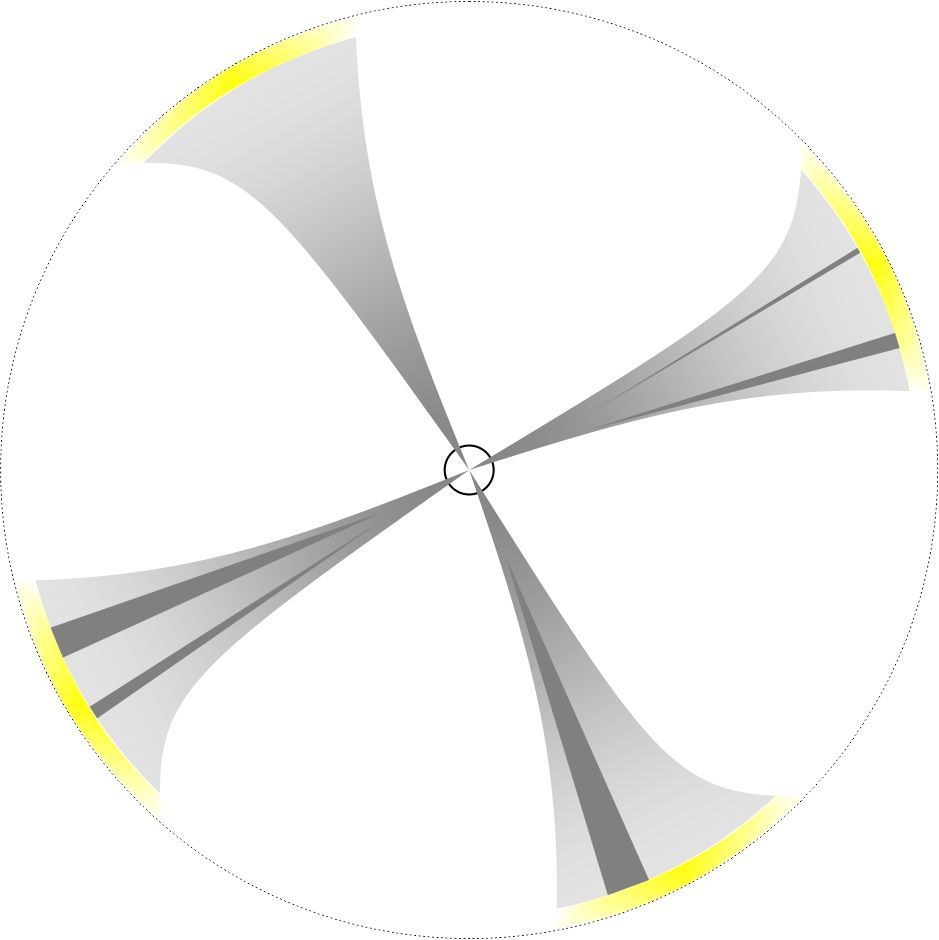
I have a number of different options which I shall blur, note that there is a fine dotted line disc around the outer edge - this is the cutting reference line.
From CD it is necessary to EXPORT the finalised drawing so that it becomes a jpeg image as we must now move the image into Photo-shop. I use Photo Elements (PE) 10.
In PE the image is going to be blurred. First stage, of course, is to open the image in PE, now we must apply the FILTER. In FILTER select BLUR and from the subsequent set of options ROTATIONAL BLUR.
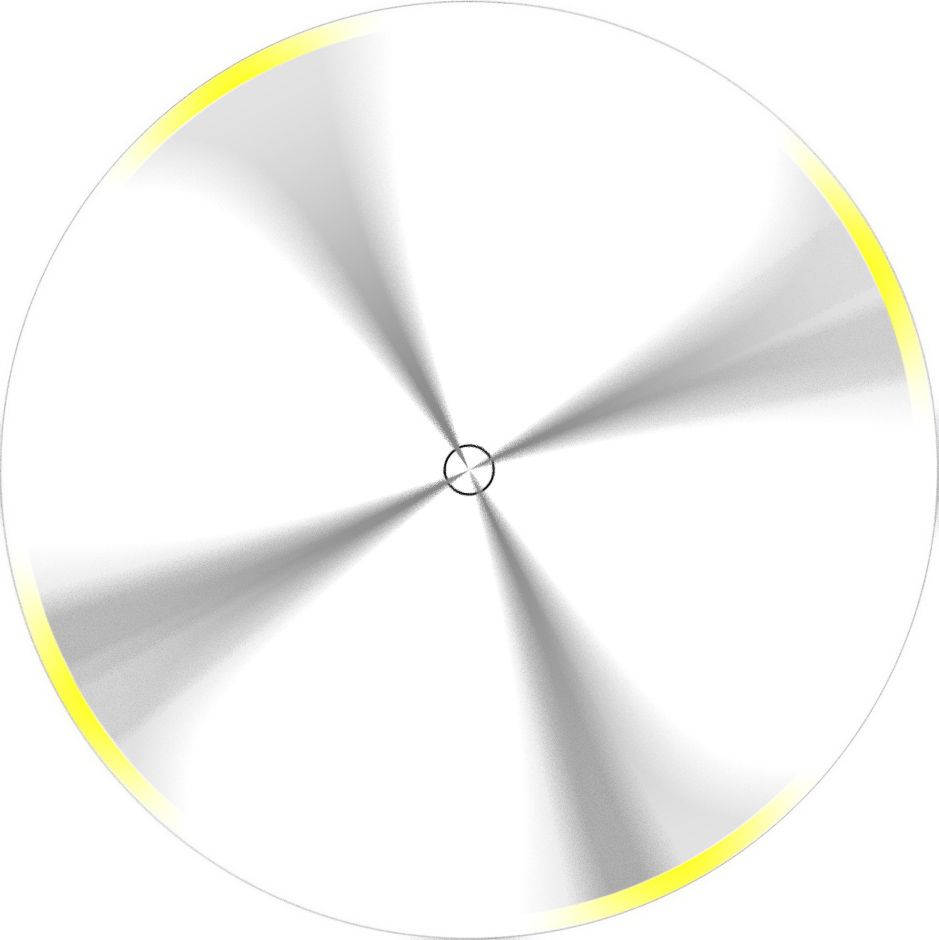
Here then, is the above image with 5ºs, 10ºs and 15ºs of Rotational Blur:
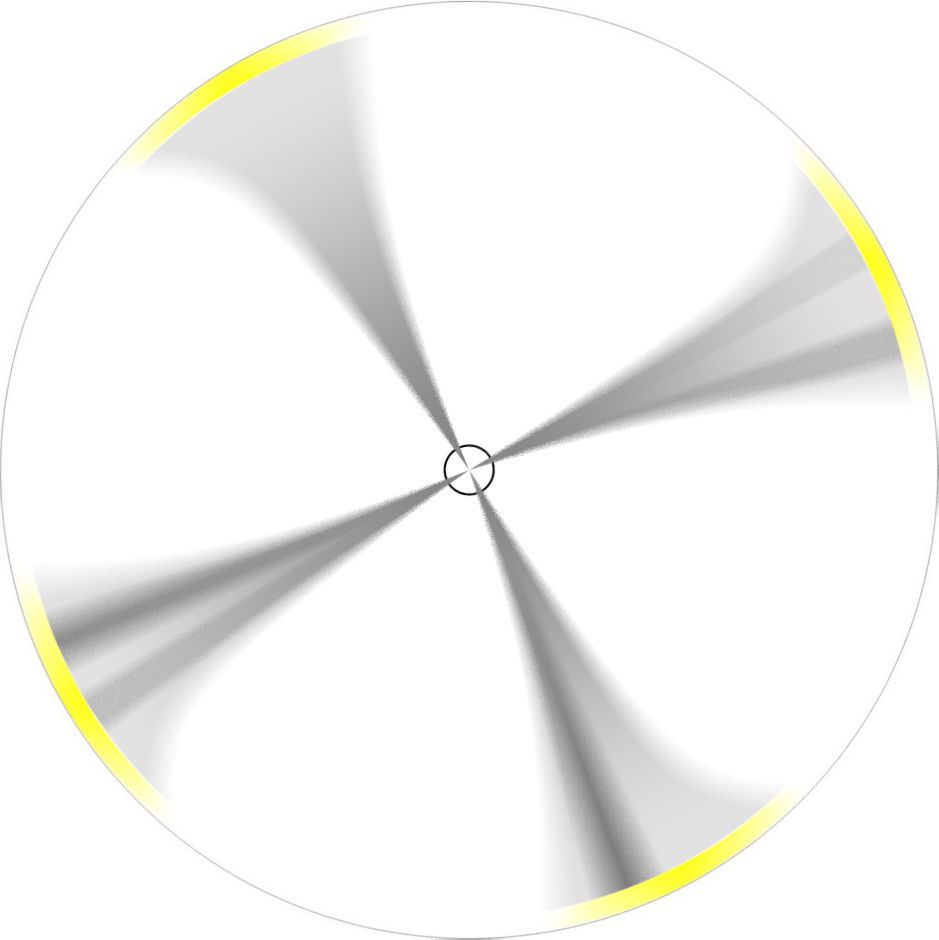
Note how the differing darker triangles appear.
I am of the opinion that 15º of rotational blur gives the best effect - but you may disagree.
If you look at the top right effect on the final 15º disc, you will see that the 2 'triangles' have merged and the effect they have created is, quite by chance, exactly the 'look' I saw on my reference photo. Easier to see rather than describe.
Re: Propellor Blur
Posted: November 23rd, 2017, 5:38 pm
by TeeELL
The final part is the pain of cutting out the prop disc from clear plastic sheet, necessary to create a 'depth' to the effect. At Telford, I saw a couple of aircraft with the prop effect on very thin film/plastic and they lacked something. I use 1mm/.04thou clear plastic to give the depth and, for my next prop spin model I will contour/bevel the outer edge to remove the rather obvious edge. In addition, mount the disc and apply a VERY LIGHT sand paper to create the 'spinning' effect. Keep it light, otherwise you will end up with an opaque prop disc!! I learnt the hard way and despite trying to polish out my excessive marks ended up cutting out a new disc.
I cut the plastic using a very time consuming and laborious technique, literally wearing my way through the plastic with a pair of dividers - (suggestions on a better solution would be very welcome). The centre hole is drilled and reamed to fit the prop hub - for aircraft with a nose cone, I would suggest filling in the slots where the blades go and painting a dark wash around the cone coincident with the blade roots. Finally, of course, you need to print off your 'prop blur, mine is printed onto OHP laser transparency and then cut out. I attach it to the rear face of the disc thus far, without needing any form of adhesive - I suggest a thin coat of FUTURE or PVA would suffice if the static doesn't work.
If, when you construct your first CD drawing, you save the component parts, then you can call them up when next you need a propeller.