As I wrote on my workbench:
"Opacity can be adjusted by the amount of ink or by the number of coats applied. I mix it in a small tin mixing dish. I start with about 1/4 teaspoon future. The quantity of ink is really small. I take a small paint brush and wet the fibers with brown and black ink. The inks are placed in the bottom of the dish, but not in the future puddle. I drag a small but of the future to the ink and let it all mix. This gives an uneven colored mix. I use select the mix that looks right. If there is a trick to this it's to keep the mixture very translucent and to use a fine brush.
Excess can be wiped away when wet. I normally just wipe it away with my finger. A paint brush with alcohol will remove it when dry. If you're using acrylic, this will take the paint also.
There are several other things you can do like applying the wash to a fresh layer of future. The ink solution will feather nicely. You can also apply multiple coats to build depth. It's best to use barrier coats when doing this. Flat coats work very well for this. It's also very useful in making colored lens cover.
I used the ink solution on the Reggiane here to color panel lines. The panel lines on the cowl here got a very light brown wash. Perhaps wash is not quite the right term. It was applied with a very fine paint brush and the excess was wiped away. The wing tip lens covers on this model got a touch of blue and a touch of red. The tires and wheels had a touch of brown/black applied to the rim and to pop the details on the wheel.
The problem with this solution is the future dries very quickly, so you have to keep your brush clean. Alcohol cleans this nicely."
Ink washes
-
johnsan

- Modelling Gent and Scholar
- Posts: 1358
- Joined: May 1st, 2011, 12:27 am
- Location: Just to the left of the great salt lake.
Ink washes
Really nothing pithy to say.
-
johnsan
- Modelling Gent and Scholar
- Posts: 1358
- Joined: May 1st, 2011, 12:27 am
- Location: Just to the left of the great salt lake.
Re: Ink washes
Sorry to break this up.
Here are a few photos to show amounts and such.
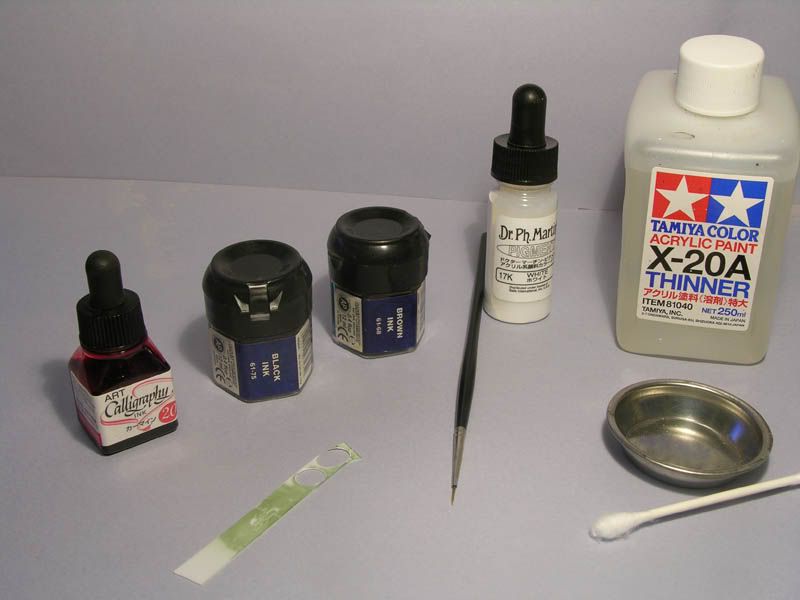
Items used. The Tamiya acrylic thinner is basically alcohol with a little retarder added. Alcohol works every bit as well.
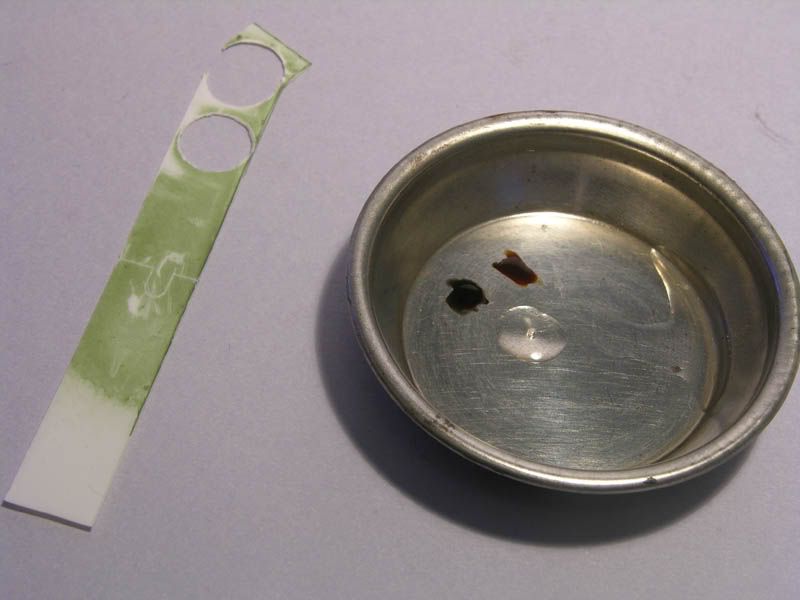
Brown ink and black ink. The amount of ink is that that can be held on a small paint brush. Not very much ink needed at all. That's about 3 drops of Future. 1 drop in the center and a couple off to the side.
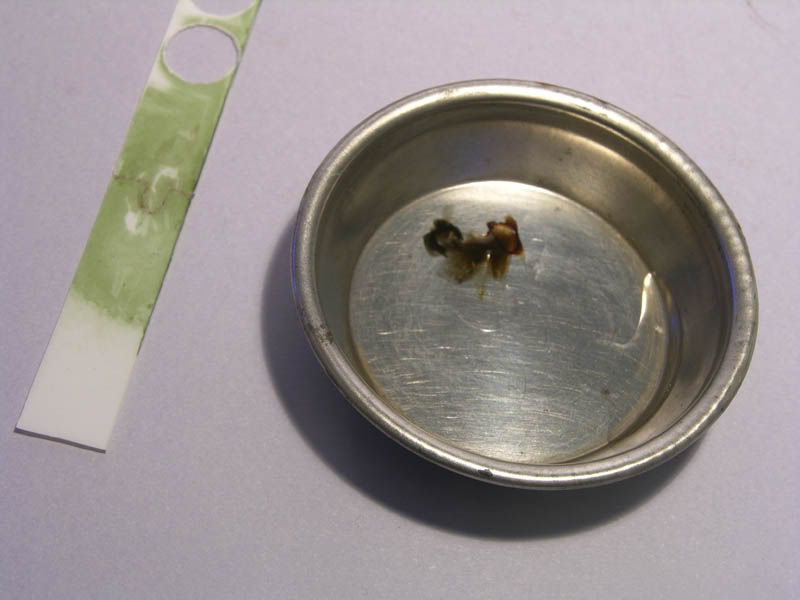
The inks mixed. Mix the ink and drag the mixture into the single drop of Future. I look fora very translucent mix. You're looking to shift tones, not to actually color anything.
The Future dries quickly and will gum up the paint brush, especially around the ferrule. So clean the brush often.
Inks offer many possibilities and I'm really surprised most modelers don't seem to know about them. Give them a try, you could be surprised atthe results.
Here are a few photos to show amounts and such.
Items used. The Tamiya acrylic thinner is basically alcohol with a little retarder added. Alcohol works every bit as well.
Brown ink and black ink. The amount of ink is that that can be held on a small paint brush. Not very much ink needed at all. That's about 3 drops of Future. 1 drop in the center and a couple off to the side.
The inks mixed. Mix the ink and drag the mixture into the single drop of Future. I look fora very translucent mix. You're looking to shift tones, not to actually color anything.
The Future dries quickly and will gum up the paint brush, especially around the ferrule. So clean the brush often.
Inks offer many possibilities and I'm really surprised most modelers don't seem to know about them. Give them a try, you could be surprised atthe results.
Really nothing pithy to say.
-
BWP

- Got in under the wire
- Posts: 777
- Joined: April 28th, 2011, 2:23 am
- Location: Melbourne, Australia
- Contact:
Re: Ink washes
I sometimes add an ink wash to my finished tank models, particularly if I feel that the colours are looking too "bright". My technique is very simple: after I have applied a coat of Future and the decals, I add a couple of drops of black ink to some water -- enough to make the water turn dark (but not black). I then just take an old soft brush and run the water into the various nooks and crannies. I've always liked the end result.
I haven't really thought about trying different coloured inks -- I'll have to give it a try!
I haven't really thought about trying different coloured inks -- I'll have to give it a try!
-
MackemPete

- Onto the Clever Stuff, Now.
- Posts: 123
- Joined: May 1st, 2011, 1:35 pm
- Location: Sunderland
Re: Ink washes
Hi Bruce, if you were using a matt cote on your builds would you ink wash before or after the matt?BWP wrote:I sometimes add an ink wash to my finished tank models, particularly if I feel that the colours are looking too "bright". My technique is very simple: after I have applied a coat of Future and the decals, I add a couple of drops of black ink to some water -- enough to make the water turn dark (but not black). I then just take an old soft brush and run the water into the various nooks and crannies. I've always liked the end result.
I haven't really thought about trying different coloured inks -- I'll have to give it a try!
Cheers
Pete
-
Beowulf Shaeffer

- Earning Reputation Points
- Posts: 823
- Joined: May 1st, 2011, 12:01 am
- Location: Monkey Hanger Town, UK
Re: Ink washes
must admit these days i use the purpose made citadel washes.......comes in various shades.....tend to use the black and sepia ones the most......just seems easier then making it
The time you enjoy wasting is not wasted time........Bertrand Russell
On the Bench: Beagle
Next on the bench: not sure yet lol
On the Bench: Beagle
Next on the bench: not sure yet lol
-
BWP
- Got in under the wire
- Posts: 777
- Joined: April 28th, 2011, 2:23 am
- Location: Melbourne, Australia
- Contact:
Re: Ink washes
My normal order is gloss coat, decals, washes and weathering, matt coat.MackemPete wrote:Hi Bruce, if you were using a matt cote on your builds would you ink wash before or after the matt?
-
craig757

- Series 3 and Beyond
- Posts: 31
- Joined: June 12th, 2011, 11:44 am
- Location: some where in a room
Re: Ink washes
Hi excuse my novice streak here lol but what type of ink is it used just normal indian ink found in wh smiths
regards
Craig
regards
Craig
Craig
On the bench 1/16th Trumpeter T34/85
stash = 1/144 antanov an124,1/35 trumpeter jagdpanzer , 1/35 tamiya JSU-152, 1/35 B1Bis Tamiya and about another 15 tanks lol
my Blog- http://monkeysmodels.blogspot.com/" onclick="window.open(this.href);return false;
On the bench 1/16th Trumpeter T34/85
stash = 1/144 antanov an124,1/35 trumpeter jagdpanzer , 1/35 tamiya JSU-152, 1/35 B1Bis Tamiya and about another 15 tanks lol
my Blog- http://monkeysmodels.blogspot.com/" onclick="window.open(this.href);return false;
-
JamesPerrin

- Looks like his avatar
- Posts: 13669
- Joined: April 5th, 2011, 8:09 pm
- Location: W. Yorkshire
- Contact:
Re: Ink washes
The Citadel Miniature Inks seen in the photo above are from Games Workshop and primarily for painting fantasy wargaming figures.
Classic British Kits SIG Leader Better to fettle than to fill
(2024 A:B 5:2) (2023 13:8:7) (2022 21:11) (2021 15:8) (2020 8:4:4)
(2024 A:B 5:2) (2023 13:8:7) (2022 21:11) (2021 15:8) (2020 8:4:4)
-
johnsan
- Modelling Gent and Scholar
- Posts: 1358
- Joined: May 1st, 2011, 12:27 am
- Location: Just to the left of the great salt lake.
Re: Ink washes
Sorry about the delay in answering. The inks above are Citadel, but this works with any type ink. I've used calligraphy inks, even carbon black blocks that reconstitute with water or alcohol. Don't limit yourself to Citadel. If you find a shade that appears useful, use them even they are not Citadel.
Really nothing pithy to say.

Re: Ink washes
Iv used Citerdel before,whilst giving good results,i find they react adversly when you do acote of Klear.Dont know if any other makes are the same?
THE COSMIC JESTER IS WATCHING !!!
-
johnsan
- Modelling Gent and Scholar
- Posts: 1358
- Joined: May 1st, 2011, 12:27 am
- Location: Just to the left of the great salt lake.
Re: Ink washes
Again, my apologies in the late response. I don't often visit these portions of UAMF.
I've only tried using Future. I assume Klear and Future are the same formulation. I've heard yes and I've heard no. I don't know. In any case, I've had no adverse reaction using Citadel inks and Future. I've also tried Windsor & Newton, several Japanese inks, and even lamp black sold here for Japanese calligraphy.
It seems that if it is water soluble, it can be diluted with Future. I've had no problems with Citadel inks in Future at all.
Really nothing pithy to say.