Airfield Diorama Base

Ideas for displaying your models.
Post Reply
User avatar
AndrewR
In the basement lab
Posts: 23866
Joined: April 5th, 2011, 4:13 pm
Location: Ottawa, Ontario, The Great White North
Contact:

Airfield Diorama Base

Post by AndrewR »

Here is my method for making a very quick and easy display base. Anyone who has made scenery before can stifle a yawn, there's nothing really new here, apart from my choices of materials (possibly).

First up, el cheapo photo frame (2 for $7.99 at Michael's)

Image

A page of concrete pattern, printed out on ordinary white paper on my ink jet. The pattern is from a Scale Scenes railway building (the concrete bridge). The white paper is glued onto thin card (think cornflake packet) with UHU/Pritt and left to dry for a while under a heavy book

http://www.scalescenes.com/

Image

Cut out the squares of concrete. Run a grey (not black) felt tip pen around the side of the cardboard square to get rid of the whiteness. I forgot to do this on all the squares, so I had to disguise a few white edges later... :)

Material for the ground. I use craft foam. It's about 2 mm thick, very flexible, takes acrylic paint and does not wrinkle when you put white glue on it.

Image


Take the glass out of the frame ( I used it as the cutting board) and stick the concrete squares onto the backing board.

I'm laying the concrete on a diagonal, to break up the squaredness of the concrete grid and the frame. Use white glue to stick the concrete down. Let it dry under a heavy weight for a while.

Cut out a piece of foam to cover the rest of the frame. Using brown foam means that you don't need to paint it.

Image

Now you need to add the ground cover. I'm using a mix with three different colours: fine turf, weeds and yellow flowers.

Image

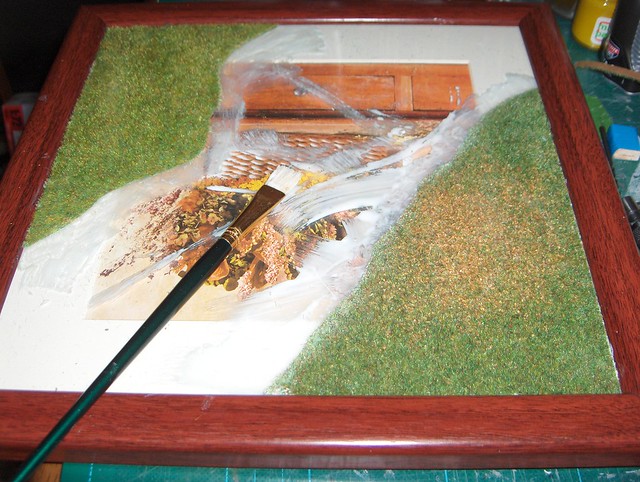
Mix up the ground cover ( I used a paper cup). Smear white glue thinly on the foam.

Image


Sprinkle on the ground cover quite thickly and spread it around using digital technology (with your finger :) ).

Image

Make sure you have plenty of glue at the join between the foam and the concrete pattern. The ground cover should spill over onto the concrete, just like in real life.

Image

If there are any annoying gaps in the concrete squares, disguise them with a bit of ground cover.

I usually leave it to dry for a while. The last step is to spray the ground cover area with a mix of (white glue and water, 1:1, with a drop of detergent added). This fixes any loose ground cover down.

Image

Excluding drying time, that took less than an hour to make. Nice and easy.

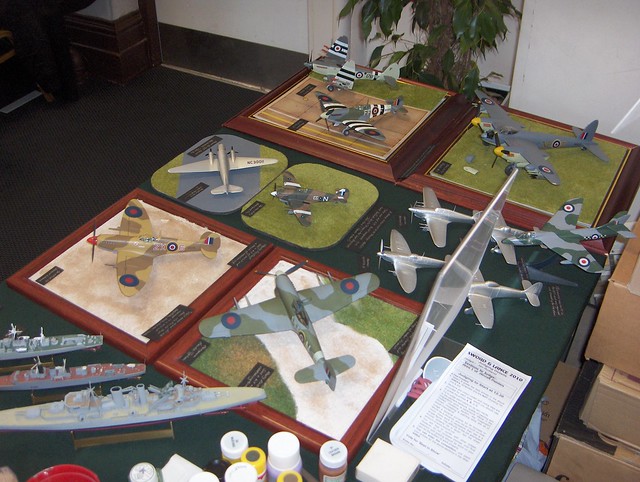
Here's one I prepared earlier... (Sorry, I couldn't resist saying that...
:lol: )

Image

cheers

Andrew
Up in the Great White North
User avatar
Chuck E
Established 1949
Posts: 2412
Joined: May 3rd, 2011, 8:05 pm
Location: Darlington. Home of the Railways

Re: Airfield Diorama Base

Post by Chuck E »

Very nice Andrew. A very good way to make a model base. I had a similar idea. You can get these at loads of DIY stores for coppers.

Image

Image

Image
So many models, so little time.
User avatar
Dirkpitt289
NUMA's Auto Mechanic
Posts: 8710
Joined: May 2nd, 2011, 1:55 am
Location: New jersey USA
Contact:

Re: Airfield Diorama Base

Post by Dirkpitt289 »

Good stuff 8-)
.... Dirk

Beware of the DOG's of WAR

My Youtube Channel
https://www.youtube.com/user/ModelingGu ... rid&view=0
User avatar
AndrewR
In the basement lab
Posts: 23866
Joined: April 5th, 2011, 4:13 pm
Location: Ottawa, Ontario, The Great White North
Contact:

Re: Airfield Diorama Base

Post by AndrewR »

Chuck E wrote:Very nice Andrew. A very good way to make a model base. I had a similar idea. You can get these at loads of DIY stores for coppers...
I picked up a couple of nice wooden display trays at Michael's the other day for $2.99 apiece. They should be good for dioramas too. I have to do a desert one next. I might have to have a go at making a Date Palm. :)

And welcome to the new forum Ian :grin:
Up in the Great White North
User avatar
Chuck E
Established 1949
Posts: 2412
Joined: May 3rd, 2011, 8:05 pm
Location: Darlington. Home of the Railways

Re: Airfield Diorama Base

Post by Chuck E »

And welcome to the new forum Ian
Thank you Andrew. I finally did it. It was all quite painless. :)

What I''ve done on some bases is to keep the picture intact and then added a card insert. These can be swapped about for different display kits. That way you can have a smallish number of frames and lots of inserts to save space.
So many models, so little time.
m1ks
Onto the Clever Stuff, Now.
Posts: 147
Joined: May 1st, 2011, 9:32 pm

Re: Airfield Diorama Base

Post by m1ks »

That looks really good and adds much to a model, I should have a go at making one.
User avatar
bromo
On a long, long journey
Posts: 1249
Joined: May 2nd, 2011, 7:05 pm
Location: Wolverhampton,England

Re: Airfield Diorama Base

Post by bromo »

Thats a great idea and nicely demonstrated
BEEN A WHILE
User avatar
Karaya
The Bug Has Well And Truly Bitten
Posts: 416
Joined: May 24th, 2011, 1:58 am
Location: Western Australia

Re: Airfield Diorama Base

Post by Karaya »

Very nice and very simple. I will certainly have to try that once the first model is done.
.....Sven W.
User avatar
TheReluctantWarrior
starter kit
Posts: 9
Joined: March 27th, 2015, 11:14 am
Location: Florida Keys, USA

Re: Airfield Diorama Base

Post by TheReluctantWarrior »

They look great. I'll try my hand at making a diorama once I finish my 1:72 Spitfire MkIIa model.
"Once we were airborne, the aircraft began to slip along as if on skates with an immediate impression of effortless performance. Here, I thought to myself, is a real lady." - Jeffrey Quill
User avatar
AndrewR
In the basement lab
Posts: 23866
Joined: April 5th, 2011, 4:13 pm
Location: Ottawa, Ontario, The Great White North
Contact:

Re: Airfield Diorama Base

Post by AndrewR »

Plastic lids from tubs of margarine or ice cream are also useful for diorama making.
Up in the Great White North
Post Reply

Return to “Display and Diorama”