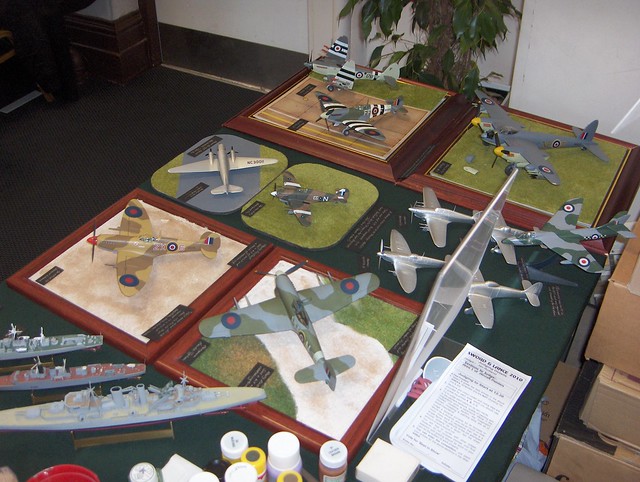
Airfield Diorama Base
Posted: April 15th, 2011, 2:48 am
Here is my method for making a very quick and easy display base. Anyone who has made scenery before can stifle a yawn, there's nothing really new here, apart from my choices of materials (possibly).
First up, el cheapo photo frame (2 for $7.99 at Michael's)

A page of concrete pattern, printed out on ordinary white paper on my ink jet. The pattern is from a Scale Scenes railway building (the concrete bridge). The white paper is glued onto thin card (think cornflake packet) with UHU/Pritt and left to dry for a while under a heavy book
http://www.scalescenes.com/

Cut out the squares of concrete. Run a grey (not black) felt tip pen around the side of the cardboard square to get rid of the whiteness. I forgot to do this on all the squares, so I had to disguise a few white edges later...
Material for the ground. I use craft foam. It's about 2 mm thick, very flexible, takes acrylic paint and does not wrinkle when you put white glue on it.

Take the glass out of the frame ( I used it as the cutting board) and stick the concrete squares onto the backing board.
I'm laying the concrete on a diagonal, to break up the squaredness of the concrete grid and the frame. Use white glue to stick the concrete down. Let it dry under a heavy weight for a while.
Cut out a piece of foam to cover the rest of the frame. Using brown foam means that you don't need to paint it.

Now you need to add the ground cover. I'm using a mix with three different colours: fine turf, weeds and yellow flowers.

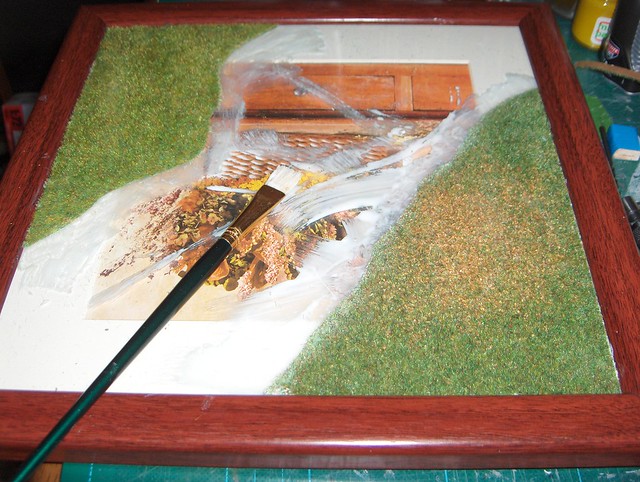
Mix up the ground cover ( I used a paper cup). Smear white glue thinly on the foam.

Sprinkle on the ground cover quite thickly and spread it around using digital technology (with your finger ).

Make sure you have plenty of glue at the join between the foam and the concrete pattern. The ground cover should spill over onto the concrete, just like in real life.

If there are any annoying gaps in the concrete squares, disguise them with a bit of ground cover.
I usually leave it to dry for a while. The last step is to spray the ground cover area with a mix of (white glue and water, 1:1, with a drop of detergent added). This fixes any loose ground cover down.

Excluding drying time, that took less than an hour to make. Nice and easy.
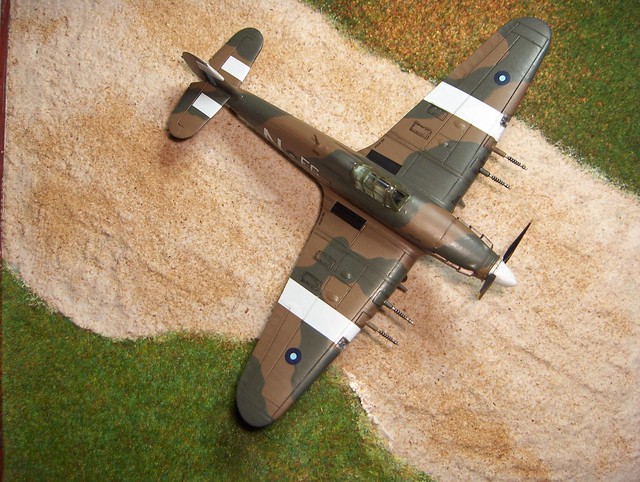
Here's one I prepared earlier... (Sorry, I couldn't resist saying that...
 )
)

cheers
Andrew
First up, el cheapo photo frame (2 for $7.99 at Michael's)
A page of concrete pattern, printed out on ordinary white paper on my ink jet. The pattern is from a Scale Scenes railway building (the concrete bridge). The white paper is glued onto thin card (think cornflake packet) with UHU/Pritt and left to dry for a while under a heavy book
http://www.scalescenes.com/
Cut out the squares of concrete. Run a grey (not black) felt tip pen around the side of the cardboard square to get rid of the whiteness. I forgot to do this on all the squares, so I had to disguise a few white edges later...
Material for the ground. I use craft foam. It's about 2 mm thick, very flexible, takes acrylic paint and does not wrinkle when you put white glue on it.
Take the glass out of the frame ( I used it as the cutting board) and stick the concrete squares onto the backing board.
I'm laying the concrete on a diagonal, to break up the squaredness of the concrete grid and the frame. Use white glue to stick the concrete down. Let it dry under a heavy weight for a while.
Cut out a piece of foam to cover the rest of the frame. Using brown foam means that you don't need to paint it.
Now you need to add the ground cover. I'm using a mix with three different colours: fine turf, weeds and yellow flowers.
Mix up the ground cover ( I used a paper cup). Smear white glue thinly on the foam.
Sprinkle on the ground cover quite thickly and spread it around using digital technology (with your finger
Make sure you have plenty of glue at the join between the foam and the concrete pattern. The ground cover should spill over onto the concrete, just like in real life.
If there are any annoying gaps in the concrete squares, disguise them with a bit of ground cover.
I usually leave it to dry for a while. The last step is to spray the ground cover area with a mix of (white glue and water, 1:1, with a drop of detergent added). This fixes any loose ground cover down.
Excluding drying time, that took less than an hour to make. Nice and easy.
Here's one I prepared earlier... (Sorry, I couldn't resist saying that...
cheers
Andrew