Hasegawa 1/48th Ju87B

Military or civil, triplanes, biplanes or monoplanes, props, jets or helicopters...models in here.
Post Reply
User avatar
Dazzled
Modelling Gent and Scholar
Posts: 9592
Joined: October 1st, 2011, 11:08 pm
Location: Mid Glamorgan, South Wales
Contact:

Hasegawa 1/48th Ju87B

Post by Dazzled »

While I'm suffering from a paint shortage from the Mig build I thought I'd wheel this shelf queen out.


Image

It's not that I ever intended for a break from building this model but the break was, in some ways, forced upon me. I started the model in July last year, my first kit after my delirium inspired return to "proper" modelling brought on by a bout of chicken pox. I had vowed to stick to building 48th scale kits, for aircraft at least, as my favourite part of building aircraft is interiors and in the larger scale brilliantly detailed cockpits are possible (and easier on the failing eyesight). As anyone familiar with my more recent kits will know, this plan didn't quite work out and I seem to be hooked on the terrific new 72nd kits on the market. Anyway, back to the Stuka.

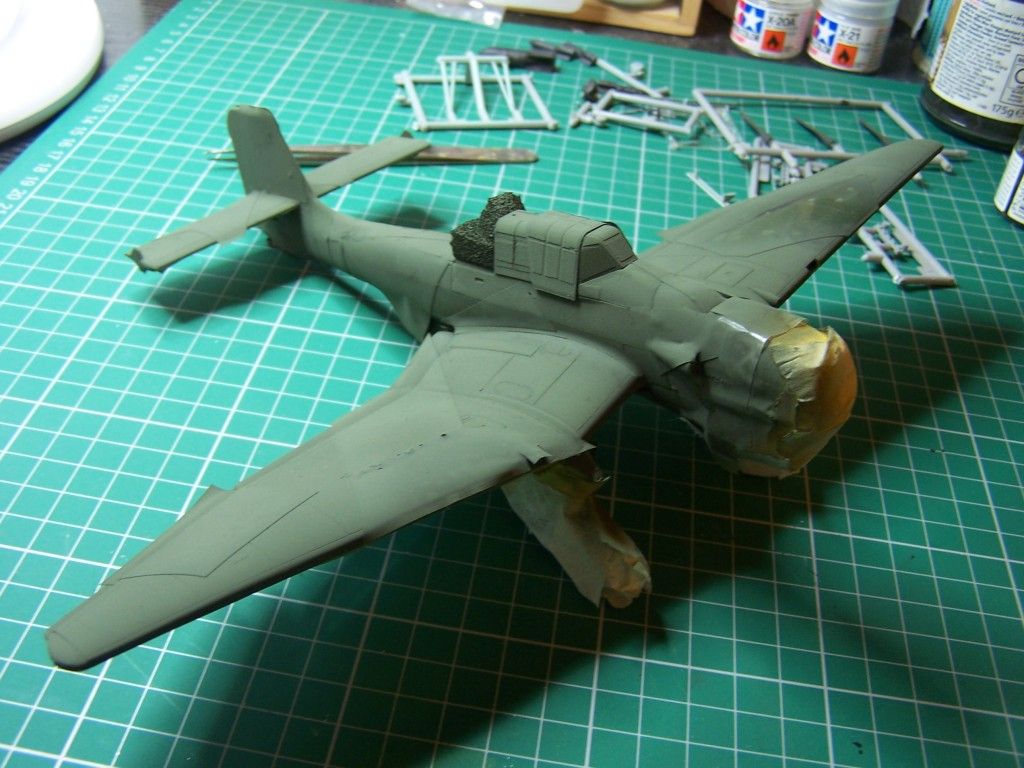
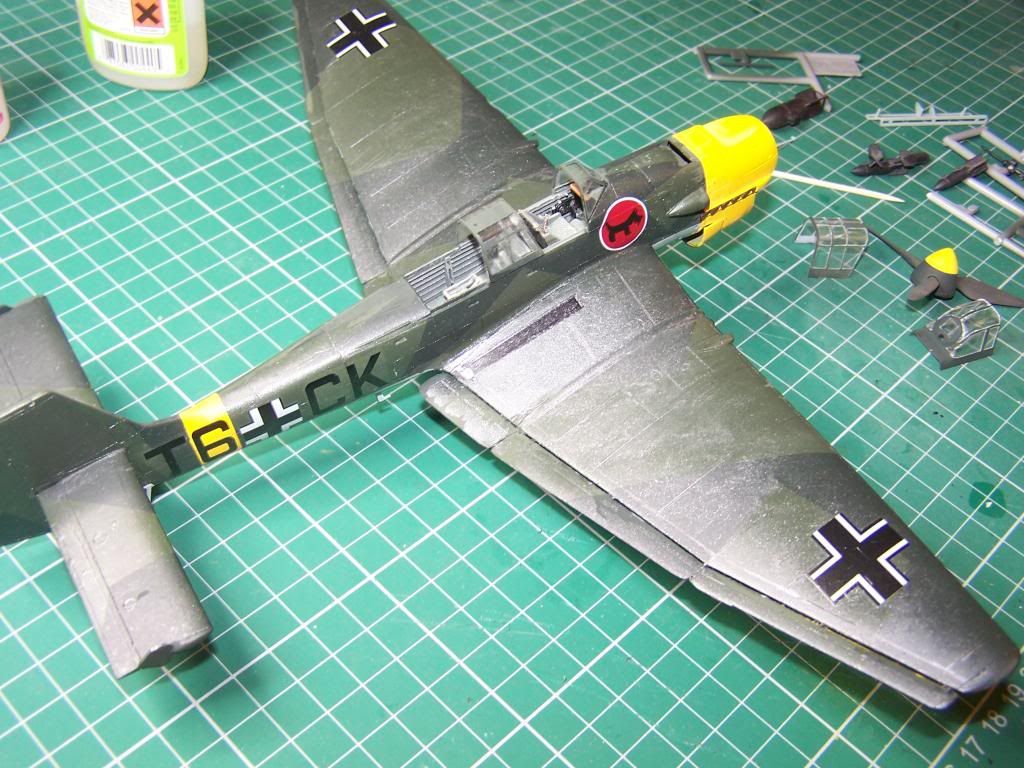
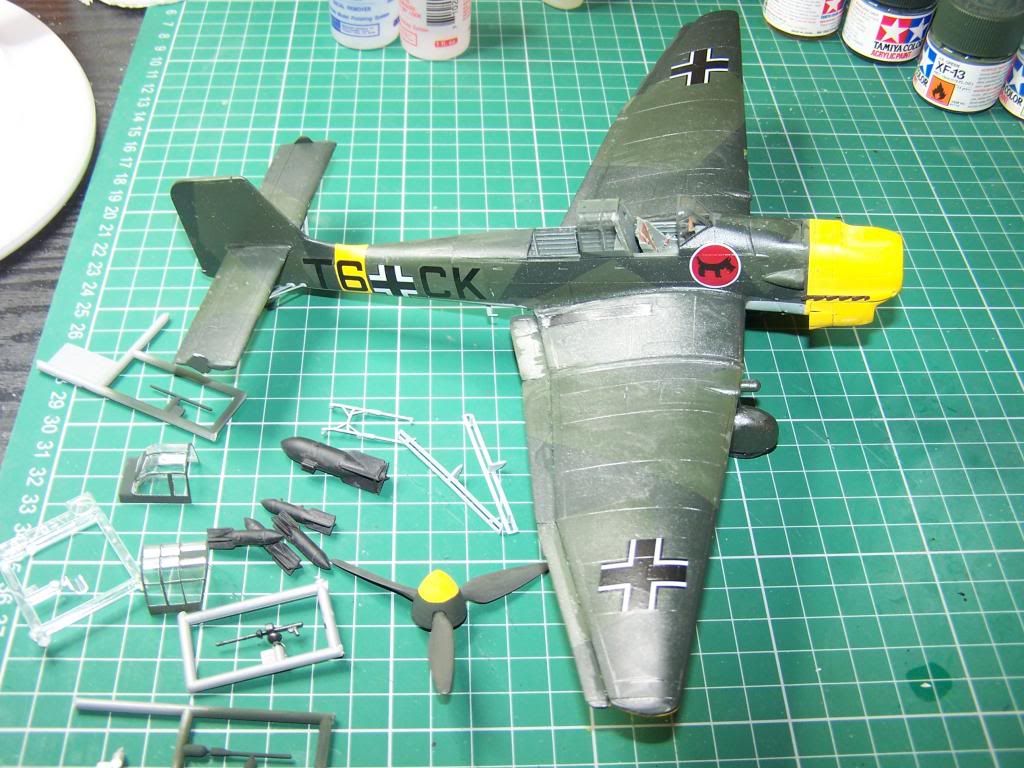
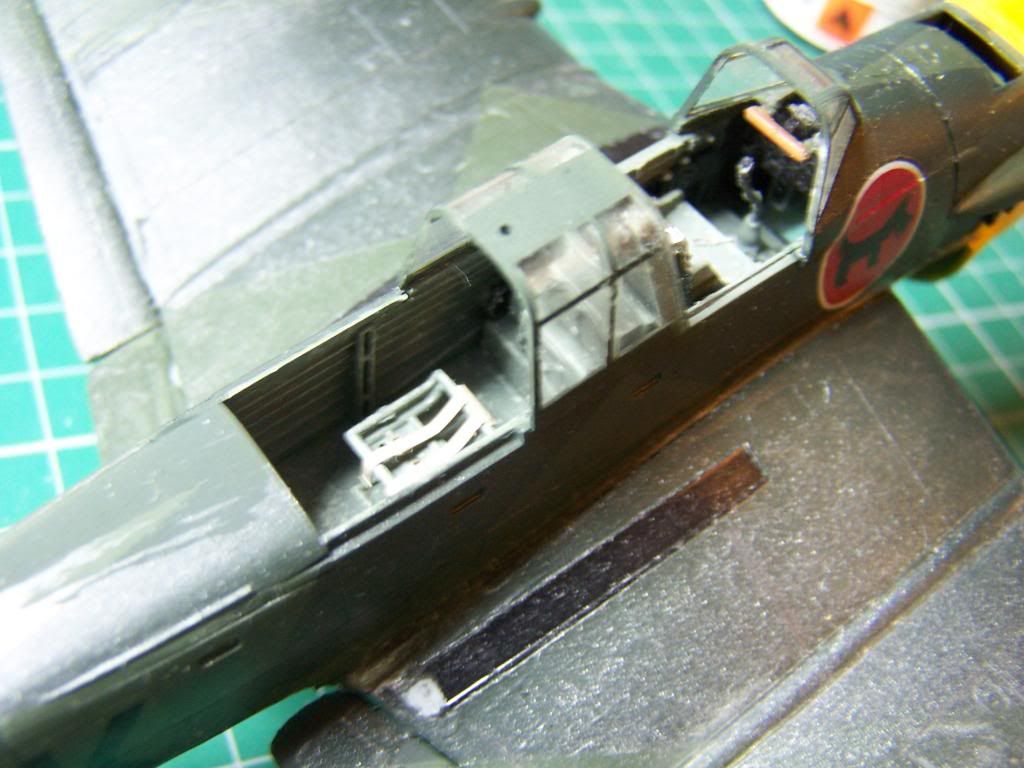
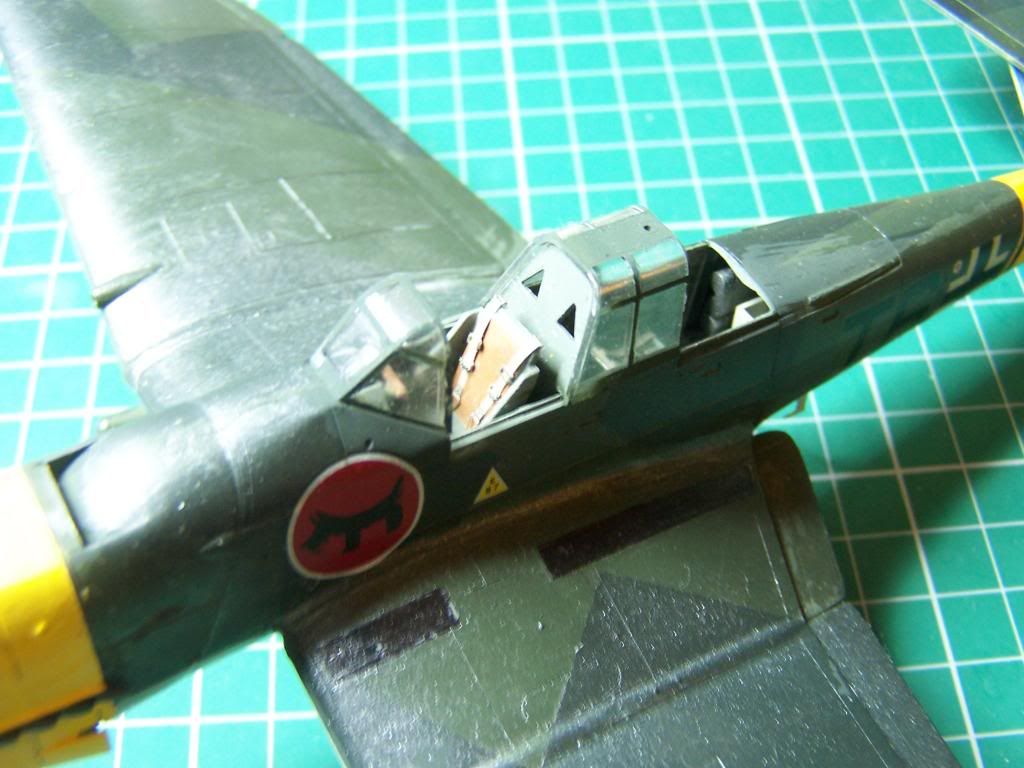
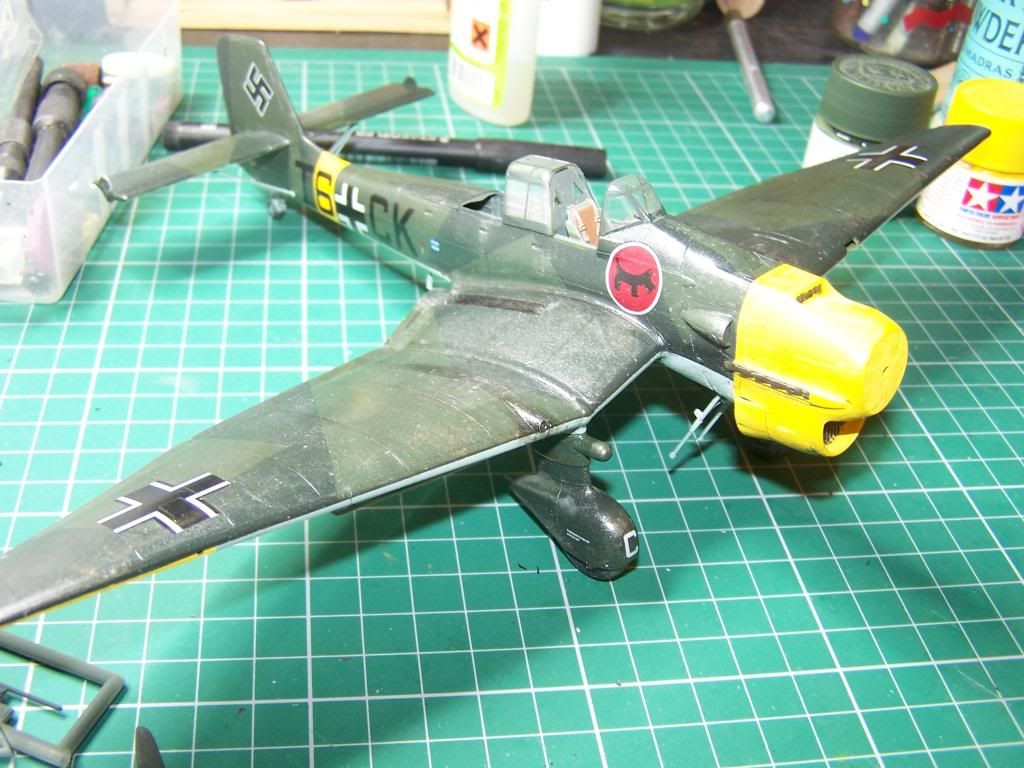
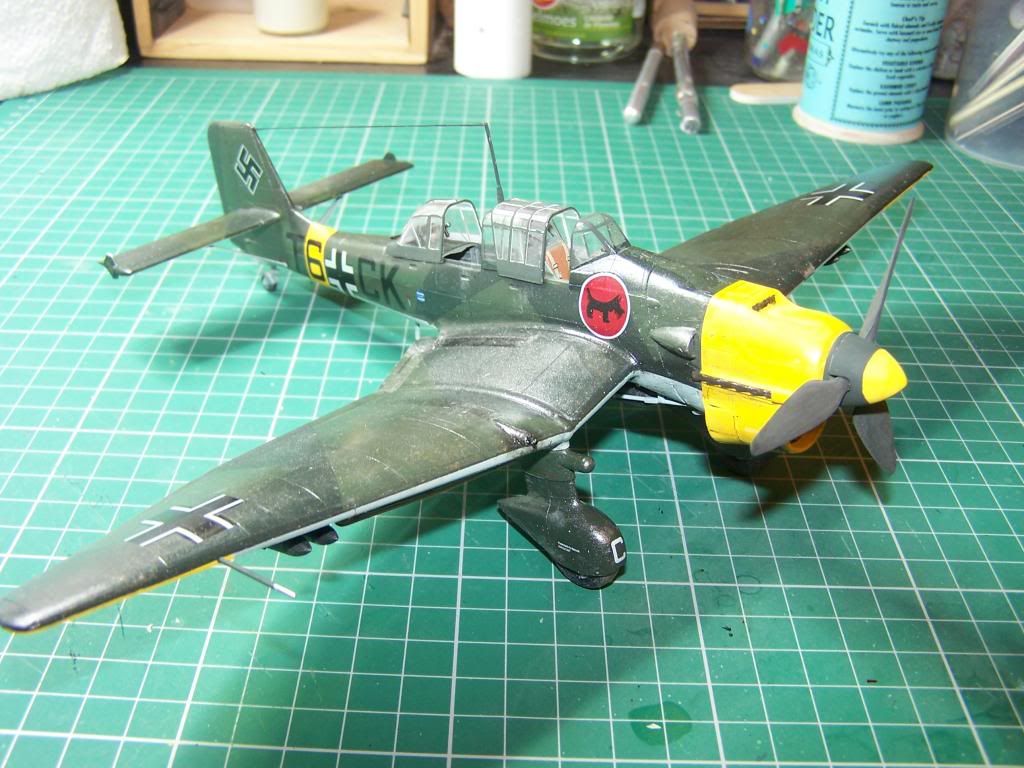
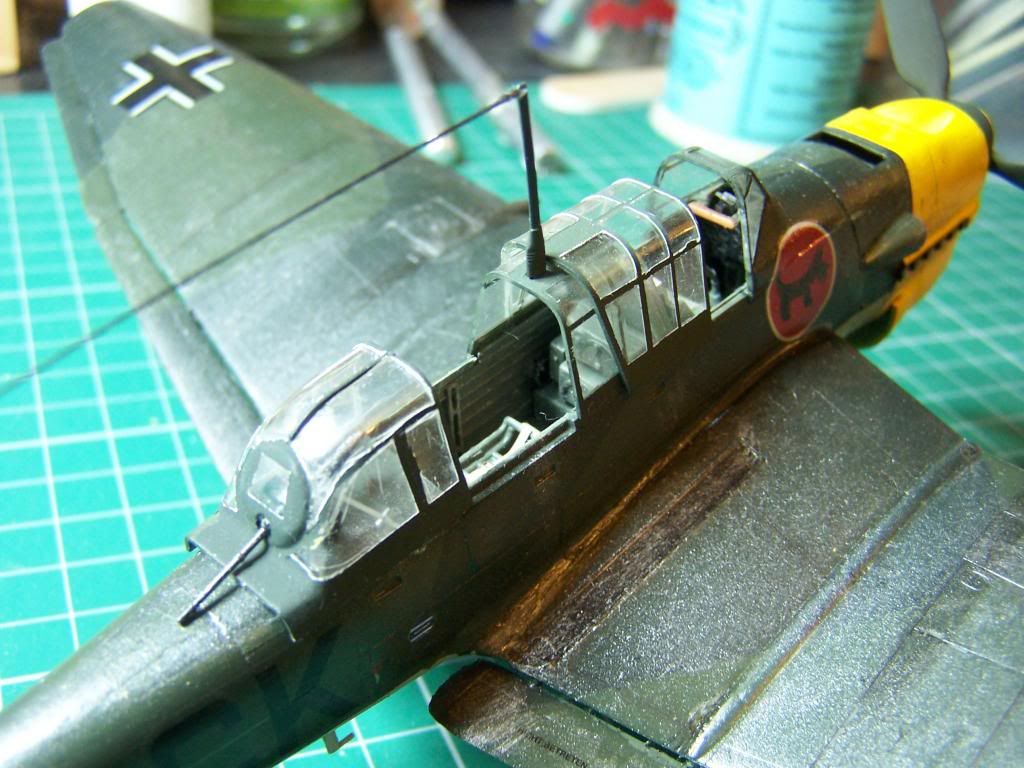
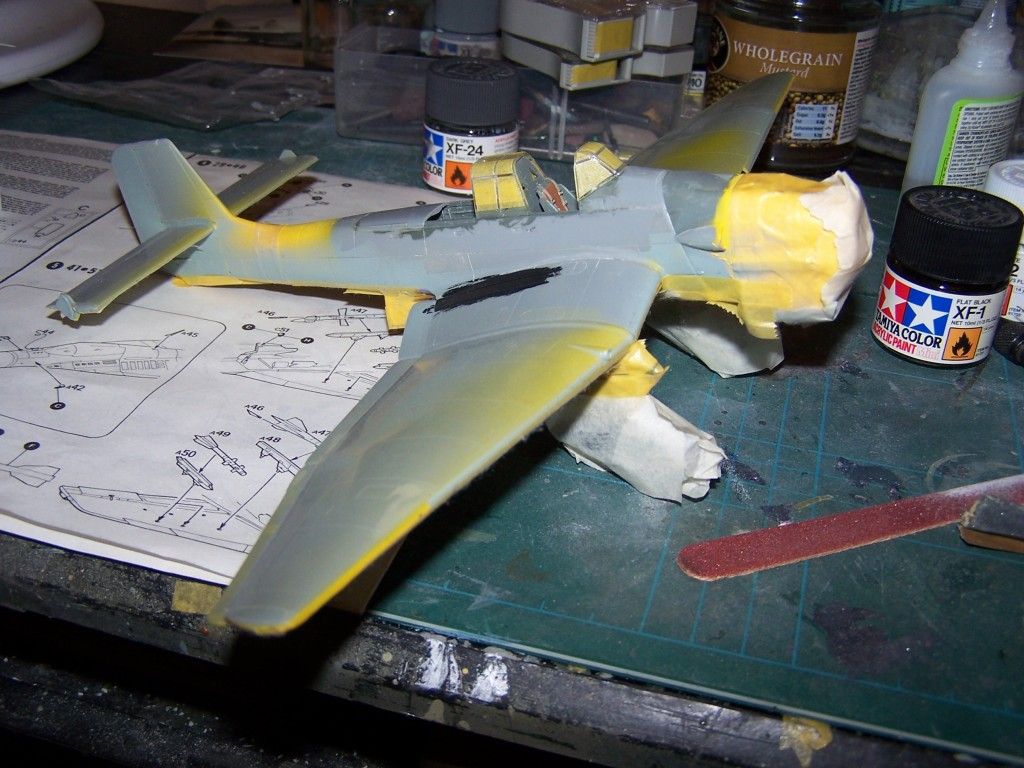
Like I said, I started this in July 2011 and it went together as you'd expect from a Hasegawa kit of this vintage, excellent fit and detail with easy assembly. I added some etched seatbelts from an Eduard set of pre-coloured Luftwaffe items. Otherwise the cockpit is standard but with carefully referenced painting. I got everything up to the painting stage. Mrs Dazzled thought that the Scottie dog emblem of St. G2 Immelmann was cute, so that decided the colour scheme, rather than the quick and easy winter scheme I had in mind although, after looking up some references, I became quite taken with the classic yellow-nosed look of the machine.

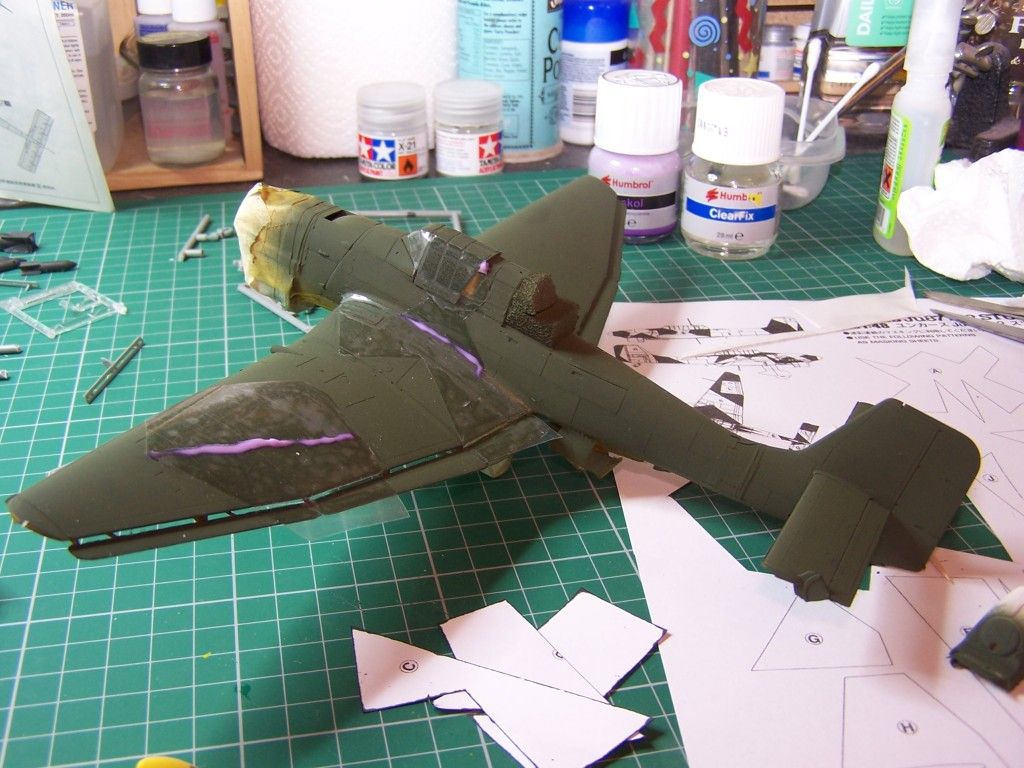
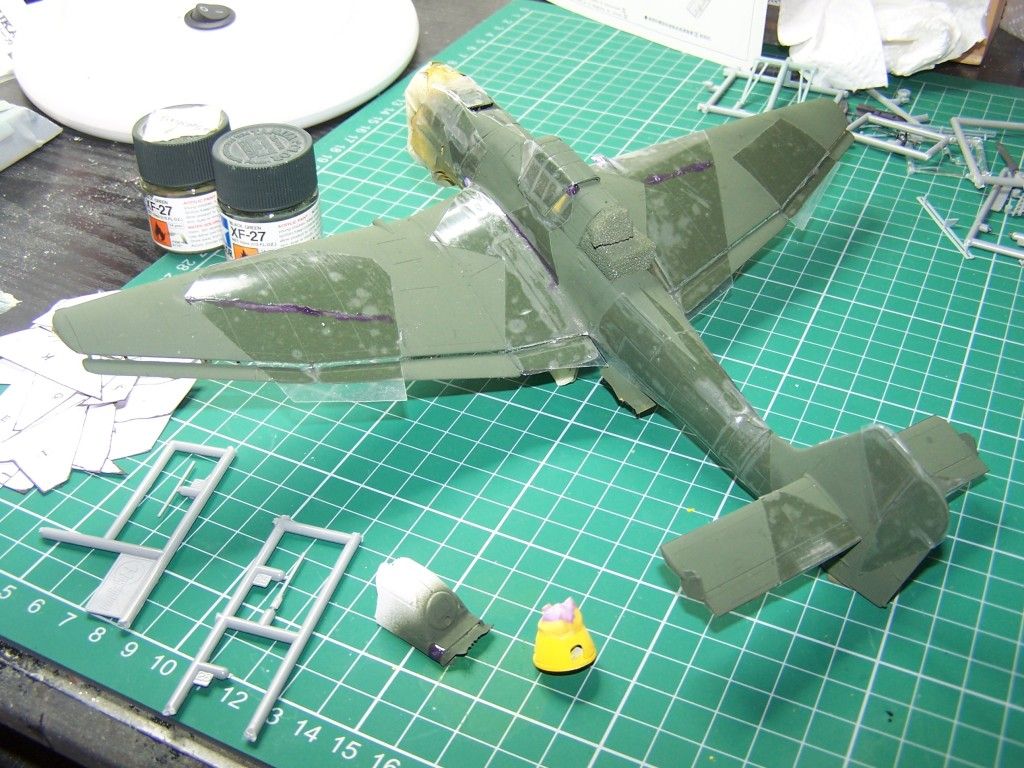
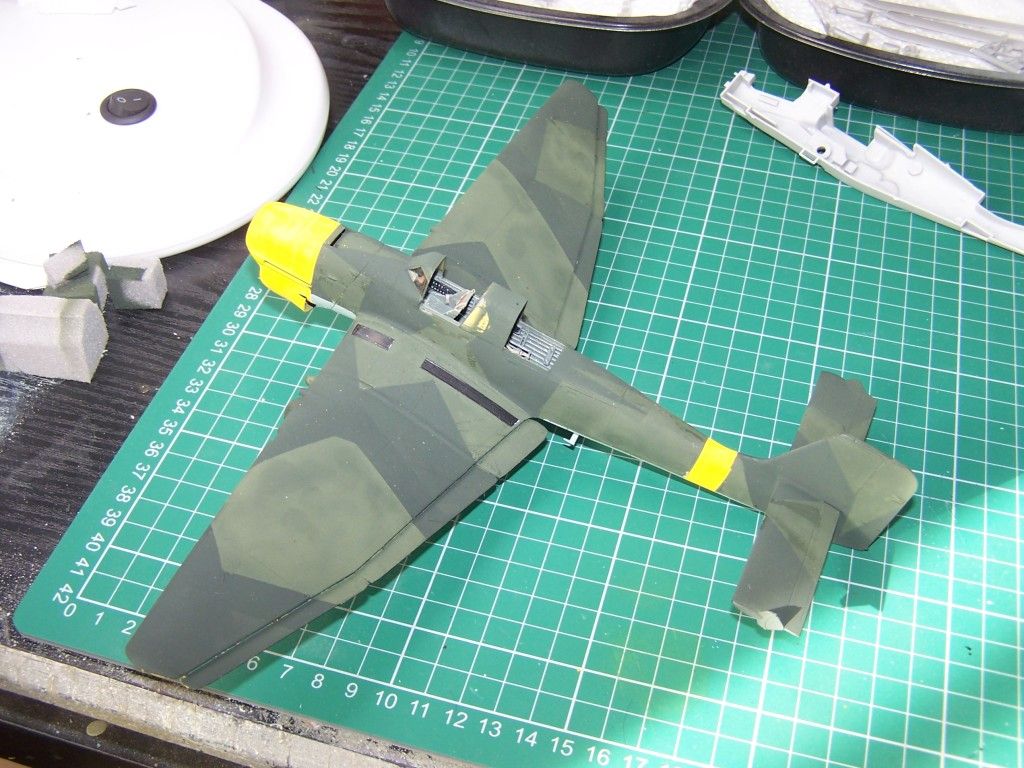
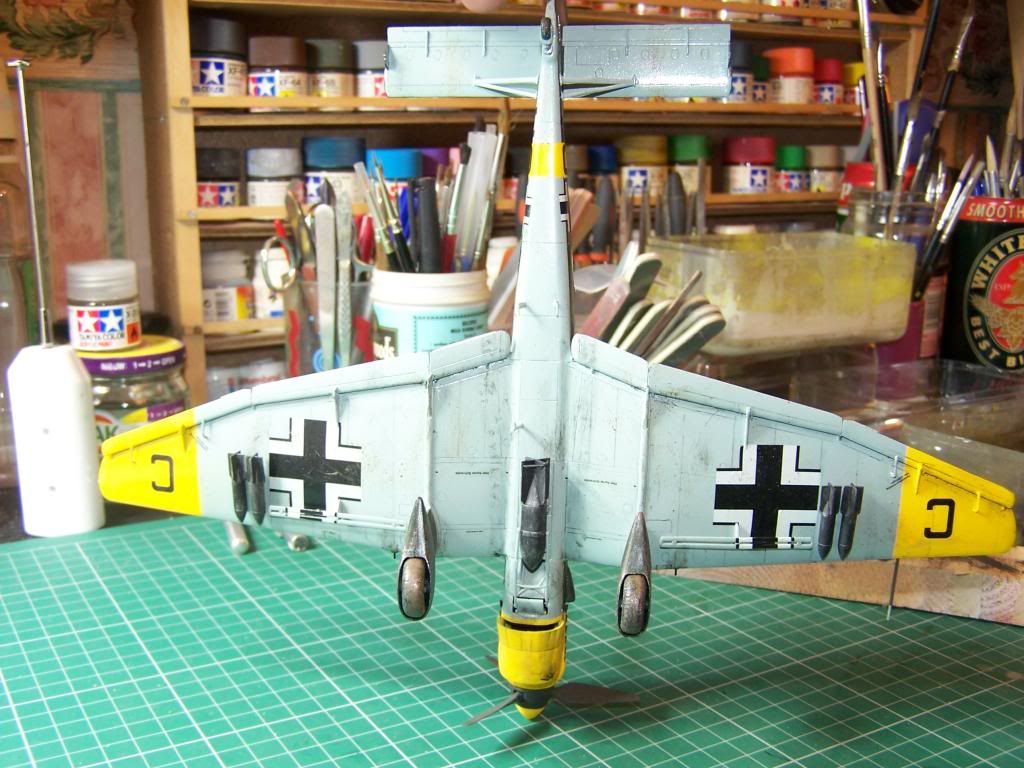
So, I got to painting the yellow and the undersides and then masked for the upper surface colours. Unfortunately my Tamiya XF-27 (RLM70) was well past it's best so some more had to be sourced. Unbelievably, at this point, there was an international shortage of XF-27. I tried all sorts of places on line and even phoned several hobby shops on the offchance but with no luck. In the meantime I got into other kits and joined this esteemed forum, getting involved in GBs. The Stuka was further sidelined, but now I'm determined that this will be finished. To this end I've started back in on it with a masking experiment.

Image

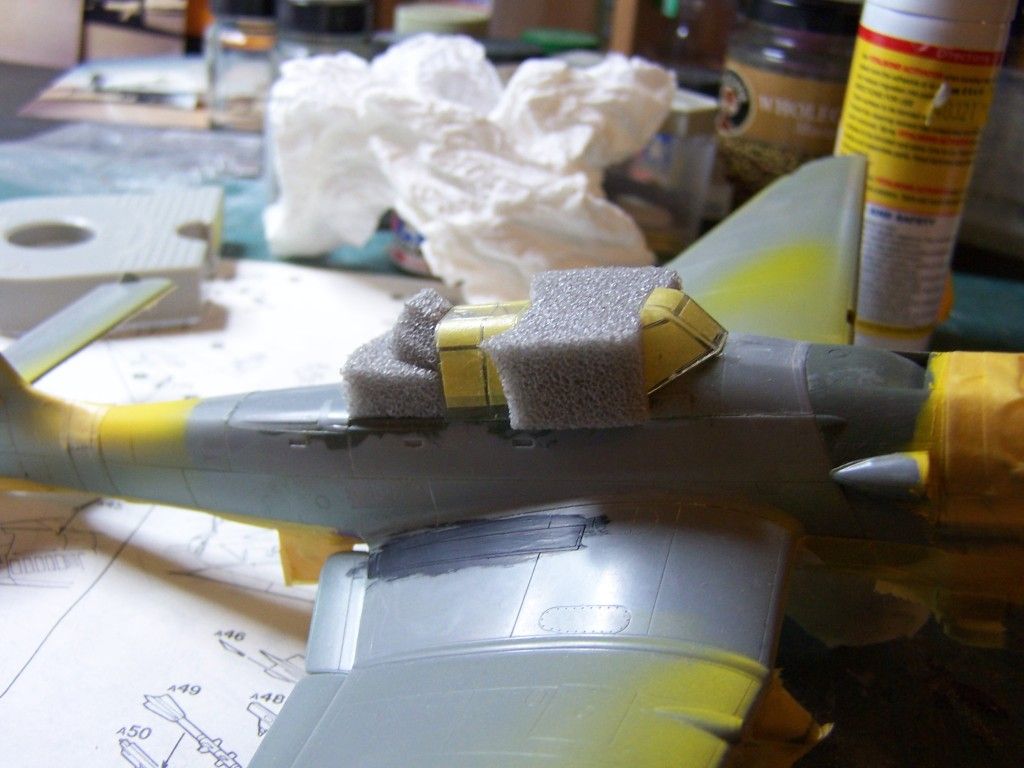
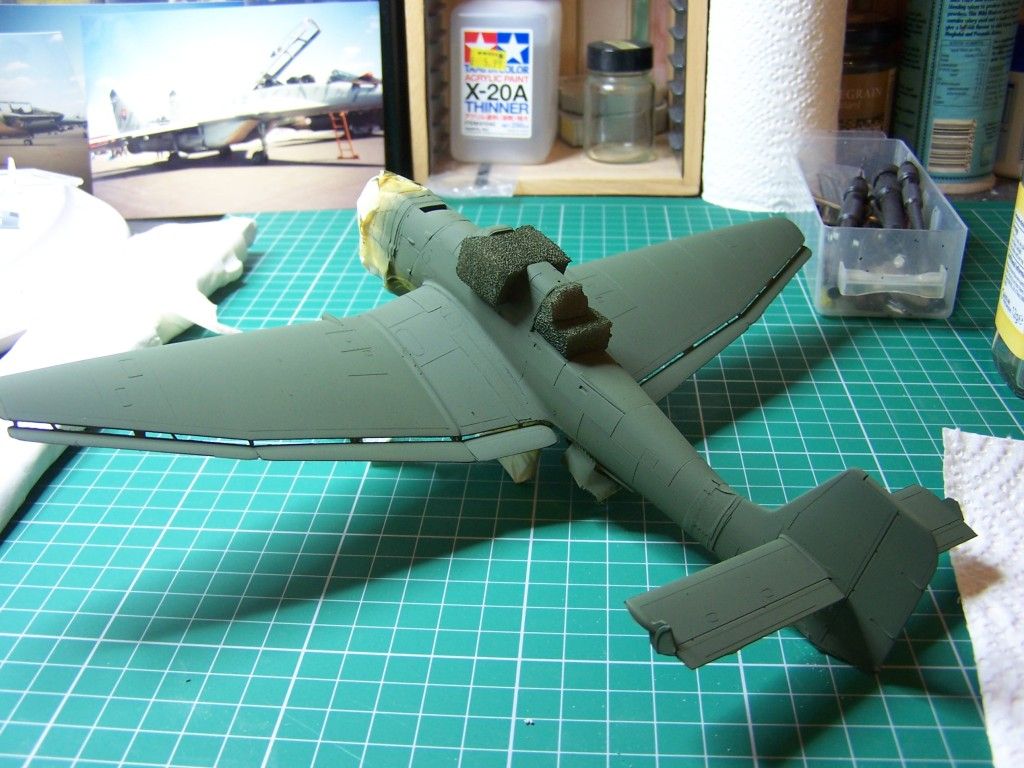
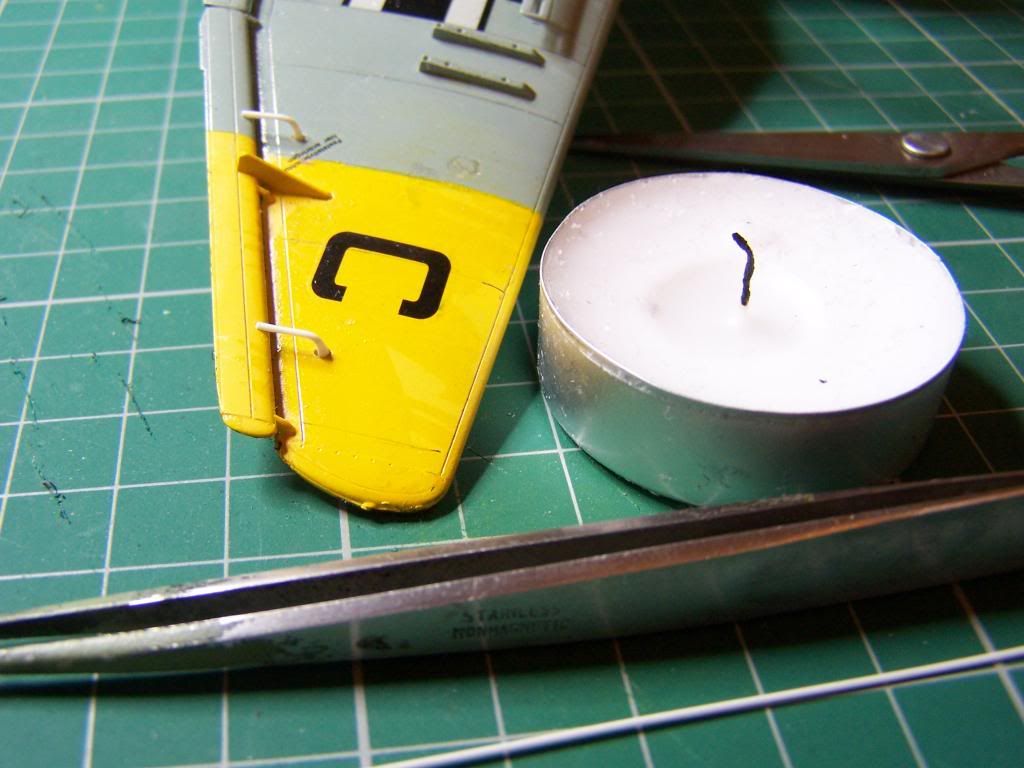
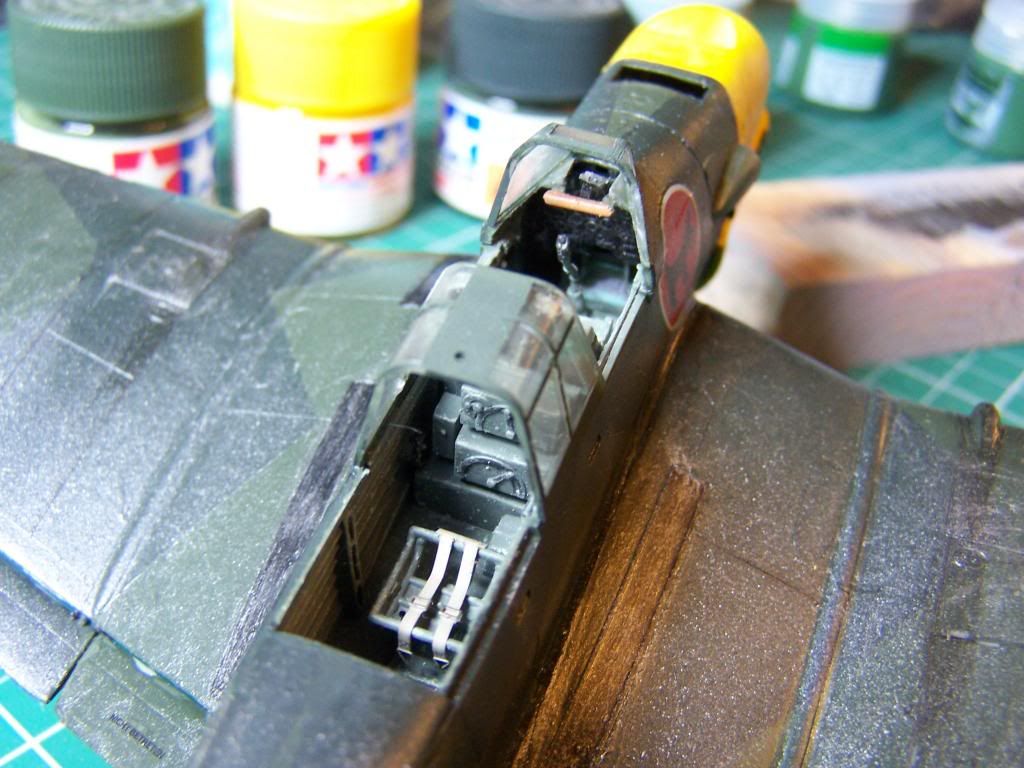
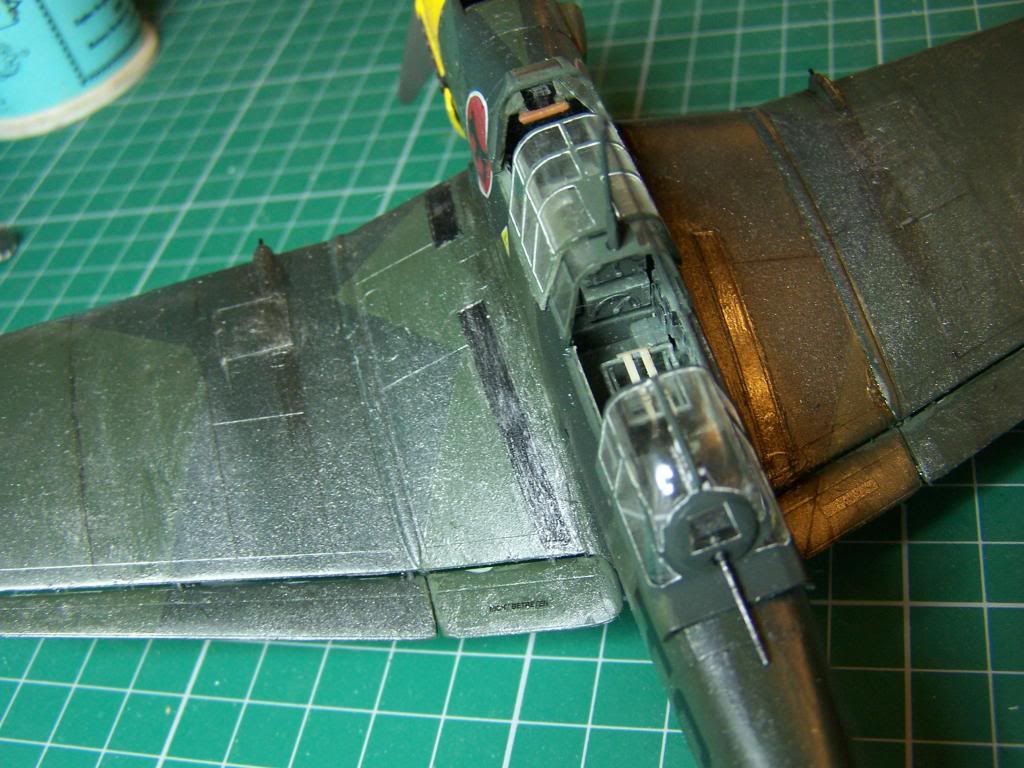
Even Tamiya tape was too fiddly to try and cover the cockpit with and soggy tissue seemed too likely to damage the delicate interior detail so I thought I'd give foam a try. It's quite a high density foam, cut to shpe and size and squeezed into the gaps where it expands to fill them. I actually have quite a good supply of it as it's something we use in work to seal up interior parts of 747 cabins. Anything under a couple of feet long is useless to us and we generate a lot of unuseable offcuts. I have a very understanding line manager :grin: so I can have as much as I want becasue they're only going into the bin in any case.

I've already given the model a first coat of it's lighter green (XF-13) and all seems well. I'll post more pics as the model progresses. 8-)
COLD WAR S.I.G. LEADER

Wherever there's danger, wherever there's trouble, wherever there's important work to be done....I'll be somewhere else building a model!
User avatar
Dazzled
Modelling Gent and Scholar
Posts: 9592
Joined: October 1st, 2011, 11:08 pm
Location: Mid Glamorgan, South Wales
Contact:

Re: Hasegawa 1/48th Ju87B

Post by Dazzled »

After a quick visit to Antics in Cardiff this morning, I've got a bit more XF-13 among the dozen or so pots I bought. So an extra coat was applied over the overnight-dried thin first coat.

Image

It looks pretty good. When I get another chance for a bout of modelling, I'll be masking up for a second colour.
COLD WAR S.I.G. LEADER

Wherever there's danger, wherever there's trouble, wherever there's important work to be done....I'll be somewhere else building a model!
User avatar
Old_Tonto
Modelling Gent and Scholar
Posts: 8063
Joined: May 1st, 2011, 7:41 pm
Location: Middlesbrough, Peoples Republic of Teesside.

Re: Hasegawa 1/48th Ju87B

Post by Old_Tonto »

Looking good.
2023 - A:0 B:0 C:0
Current Projects:
East German Air Force (1956-90)
South African Air Force (1958-93)
User avatar
Dazzled
Modelling Gent and Scholar
Posts: 9592
Joined: October 1st, 2011, 11:08 pm
Location: Mid Glamorgan, South Wales
Contact:

Re: Hasegawa 1/48th Ju87B

Post by Dazzled »

With the Yellowjacks in the display cabinet, the Stuka now has some attention lavished upon it again, in between bouts of revision for my big exam on Friday (I'm a mature student, not THAT mature though-just thought I'd point that out ;-) )

The first camoflage colour (Tamiya XF-13) is now complete after a second light coat. My next problem was how to mask the model for the splinter camoflage pattern. It's very sharply defined but, this time, a freehand layer of Maskol wasn't going to do because of the straight lines and sharp angles. I considered masking tape. Not impossible but certainly difficult. Then I remembered something I'd intended to try a few months back. Again, it was something we use at work (the aviation industry is great if you build models). Basically, it's a kind of self-adhesive polythene sheet used as a protective layer for newly fitted floor coverings, and structures and cabling during structural repairs. As with a lot of other stuff, we generate an awful lot of offcuts that are of no use and go straight in the bin. Rescuing these offcuts and attaching them to some 2" carpet tape backing paper meant that I could safely bring some home without ruining it.

I tried some on an old couple of bits and pieces I keep for experiments and it seems to work quite well, so I decided to take the plunge and use it to mask the Stuka.

Image

This is where it is at the moment. Hasegawa give you a sheet of templates to cut out and use as masks so I made a copy of this with my printer then started cutting them out then transfering the patterns on to the masking film. One limiting factor I found with my new "tape" was that, at 2" wide, I need to make some of the masks in 2 halves then seal the join with Maskol. So far I've got 3 of the masks in place and they seem to have gone down nicely with a little Maskol used to seal any gaps. It's going to take a while to get all the masks on though.

Fingers crossed it'll all go well.
COLD WAR S.I.G. LEADER

Wherever there's danger, wherever there's trouble, wherever there's important work to be done....I'll be somewhere else building a model!
User avatar
Dazzled
Modelling Gent and Scholar
Posts: 9592
Joined: October 1st, 2011, 11:08 pm
Location: Mid Glamorgan, South Wales
Contact:

Re: Hasegawa 1/48th Ju87B

Post by Dazzled »

Seems to be a little bit of an ignored section this one. Maybe I should have posted this in the aviation section instead?

I've had a couple of masking sessions and here's where the Stuka is now.

Image

All the masks are on. No mean feat considering they each had to be cut out twice and some of them had to go on in two halves. I've also masked the spinner and the rear canopy ready for a coat of XF-27.

Fingers crossed :-|
COLD WAR S.I.G. LEADER

Wherever there's danger, wherever there's trouble, wherever there's important work to be done....I'll be somewhere else building a model!
User avatar
Jagewa
Modelling Gent and Scholar
Posts: 2752
Joined: April 6th, 2011, 2:18 am
Location: Christchurch, New Zealand
Contact:

Re: Hasegawa 1/48th Ju87B

Post by Jagewa »

Interesting experiment, cheap masking material is always good. Looking forward to further reports, from the masked splinter :lol:

Cheers
Jim
jelly071
Getting well comfy!
Posts: 88
Joined: September 24th, 2012, 9:14 pm
Location: Witham, Essex

Re: Hasegawa 1/48th Ju87B

Post by jelly071 »

Lookforward to seeing the results of this one
Thanks Mike
IPMS 12171 AMSIG Member

Love an old kit
User avatar
Old_Tonto
Modelling Gent and Scholar
Posts: 8063
Joined: May 1st, 2011, 7:41 pm
Location: Middlesbrough, Peoples Republic of Teesside.

Re: Hasegawa 1/48th Ju87B

Post by Old_Tonto »

Great looking kit. Looking forward to seeing the tape come off.
2023 - A:0 B:0 C:0
Current Projects:
East German Air Force (1956-90)
South African Air Force (1958-93)
User avatar
Dazzled
Modelling Gent and Scholar
Posts: 9592
Joined: October 1st, 2011, 11:08 pm
Location: Mid Glamorgan, South Wales
Contact:

Re: Hasegawa 1/48th Ju87B

Post by Dazzled »

A bit more recent "progress" to report.

I took the plunge and began painting the second camo colour. I soon suspected that all was not right however.

Can anybody tell what the problem is.

Image

The eagle-eyed among you will have noticed that the colour hasn't changed. I myself was a little surprised too. After all, this was supposed to be XF-27 over XF-13 and XF-27 is a much darker shade so what was going on?

After a little experiment and comparison, I discovered that my supposed XF-27, from a new pot, was in actuality XF-13 with an XF-27 label and lid. Thanks Mr Tamiya :evil:

Luckily, I had another pot of XF-27 bought at a different time and this turned out to be the genuine article, so a couple of coats were applied. After this the masking came off.

Disaster number two occured at this stage.

My new masking material turned out to be a little more persistent than I had envisaged and pull off a few chunks of paint with it. Undaunted, I added area masks from Tamiya tape, put the finest nozzle in the Aztek, and proceeded to fill in the gaps. After all I had plenty of XF-13!

This also didn't quite go to plan and left a somewhat blotchy appearance.

Image

With the masks fully off the effect can be fully seen. Actually, as I intend to weather the model to represent a rather war-weary aircraft, I don't think it's too much of a disaster after all. There are some areas to be touched up and, due to it's extended period "in mask", there is some residue to clean up.

The model is going to be sidelined for a couple of weeks now to allow the paint to fully harden so I can buff and balance it out with a little micromesh. In the meantime I'm building a helicopter for the whirlibirds III GB.

More progress reports to come :)
COLD WAR S.I.G. LEADER

Wherever there's danger, wherever there's trouble, wherever there's important work to be done....I'll be somewhere else building a model!
User avatar
Old_Tonto
Modelling Gent and Scholar
Posts: 8063
Joined: May 1st, 2011, 7:41 pm
Location: Middlesbrough, Peoples Republic of Teesside.

Re: Hasegawa 1/48th Ju87B

Post by Old_Tonto »

I think you have had a happy accident there Dazzled. It looks nicely worn. :lol:

Looking forward to seeing this one done.
2023 - A:0 B:0 C:0
Current Projects:
East German Air Force (1956-90)
South African Air Force (1958-93)
User avatar
Dazzled
Modelling Gent and Scholar
Posts: 9592
Joined: October 1st, 2011, 11:08 pm
Location: Mid Glamorgan, South Wales
Contact:

Re: Hasegawa 1/48th Ju87B

Post by Dazzled »

Time to make the best of my weekend off work that's been ruined by snow :sad:

The Stuka's been looking at me again for a while so I decided to forego my Mig project for a bit and push on with this one. I have, however finished a 1/76 M16 half-track. If I'd remembered to take pictures I'd have put in in the small-scale armour GB for which it was originally purchased. Oh well, that's stress for you.

Anyhow, the Stuka has taken something of a leap forward.

Image

Image

There's been a further bout of demasking, some touching up and the beginning of the decalling. A coat of Klear was applied with a brush beforehand to give the decals a suitable surface to adhere to. Hasegawas decals took ages to release from their backing paper and don't seem to like Microsol very much. However, they did go on well with Microset and are really nice to handle with the added bonus of excellent colour density. This is particularly noticeable on the fuselage crosses that overlap from camoflage to underside. Nice one Hasegawa :grin:

I'm pretty pleased with the cockpits too.

Image

Image

The only additions I made to the kit parts were some Eduard etched seat belts so yet more praise must fall to the manufacturer. To be honest, it's been masked up for so long I forgot how much work had gone into these.

There is a slight downside however. With any kit that gets started then stored there are some problems that can occur. One common one is parts that have "drifted off" (I have a thoery that this is down to model making dimension shifting aliens, but that's another story and is between me and my psychiatrist). In this case the gun barrels have gone walkies. This isn't such a bad thing as new ones are easy to fabricate in 1/48th from brass or plastic tube. More puzzling is the disappearance of three of the flap actuators, especially as they were attached to the model and painted (Aliens, I tell you!). So I'll have to flex my scratchbuilding arm a little further it seems.

Oh well, at least there's some progress :) .
COLD WAR S.I.G. LEADER

Wherever there's danger, wherever there's trouble, wherever there's important work to be done....I'll be somewhere else building a model!
User avatar
Old_Tonto
Modelling Gent and Scholar
Posts: 8063
Joined: May 1st, 2011, 7:41 pm
Location: Middlesbrough, Peoples Republic of Teesside.

Re: Hasegawa 1/48th Ju87B

Post by Old_Tonto »

Wow this one has come on some. The interior looks great as does the rest of the kit.

I wish I could get canopy frames as sharp as those!
2023 - A:0 B:0 C:0
Current Projects:
East German Air Force (1956-90)
South African Air Force (1958-93)
User avatar
Dazzled
Modelling Gent and Scholar
Posts: 9592
Joined: October 1st, 2011, 11:08 pm
Location: Mid Glamorgan, South Wales
Contact:

Re: Hasegawa 1/48th Ju87B

Post by Dazzled »

Just good ol'Tamiya masking tape on the frames OT.

Largely thanks to the effects of the snow I've had time to crack on with this build.

I managed to finish the decalling and did stretche my scratchbuilding arm, as well as stretching and bending some plastic rod with the aid of a candle. The flap acuator arms were duly fabricated and glued in place. This is 2 of them prior to paint.

Image

The whole model then got a coat of Klear matted down with talc to seal things in. Then I set about with a bit of weathering.

Image

Image

I wanted a dirty, slightly war-worn look. St. G2 got around a bit (actually a LOT) during WW2 and a lot of the time they were operating in pretty primitive conditions so an aircraft with a little wear and tear apparent seemed appropriate. Weathering was carried out using pencil, black ink and various acrylics roughly applied in areas where dirt and grime would build up.

After weathering the last parts. including replacement gun barrels, were atttached in a 2 hour session last night and....


Image

Image

Image

Image

It's done!.

A model some 18 months in the building.

I started...and I ruddy well finished!!
COLD WAR S.I.G. LEADER

Wherever there's danger, wherever there's trouble, wherever there's important work to be done....I'll be somewhere else building a model!
Post Reply

Return to “Aviation Modelling”