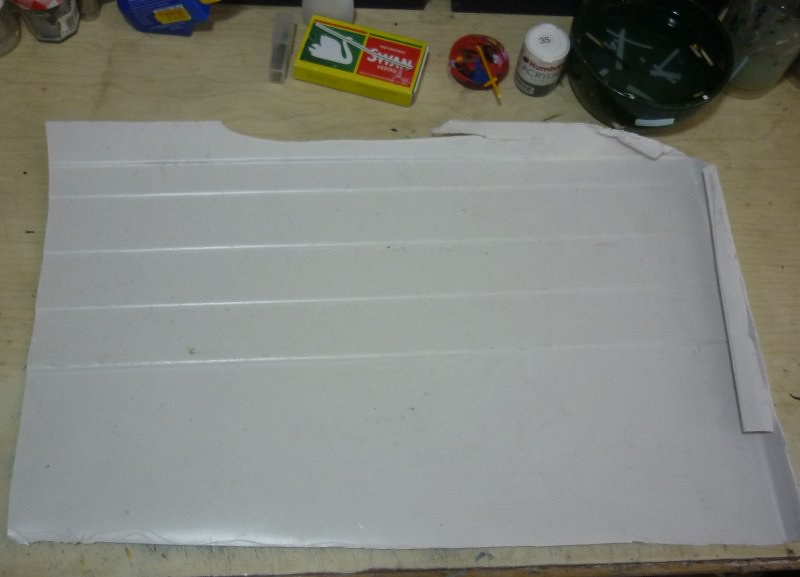
The following morning, I found a large sheet of moulded white plastic lying in the road near my house. It measured about 5 ft by 2 ft. I had no idea where it came from. I looked at it and saw wings, fuselages, buildings and a multitude of other possibilities. This was a piece of modelling roadkill, so I took it home and put it in my garage until I could think of what to do with it.
Last week, I saw a magazine with plans and photos of a Short 830 seaplane. At that moment, the project was born (‘Windsock International’ Vol. 10 no 5 1994).
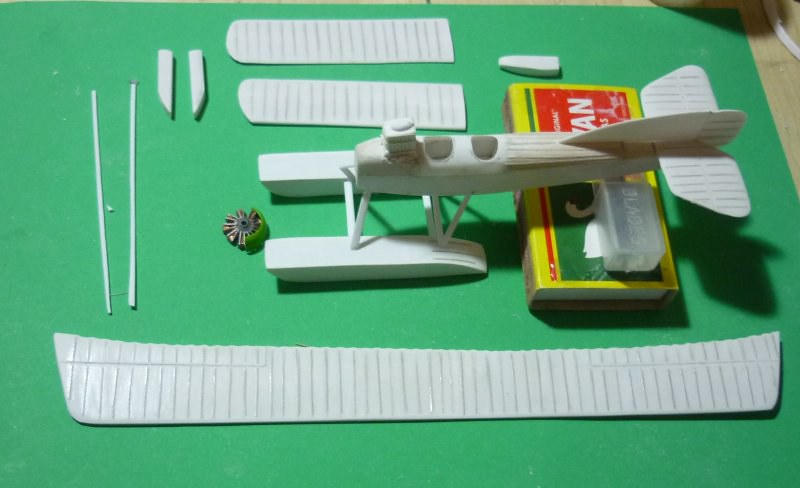
The first photo is the starting point. It shows a sheet of the white plastic that I cut out from the larger sheet. It has various mouldings in it, but I don’t know what they were for.
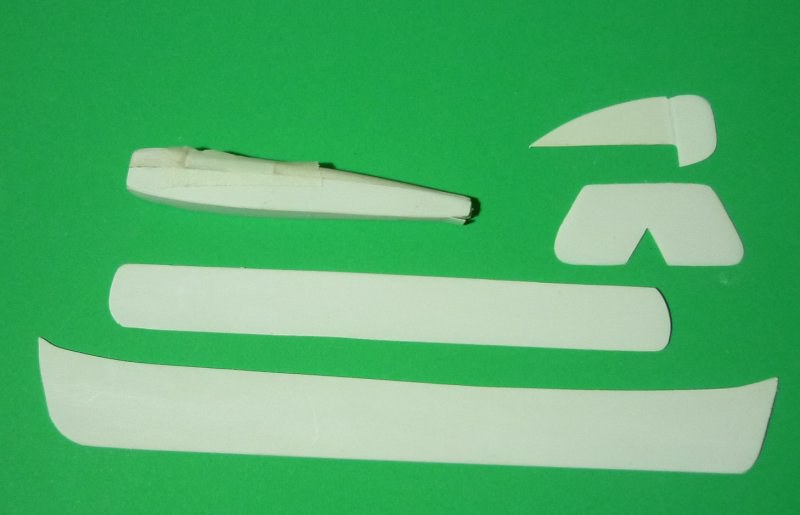
In the next photo, I have cut out some wings and parts for a fuselage from the plastic sheet. The fuselage is a basic box structure, curved towards the front and rear and with a curved top deck. I glued some balsa to the top at the front and rear then sanded it to the right shape. I left a gap for the cockpits.
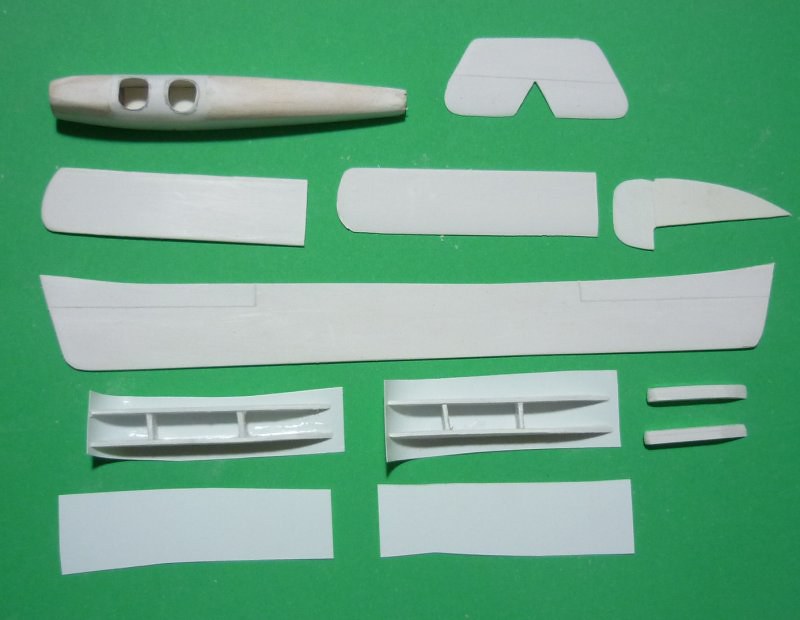
The next step was to complete the fuselage by adding a piece of thin plastic card and opening holes in it for the cockpits. You can also see the box structures of the main floats using thick plastic for the sides. These were completed with the thin plastic card on the tops and bottoms.
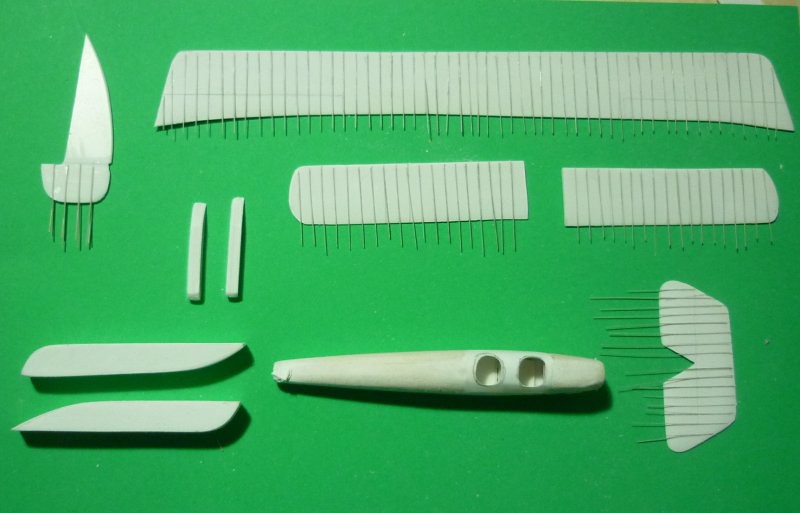
Rib detail was added to the wings and fuselage using stretched sprue. The photo also shows the completed main floats. The outer floats were made from laminated blocks of thick plastic card, carved to shape.
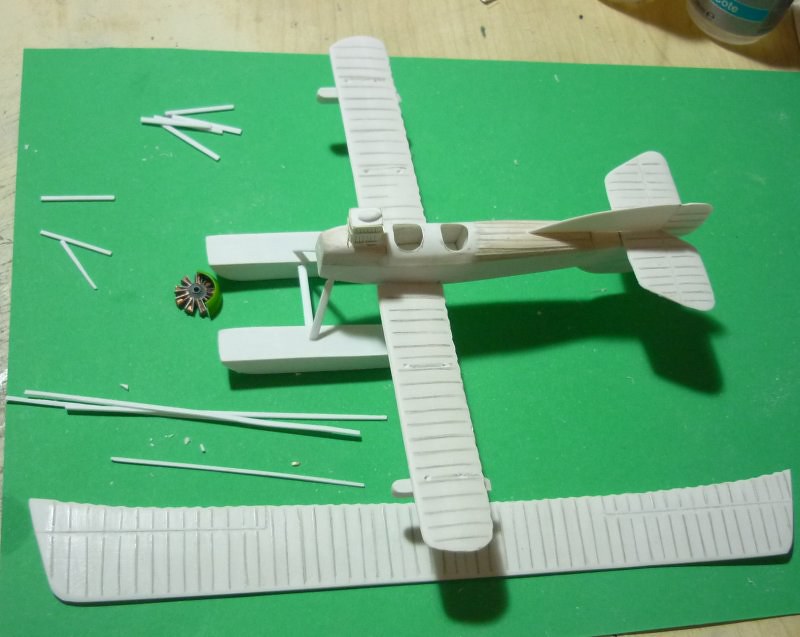
The stretched sprue was then sanded and tidied up. I raided the spares box for an engine and top part of a cowling. I added push rods to the front of the engine to make it look more like the Salmson radial that was fitted to some of these aircraft (others were fitted with online engines).

With the main parts built, it was time to start to assemble them. I cut and shaped plastic card to make the struts. The massive radiator was made from scrap plastic card (the one in the photo is too wide so I replaced it at a later stage of the build).
The lower wings were attached.
In the next photo, the upper wings are just balanced in place to check for general fit. Inner struts have been glued in place. The idea is to attach the upper wings to these inner struts first, then slot the others in place.
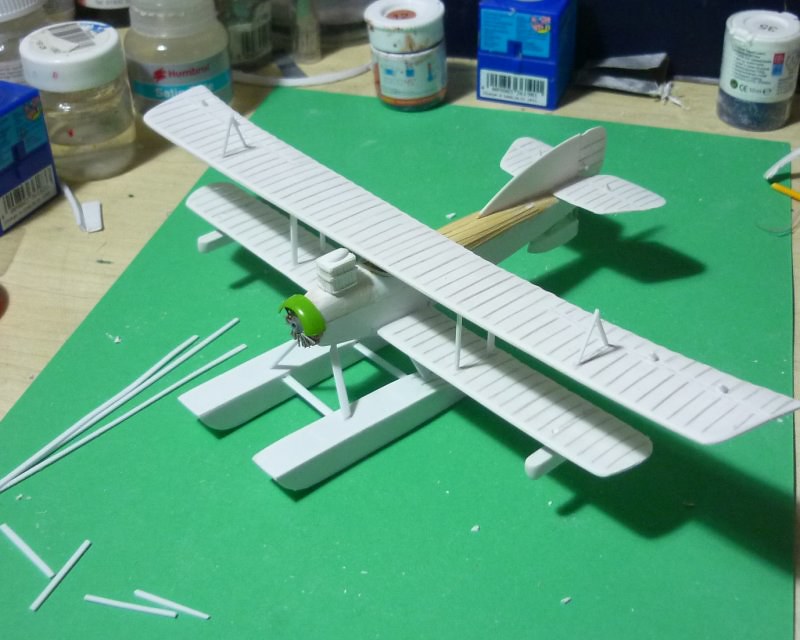
Then it was time for painting. This is best done before the upper wings are glued in place.
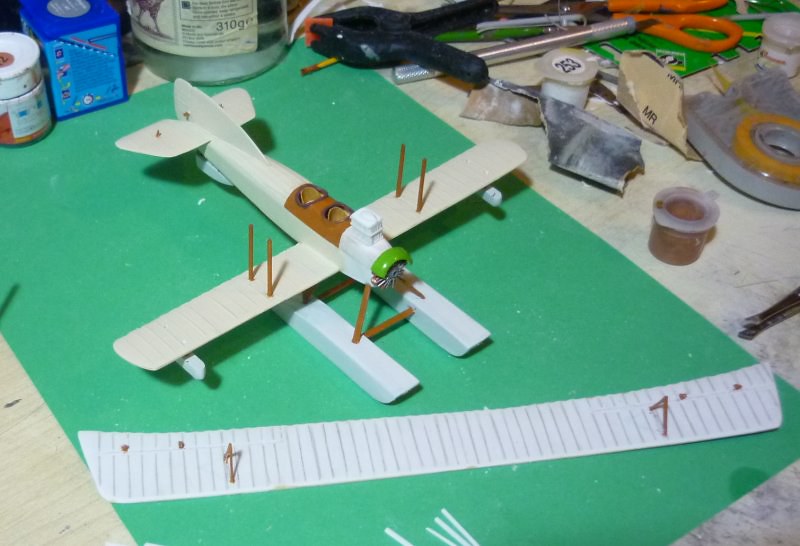
At this point, I should mention that I have made a mistake with the radiator. Although on photos of the real thing, it looks a if it is joined to the fuselage, there should be a narrow gap under it. It seems to be held up on some short supports. This is not a mistake I aim to rectify.
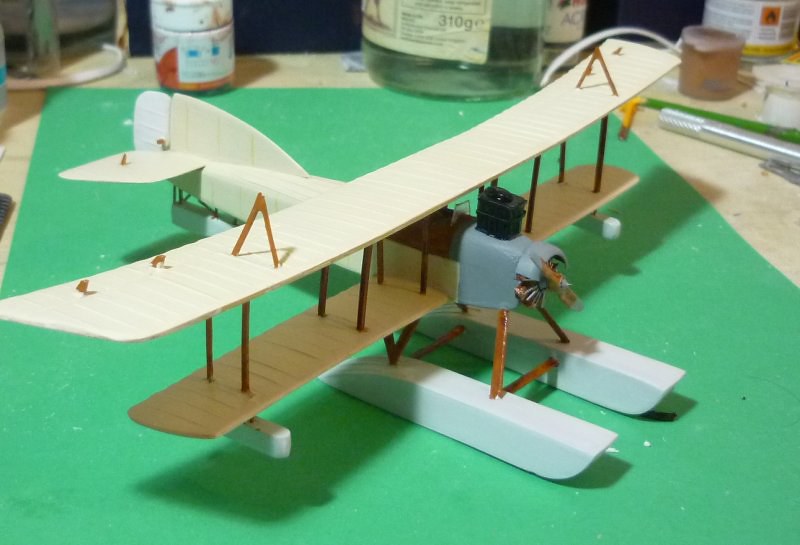
Attaching the upper wings can be problematic, especially when six pairs of struts are involved. By attaching the upper wing to the four middle struts first, it was however, fairly easy to then cut and insert the remaining ones, securing them with dabs of superglue.
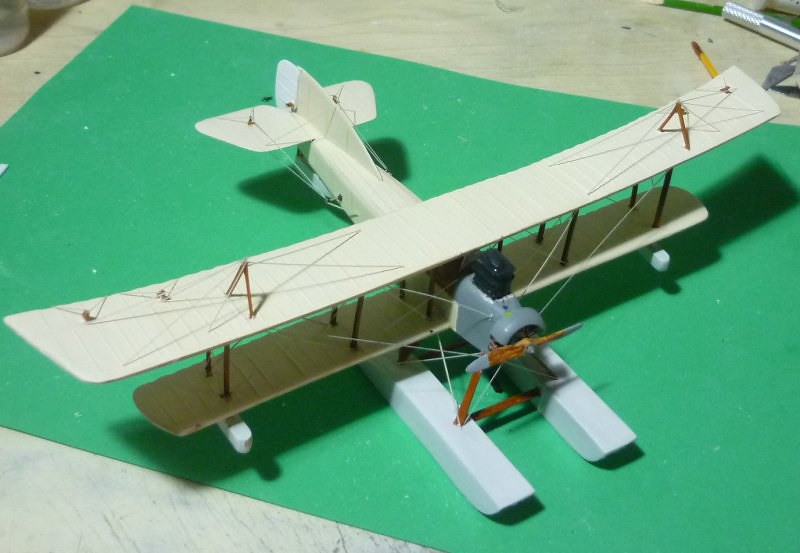
From this stage on, it was just a matter of painting, rigging and adding decals. I won’t bother to provide details since that is all bog standard stuff.
And finally.
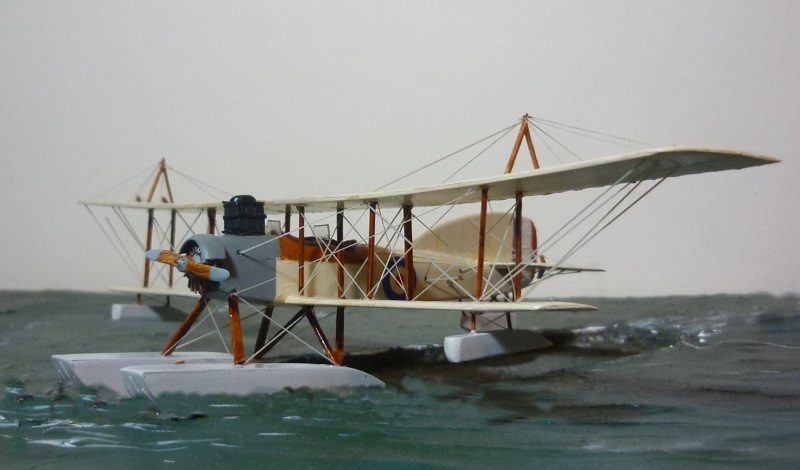

There were several things I either got wrong or could have done better, but I won’t dwell on them. I just felt lucky to have stayed more or less on top of the build from start to finish.


