1969 Revell's North America p-51B 1:32
-
JamesPerrin

- Looks like his avatar
- Posts: 13680
- Joined: April 5th, 2011, 8:09 pm
- Location: W. Yorkshire
- Contact:
Re: 1969 Revell's North America p-51B 1:32
I'm with John, this is a perfect opportunity to attempt some scratchbuilding. You've got nothing to loose. There doesn't seem much twist to the blades so just get the outline right and then sand to the correct cross section. I find doing these kind of things the most satisfying part of the hobby.
Classic British Kits SIG Leader Better to fettle than to fill
(2024 A:B 5:2) (2023 13:8:7) (2022 21:11) (2021 15:8) (2020 8:4:4)
(2024 A:B 5:2) (2023 13:8:7) (2022 21:11) (2021 15:8) (2020 8:4:4)
-
Michael modeller 48
Re: 1969 Revell's North America p-51B 1:32
Are u suggesting melting or gluing the addition to the prop? What is the cuff? Where do I buy a brass pin? I do not have any brass pins.jRatz wrote:Why cast a blade, or even look for another prop ?
It appears that the cuff on the short-shot blade is intact, so all you need is the outer 2/3 of a blade.
All the sprue on that kit is just begging to be made into a blade -- maybe a couple pieces slightly longer than you need melted together, maybe a sprue somewhere is big enough by itself. Then a bit of work with a knife and sanding stick and there's your replacement blade. A bit of clean-up on the cuff, maybe a small hole in the cuff and blade for a brass pin and there it is.
Good news is you have 3 full blades to use as a model and there is enough sprue that you can practice on.
Would I sand the short-shot blade flat at the end and glue on the scratch build prop onto it?
I am not sure this within my abilities ....I am not sure I understand your instructions.... "A bit of clean-up on the cuff, maybe a small hole in the cuff and
blade for a brass pin and there it is."
-
iggie

- Modelling Gent and Scholar
- Posts: 23434
- Joined: July 31st, 2013, 11:04 am
- Location: North Somercotes, Lincolnshire
- Contact:
Re: 1969 Revell's North America p-51B 1:32
What John is suggesting is that you craft a replacement for the missing section of propeller blade by whittling down part of the kit sprue, and glue it onto the end of the broken prop.
If you get the new part as close to the required size and shape before you add it to the prop, once it is glued on you can then do the final shaping once it's all solid.
The brass pin is to strengthen the join if you want to; drill a hole down the stump of the broken blade and also into your new part. Glue the two together and the pin holds the join straight. It is not essential to do this though!
Best wishes
Jim
If you can walk away from a landing, it's a good landing. If you use the airplane the next day, it's an outstanding landing
"Never put off till tomorrow, what you can do the day after tomorrow"
Jim
If you can walk away from a landing, it's a good landing. If you use the airplane the next day, it's an outstanding landing
"Never put off till tomorrow, what you can do the day after tomorrow"
-
Michael modeller 48
Re: 1969 Revell's North America p-51B 1:32
Ok, however it is misinformed not broken. It looks like not enough plastic when into the form.
It is curved on the end, I think I would need to sand that flat too...?
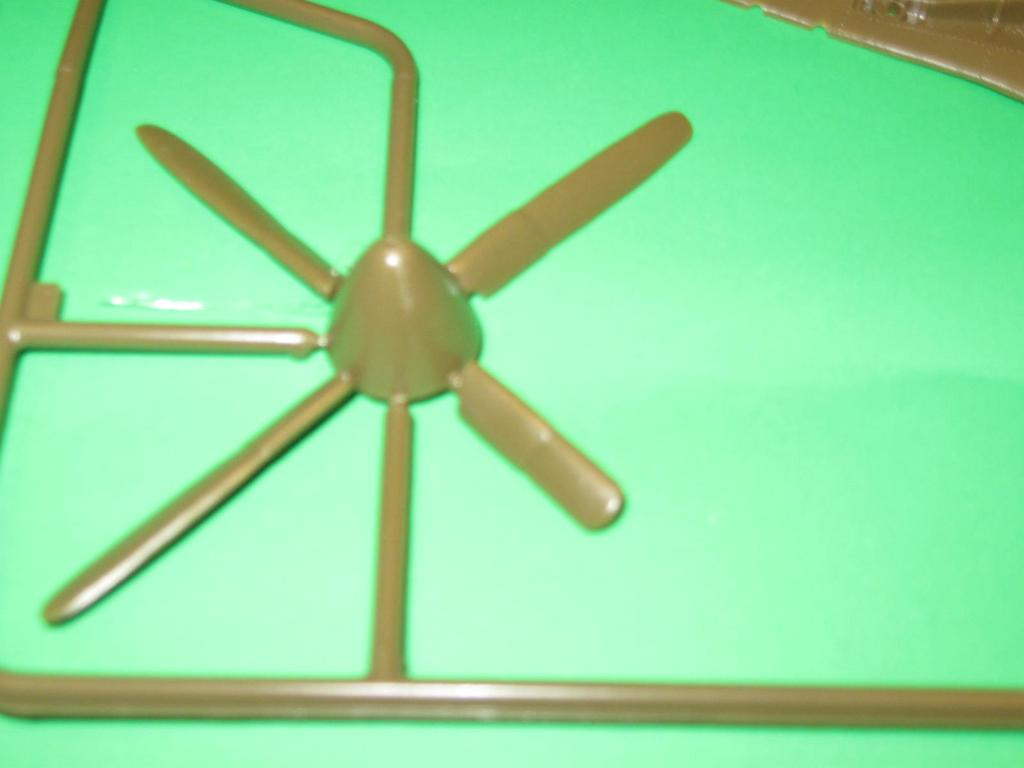
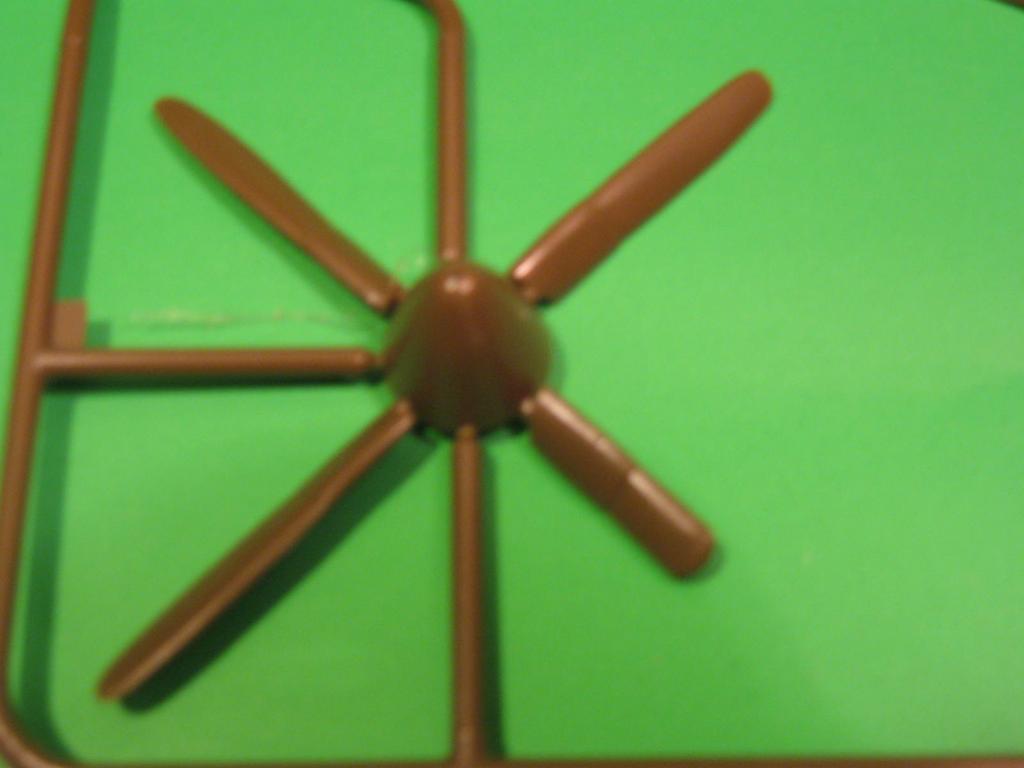
It is curved on the end, I think I would need to sand that flat too...?
-
JohnRatzenberger

- Why is he so confused ?
- Posts: 15730
- Joined: April 5th, 2011, 3:42 pm
- Location: Living on a sandbar - Nags Head, NC.
Re: 1969 Revell's North America p-51B 1:32
Michael,
The fatter part of each blade, next to the spinner, is known as the cuff.
Doesn't have to be a brass pin, could just be a short piece of any small metal rod -- pin, paperclip, etc -- that provides strength to the join.
Carve/sand a replacement blade, less the cuff, using one of the good blades as a pattern.
When happy with it, cut the stub blade off the cuff and neaten things up for a good glue join.
Drill a small hole in each for the pin -- glue the blade to the cuff and while the glue dries do any twisting/turning/aligning you need to make it look neat.
Once you have a
John Ratzenberger 
It's my model and I'll do what I want with it.
It's my model and I'll do what I want with it.
-
Michael modeller 48
Re: 1969 Revell's North America p-51B 1:32
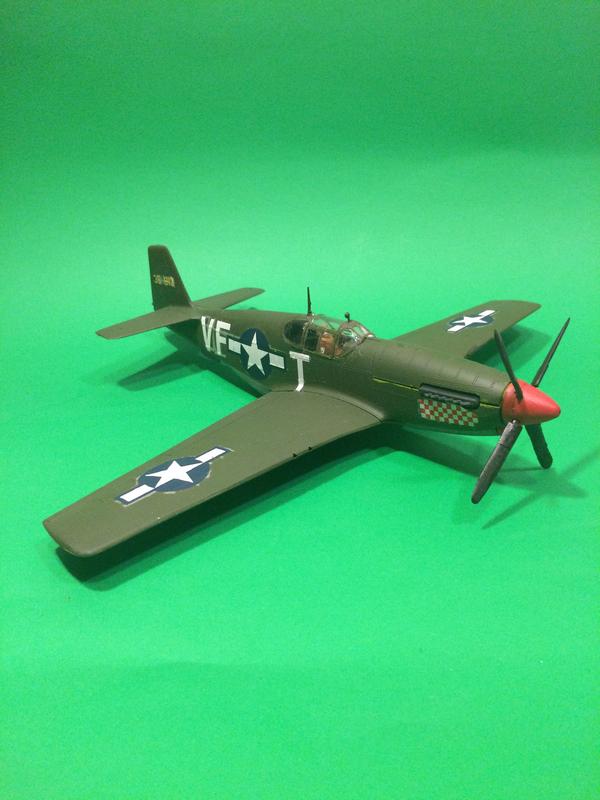
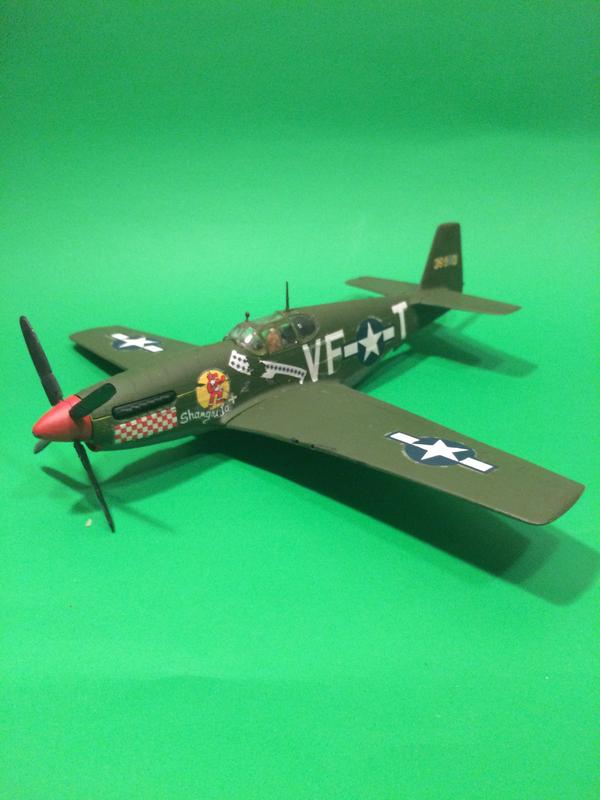
I had some problems with 1969 kit...but managed to fit the prop after all...