1/8 Jaguar E-Type - Completed!

Time to pimp them rides!
DamianHarty
Getting well comfy!
Posts: 93
Joined: October 25th, 2020, 6:55 pm

1/8 Jaguar E-Type - Completed!

Post by DamianHarty »

I am new to your wondrous chambers so please go easy on me. I recently completed a build started half a lifetime ago. It seems to fit this sub-forum well...

Image

Image

I don't think it's a *spectacularly* high standard, but equally it's not too shabby. My photography is arguably better than my modelmaking, so I am able to show the finished thing well.

I am so pleased with it, even though it has taken me about 25 years to complete it.

More to come in following posts!
User avatar
DavidWomby
Modelling Gent and Scholar
Posts: 11759
Joined: May 1st, 2011, 8:09 pm
Location: Florida, USA

Re: 1/8 Jaguar E-Type - Completed!

Post by DavidWomby »

It looks real!

David
DamianHarty
Getting well comfy!
Posts: 93
Joined: October 25th, 2020, 6:55 pm

Re: 1/8 Jaguar E-Type - Completed!

Post by DamianHarty »

It's the Monogram kit. I bought it in about 1995. I’ve always had a soft spot for E-Types, particularly the early 6 cylinder ones with the glassed over headlights.


Image


I always preferred the open top to the fixed head, but no kit was available. I was living in Essex in the UK at that point. I found a local E-Type (they weren’t quite so rare and valuable in the mid-90s) and asked if I could take some pictures of the back end with some ropes draped over it. This was back in the days of film, of course. I used a 200mm lens with a 1.4x teleconverter, the longest combination I had at the time, and stood well back to flatten the perspective. Once I got the prints back, I traced over them, picking the mid point between the rope and its reflection to give me the actual surface line.


Image

Image

Image

Using a computer, printer, ruler and trial and error, I managed to scale these contours to 1/8 scale. Along with a more official picture, this gave me some sections at known points on the vehicle as well as a sense of the overall form.

Image
DamianHarty
Getting well comfy!
Posts: 93
Joined: October 25th, 2020, 6:55 pm

Re: 1/8 Jaguar E-Type - Completed!

Post by DamianHarty »

Starting from paper templates, I cut six balsa blocks and used the paper templates to shape the blocks to the rear end of the convertible contours. I glued the blocks together to make a whole, and filled and sanded the whole thing to make a plug mould. I cut a similarly shaped aperture in a piece of ¼” plywood and I was ready to go. I got some 1.5mm (0.060”) thick polystyrene sheet, put it under the grill to soften it and moulded the back end.

I didn’t take any pictures of all that, though I still have the plug form. A couple of the seams have opened back up with all the moving over the years, but they were smooth when I moulded the rear end.


Image

Image


I used a saw to cut up the fixed head bodyshell…

Image


…and my moulded rear deck, imagined a bootlid shape and cut it out then glued it back in. The original model didn’t have a hinging rear door, so I figured I would just skip going to the trouble of actually hinging the boot lid. Y’know, to save time – it took 25 years as it was…
User avatar
DavidWomby
Modelling Gent and Scholar
Posts: 11759
Joined: May 1st, 2011, 8:09 pm
Location: Florida, USA

Re: 1/8 Jaguar E-Type - Completed!

Post by DavidWomby »

Wow. You converted it from the Fixed Head Coupe? Amazing job. :wanw

David
DamianHarty
Getting well comfy!
Posts: 93
Joined: October 25th, 2020, 6:55 pm

Re: 1/8 Jaguar E-Type - Completed!

Post by DamianHarty »

dwomby wrote:Wow. You converted it from the Fixed Head Coupe? Amazing job. :wanw

David
Thanks for your kind words. It was definitely a labour of love! More to come...
DamianHarty
Getting well comfy!
Posts: 93
Joined: October 25th, 2020, 6:55 pm

Re: 1/8 Jaguar E-Type - Completed!

Post by DamianHarty »

All this took a while, just giving it an hour now and again. By about 1999, the body was basically together, with an invented bulkhead behind the seats – I just guessed based on my pictures of the Essex car. In the early 2000s, I painted the engine parts and underhood area and started assembling everything.

And then stopped.

Life got in the way. Two children, divorce, remarriage, career in motorsport, moves to Minnesota and California. However, I wouldn’t give it up. I carried around through all of that, every few years wistfully looking in the boxes and then closing the lid.

Until March this year!

Image

My employer, Byton, was in the process of going bankrupt but still paying medical insurance. So after some encouragement from my wife, I settled in.

The picture above was what I got out of the box. The manifolds – intake and exhaust – had disassembled themselves from the engine in the intervening ~2 decades but other than that, everything looked pretty good. The bar on top of the windscreen was a bit bashed but all the pieces were there. None of the transparencies were damaged, although one of the tyres was badly misshapen.

I had put filler on the sill joints but never sanded it. I’d also glued, filled and sanded the bonnet, and given it a quick blow over with some white paint to check if it was smooth.

I was impressed at how much effort I had put into painting the engine, with the little white spark plugs and silver bolts on the gold head. I discovered quite a long way into the exercise that only the head was gold on the real cars. I’ve seen gold painted engines in other British cars before, and in all my photos from the Sheffield car it’s not obvious that the whole engine isn’t gold, so that’s just a mistake. By time I realized it, I felt it was too late. Did I mention the Sheffield car?

Like I said, E-Types were less rare in the 1990s. I lived and worked in Sheffield and saw one sitting in a car dealer. I went back with my camera and asked if I could take some pictures of the engine bay. I had an ambition to make a model "at some point" and wanted some reference shots.

Image

The engine bay of the Sheffield car had a very lived-in look. I loved that this beautiful car was a real car and not a garage queen, and had a real life with its dangly red wire and red tape around the plug leads and so on. I was aiming for a patina not too dissimilar to that inside the future model I was imagining.
DamianHarty
Getting well comfy!
Posts: 93
Joined: October 25th, 2020, 6:55 pm

Re: 1/8 Jaguar E-Type - Completed!

Post by DamianHarty »

The engine all went back together without issue. Getting that top hose on with its sharp right angle bend was quite tricky, I ended up bending a piece of solder and poking it down the pipe to make it hold the bend. I put the engine into the rail assembly and put it into the shell with all its accoutrements. With hindsight I should have left that all off until I finished painting, it would have eased the task of handling the part-built car a lot.

Image

Some of the little plastic stubs on the suspension uprights had also suffered in storage, but it was easy to reinstate those with some stretched sprue. I don’t bounce the car on its suspension, though – I don’t know how robust they are.

Image

The colouring for the underhood area came largely from peering at the photos of the Sheffield car. So it doesn't have gleaming bits of brass on the SU carb tops, and the tops themselves are a painted finish instead of chrome like in the kit (and like all the restored ones you see these days). The airbox top in the kit lacks the ribs; I think that makes a really early car. I noticed the missing baffling in the wheel arch but at that point I didn't have good reference photos of that area. E-Types were becoming rarer all the time and so I couldn't easily go and harvest some. I just decided to go with it.
User avatar
JohnRatzenberger
Why is he so confused ?
Posts: 15734
Joined: April 5th, 2011, 3:42 pm
Location: Living on a sandbar - Nags Head, NC.

Re: 1/8 Jaguar E-Type - Completed!

Post by JohnRatzenberger »

Wow, first - Welcome Aboard !!!

I learned a bunch just with your "rope trick".

Please make an intro post, with a couple final pix, linking back to here in the Automotive forum when you are ready.
John Ratzenberger :???:
It's my model and I'll do what I want with it.
DamianHarty
Getting well comfy!
Posts: 93
Joined: October 25th, 2020, 6:55 pm

Re: 1/8 Jaguar E-Type - Completed!

Post by DamianHarty »

The interior represents a really early 3.8 car without the storage box between the seats, and the external hood latches are consistent with this. Apart from putting some thin, clear acetate behind the gauge apertures I didn’t do much apart from paint and assemble it.

Image

I did, though, find a nice picture online, and snipped out the badge in the centre of the steering wheel. After some judicious perspective correction in photoshop, I printed it out at about 7mm diameter and stuck it to the centre of the wheel with PVA glue. My wife donated some clear nail lacquer to go over the top of it.

Image

Image

Image


I didn’t glue the steering wheel in place, it’s a nice firm dry fit on the column and it allows me to pose the wheel in different orientations as the mood takes me.

Also in the interior I note the mirror is held up on a rod from top to bottom of the windshield and that the convertible mirror seems different to the fixed head. I used some mirrored plastic from an old Gilette razor package that I had carried around for exactly this purpose. For two decades.

I made the body of the mirror from some 3mm sheet, wrapped in 0.5mm sheet to give a recessed mirror area. I carefully drilled some sprue to take the rod, which was just solder. At about this point in the journey I discovered some fantastic foil tape that heating technicians had left in our house when fixing the air conditioning. With a little care I was able to cover the solder in it and it gave a beautiful mirror finish, broadly indistinguishable from chome in small areas, and quite easy to handle. The mirror itself was just painted silver.

Image

Image


I had also imagined for a long time I was going to flock the interior for carpeting, so I ordered some black flocking . I’ve never used it before but I was really impressed. You need to do a solid panel all at the same time, and work quickly to keep the paint wet. Then you just sprinkle it on and wait. It doesn’t seem to need any special technique. Be warned, though – it gets everywhere. Again with hindsight, I would have taken it somewhere else and vacuumed once it was all set. I didn’t to that, and it came back to haunt me.
DamianHarty
Getting well comfy!
Posts: 93
Joined: October 25th, 2020, 6:55 pm

Re: 1/8 Jaguar E-Type - Completed!

Post by DamianHarty »

The rear suspension went together pretty easily, although as a Chassis engineer I am amused that the dampers are upside down. I initially painted the diff a sort of gunmetal finish to represent the cast iron, but then changed my mind and went for glossy black. It contrasted well with the semigloss black I blew onto the subframe.

Image

Image

I didn’t like the fact there was no driveshaft, so I made a universal joint out of 3mm plastic and attached to a strategically retrieved piece of ball point pen. When looking at pictures to figure this out, I noticed two very substantial sections under the real car that weren’t there in mine. I guess the hardtop model didn’t need them but my hacked up version was struggling to stay together. Before stopping 2 decades ago I had epoxied some pieces of thin steel between the floor and the rear deck, but it wasn’t enough. I added in some box sections, just sizing them by eye and trimming to suit.

Image

Image

By the time these pictures were taken I had done some more sanding and filling and had blown over some more white so I could see how the surface was going to take the paint, and then started with a first coat of red. More on that later. You can see the joint between the sill and the rear arch still needed some love at this point.
DamianHarty
Getting well comfy!
Posts: 93
Joined: October 25th, 2020, 6:55 pm

Re: 1/8 Jaguar E-Type - Completed!

Post by DamianHarty »

Next challenge was the tonneau cover. I roughly cut some pieces of cardboard to represent the hood I was covering, then set about assembling myself a pattern by repeated trial and error with paper and masking tape. If anyone wants to scale from the pictures, the squares on the paper are 5mm.

Image

Image

I looked at many pictures of the real cover (though by now all the pictures are of lavishly restored examples so it's difficult to be sure of anything) and decided it was probably a sort of heavy canvas. I found some thin, finely woven cotton and thought that would probably do. The edges of the cotton are a disaster when you trim them, so you need to allow extra and iron back a “hem”. I glued the hems down and the pieces together with PVA glue, which ended up seeping through the material and giving the edges a nice amount of stiffness.

Image

Image

I coloured it black using shoe cream initially. It looked great going on, but somehow lost its blackness as it dried. I experimented blowing matt black onto it, but it seemed to ball up into great big dusty baubles, so I sanded it back off and just brush painted it in the end. I like to think it has a slightly “lived-in” look. By making the tonneau from real material it has a sort of slightly random way of creasing and sitting down, which I find very pleasing.

Image

The last thing to mention was the screen. It was a truly miserable fit. I ended up having to superglue it because I just couldn’t get it to sit well, and it still wasn’t great. I actually ended up getting it out and refitting it, which cracked the lower left corner. I did my best to disguise it. It took so much handling that it was very difficult to keep it unscuffed, and I ended up trimming a good 7-8mm out of the screen top rail to make the pillars bend in enough to have everything sort of join up.

This area is definitely one where I’d like to have my time again. I think the convertible screen is shorter, but when I measured the overall height it seemed about right. My header rail is significantly more chunky than the real one. I covered the screen surround with more of that splendid foil tape, with joins more or less where the real finishers join. The detail at the top of the screen isn’t right, the convertible having quite a square corner where the fixed head as modelled has a generous radius. You have to pick your battles.
DamianHarty
Getting well comfy!
Posts: 93
Joined: October 25th, 2020, 6:55 pm

Re: 1/8 Jaguar E-Type - Completed!

Post by DamianHarty »

On to the thing I have been nervous about for 20 years – the paint. I used to have an airbrush but never really a very good air delivery for it. I had a gloriously Heath Robinson scheme involving a 12V tyre inflator and a trailer wheel & tyre with two valves. The tyre acted as a reservoir to calm the pulsing from the piston compressor. It worked, but never really got good flow rates. These days I have 150 psi compressor I regulate down to use with the airbrush. Much better!

I blew everything over in white, as much for the practice as anything, and fixed the blemishes I found – scratches, dips and so on. I started this process using “normal” masking tape as they sell it over there. To say it was rubbish is an affront to garbage everywhere. It would barely stick to anything, except to my fingers or itself – to which it clung as if to life itself. It made for some very clumsy handling and in the end I cursed it so much I ordered some Tamiya tape – the yellow you see in the photos. This was a night and day difference to use, clinging to the model and itself with about equal (and appropriate) tenacity and barely sticking to my fingers at all.

Image

Image

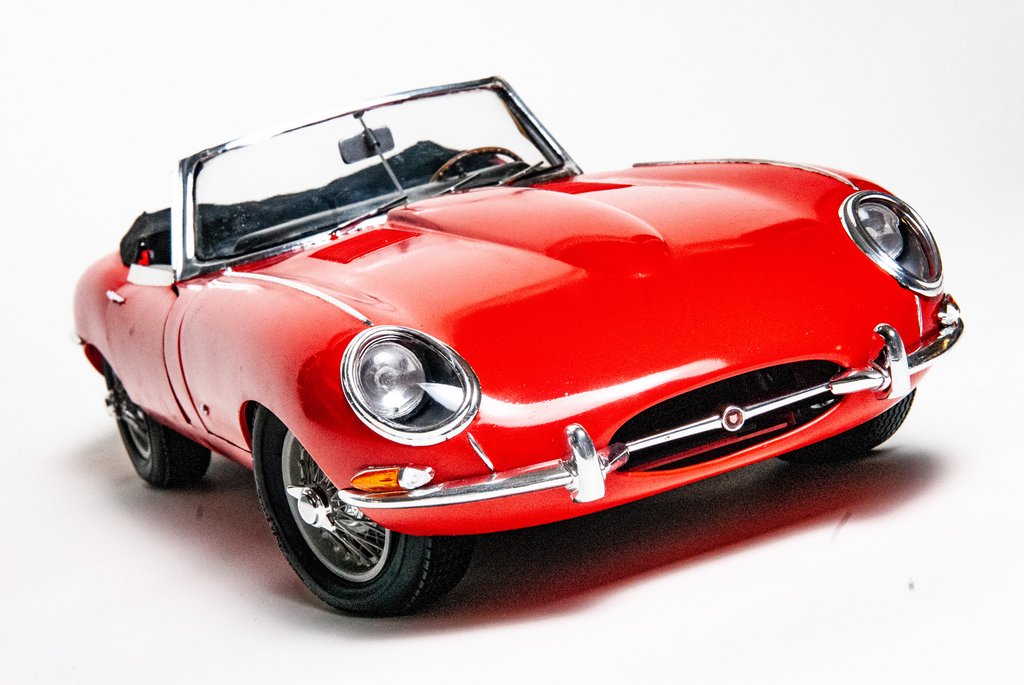
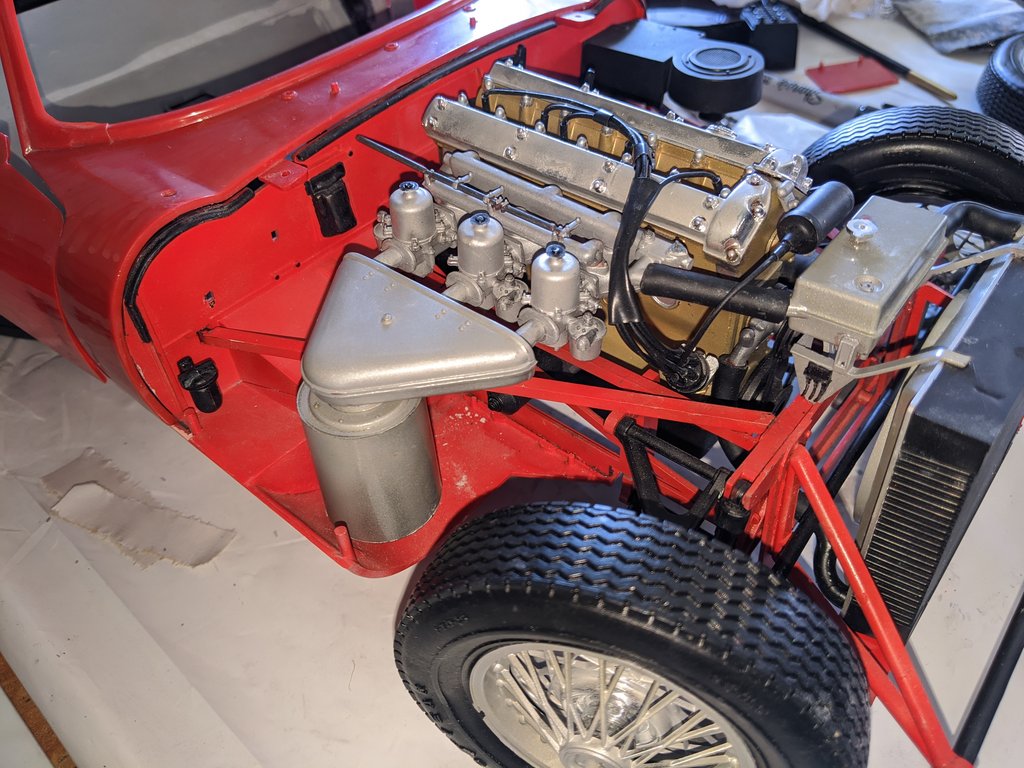
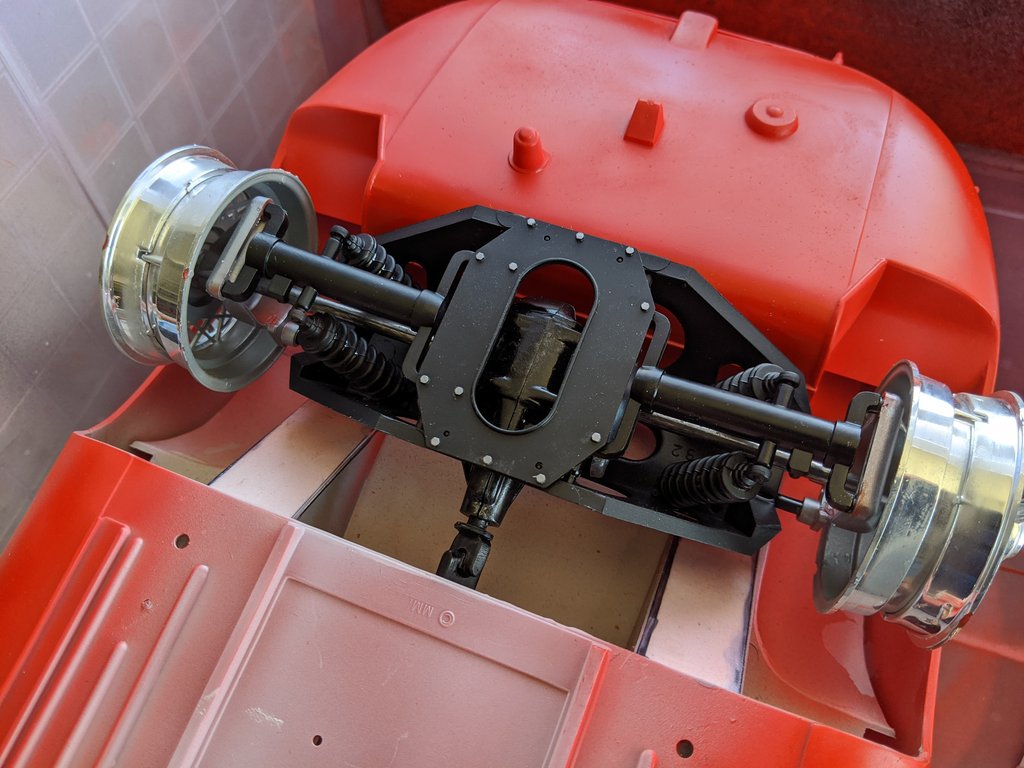
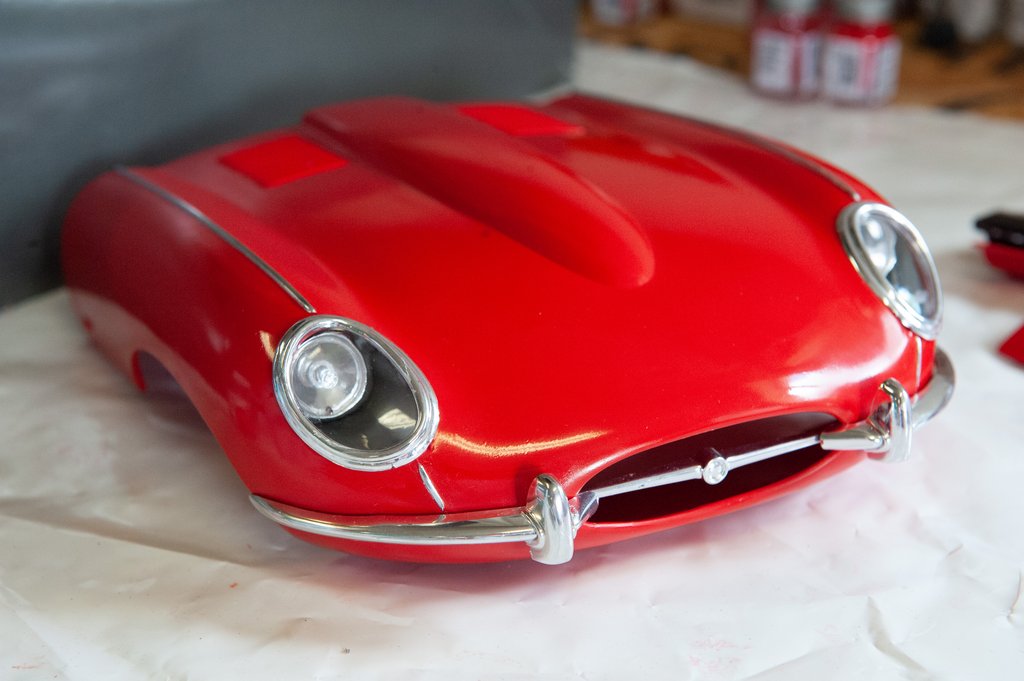
I presumed the headlight buckets should be body coloured, but then noticed in pictures they were silver. I pulled them out of the bonnet again and carried on to the red. It was just a very standard Testor’s red. I am very out of practice airbrushing, but having recently bought myself a Badger 105 and having acquired a compressor in the last 20 years, I did at least have a fighting chance.

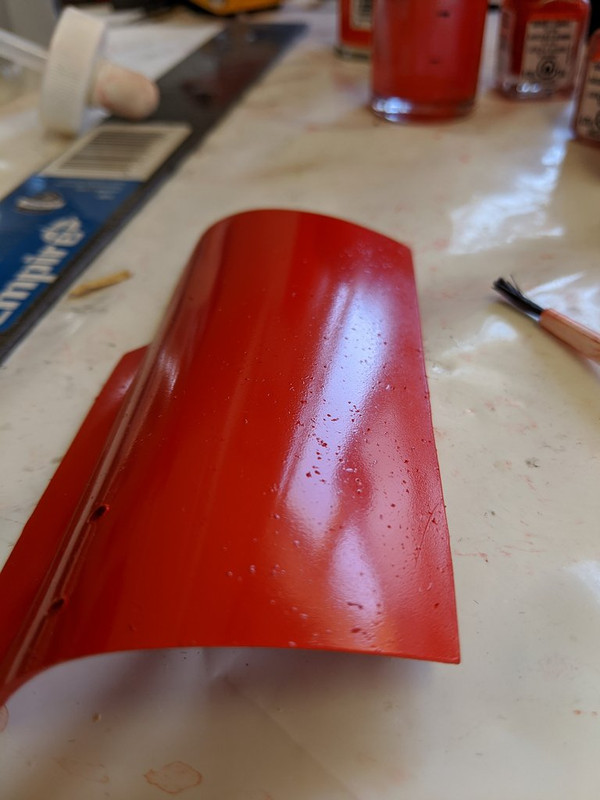
I was initially mixing paint and thinners 1:1 – it seemed OK with the white apart from that enormous sag next to the headlight bucket. But with the red the results were pretty disappointing. Whatever I did with the airbrush I couldn’t seem to keep the paint wet, so it forever had an orange peel look to it, or worse. And it was very thin – looking like it would take a gazillion coats to cover the white. After some experimentation I changed the mix to 2:1 paint to thinners, turned up the pressure on the regulator (an indicated 30psi no load, sagging back to about 25psi) and also adjusted the needle to make it “always open a bit” – about 1-2mm back from the seat. This meant full open the volume of paint was usefully higher – perhaps the lesson here is that I needed a medium tip & needle instead of the fine that airbrush comes with as standard.

Once I got the airbrush delivering enough paint, I discovered a new problem. The detritus from the flocking process, some of which had ended up sitting on the bench, was being drawn into the little spray booth (along with who knows what else). This only started happening with the red and hadn’t happened with any of the colours I had blown previously – semi-gloss black, silver, white. I think the fact that I had upped the pressure was just increasing the volume of air, or else perhaps it was a windier day outside, or whatever. Anyway, I ended up clearing everything off the bench, hoovering, turning my plastic “tablecloth” inside out and generally giving everything a really good clean.

Image

Image

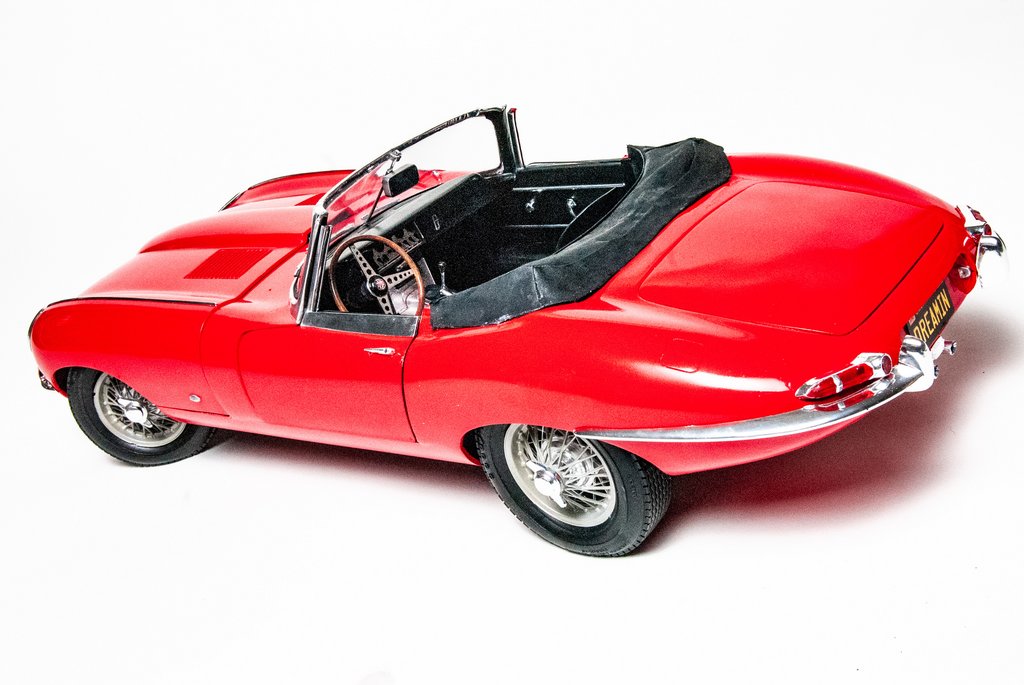
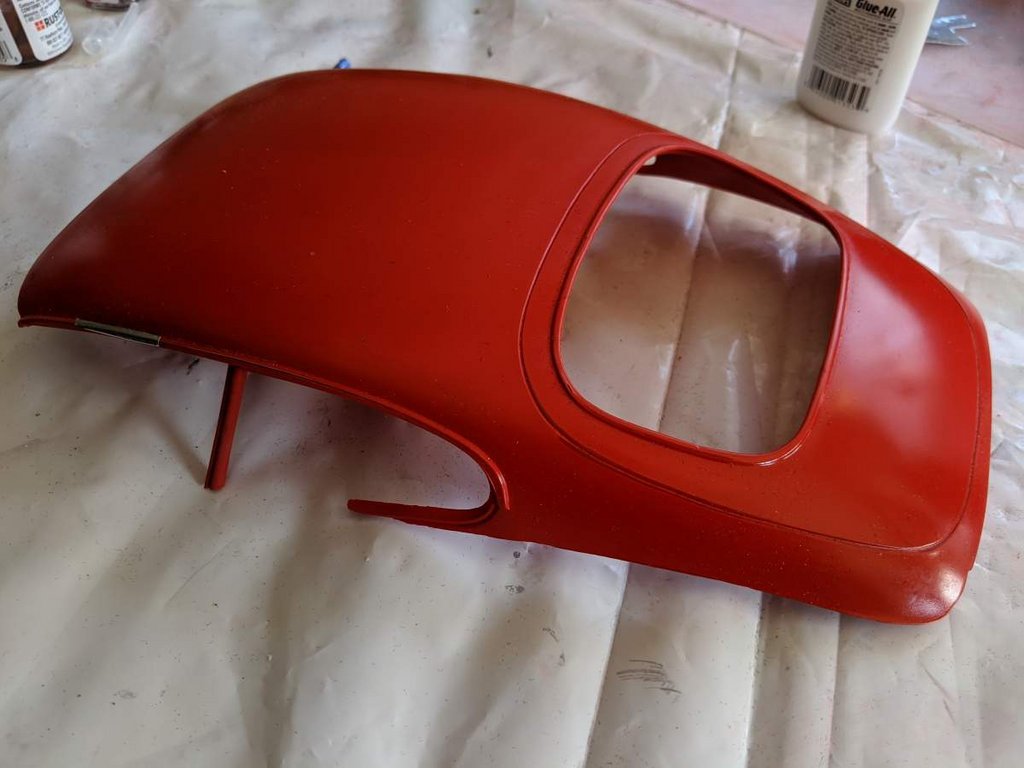
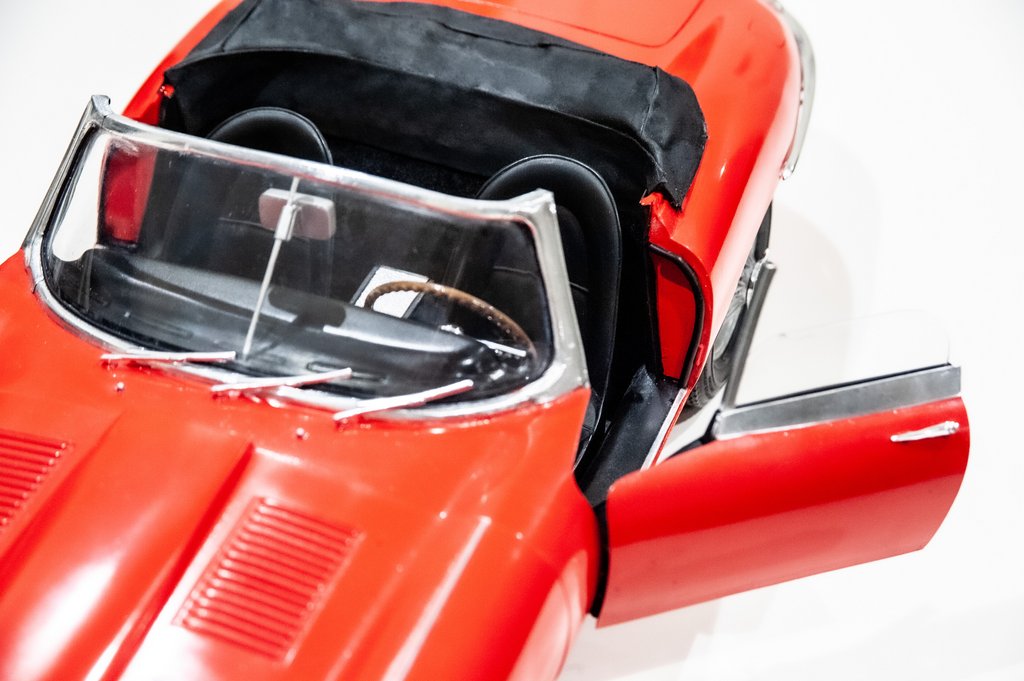
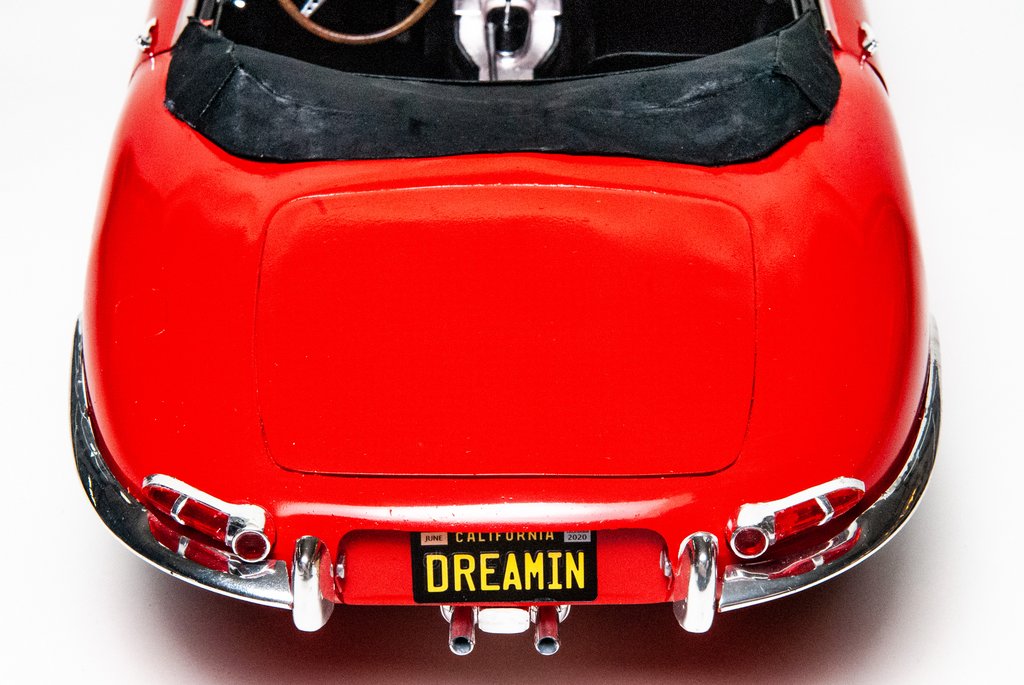
Finally, on track to finish the paint job!

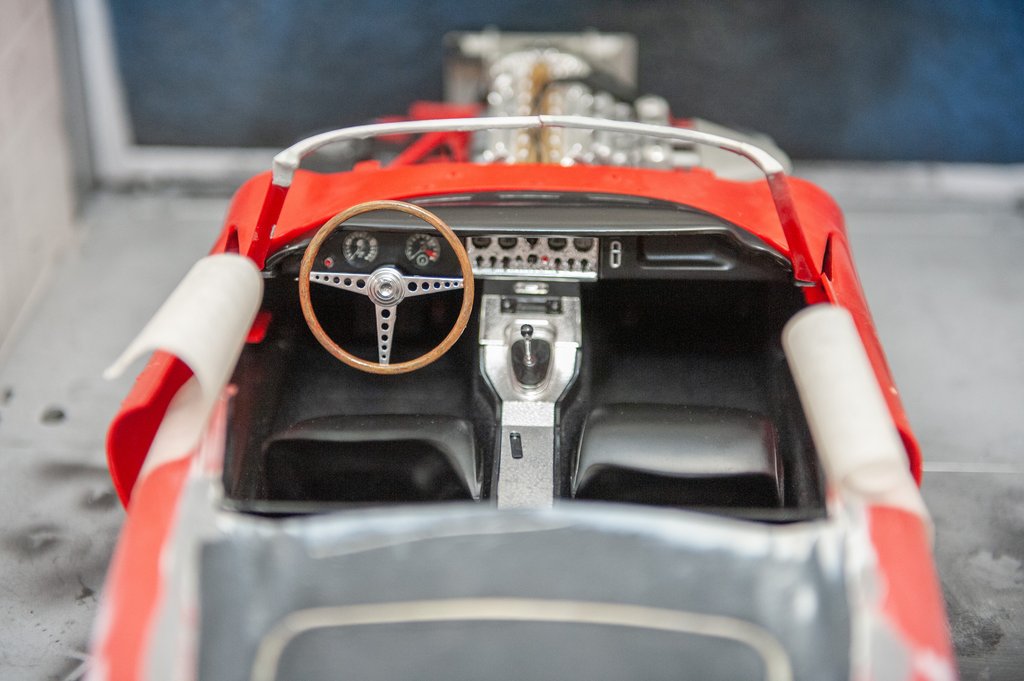
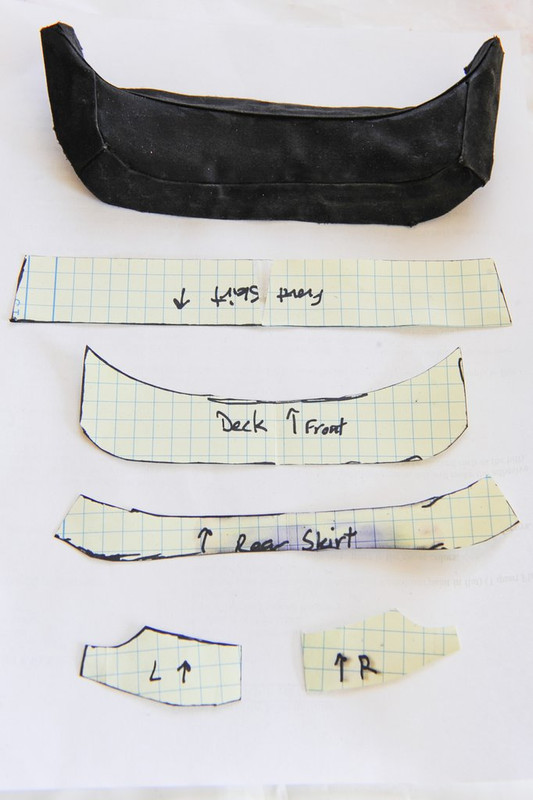
I was really pleased with how well integrated the new rear deck section was to the whole. I have been nervous about it for twenty years, on and off, but it came together a treat. I gave everything multiple coats to get a good finish, with some rubbing down with 3000 grade wet/dry paper between coats. I’m still not *really* delighted with the finish but I am at least satisfied. I am sure it could be better, but life is short and I was moving back to the UK soon. I wanted the damn thing finished! I ended up consuming 8 bottles of Testors red on this!
DamianHarty
Getting well comfy!
Posts: 93
Joined: October 25th, 2020, 6:55 pm

Re: 1/8 Jaguar E-Type - Completed!

Post by DamianHarty »

First part really finished was the bonnet. I used the chrome tape to wrap the raised ribs on the bonnet and was delighted with the results. I cut a piece roughly to size and then patiently smoothed the foil onto the feature, using a fingernail to get it into the bottom of the feature crisply. I just trimmed it with a scalpel. Because the foil is quite thick, it needs a bit more pressure than you would like on paintwork, but the only casualty was that it slightly damaged the paint on one side of one of the ribs for a length of about an inch. I gently touched up the damage with a bit of paint on a brush; you can still see it but your eye isn’t drawn to it. I’m over it already.

Image

I put little pieces of transparent sprue through the holes in the headlight reflectors. I noted with interest the headlight lens has a GE logo carefully moulded in. Baffling.

The front bumpers fitted well, although one of the fitting pins on the bonnet had got knocked off in storage. I stretched some sprue and drilled a hole, then pushed it through. It took a lot more craftsmanship than it sounds like to get the bumper to line up. The turn signal/sidelights were a delight, the transparent covers painted up orange (I think some of the early cars had clear lenses and orange bulbs, but I like the orange look) using the Tamiya clear acrylic.

I also noticed the logo in the centre of the grille bar was missing. Again online I found picture, cropped, perspective corrected, sized and printed it. Again, clear nail lacquer was put over the top of it.

Image

Image

Image
DamianHarty
Getting well comfy!
Posts: 93
Joined: October 25th, 2020, 6:55 pm

Re: 1/8 Jaguar E-Type - Completed!

Post by DamianHarty »

I foil wrapped the screen surround and door tops carefully – there are a few areas where it looks a bit rough and if I had my time again I might use a finer, purpose-made adhesive foil, but again it’s not rough enough to draw the eye. I also used the remainder of the “spark plug wire” to make a black seal between the screen and the frame. It was more to disguise the shocking and asymmetric gap than to improve accuracy. Inside the car I note the real cars have black trim up the pillar, so I used some common or garden vinyl electrical tape to wrap that area and cover up the mess that was the inside of the screen edges. Given what a dogs breakfast the screen fitting was as a whole, I am surprised it doesn’t look worse.

Wipers went on fine – they seem too short to do the job, but who am I to say. This car will never go out in the rain, so we’ll never know. The radio aerial struck me as a bizarre detail. I have never seen a single photograph of an E-Type with it up. I cut it and painted the top silver. All the chromed parts were completely resistant to being glued with the normal liquid cement I use (Testors at the moment) so I used PVA glue and just held patiently until it had set enough to stay in place.

It seems some cars have sunvisors and some don’t. I was up for making some, but in the end I didn’t as I got nearer and nearer to finishing and excitement got the better of me.

The remaining area of work was the doors. I glued the doorskins onto the hinges after brush painting the hinges black (they had been painted gloss red, but it was obvious on trial fitting this was an error). I had to add some additional guidance for the drop glass but to be honest the function of the drop glass is still a bit janky. I doubt I will ever operate it except by grabbing the drop glass and pulling or pushing. I trimmed the drop glass itself to the convertible shape – it is pronouncedly round at the rear edge – and also took some height off so it drops all the way into the door.

I had to plastic weld (with a soldering iron) the little cog to the window winder – no amount of any adhesive seemed to make it happy. I foil-tape wrapped the rails on the door inners, which look great. I didn’t add a new rail higher on the door that some cars seem to have. Finally the door inners seemed to have a bit of a terrible fit to the door skin. I made some changes around the area where the doors land to have them capture at least in spirit the door seal and divider that is there on the real car.

I was particularly pleased with the seal. I had cut a rail from 0.5mm plastic card and slid it down the gap between the body outer and inner parts to give a projecting rib not dissimilar to the real car. I took some 10 SWG electrical wiring and pulled the copper out of the middle, then very patiently cut along the wire with a scalpel to turn the tube into a C-section. Finally, I carefully assembled it onto the rib on the body. I also cut a thin strip of 0.5mm (0.020”) plastic and wrapped it more foil to make a divider between the body colour and the trim on the sill. The real cars have a feature a bit like this. The door latch is entirely absent but the door inner lodges on the seal and holds itself shut well enough.

Image

The rear bumpers also suffered from knocked off locating pins on the right hand side of the body, so they were replaced as previously. The rear lights are all red, not red and orange like UK cars. I am pretty convinced that makes this car a US car. I foil wrapped the bar between the two parts of the longer lens and it’s pretty much indistinguishable from the chrome backing piece. The fit of the rear lights and the bumper over-riders was terrible; I just ignored it and glued them together as Monogram intended, right or wrong.

I found an image online that would let me print to scale a period-ish custom California license plate onto photo paper to give that last piece of delight.

Image

Finally, after all that time, my E-Type soft top conversion to the Monogram 1/8 scale kit was done!
Post Reply

Return to “Cars, Trucks, Bikes, Locos and other civvie vehicles”