Tamiya McLaren Senna

Time to pimp them rides!
Post Reply
User avatar
harti20
Onto the Clever Stuff, Now.
Posts: 114
Joined: November 16th, 2021, 3:06 pm

Tamiya McLaren Senna

Post by harti20 »

Hi all :)

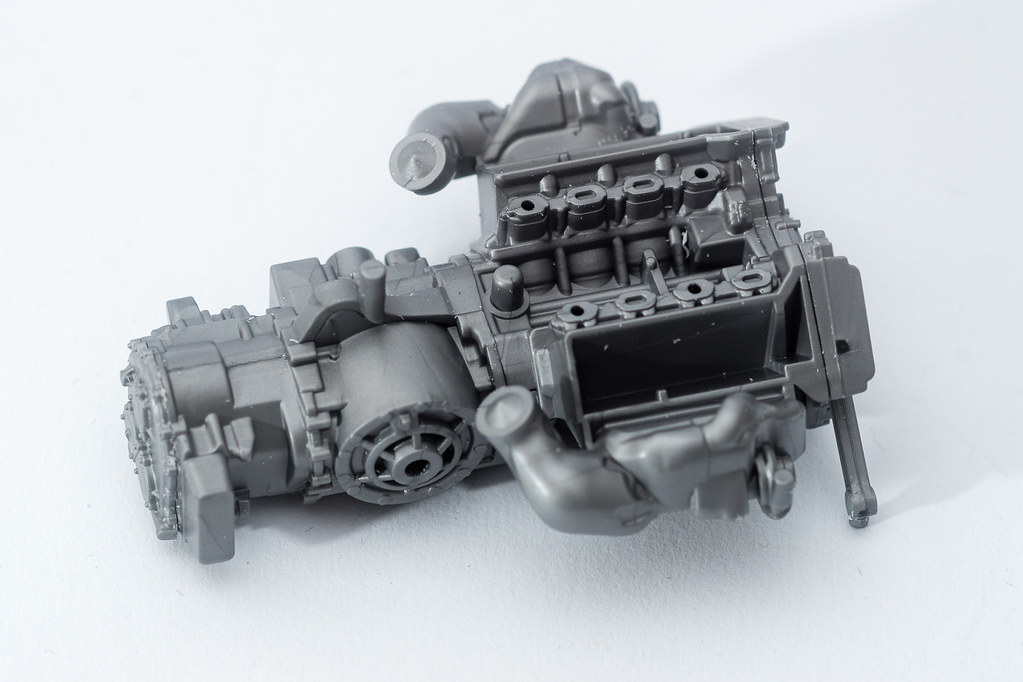
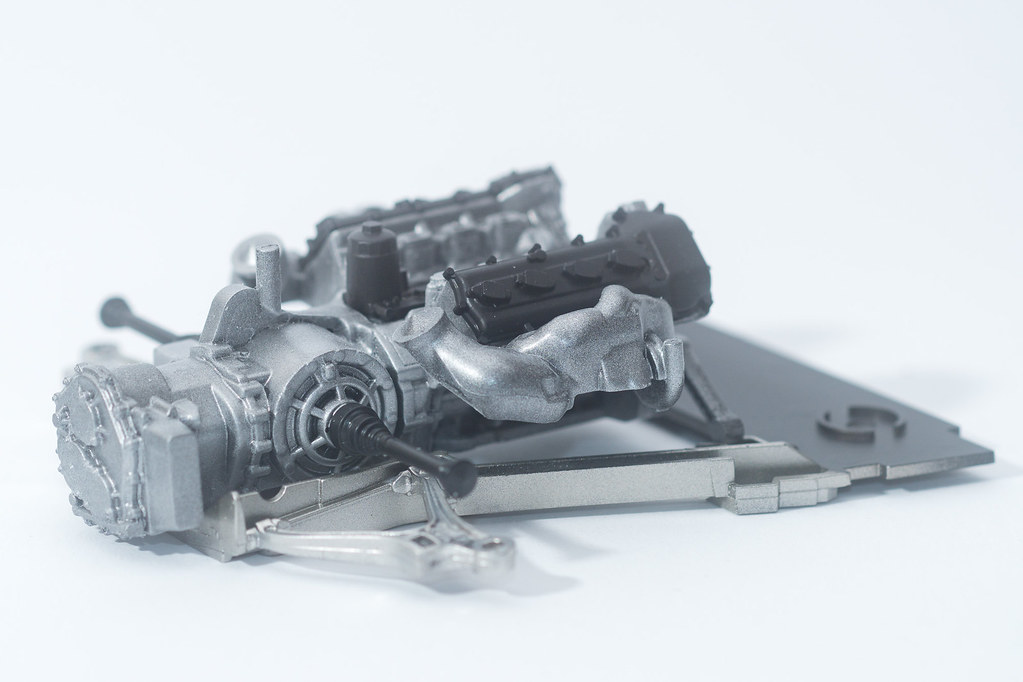
As I still wasn't in the mood to continue work on my FXX-K, I'll start a new WIP. As stated in the title, I'll build the McLaren Senna. Additionally I will use the PE detail up set by Hobby Design and the carbon decal set by S.K. Decals. I already started building it a few weeks ago, but only worked on it occasionally when I needed some distraction from the Ferrari.

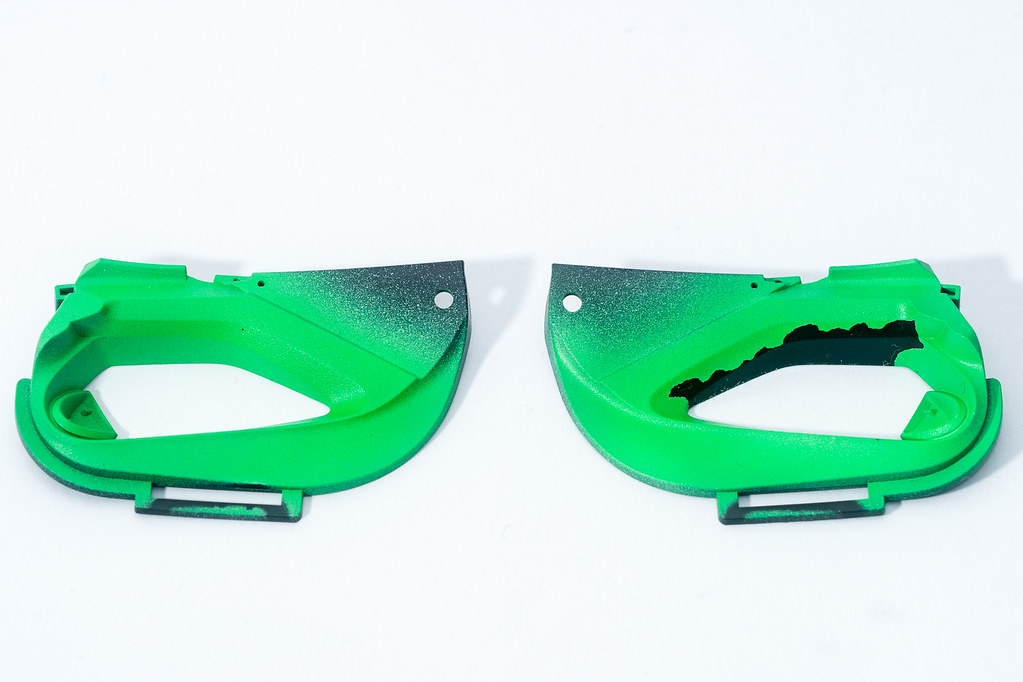
I already know S.K.Decals from my Haribo-Mercedes, so I knew that the decals will stick to the part as soon as they touch and won't easily move afterwards. In fact I ruined the first decal I tried to apply :( Happily the decal set offers to quite large areas of carbon fibre where one can cut out decals if something went wrong. Nevertheless I'm thinking about re-ordering the set to have some spare decals (just in case...). The part where I tried to apply the decal is the rear body panel which won't be easy to cover with decals anyway as it has a very narrow curve on each side. I didn't even manage to lay down a self made decal with some ScaleProduction stuff (which I usually like very much).
Image

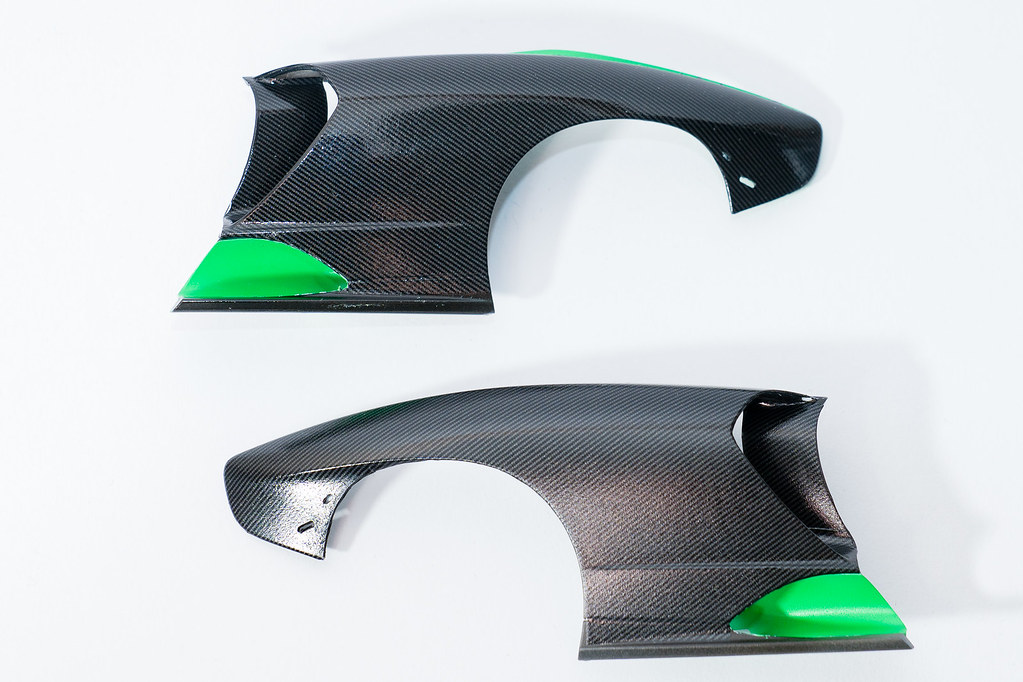
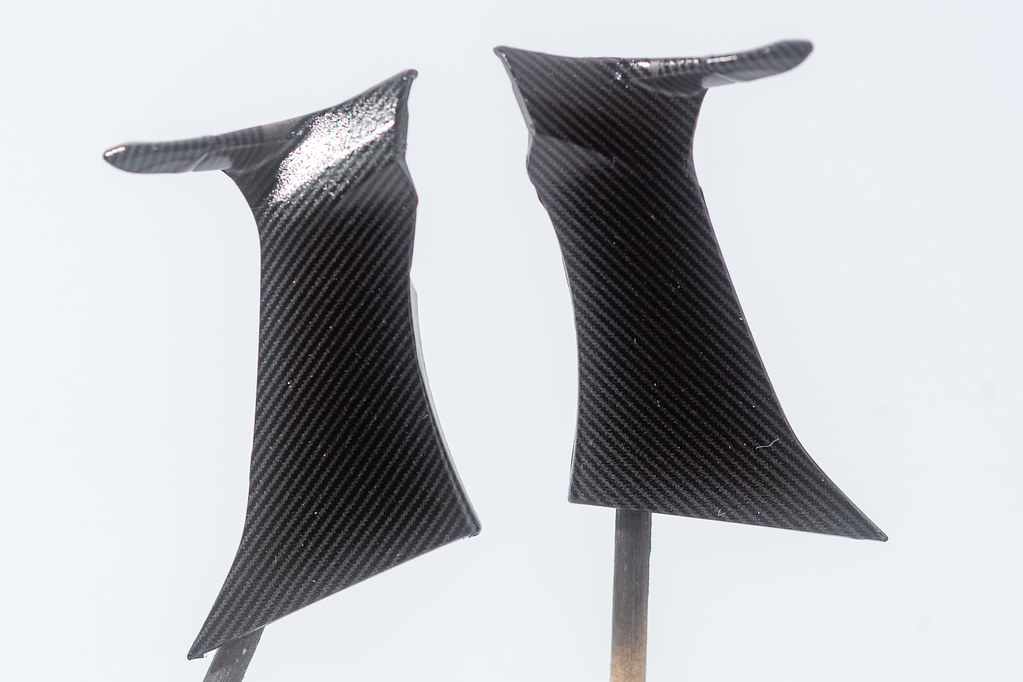
Then I assembled and painted one of the rear fenders. After the experience with the rear body panel I clear coated it (after that picture was taken), hoping the decals would be easier to move around.
Image

Meanwhile the fender got some paint (which I will have to touch up later) and the first carbon decal. Additionally to the clear coating I added some drops of dish liquid to the water I soaked the decal in and have applied to the fender before hitting it with the decal. Neither clear coating nor adding soap to the water really did help, but as the shape of the fender made it easier to lay the decal down without too much wrinkles it turned out ok I think :)
Image

Finally the seat shells have been painted and the first transparent carbon decal has been applied. Meanwhile this seat had its paint stripped as I noticed that I made a mistake when doing the stencils for the decals. Because the decal is transparent, it's not that easy to fix it, because I have to make sure that the decals don't overlap, because in the overlapping areas the pattern would be darker. Luckily a lot of the inner part of the shell will be hidden by the upholstery, so that shouldn't be too much of a problem. I'm sure there will be other challenges doing the rest of the interior.🤔
Image

That's everything for today. I hope to have piqued your interest and am looking forward to your tips, critiques, suggestions and plaudits :D
Urs
User avatar
JamesPerrin
Looks like his avatar
Posts: 13695
Joined: April 5th, 2011, 8:09 pm
Location: W. Yorkshire
Contact:

Re: Tamiya McLaren Senna

Post by JamesPerrin »

Hardly any parts recognisable as car apart from the seat. Hats off to you, I can’t always get decals to sit flat on an aircraft wing let slime these complex shapes.
Classic British Kits SIG Leader Better to fettle than to fill
(2024 A:B 5:2) (2023 13:8:7) (2022 21:11) (2021 15:8) (2020 8:4:4)
User avatar
Narayan
If anyone needs me, I'll be in my office
Posts: 2602
Joined: April 10th, 2011, 7:01 pm
Location: The Middle of Nowhere in Ireland

Re: Tamiya McLaren Senna

Post by Narayan »

Great start to a very interesting model.

_________________
Narayan

He's experienced about as much pain and suffering as anyone I've encountered, give or take, and he still has Hell to look forward to.

A:B 2022 25:09 2021 100:06 2020 113:11 2019 113:16 2018 35:05 2017 28:03 2016 27:10 2015 53:07 2014 21:04 2013 39:12 2012 20:05 2011 11:10 2010 44:12 2009 19:16 2008 16:03 Overall 533:135 Stash 398
syd-baines
Modelling Gent and Scholar
Posts: 1050
Joined: September 10th, 2013, 4:22 pm

Re: Tamiya McLaren Senna

Post by syd-baines »

the carbon decal on the front wing looks good i can not see anything wrong with it it all looks nice and flat and wrinkle free the seat is looking good as well
User avatar
harti20
Onto the Clever Stuff, Now.
Posts: 114
Joined: November 16th, 2021, 3:06 pm

Re: Tamiya McLaren Senna

Post by harti20 »

Hi all :)
JamesPerrin wrote: August 22nd, 2022, 9:53 pm Hardly any parts recognisable as car apart from the seat. Hats off to you, I can’t always get decals to sit flat on an aircraft wing let slime these complex shapes.
Thank you :) I always was afraid of laying down decals, but after some hours of youtube over the last few years I learned quite a lot from the real masters ;-) First of all you really have to take your time to get rid of every little wrinkle. This fender took me about 45 minutes to apply one single decal. And that was the easy one on this part. So I think, I'll spend quite some time decaling on this kit.
Narayan wrote: August 26th, 2022, 12:05 am Great start to a very interesting model.
Thank you too :-)
syd-baines wrote: August 27th, 2022, 2:21 pm the carbon decal on the front wing looks good i can not see anything wrong with it it all looks nice and flat and wrinkle free the seat is looking good as well
Thank you. As James already mentioned, hardly any part is recognizable as car, so I hope you don't mind if I tell you that I didn't even start with the front ;-) The fender is one of the rear ones and the other, X-shaped part, is the rear body panel.

But now the the progress of last week. Mainly I cut the parts for the interior off their sprues, made a mock up and had a look at which parts will need carbon fibre decals in the end. It will be quite a lot, but I think most of it shouldn't be that complicated. As I didn't start making stencils for the decals I refrained from taking pictures of these parts as I thought that wouldn't be of much interest.

Beside of this I painted and assembled the brake discs from the detail up set.
Image

Each of these brake discs will still get 10 PE parts in the center (there where you can see the recesses in the black parts). But of course you can't just glue in these parts, they have to be folded by 180°. As I had some trouble finding a way to do this, I decided to show my way that worked out best for me. If somebody knows of a more efficient / easy way, I'd be happy to hear that.


That's how they looked like before bending them
Image

To start, I pressed them down in my cutting mat with a Tamiya paint stirrer to get a bend
Image

Then I held the part down with the stirrer and bent it to a 90° angle with the blade of a knife
Image

After that the stirrer was replaced by a razor blade and the knife by the stirrer to bend it even more
Image

Once that was done it looked like this
Image

To continue I could slip it off the blade and position it like an advertising stand
Image

To finish and close the gap, I slowly approached it with the chops(?) of a bending plier, trying to touch it on both sides at the same time, to avoid overbalancing it and then press it flat.
Image

I only remarked now that I forgot to take a picture of a completed part. I will do it when I'll mount them to the brake discs.

Last weekend I had to wait on a colleague to finish work before I could start with mine, so I decided to start assembling the engine. So far all the parts that have to be painted aluminum have been assembled. Before primering and painting I'll sand the glue joints flush so there will be no visible mark where the parts meet.
Image

That's all for today's update :)
Urs
ShaunW
NOT the sheep
Posts: 26188
Joined: November 26th, 2011, 6:11 pm
Location: Pontefract West Yorkshire

Re: Tamiya McLaren Senna

Post by ShaunW »

Off to a great start with this, Urs. You have a lot of patience with those tiny PE parts!
Doing - Tamiya 1/35th Universal Carrier.

Work is the curse of the modelling classes!
IPMS#12300
syd-baines
Modelling Gent and Scholar
Posts: 1050
Joined: September 10th, 2013, 4:22 pm

Re: Tamiya McLaren Senna

Post by syd-baines »

great start
User avatar
harti20
Onto the Clever Stuff, Now.
Posts: 114
Joined: November 16th, 2021, 3:06 pm

Re: Tamiya McLaren Senna

Post by harti20 »

Hi all

Long time I didn't post anything on this build, but my priority in the last few weeks was to finish the Ferrari FXX-K and after that I hardly had any motivation to build models. But now I have some small progress to share. I didn't stick to the instructions at all, I only did what I felt like doing, so don't wonder if the parts don't really go together  ;-)
ShaunW wrote: September 4th, 2022, 6:11 pm Off to a great start with this, Urs. You have a lot of patience with those tiny PE parts!
Thank you :) This time it went quite well after I figured out how to bend them.
syd-baines wrote: September 13th, 2022, 4:05 pm great start
Thank you too :)

First I assembled and installed the engine as far as I could. There will be more parts to be added later.
Image

Then assembly of the front cooler has been done
Image

And finally I needed some distraction from applying all the carbon decals on the body parts, so I decided to start applying carbon decals on the interior parts 😂

First a pic of the middle console which got some clear carbon decals on one side. I'm quite curious about that as this is the first time I'll use transparent carbon decals.
Image

For the rear upper part of the middle console I used conventional carbon decals.
Image

That's all for this update. I hope you won't have to wait another two months for the nex one on this build 😎
Urs

User avatar
JamesPerrin
Looks like his avatar
Posts: 13695
Joined: April 5th, 2011, 8:09 pm
Location: W. Yorkshire
Contact:

Re: Tamiya McLaren Senna

Post by JamesPerrin »

My eyes are still watering the brake PE.
Classic British Kits SIG Leader Better to fettle than to fill
(2024 A:B 5:2) (2023 13:8:7) (2022 21:11) (2021 15:8) (2020 8:4:4)
ShaunW
NOT the sheep
Posts: 26188
Joined: November 26th, 2011, 6:11 pm
Location: Pontefract West Yorkshire

Re: Tamiya McLaren Senna

Post by ShaunW »

Looking good, Urs, those carbon effect decals really look the part.
Doing - Tamiya 1/35th Universal Carrier.

Work is the curse of the modelling classes!
IPMS#12300
User avatar
harti20
Onto the Clever Stuff, Now.
Posts: 114
Joined: November 16th, 2021, 3:06 pm

Re: Tamiya McLaren Senna

Post by harti20 »

Hi all :)

Thank you very much for your kind comments :)

Somehow the McLaren turns into a never-ending story. On one hand it might be caused by the fact that I want it to turn out as perfect as I can do it, on the other hand I will have to do some carbon work no matter where I want to continue with it. And that's the kind of work I can't really find the right motivation right now. Nevertheless some minor progress has been made, although it was more of a "one step forwards, two steps back" kind...

The interior parts have been painted in dark grey (here I will have to check again, as the paint looks quite uneven and grainy in this picture)
Image

and green.
Image

The green parts will mostly be covered with transparent carbon decals later on. The time I tried to make some stencils for the decals I ripped off the paint on almost every part. So I'll have to strip most of these parts, sand and repaint them. If I remember correcty I painted these parts without degreasing them first as I tried to get some motivation back and just do something to get it going...😒
Image

Some parts of the underarriage have been painted
Image

and the second rear fender got its carbon decals. Furthermore I noticed that there is a small spot which had to be painted in green, something I completley forgot on the first part. So I had to mask over the decals (which luckily have already been sealed by two thin layers of clear) and repaint the air inlet. Happily nothing got ripped off when removing the masking tape afterwards :) Now there will only be some small spot repairs needed where you can see the white primer shine through.
Image

That's all for today :)
Urs
User avatar
JamesPerrin
Looks like his avatar
Posts: 13695
Joined: April 5th, 2011, 8:09 pm
Location: W. Yorkshire
Contact:

Re: Tamiya McLaren Senna

Post by JamesPerrin »

I think the interior might be require sunglasses regardless of the weather.
Classic British Kits SIG Leader Better to fettle than to fill
(2024 A:B 5:2) (2023 13:8:7) (2022 21:11) (2021 15:8) (2020 8:4:4)
User avatar
harti20
Onto the Clever Stuff, Now.
Posts: 114
Joined: November 16th, 2021, 3:06 pm

Re: Tamiya McLaren Senna

Post by harti20 »

Once all the transparent carbon decals are applied it will be much darker 8-)
ShaunW
NOT the sheep
Posts: 26188
Joined: November 26th, 2011, 6:11 pm
Location: Pontefract West Yorkshire

Re: Tamiya McLaren Senna

Post by ShaunW »

Some progress is always better than none, Urs, although it can be difficult to keep motivated when things go wrong and work has to be redone. Keep at it, I'm sure you'll end up with a great model in the end!
Doing - Tamiya 1/35th Universal Carrier.

Work is the curse of the modelling classes!
IPMS#12300
User avatar
harti20
Onto the Clever Stuff, Now.
Posts: 114
Joined: November 16th, 2021, 3:06 pm

Re: Tamiya McLaren Senna

Post by harti20 »

Hi all
ShaunW wrote: December 11th, 2022, 6:42 pm Some progress is always better than none, Urs, although it can be difficult to keep motivated when things go wrong and work has to be redone. Keep at it, I'm sure you'll end up with a great model in the end!
Thank you very much for your kind comment, I really appreciate it :)

It's been a long time since my last update. On one hand I was kept busy by other builds and on the other hand I still couldn't find motivation to continue decal work on this one. But now I finally managed to make some progress on this build.

First of all a few parts that will receive carbon decals in the end have been primed in black
Image

After that the first ones of them got their carbon decals applied. I started with an easy one, the diffusor (not yet finished)
Image

and then some parts of the doors.
Image

That's it for today's update. I hope it won't take another 7 months for my next update on this build :)
Urs

Post Reply

Return to “Cars, Trucks, Bikes, Locos and other civvie vehicles”