Page 2 of 4
Re: Airfix 1/72 Grumman J2F-6 Boxart Diorama
Posted: September 28th, 2011, 11:32 pm
by JamesPerrin
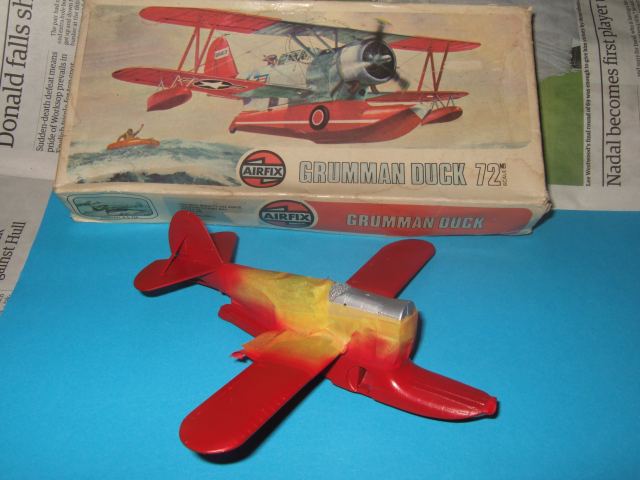
One of the good things about doing these boxart dioramas is that it really cuts down on the usual stress of checking markings as it's all there on the box. The Duck is a good case. The latest release shows it with a blue main float rather than the red of mine - I await the first person to point it out at Telford. Also the instructions in mine suggest that only the vertical tail should be red - the box art (if you look hard) has the hole tail section and arrestor hook in red too. This is also born out by the latest boxing.
http://uamf.org.uk/viewtopic.php?f=13&t=1874;
It took three coats of GS Madder Red - which I like as it much brighter than say standard Tamiya Red. It starts off looking rather pinky/purple over the silver but eventually to get this lovely cheery finish. Masking is still on as I've got to do the anti-glare.
Re: Airfix 1/72 Grumman J2F-6 Boxart Diorama
Posted: September 29th, 2011, 8:47 am
by Jagewa
Looking forward tot he unwrapping James.
All these inflight models, I'm getting all faint with anticipation.. I think I'll have to have a lie down

Cheers
Jim
Re: Airfix 1/72 Grumman J2F-6 Boxart Diorama
Posted: October 1st, 2011, 10:14 pm
by JamesPerrin
...and here is the unwrapped model...

Re: Airfix 1/72 Grumman J2F-6 Boxart Diorama
Posted: October 2nd, 2011, 6:43 pm
by JamesPerrin
Small issue in that I'm having to complete repaint the cowling after finding out I'd got the anti-glare completely out of alignment

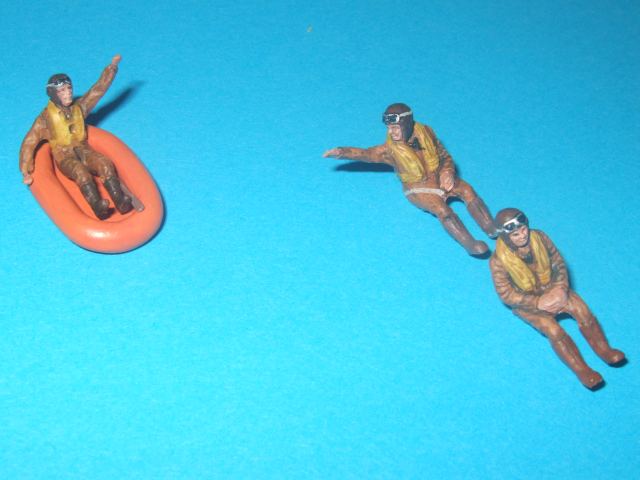
While that has been seen to I've got the glazing painted after crash moulding a new pilot's hood which allows it to positioned open. The main decals are on bar the white stripes - pouring Micro Sol over them in an attempt to get them to settle down over the detail. There are a couple of handholds that I've had to score round. Holes have been drilled for rigging in the wings. Finally I've got the pilots done today:
Re: Airfix 1/72 Grumman J2F-6 Boxart Diorama
Posted: October 2nd, 2011, 6:49 pm
by PaulBradley
Very nice, James.
Re: Airfix 1/72 Grumman J2F-6 Boxart Diorama
Posted: October 2nd, 2011, 8:56 pm
by shangos70
Great work James.
Re: Airfix 1/72 Grumman J2F-6 Boxart Diorama
Posted: October 2nd, 2011, 10:06 pm
by JamesPerrin
Cheers guys. Here's the state of play this evening. The stripes went on very easily and sighting along the hull looks like I got them straight too!
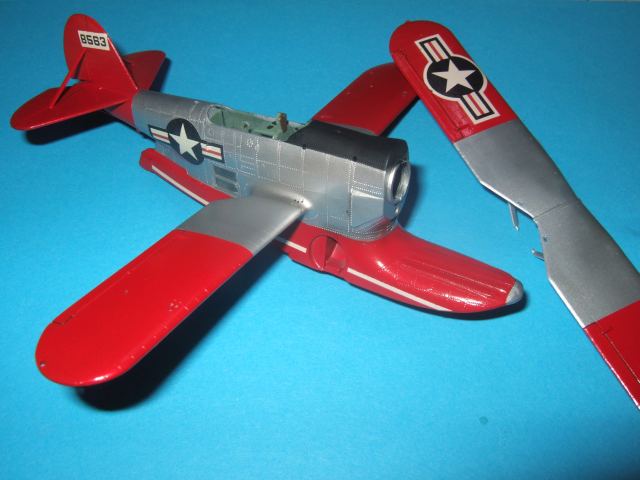
Tomorrow rigging!
Re: Airfix 1/72 Grumman J2F-6 Boxart Diorama
Posted: October 3rd, 2011, 7:14 am
by Jagewa
I'm trying to save the superlatives till its all together, but crikey Richard, the parts are looking so good, the whole is going to be stunning. Invisible thread rigging?
Cheers
Jim
Re: Airfix 1/72 Grumman J2F-6 Boxart Diorama
Posted: October 3rd, 2011, 10:52 pm
by JamesPerrin
Cheers Jim. I'll taunt a little more with some progress shots of the rigging.
This is only the second fully rigged a/c I've done in recent years (previous was the Avro Triplane so that counts as as least two if not more). I worked in a similar fashion from top down. Holes were drill part way through the upper wing and the all the way through the lower wing and into the fuselage - note the lack of engine. I attempt to drill the holes as close to the angle that the wires will go as possible.
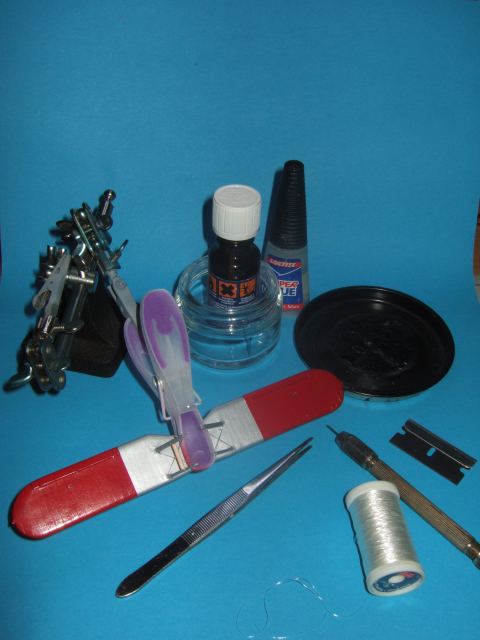
Below I took a shot of the equipment I used. The "helping hand" is almost compulsory as you need both you hands to hold the threads and apply glue. The accelerator in in another jar just so I can't knock it over as easily.
I rigged the cabane struts directly as these would be tricky to access later (unfortunate a weakened strut broke off so as had to return to it anyway). The rest of the wires were 5" threads glued into the receiving holes. I dip the ends in a small pool of super glue and then top up using a pin. Make sure you are working comfortably so your hands are not crossing each other. Practice placing the thread and make adjustments to the orientation of parts if required.
Once all the threads were in place and dry the top wing was added to the lower. I didn't glue the main struts into the lower wing initially as I would have gummed up the thread holes. All the wire were threaded through their respective holes. Those in the fuselage being pull through the nose. clothes pegs are useful to hold groups of threads or apply tension. Threads are then pulled tight individually and glued into position.

I then trimmed of the remaining end with a razor blade. I've added the floats to which had some rigging was also added.

Re: Airfix 1/72 Grumman J2F-6 Boxart Diorama
Posted: October 3rd, 2011, 11:33 pm
by Jagewa
Nice, and double wires too. One of those times where you go, I am so pleased that there's super glue and accelerator.
Are you going to colour the wires?
I just finished rigging a Revell Camel last night, and strangley found it very relaxing, quite tranquil like, that was after I got over the fact I broke two 80 gauge drill bits...
Cheers
Jim
Re: Airfix 1/72 Grumman J2F-6 Boxart Diorama
Posted: October 3rd, 2011, 11:49 pm
by JamesPerrin
Jagewa wrote:Are you going to colour the wires?
Probably. I've never really been satisfied with the irregular finish you get when painting these threads. I've been experimenting with heavily thinned Citadel Mithril Silver which might do it.
I just finished rigging a Revell Camel last night, and strangely found it very relaxing, quite tranquil like...
So it's not just me! I find the puzzle solving of how best to rig and in what order very absorbing. It's a slow job but it's the one think that forces me to be methodical. I think I did a zen like 4 hours sess when I did the Triplane.
Re: Airfix 1/72 Grumman J2F-6 Boxart Diorama
Posted: October 4th, 2011, 12:20 am
by shangos70
knit one purl one , don't drop a stich!
Re: Airfix 1/72 Grumman J2F-6 Boxart Diorama
Posted: October 4th, 2011, 4:08 am
by Dirkpitt289

BRAVO!!!
Re: Airfix 1/72 Grumman J2F-6 Boxart Diorama
Posted: October 5th, 2011, 12:58 am
by JamesPerrin
Thanks Dirk.
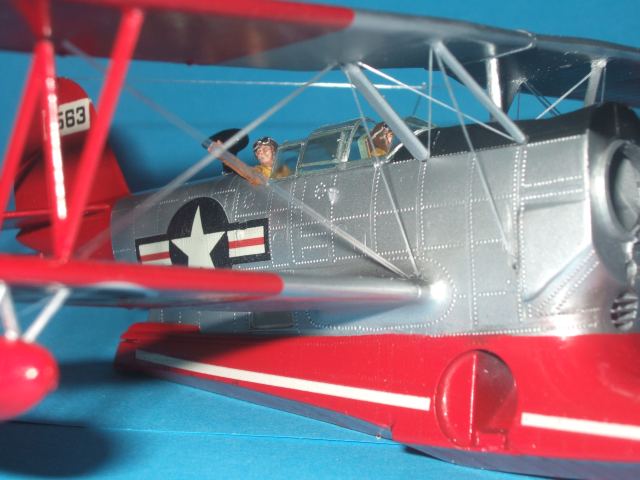
Had a little trouble with the crew. I knew the pilot would go into the fuselage but with the wing now in place there wasn't room for manoeuvre so he was in for the chop and lost both legs. Then I realized he was too far forward and there was no room for the wind shield. Check the instructions, Step 1 shows part 9 his chair meeting the cockpit floor, part 7, with two lugs either side. I though these would be behind his chair, but no. Now squinting at Step 2 you can just make out the lugs in front which moved him back a couple of mills. I was able to prise off the part and get him comfortable sat behind the windshield.
Aerial wires form the wings to the tail have been attached. Just after taking this pic I spotted that there should be an aerial stuck out of the rear fuselage which has now been added to.
Re: Airfix 1/72 Grumman J2F-6 Boxart Diorama
Posted: October 6th, 2011, 4:54 pm
by beany
Excellent looking build so far James - I really must get me one of them. Look forward to seeing the base and backdrop. Looks like a prefect candidate for the silicone sealant and tile adhesive comb to me!!
Cheers
Al.