Mav's Cold War Builds
-
Dazzled

- Modelling Gent and Scholar
- Posts: 9592
- Joined: October 1st, 2011, 11:08 pm
- Location: Mid Glamorgan, South Wales
- Contact:
Re: Mav's Cold War Builds
Very nice. I've built the X-29 (more years ago than I'd like to admit  ) and I have the same Tu-22s in the stash.
COLD WAR S.I.G. LEADER
Wherever there's danger, wherever there's trouble, wherever there's important work to be done....I'll be somewhere else building a model!
Wherever there's danger, wherever there's trouble, wherever there's important work to be done....I'll be somewhere else building a model!
-
IronMan129
- Modelling Gent and Scholar
- Posts: 4385
- Joined: November 23rd, 2012, 4:20 pm
Re: Mav's Cold War Builds
Daz they seem pretty good kits so I'm really looking forward to building them.
So I have been a lover of the Harrier my whole life and I have 4 sitting in the stash and with the GB thats going on at the moment I decided to have a go at building at least one.
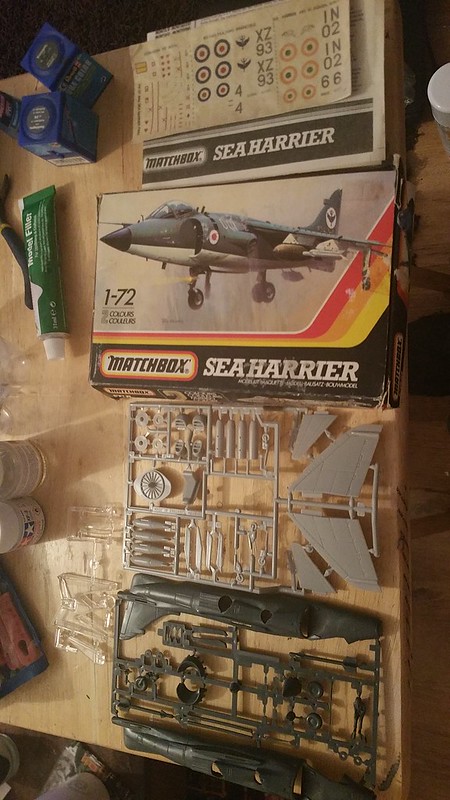
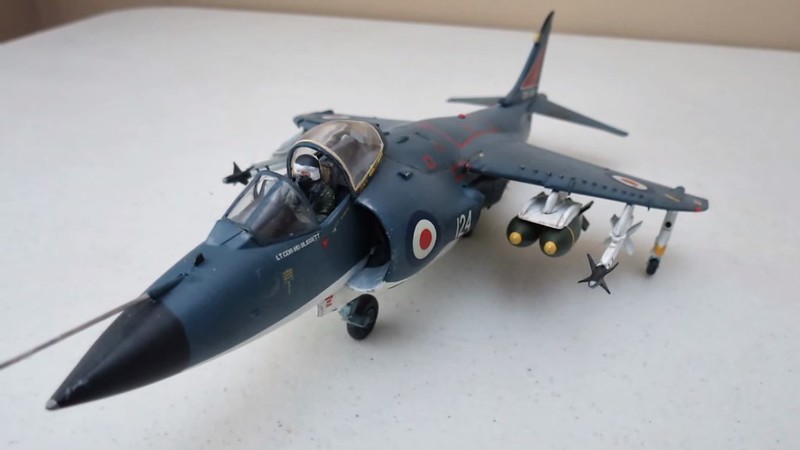
So my first victim is the 1/72 Matchbox Sea Harrier FRS.1.
I'm going to be building this one out of the box but putting her into the Grey and White Royal Navy livery with the Red Arrow on the tail using tail decals from the stash.
Here is an overview of the kit:
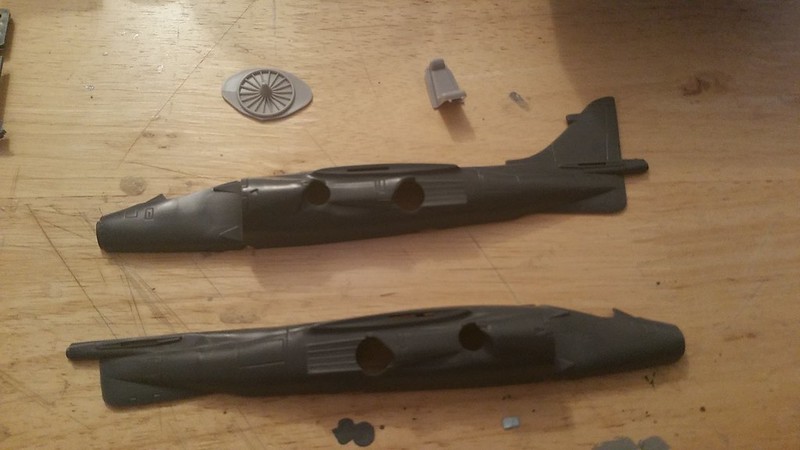
The fuselage and other first bits are off the sprew and sanded down:
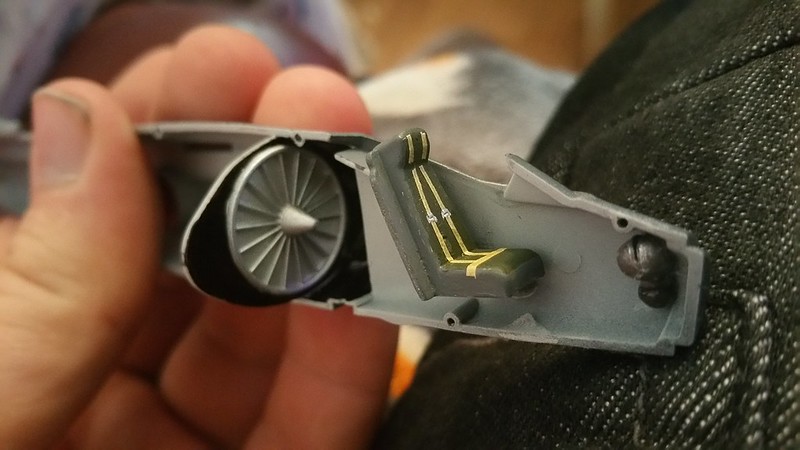
The very basic seat and Engine fan now painted up ready to go inside the fuselage:

I've painted the cockpit interior a light grey, glued in the nose weights, painted the inside of the fuselage black that are visible through the air intakes and glued in the seat and engine fan.
I'm going to try and get alot done today after I finish so watch this space.
So I have been a lover of the Harrier my whole life and I have 4 sitting in the stash and with the GB thats going on at the moment I decided to have a go at building at least one.
So my first victim is the 1/72 Matchbox Sea Harrier FRS.1.
I'm going to be building this one out of the box but putting her into the Grey and White Royal Navy livery with the Red Arrow on the tail using tail decals from the stash.
Here is an overview of the kit:
The fuselage and other first bits are off the sprew and sanded down:
The very basic seat and Engine fan now painted up ready to go inside the fuselage:
I've painted the cockpit interior a light grey, glued in the nose weights, painted the inside of the fuselage black that are visible through the air intakes and glued in the seat and engine fan.
I'm going to try and get alot done today after I finish so watch this space.
-
ShaunW
- NOT the sheep
- Posts: 26188
- Joined: November 26th, 2011, 6:11 pm
- Location: Pontefract West Yorkshire
Re: Mav's Cold War Builds
Nice one Mav and it's great to see another one of these classics being built (Andrew R has just completed one in Indian Navy markings). I'm also a fan of the earlier grey over white FAA scheme for these jets.
Doing - Tamiya 1/35th Universal Carrier.
Work is the curse of the modelling classes!
IPMS#12300
Work is the curse of the modelling classes!
IPMS#12300
-
IronMan129
- Modelling Gent and Scholar
- Posts: 4385
- Joined: November 23rd, 2012, 4:20 pm
Re: Mav's Cold War Builds
Thanks Shaun, Yeah I've seen his and it looks awesome.
The Grey over White is definitely the best livery on the FRS.1.
Today I tried something I've seen and been very inspired by when other modellers do it.
I have never tried this before so please go easy on my result.
I have looked into various photos of FRS.1 Ejector Seats and I have done my best on getting the seat belts and buckles right so here are the results:
Hope you all like it so far.
-
IronMan129
- Modelling Gent and Scholar
- Posts: 4385
- Joined: November 23rd, 2012, 4:20 pm
Re: Mav's Cold War Builds
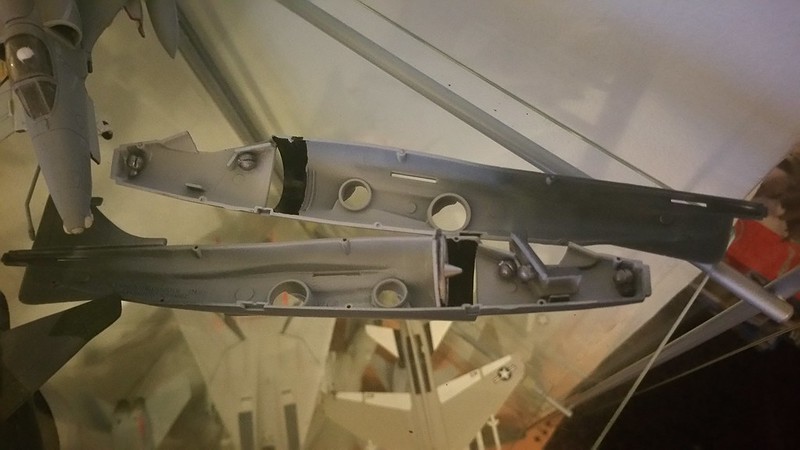
Tonight I closed the fuselage up, put a layer of primer on and the paint work too.
The next step is to sand and fill then touch up the paint work.
I decided to go back to my old way of building just for one kit.
The next step is to sand and fill then touch up the paint work.
I decided to go back to my old way of building just for one kit.
-
Dazzled
- Modelling Gent and Scholar
- Posts: 9592
- Joined: October 1st, 2011, 11:08 pm
- Location: Mid Glamorgan, South Wales
- Contact:
Re: Mav's Cold War Builds
Very nice. Looks to have the correct number of aux doors too 
COLD WAR S.I.G. LEADER
Wherever there's danger, wherever there's trouble, wherever there's important work to be done....I'll be somewhere else building a model!
Wherever there's danger, wherever there's trouble, wherever there's important work to be done....I'll be somewhere else building a model!
-
IronMan129
- Modelling Gent and Scholar
- Posts: 4385
- Joined: November 23rd, 2012, 4:20 pm
Re: Mav's Cold War Builds
Thanks Daz.
Haha that's were pilots plug their headphones into.
Haha that's were pilots plug their headphones into.
-
Dazzled
- Modelling Gent and Scholar
- Posts: 9592
- Joined: October 1st, 2011, 11:08 pm
- Location: Mid Glamorgan, South Wales
- Contact:
Re: Mav's Cold War Builds
There is actually a kit, possibly Italeri, that has one door too many on each side.
COLD WAR S.I.G. LEADER
Wherever there's danger, wherever there's trouble, wherever there's important work to be done....I'll be somewhere else building a model!
Wherever there's danger, wherever there's trouble, wherever there's important work to be done....I'll be somewhere else building a model!
-
Stuart

- Raider of the Lost Ark Royal
- Posts: 19451
- Joined: February 25th, 2013, 4:55 pm
- Location: North Wales
- Contact:
Re: Mav's Cold War Builds
Great stuff Mav!
Stuart Templeton I may not be good but I'm slow...
My Blog: https://stuartsscalemodels.blogspot.com/
My Blog: https://stuartsscalemodels.blogspot.com/
-
ShaunW
- NOT the sheep
- Posts: 26188
- Joined: November 26th, 2011, 6:11 pm
- Location: Pontefract West Yorkshire
Re: Mav's Cold War Builds
Nice one Mav. The addition of seat belts is always worth the effort IMHO, even with a closed canopy, as it helps lift the model that little bit. Be warned, it starts with seat belts and can progress to all sorts of madness with bits of placcy card, wire or, if you're feeling flush, resin replacement cockpits 
Doing - Tamiya 1/35th Universal Carrier.
Work is the curse of the modelling classes!
IPMS#12300
Work is the curse of the modelling classes!
IPMS#12300
-
IronMan129
- Modelling Gent and Scholar
- Posts: 4385
- Joined: November 23rd, 2012, 4:20 pm
Re: Mav's Cold War Builds
Haha yes it does as I've already started looking as resin bits!
I got chance to do some more work on the Sea Harrier today.
I have been thinking about what configuration and loadout I should have her in since I started this builds.
I have settled on having a refueling probe as I won't be using it on any other future harrier build.
I'm going to have twin sidewinder mounts on each of the outer mounted pilons, standard drop tanks on the inner pilons and I'm still unsure yet if I want gun pods mounted on the belly or not.
If I do I will be stealing them from the GR.1 kit as I can't find replacements for a good price.
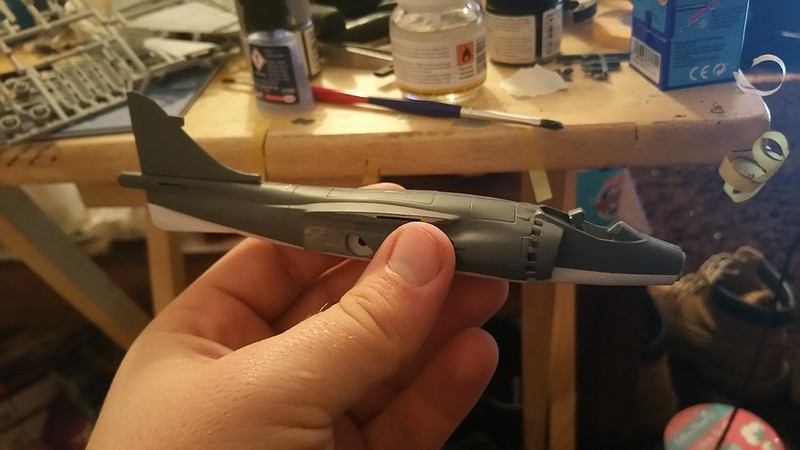
So onto tonights progress.
I have sanded down the fuselage joins, added the tail boom, nose cone, nose antenna and refueling probe.
I've also made a start painting the wings and landing gear.
Only one pic tonight.
More tomorrow hopefully.
I got chance to do some more work on the Sea Harrier today.
I have been thinking about what configuration and loadout I should have her in since I started this builds.
I have settled on having a refueling probe as I won't be using it on any other future harrier build.
I'm going to have twin sidewinder mounts on each of the outer mounted pilons, standard drop tanks on the inner pilons and I'm still unsure yet if I want gun pods mounted on the belly or not.
If I do I will be stealing them from the GR.1 kit as I can't find replacements for a good price.
So onto tonights progress.
I have sanded down the fuselage joins, added the tail boom, nose cone, nose antenna and refueling probe.
I've also made a start painting the wings and landing gear.
Only one pic tonight.
More tomorrow hopefully.
-
Dazzled
- Modelling Gent and Scholar
- Posts: 9592
- Joined: October 1st, 2011, 11:08 pm
- Location: Mid Glamorgan, South Wales
- Contact:
Re: Mav's Cold War Builds
Gun pods were by far the more common fit than strakes. They were necessary to assist in vertical landings by creating a "cushion" beneath the aicraft so Harriers used to carry them even without guns in them. Any Harrier without either pods or strakes would be unable to make a vertical landing without risk of damaging the landing gear.
COLD WAR S.I.G. LEADER
Wherever there's danger, wherever there's trouble, wherever there's important work to be done....I'll be somewhere else building a model!
Wherever there's danger, wherever there's trouble, wherever there's important work to be done....I'll be somewhere else building a model!
-
IronMan129
- Modelling Gent and Scholar
- Posts: 4385
- Joined: November 23rd, 2012, 4:20 pm
Re: Mav's Cold War Builds
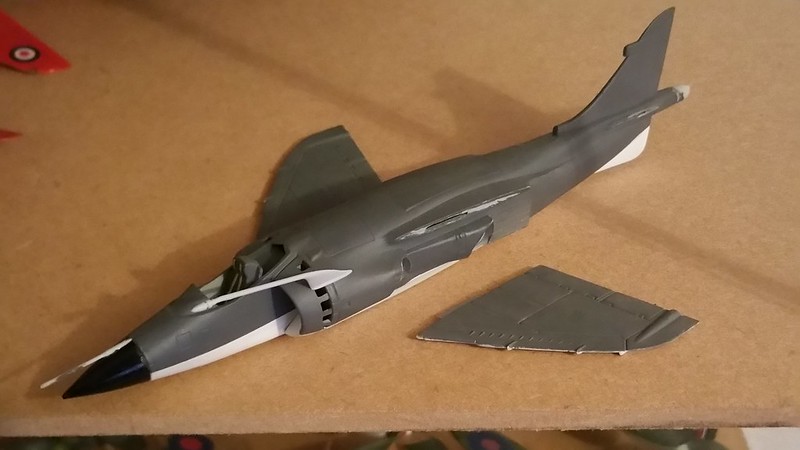
I'm really cracking on with this one now.
Tonight I got the wings, horizontal stabilizers and landing gear on and along with the tail boom, nose pitot tube and refueling probe all painted too.
Thanks for that Daz, I decided to add a borrowed set of gun pods from the Airfix FA.2 kit, they're borrowed as I am being sent a set which I'll return to the FA.2 when they arrive.
I know they are about 4mm too short as it seems but atleast they're from another Sea Harrier.
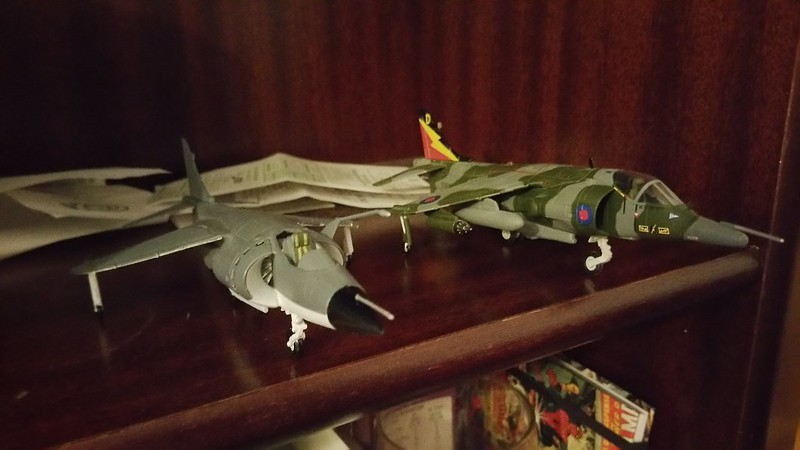
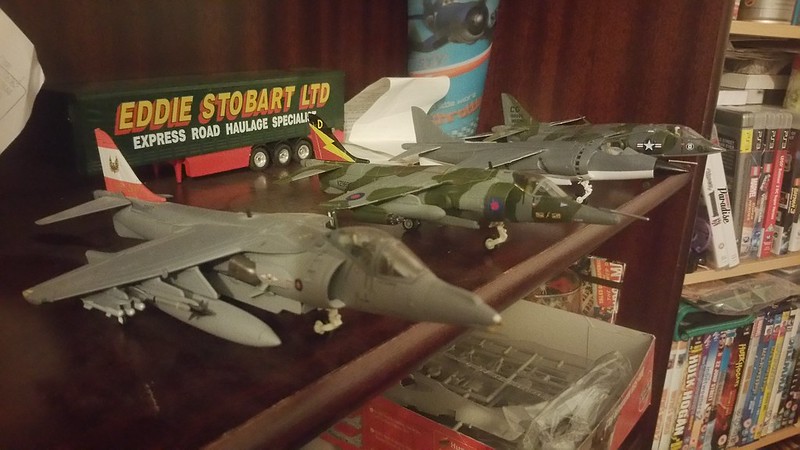
Here are a couple of pics of her sat next to a 4 Squadron GR.3.
I think painting the engine fan silver was a really good idea as its really visible through the intake and I'm still very impressed with the Ejector Seat:
I tried using HDR on my phone but its only made a very tiny difference:
C&c welcome as always.
Tonight I got the wings, horizontal stabilizers and landing gear on and along with the tail boom, nose pitot tube and refueling probe all painted too.
Thanks for that Daz, I decided to add a borrowed set of gun pods from the Airfix FA.2 kit, they're borrowed as I am being sent a set which I'll return to the FA.2 when they arrive.
I know they are about 4mm too short as it seems but atleast they're from another Sea Harrier.
Here are a couple of pics of her sat next to a 4 Squadron GR.3.
I think painting the engine fan silver was a really good idea as its really visible through the intake and I'm still very impressed with the Ejector Seat:
I tried using HDR on my phone but its only made a very tiny difference:
C&c welcome as always.
-
IronMan129
- Modelling Gent and Scholar
- Posts: 4385
- Joined: November 23rd, 2012, 4:20 pm
Re: Mav's Cold War Builds
I was looking online for a while and I found this pic:
Is this load out accurate?
If so would the twin bomb rack be used with rockets on the outer pilons and a single bomb mounted on the center pilon?
Is this load out accurate?
If so would the twin bomb rack be used with rockets on the outer pilons and a single bomb mounted on the center pilon?
-
IronMan129
- Modelling Gent and Scholar
- Posts: 4385
- Joined: November 23rd, 2012, 4:20 pm
Re: Mav's Cold War Builds
Not a lot of progress has been made today but I decided to post a reply to keep the thread alive.
Basically just finishing off the grey paint work and making her a more solid model.
I'm going to finish off the white and adding the last little details as well as adding the 2 black antenna to the top of the fuselage behind the canopy.
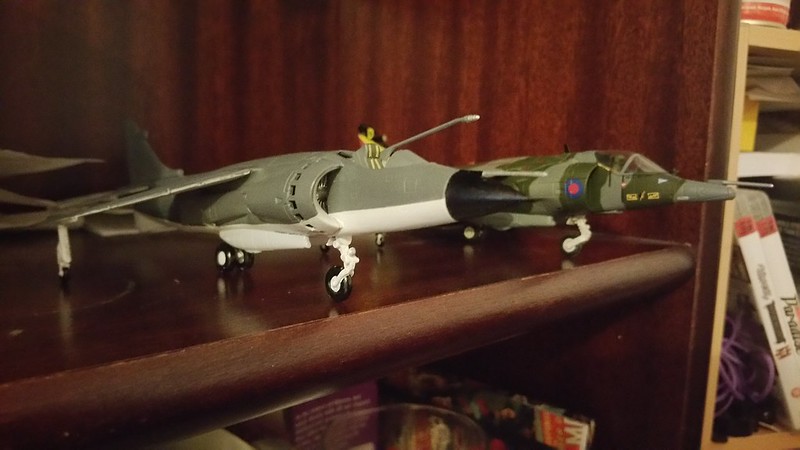
I haven't taken a pic as she is in therers no big changes to see through the camera lens but here is a pic of one of each type of Harrier in my collection.
Basically just finishing off the grey paint work and making her a more solid model.
I'm going to finish off the white and adding the last little details as well as adding the 2 black antenna to the top of the fuselage behind the canopy.
I haven't taken a pic as she is in therers no big changes to see through the camera lens but here is a pic of one of each type of Harrier in my collection.