Clashcityrocker wrote:I've thrown out larger pieces of plastic than that Iranian sub
Nigel
Ernie's Comfy Corner
-
Ernie

- The Bug Has Well And Truly Bitten
- Posts: 354
- Joined: May 1st, 2011, 3:09 am
- Location: A small town in New Hampshire
Re: Ernie's Comfy Corner
-
Ernie
- The Bug Has Well And Truly Bitten
- Posts: 354
- Joined: May 1st, 2011, 3:09 am
- Location: A small town in New Hampshire
Re: Ernie's Comfy Corner
Latest progress from the bench...….
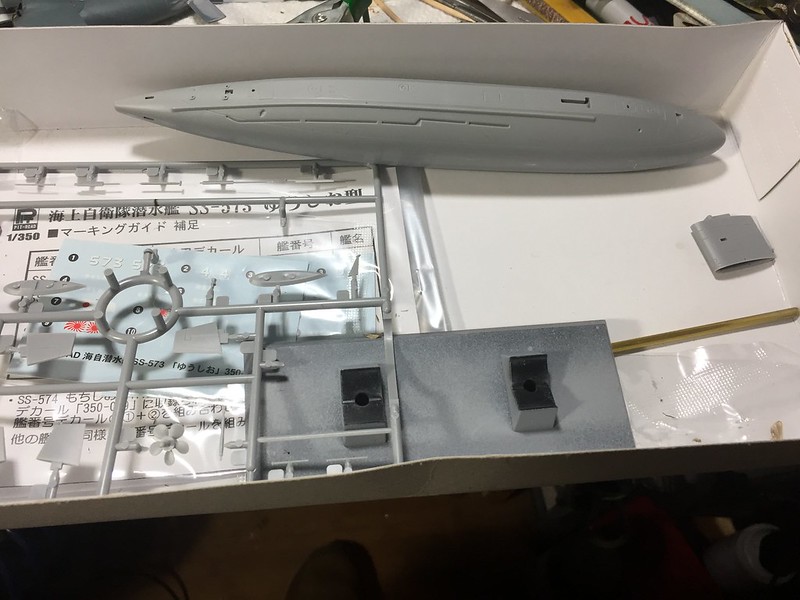
The Yushio when I picked back up working on her.
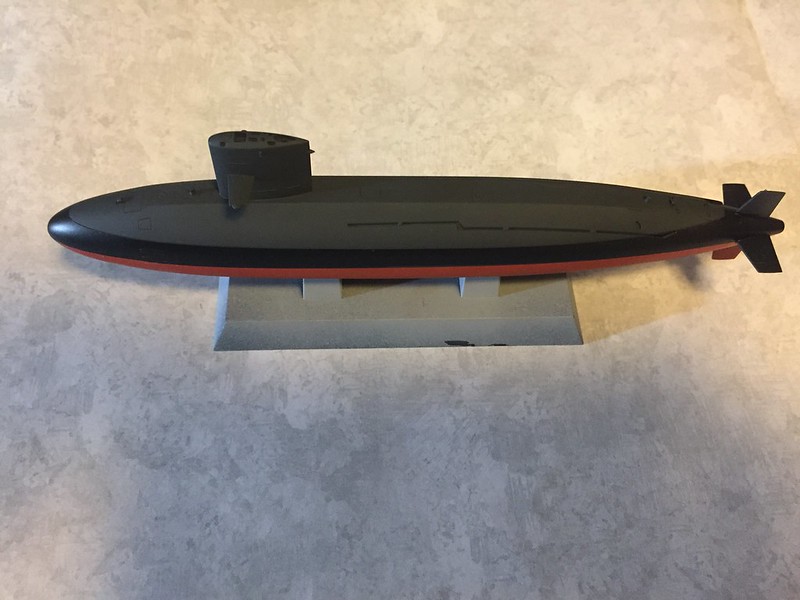
And today after removing the last of the masking. Painting of the hull is done, gloss and decals next, as well as painting all the sticky outie things atop the sail.
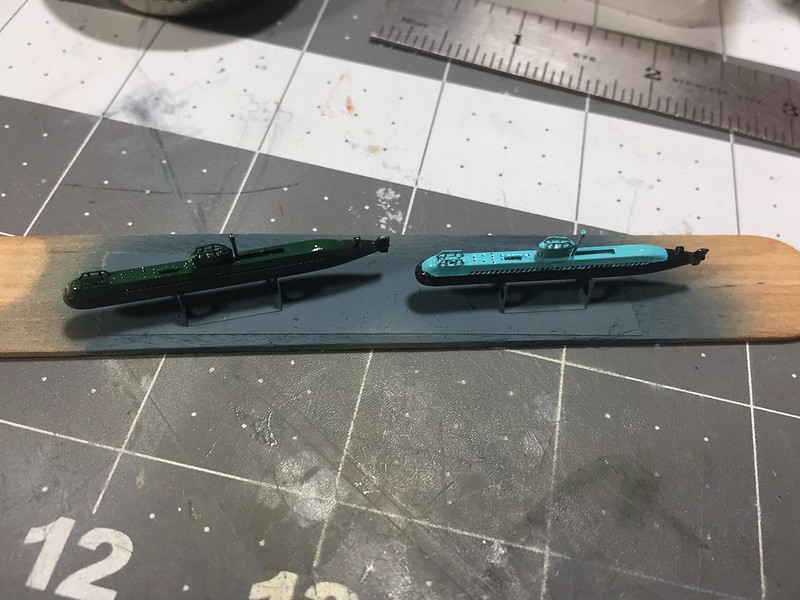
And the Iranian subs, need a little touch up and the rear planes added. Then a wash to bring out the details.
All three getting closer, almost time to start thinking about the next project
The Yushio when I picked back up working on her.
And today after removing the last of the masking. Painting of the hull is done, gloss and decals next, as well as painting all the sticky outie things atop the sail.
And the Iranian subs, need a little touch up and the rear planes added. Then a wash to bring out the details.
All three getting closer, almost time to start thinking about the next project
-
Dazzled

- Modelling Gent and Scholar
- Posts: 9592
- Joined: October 1st, 2011, 11:08 pm
- Location: Mid Glamorgan, South Wales
- Contact:
Re: Ernie's Comfy Corner
Aww, ain't they dinky 
For the benefit of some of us with dodgy eyesight I reckon those would be best displayed under a magnifier
For the benefit of some of us with dodgy eyesight I reckon those would be best displayed under a magnifier
COLD WAR S.I.G. LEADER
Wherever there's danger, wherever there's trouble, wherever there's important work to be done....I'll be somewhere else building a model!
Wherever there's danger, wherever there's trouble, wherever there's important work to be done....I'll be somewhere else building a model!
-
Stuart

- Raider of the Lost Ark Royal
- Posts: 19451
- Joined: February 25th, 2013, 4:55 pm
- Location: North Wales
- Contact:
Re: Ernie's Comfy Corner
Those are cool looking subs - very nice work!
Stuart Templeton I may not be good but I'm slow...
My Blog: https://stuartsscalemodels.blogspot.com/
My Blog: https://stuartsscalemodels.blogspot.com/
-
Ernie
- The Bug Has Well And Truly Bitten
- Posts: 354
- Joined: May 1st, 2011, 3:09 am
- Location: A small town in New Hampshire
Re: Ernie's Comfy Corner
Hello all! , so a new update from the bench; not much has been going on. I have been in a bit of a funk for a few months and have not done a whole lot of modeling or socializing for that matter. Just kind of going with the flow I guess. But anyway I have completed a couple of the last projects I was working on, the pair of Ghadir class Iranian midget submarines are finished.....
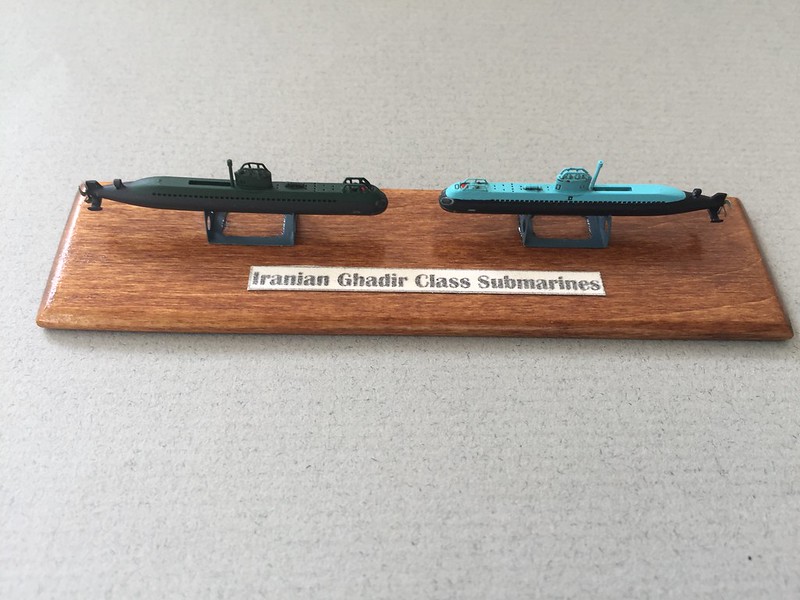
These were fun little builds and I like the way they turned out.
And the JMSDF Yushio is also finished. Being a Pit Road kit it was pretty decent kit to start with and went together quite easily.

And another project was dragged back to the forefront, the little Brengun 1/48 Me. P1103. This is a limited run type kit and I alos purchased the associated etch set to go with it.


More on this one soon!
These were fun little builds and I like the way they turned out.
And the JMSDF Yushio is also finished. Being a Pit Road kit it was pretty decent kit to start with and went together quite easily.
And another project was dragged back to the forefront, the little Brengun 1/48 Me. P1103. This is a limited run type kit and I alos purchased the associated etch set to go with it.
More on this one soon!
-
Ernie
- The Bug Has Well And Truly Bitten
- Posts: 354
- Joined: May 1st, 2011, 3:09 am
- Location: A small town in New Hampshire
Re: Ernie's Comfy Corner
I had never built a Brengun kit before, so I figured the P.1103 would be a good one to try. The kit is a limited run type with no locating pins and butt joins on the major parts. The cockpit takes a fair amount of work to get it to fit reasonably well, then a bit more work to get the fuselage half's to fit together around it.


The separate photo etch set provides some nice details for the cockpit that dress it up a bit, in particular the instrument panel and seat belts. I added the photo etched face to the front of the panel, and then added some wires to the back that could be visible through the canopy.

The seat belts helped a lot, and I also scratchbuilt a new control stick as the kit one interfered with the instrument panel ( or vice versa ).


The kit also supplies a nice clear injected canopy, but I was never able to get it to fit quite right, fortunately for me Brengun also sell a pair of vacuformed canopies for the kit; how fortuitous, so I ordered a set of those and was able to get a good fit of the canopy at last.
Also, the kit supplies a ground dolly for the plane, but they molded it with the cutouts in the frame for the axle on the top side of the frame instead of the bottom. If built this way the model would not sit in the cradle as the axle would be in the way. I filled the spots for the axel with Evergreen half round styrene and built a new one from some Evergreen channel styrene and a brass rod for the axel.
The model is rather tiny, even in 1/48th scale so I decided I would make a base for it to sit on. I prepared a wooden base, and used epoxy putty rolled out and cut with the top of a decorative tin to give it the correct diameter. The concrete sections had the expansion cracks scribed in before painting and the grass areas were covered with static grass, I used 4mm long grass next to the concrete where the grass would be more likely to be trodden / mowed / grazed lower, and 7mm grass as I mover further away from the concrete areas.

The separate photo etch set provides some nice details for the cockpit that dress it up a bit, in particular the instrument panel and seat belts. I added the photo etched face to the front of the panel, and then added some wires to the back that could be visible through the canopy.
The seat belts helped a lot, and I also scratchbuilt a new control stick as the kit one interfered with the instrument panel ( or vice versa ).
The kit also supplies a nice clear injected canopy, but I was never able to get it to fit quite right, fortunately for me Brengun also sell a pair of vacuformed canopies for the kit; how fortuitous, so I ordered a set of those and was able to get a good fit of the canopy at last.
Also, the kit supplies a ground dolly for the plane, but they molded it with the cutouts in the frame for the axle on the top side of the frame instead of the bottom. If built this way the model would not sit in the cradle as the axle would be in the way. I filled the spots for the axel with Evergreen half round styrene and built a new one from some Evergreen channel styrene and a brass rod for the axel.
The model is rather tiny, even in 1/48th scale so I decided I would make a base for it to sit on. I prepared a wooden base, and used epoxy putty rolled out and cut with the top of a decorative tin to give it the correct diameter. The concrete sections had the expansion cracks scribed in before painting and the grass areas were covered with static grass, I used 4mm long grass next to the concrete where the grass would be more likely to be trodden / mowed / grazed lower, and 7mm grass as I mover further away from the concrete areas.
-
Clashcityrocker

- Modelling Gent and Scholar
- Posts: 10823
- Joined: May 1st, 2011, 12:31 am
- Location: Adelaide. South Australia
Re: Ernie's Comfy Corner
Nicely finished submarines, and your P-1103 is going to look good on that well prepared base.
Nigel
Nigel
-
skypirate

- Modelling Gent and Scholar
- Posts: 7303
- Joined: May 1st, 2011, 6:13 am
- Location: Port Macquarie, Australia
Re: Ernie's Comfy Corner
Wow!
Variable grass height! Now that's what I call attention to detail.
Marvellous!
David
Variable grass height! Now that's what I call attention to detail.
Marvellous!
David
-
gnomemeansgnome

- Modelling Gent and Scholar
- Posts: 5269
- Joined: July 16th, 2013, 4:03 pm
- Location: No Fun City
Re: Ernie's Comfy Corner
Nice work!
Ego no habeo consilium.
ICBM = Insatiable Collector and Builder of Models
ICBM = Insatiable Collector and Builder of Models
-
Ernie
- The Bug Has Well And Truly Bitten
- Posts: 354
- Joined: May 1st, 2011, 3:09 am
- Location: A small town in New Hampshire
Re: Ernie's Comfy Corner
I am calling the P-1103 done! Painting was done with Xtra Color enamels RLM 76, 80 and 81....very old ones, probably from the first batch the was imported into the States back in the early 1990's! But they worked great with the right thinner and I was very happy with how they preformed. Plus, I've got 'em, might as well use them  The paint scheme is modified from one shown on the back of the box. I used AK Real Colors RLM 76 Modified (the late war color that more resembled RAF Sky than RLM 76),for the fairing between the wing and fuselage, not too sure I agree with the color, but the paint worked very well so happy to know that. The green fuselage band was done with some old Polly Scale RLM 23 Green. The ground dolly was painted with Tamiya red and then weathered up a bit with a wash and some graphite around the edges to show wear. All the major decals are from the kit and worked very well. The small stencil decals and the Wk. Number on the tail came from old Micro Scale and Eduard stencil sheets. The panel lines were given an oil paint wash and some grime was added around a couple of the access panels to help define those a bit more.


I must say the kit took a bit more effort than I bargained for, but I like the way it turned out and the effort put into it was definitely a good skill builder exercise that will come in handy on plenty of other kits I have
I must say the kit took a bit more effort than I bargained for, but I like the way it turned out and the effort put into it was definitely a good skill builder exercise that will come in handy on plenty of other kits I have

Re: Ernie's Comfy Corner
That was quick and nicely done. Like the base as well.
It's only pain, work through it.
-
Lone Modeller
- Modelling Gent and Scholar
- Posts: 5345
- Joined: April 1st, 2013, 6:45 pm
Re: Ernie's Comfy Corner
Super finish, especially the mottle on the fuselage. The base is first class and the variable height of the grass is certainly something to think about in future.
-
Early Bird Fan

- Modelling Gent and Scholar
- Posts: 1808
- Joined: February 25th, 2020, 1:41 am
- Location: Hertfordshire
Re: Ernie's Comfy Corner
the subs look great and the scheme on the 1103 has come out really well 
Current Builds:
Revell 1/48 S.e.5a
Revell 1/72 P-47 'bolt
Frog 1/72 Bleriot X1
Revell 1/48 S.e.5a
Revell 1/72 P-47 'bolt
Frog 1/72 Bleriot X1
-
johnsan

- Modelling Gent and Scholar
- Posts: 1358
- Joined: May 1st, 2011, 12:27 am
- Location: Just to the left of the great salt lake.
Re: Ernie's Comfy Corner
How have I missed your workbench?
Some really nice work. Really, really like your Yushio. Used to love visiting Japanese boats when they would pull into Pearl. So incredibly clean!
Nice models!
Some really nice work. Really, really like your Yushio. Used to love visiting Japanese boats when they would pull into Pearl. So incredibly clean!
Nice models!
Really nothing pithy to say.
-
iggie

- Modelling Gent and Scholar
- Posts: 23438
- Joined: July 31st, 2013, 11:04 am
- Location: North Somercotes, Lincolnshire
- Contact:
Re: Ernie's Comfy Corner
Love the P1103! Very nicely done indeed
Best wishes
Jim
If you can walk away from a landing, it's a good landing. If you use the airplane the next day, it's an outstanding landing
"Never put off till tomorrow, what you can do the day after tomorrow"
Jim
If you can walk away from a landing, it's a good landing. If you use the airplane the next day, it's an outstanding landing
"Never put off till tomorrow, what you can do the day after tomorrow"