Fantastic Plastic 1/288 Starduster from Space Angel

From Apollo and Soyuz, to Gerry Anderson, Irwin Allen, Star Wars and Trek to Babylon 5, Battlestar Galactica and those strange, doe-eyed Japanese school girls...to any model kits you can think of, that only exists in imagination.
User avatar
Tarkas
Active Participant
Posts: 623
Joined: August 9th, 2012, 6:24 pm
Location: Geosynchronous orbit, but at a very low altitude

Fantastic Plastic 1/288 Starduster from Space Angel

Post by Tarkas »

I put up a thread about this kit on the In-Box Reviews folder, and now it's time to get on with it. For those of you who missed the previous thread, here's the box:
Image

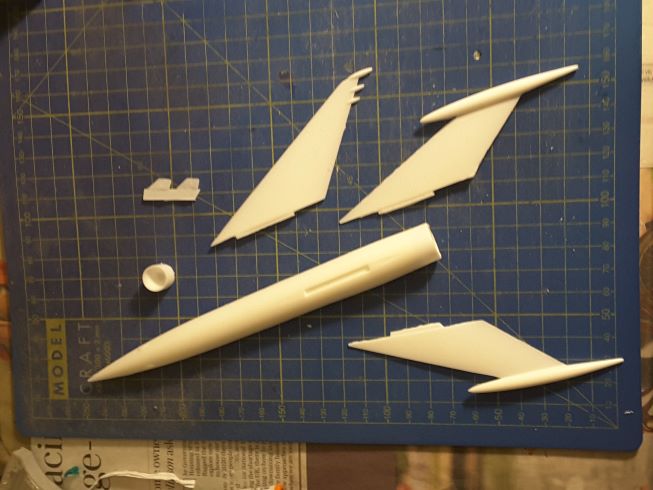
...and this is what's in it (save only the two decals) after being washed.
Image

As I said "last time" (hey, Space Angel was a serial cartoon :mrgreen:), there was a fair bit of flash to clean up, which wasn't much trouble. What was, however, was separating the starboard wing from the casting block. The port wing was no problem that way, as can be seen in the above photo, but the starboard wing -- the one with all the flash along the leading edge -- had a rather dodgy casting, and the root and tab for the fuselage slot were effectively one big slab that incorporated the casting block! It took a lot of work with a razor saw, knife and files to detach it from the block and grind it down to something like the right shape, and even then the wing root was quite uneven, as you can see. Against that, the leading and trailing edges of both wings and fin are remarkably thin -- and thus prone to damage. Just as well the roots will be covered in filler.
Image

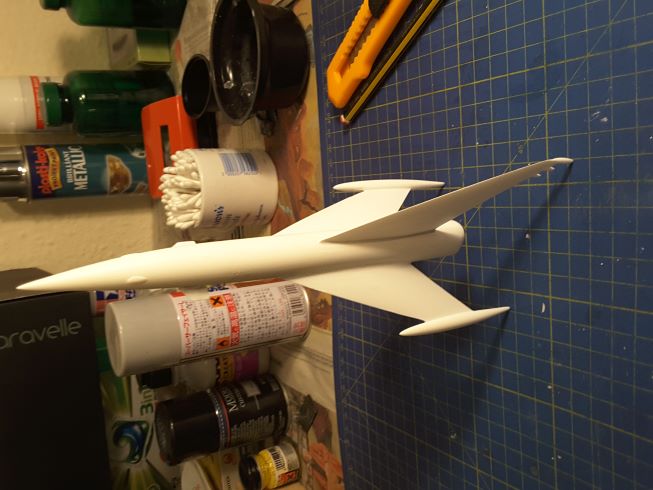
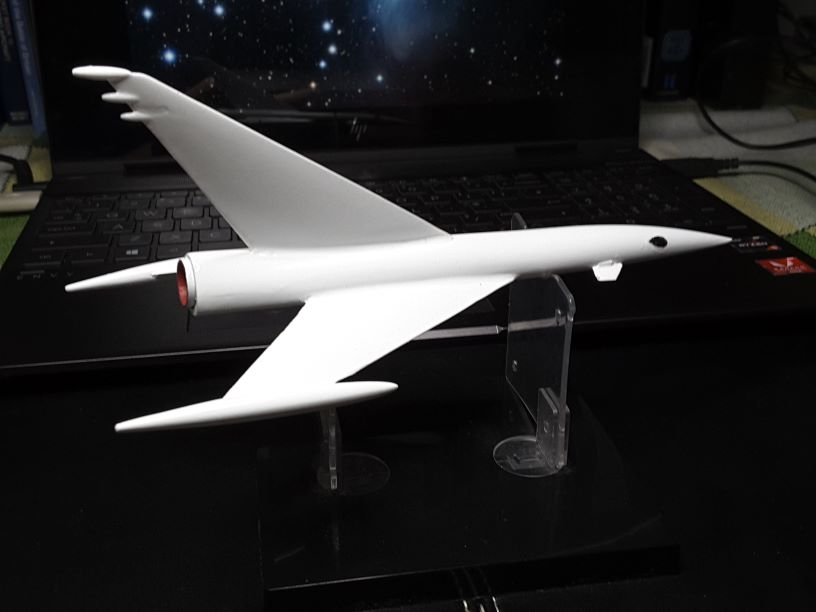
I did a quick test fit of the fin and the port wing, and they weren't too bad. The fin was a bit twisted, but the old hot water treatment sorted that out, though I may have to do it again. The port wing took a bit of fettling, as I'd suspected because the slot in the fuselage is none too big. Still, she looks good.
Image

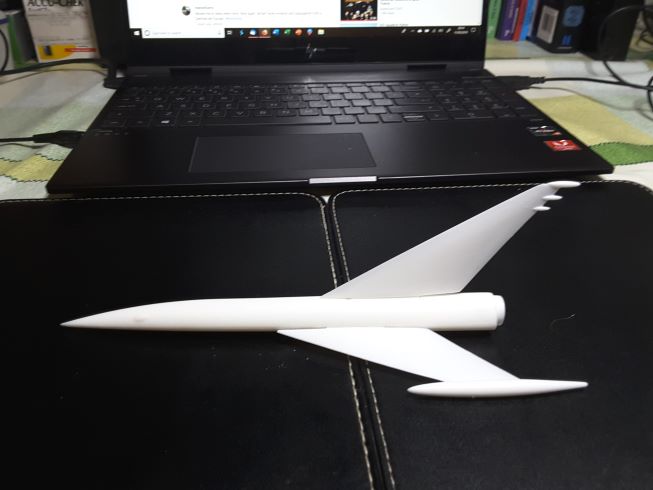
Now, on the other side, it was much more of a battle to get wing and fuselage aligned. The tab was oversize and the slot undersize, so it was out with files, wet-and-dry, et al. in an attempt to get them together. It wasn't all that successful, especially once I glued everything together, but I was expecting to use a fair bit of filler, so there was a limit to how much I was prepared to do. The photo below shows the ship after main assembly.
Image

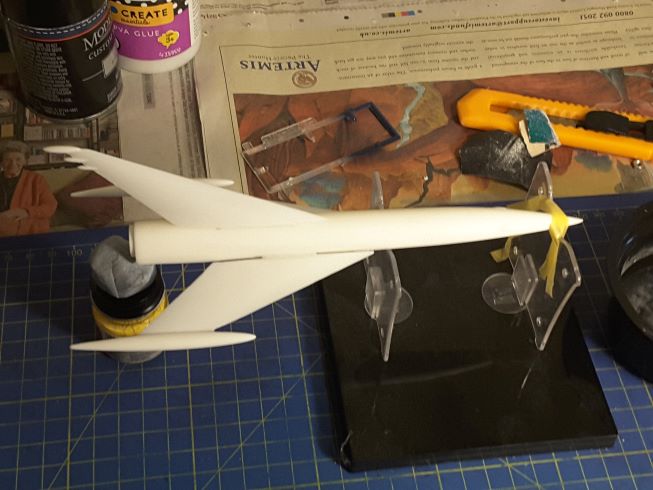
I was surprised with the fit of the exhaust nozzle. When I test-fitted it early on, it sat out of the hole in the back of the hull rather like the depiction on the box lid, but when I added glue (superglue) and fitted it, it went in more than that, and now only projects about 2 mm from the rear of the hull. Since the nozzle is not actually visible in the cartoon, AFAICT, I'm not worried; if I could be bothered to argue the point, I could claim that it is more screen-accurate as is. :roll:

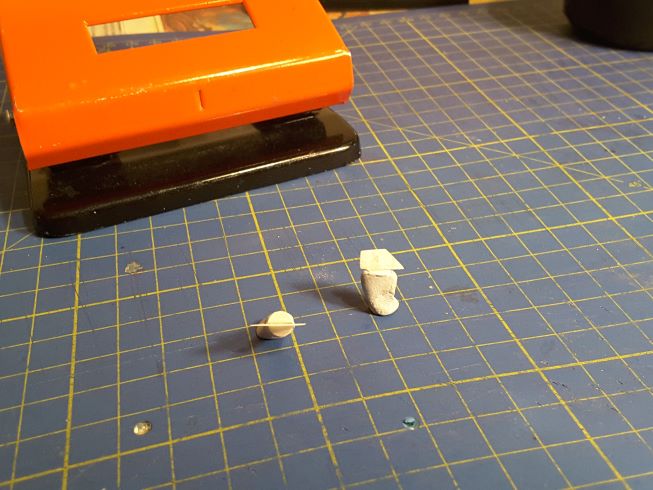
At the other end, the two small canards were not something that I was (or am) looking forward to dealing with. I'm putting them on last in order to not have to worry about them getting knocked off all the time; they are both small and thin -- not sure if you can tell, but the resin is thin enough to be translucent -- and the only thing indicating where they should go is a pair of very shallow grooves. Making a butt joint, and holding one of these tiny things in place long enough for the glue to grip, is not going to be fun, so I had an idea: using a standard hole punch (the red thing in the picture below), I cut out a pair of discs to mount the canards on from a sheet of thin plastic card -- and there they are. Hopefully, this will be a lot less hassle when the time comes to put them on. It's also vaguely realistic in terms of how the canards might be made to move, which pleases the engineer in me.
Image

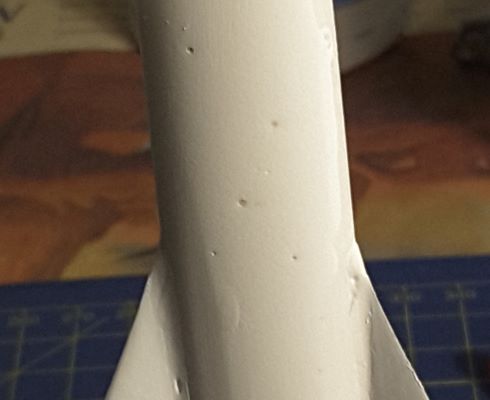
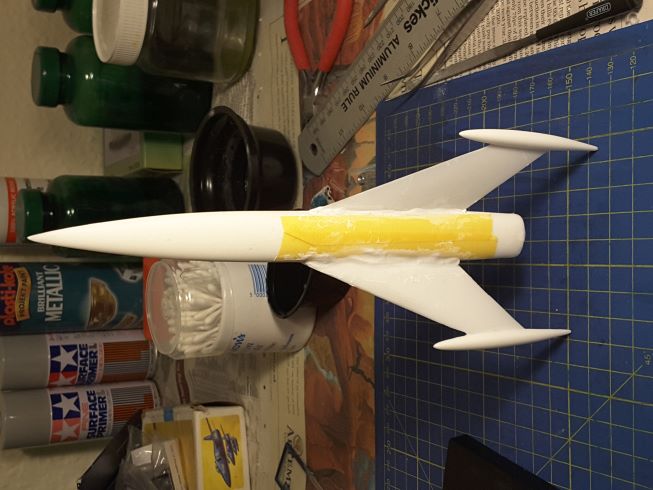
With the fin and wings on, it's time to fill the gaps at their roots. ISTR someone suggesting using masking tape to limit the spread of putty prior to sanding, so I thought I'd have a go. Here she is with the tape on and a load of Perfect Plastic Putty in the gaps. I used wet cotton buds (Q-tips) to smooth the putty down, and it remains to be seen what sort of surface finish I'll get with it, and how many PSR cycles may be needed.
Image

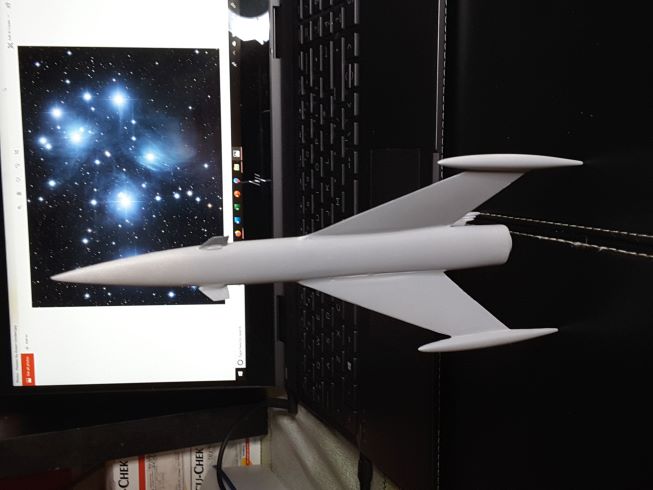
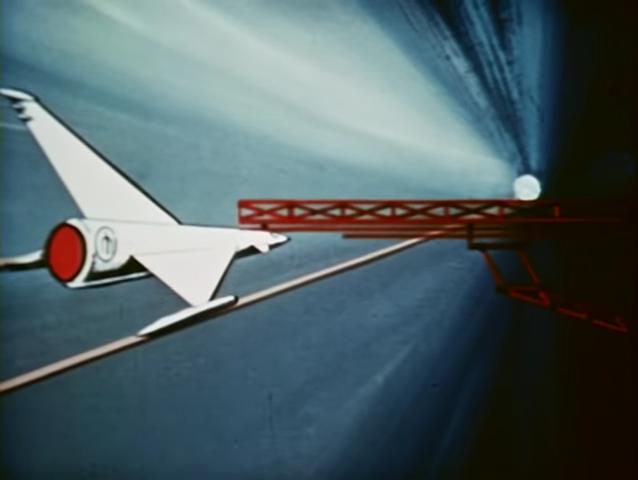
This last shot shows the puttying on the underside, and also demonstrates that she'll stand comfortably on her "landing gear" -- because that's how the Starduster landed on planets. She would dock with space stations (especially her home base, the Evening Star) in a horizontal attitude, but for soft landing on planets, etc., she was a tail-sitter. As a small item of trivia, the control room was fitted with pivoting seat-control panel units, thereby anticipating Thunderbird 1 by 2 or 3 years! 8-)
Image
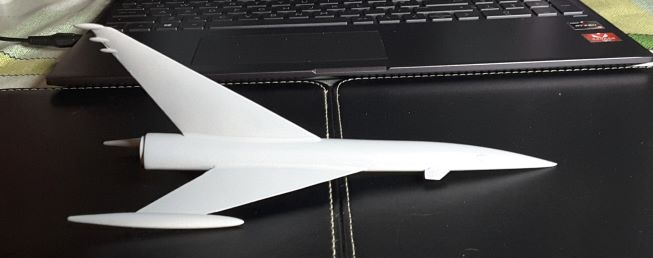
Why is this image the wrong way up? :roll: Please imagine it in a vertical attitude. [LATER: As it now is, for some unknown reason... :roll:]

Next step is sanding, after which it'll be PSR until I'm satisfied. I'll keep you posted. ;-)
Ping! Ping!! Ping!!! -- Mother Box
She's such a chatterbox, sometimes...
User avatar
DavidWomby
Modelling Gent and Scholar
Posts: 11766
Joined: May 1st, 2011, 8:09 pm
Location: Florida, USA

Re: Fantastic Plastic 1/288 Starduster from Space Angel

Post by DavidWomby »

I'm not familiar with the program that's from but it looks very cool!

David
ShaunW
NOT the sheep
Posts: 26188
Joined: November 26th, 2011, 6:11 pm
Location: Pontefract West Yorkshire

Re: Fantastic Plastic 1/288 Starduster from Space Angel

Post by ShaunW »

A very interesting build thread, Tarkas and I would endorse your method of attaching those delicate looking canards. Butt joints can be a bit of a pain and I much prefer mounting pins or tongue into slots but those discs of plastic card should provide decent enough mountings that will be realistic looking as well. I've never heard of the Space Angel cartoon series either but Starduster looks like a classic 1950's vision of a spacecraft to me.
Doing - Tamiya 1/35th Universal Carrier.

Work is the curse of the modelling classes!
IPMS#12300
User avatar
Tarkas
Active Participant
Posts: 623
Joined: August 9th, 2012, 6:24 pm
Location: Geosynchronous orbit, but at a very low altitude

Re: Fantastic Plastic 1/288 Starduster from Space Angel

Post by Tarkas »

Thanks for the kind words, guys. I've been busy sanding down the fuselage-wing/fin joints and filling in a couple of voids that appeared. No photos because it's white putty on off-white resin, so there's not much to see. I'll be applying the first coat of primer tomorrow, and we'll see how well the surface looks. The tape didn't work all that well, getting stuck under the putty to the extent that it took out large chunks of the fillet when I tried to pull it off. It might be okay in another situation, but it wasn't really needed here. Maybe I should have taken it off while the putty was still wet?

The canard discs may be a problem because I didn't take into account the curvature of the nose cross-section, which is rather like a triangle with curved sides and rounded corners, with the canard intended to be mounted at two of the corners. So the question becomes, how do I curve the plastic around the rather tight corners and get it to stay in place? Still thinking about that...

Space Angel dates from 1962, so yes, it's very definitely in the 1950s/early 60s era of spaceship design; in fact, the Starduster has been described as "the last of the classic cigar-with-wings" designs, very much in the tradition of ships like those from When Worlds Collide, Destination Moon and Rocketship X-M, among many others. All the usual websites that deal with cartoons have references to it, some with a lot of screenshots, and of course there are clips on YouTube, so do take a look if you're interested.
Ping! Ping!! Ping!!! -- Mother Box
She's such a chatterbox, sometimes...
User avatar
Stuart
Raider of the Lost Ark Royal
Posts: 19451
Joined: February 25th, 2013, 4:55 pm
Location: North Wales
Contact:

Re: Fantastic Plastic 1/288 Starduster from Space Angel

Post by Stuart »

Very cool looking build!
Stuart Templeton I may not be good but I'm slow...

My Blog: https://stuartsscalemodels.blogspot.com/
User avatar
Tarkas
Active Participant
Posts: 623
Joined: August 9th, 2012, 6:24 pm
Location: Geosynchronous orbit, but at a very low altitude

Re: Fantastic Plastic 1/288 Starduster from Space Angel

Post by Tarkas »

Tarkas wrote:Next step is sanding, after which it'll be PSR until I'm satisfied. I'll keep you posted. ;-)
Not too much has happened since last time. I've gone through the first round of PSR, but not the last, unfortunately. The weather hasn't helped, delaying any attempts at painting.

Eventually, I got the first coat of primer on. I used a spray can of Mr Surfacer 1000, which I'd never used before, and I learnt a few things about it. In particular:
  • it's very thin, so it has to be used quite sparingly. What looks like a reasonable coverage from an ordinary spray can will in fact run quite readily, requiring sanding down. Oops.
  • it's very good at revealing heretofore invisible imperfections, like a bunch of pinholes on the underside of the body that I would have sworn weren't there -- and I did check earlier -- but they showed up and I had to fill them.
Here's a not-very-informative view of the ship after being primed. White primer over off-white resin and white putty does not make for a very detailed image, I'm afraid, but at least the upper sides look okay.
Image

And here are the pinholes. Completely unseen until the primer went on, and they all came out to play.
Image

Well, the pinholes have been buried under a layer of PPP, and that's been sanded down, and it seems to have got rid of them. Hopefully, tomorrow will be dry, so that I can apply another coat of primer -- but this time I think I'll use Tamiya grey so that I can at least see it when it goes on! :roll: Still, things progress.
Ping! Ping!! Ping!!! -- Mother Box
She's such a chatterbox, sometimes...
ShaunW
NOT the sheep
Posts: 26188
Joined: November 26th, 2011, 6:11 pm
Location: Pontefract West Yorkshire

Re: Fantastic Plastic 1/288 Starduster from Space Angel

Post by ShaunW »

I gave up on primers after trying Vallejo and finding the stuff wouldn't sand properly but preferred to come off in lumps instead of giving nice feathered edges. Yes, I should have tried other primers and not just the one before deciding to write them all off but hey, ho, I can be like that. I've now returned to my favourite method which is to airbrush on a coat of neutral grey paint and the brand is usually, but not exclusively, Tamiya acrylic.

Starduster is looking very promising. Be patient with the fill, sand, repeat cycle and all will be well, Grasshopper!
Doing - Tamiya 1/35th Universal Carrier.

Work is the curse of the modelling classes!
IPMS#12300
User avatar
Tarkas
Active Participant
Posts: 623
Joined: August 9th, 2012, 6:24 pm
Location: Geosynchronous orbit, but at a very low altitude

Re: Fantastic Plastic 1/288 Starduster from Space Angel

Post by Tarkas »

That looks better! This is the underside of the ship after filling, sanding and recoating with grey Tamiya Surface Primer.
Image
Will someone please tell me why photos keep being rotated, presumably because they're taller than they're broad? :roll: [LATER: And then coming out the way they should an indeterminate time later? Fnord.]

Pinholes look to be gone and, FWIW, the Mr Surfacer sanded down very well, so once I get the hang of applying it, it could be very useful -- especially on kits that aren't moulded in white! :roll:

The canard discs turned out to be a non-starter due to the tight curvature of the body at their mounting points. The plastic was very thin (10 thou?), but I think the glue in the joint with the canard stiffened it so that it couldn't bend enough. After the first one broke (the disc, not the canard), I cut both sides down to a small strip that protruded either side of the canard, which worked okay. Had I realised it before I was mounting them, I'd have simply attached a thin strip of plastic strip to the root of each canard, which would have produced much the same result in a simpler fashion.

I did the upper sides in the same primer, but you might be hard-put to tell from this photo. The lighting really washed out most of the grey -- which, it should be said, is a medium-dark shade, though it doesn't look it here.
Image

Of perhaps more interest, a little digging on IMDB.com let me find a rare view of the rear end of the ship without the engine blazing. This will help in the painting of the exhaust cone. For anyone interested, the Starduster is shown here inside one of the docking tubes of the Evening Star, her usual base, with the access gantry deployed.
Image

Next step will be to rub her down with some micromesh in preparation for a number of coats of gloss white -- gloss in order to help with the decals, after which I'll apply a satin or matt varnish because, after all, this is a cartoon ship from the early 1960s, and so it shouldn't look too shiny. That may be a few days off, though, because the weather forecast for the next week is not for good spraying weather. :frown:
Ping! Ping!! Ping!!! -- Mother Box
She's such a chatterbox, sometimes...
ShaunW
NOT the sheep
Posts: 26188
Joined: November 26th, 2011, 6:11 pm
Location: Pontefract West Yorkshire

Re: Fantastic Plastic 1/288 Starduster from Space Angel

Post by ShaunW »

She's looking great now, Tarkas and it's interesting to see the still from the cartoon. Sorry but I can't help regarding the orientation of your photos. I always prepare my pics prior to uploading onto here using Irfanview, which is a free download photo app that is very useful for sizing and sharpening out any minor focus issues amongst other things.
Doing - Tamiya 1/35th Universal Carrier.

Work is the curse of the modelling classes!
IPMS#12300
User avatar
Stuart
Raider of the Lost Ark Royal
Posts: 19451
Joined: February 25th, 2013, 4:55 pm
Location: North Wales
Contact:

Re: Fantastic Plastic 1/288 Starduster from Space Angel

Post by Stuart »

Very cool!
Stuart Templeton I may not be good but I'm slow...

My Blog: https://stuartsscalemodels.blogspot.com/
User avatar
DavidWomby
Modelling Gent and Scholar
Posts: 11766
Joined: May 1st, 2011, 8:09 pm
Location: Florida, USA

Re: Fantastic Plastic 1/288 Starduster from Space Angel

Post by DavidWomby »

Looking very sleek.

David
User avatar
Tarkas
Active Participant
Posts: 623
Joined: August 9th, 2012, 6:24 pm
Location: Geosynchronous orbit, but at a very low altitude

Re: Fantastic Plastic 1/288 Starduster from Space Angel

Post by Tarkas »

Tarkas wrote:
Tarkas wrote:Next step is sanding, after which it'll be PSR until I'm satisfied. I'll keep you posted. ;-)
Not too much has happened since last time. I've gone through the first round of PSR, but not the last, unfortunately. [...] Still, things progress.
Yes, but rather slowly, and not helped by the weather and RL demands. Basically, it's PSR over and over again, and just when I think I've got it sorted, I find something like a paint blob or a chip and have to go round again.

I'm hoping to finish the main paint job this weekend, and then I can work on the cockpit windows and the exhaust nozzle, but mainly I'm hoping that I haven't just jinxed myself! :roll: More as and when, possibly with pictures if there's anything to show -- white everywhere, with almost no surface detail, is rather hard to photograph... ;-)
Ping! Ping!! Ping!!! -- Mother Box
She's such a chatterbox, sometimes...
User avatar
DavidWomby
Modelling Gent and Scholar
Posts: 11766
Joined: May 1st, 2011, 8:09 pm
Location: Florida, USA

Re: Fantastic Plastic 1/288 Starduster from Space Angel

Post by DavidWomby »

Tarkas wrote: Basically, it's PSR over and over again, and just when I think I've got it sorted, I find something like a paint blob or a chip and have to go round again.
Happens to me all the time too! Annoying, eh! I sympathize but such a cool looking ship will be worth it all.

David
User avatar
Tarkas
Active Participant
Posts: 623
Joined: August 9th, 2012, 6:24 pm
Location: Geosynchronous orbit, but at a very low altitude

Re: Fantastic Plastic 1/288 Starduster from Space Angel

Post by Tarkas »

Been a while, courtesy of RL and other distractions, but the paint job is finally done. Here's a quick look at what she looks like now:
Image

And, just for fun, a shot from roughly the same angle as the episode still:
Image

All (? :roll:) that's left is the decals -- all 2 of them -- and the satin/matt topcoat. With a bit of luck, I should get that done in the next couple of days, which is good because I'll be off on holiday soon. Keep your fingers crossed... ;-)

[LATER:] I jinxed it! :sad: The first decal I put in water promptly tied itself in knots! :frown: I've emailed the FP people (person?) and enquired about a replacement sheet, so we'll see what happens. If that falls through, I'll have to work on hand-made ones, but I'd like to avoid that if I can. Either way, nothing further is going to happen for some time. Blast! (and I don't mean with the Starduster's engine)
Ping! Ping!! Ping!!! -- Mother Box
She's such a chatterbox, sometimes...
User avatar
JamesPerrin
Looks like his avatar
Posts: 13695
Joined: April 5th, 2011, 8:09 pm
Location: W. Yorkshire
Contact:

Re: Fantastic Plastic 1/288 Starduster from Space Angel

Post by JamesPerrin »

Damm that’s annoying so close to the end. Looking good as it is though
Classic British Kits SIG Leader Better to fettle than to fill
(2024 A:B 5:2) (2023 13:8:7) (2022 21:11) (2021 15:8) (2020 8:4:4)
Post Reply

Return to “Real Space, Sci-Fi and What-iffery”