EB's bench ramblings
-
TeeELL

- Modelling Gent and Scholar
- Posts: 11634
- Joined: December 28th, 2015, 4:38 pm
- Location: North Wiltshire
Re: EB's bench ramblings
That’s looking good EBF.
Tony
The older I get the better I was!
Current build:
Airfix 1:72 Javelin FAW9
Particular modelling interests:
Cuban Airforce aircraft, 29(F) Sqn aircraft, Aircraft I’ve flown
The older I get the better I was!
Current build:
Airfix 1:72 Javelin FAW9
Particular modelling interests:
Cuban Airforce aircraft, 29(F) Sqn aircraft, Aircraft I’ve flown
-
Stuart

- Raider of the Lost Ark Royal
- Posts: 19451
- Joined: February 25th, 2013, 4:55 pm
- Location: North Wales
- Contact:
Re: EB's bench ramblings
Good progress on that Snipe EB
Stuart Templeton I may not be good but I'm slow...
My Blog: https://stuartsscalemodels.blogspot.com/
My Blog: https://stuartsscalemodels.blogspot.com/

-
Early Bird Fan

- Modelling Gent and Scholar
- Posts: 1808
- Joined: February 25th, 2020, 1:41 am
- Location: Hertfordshire
Re: EB's bench ramblings
thanks all for the comments and continued support, still not as active in here or on the bench as i'd like to be...life keeps getting in the way at the moment.
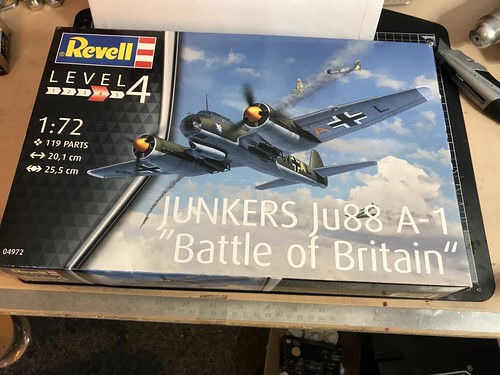
I ran out of .3mm drill bits while finishing off the rigging holes on the snipe so can't get to painting it just yet. To keep the build juices flowing i decided to make a start on my Revell Ju88, it looked a well detailed and interesting build so here's where i'm at so far...
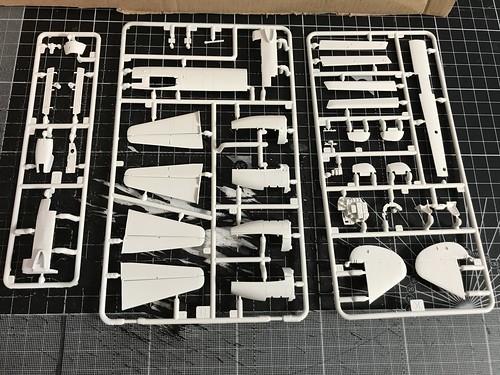
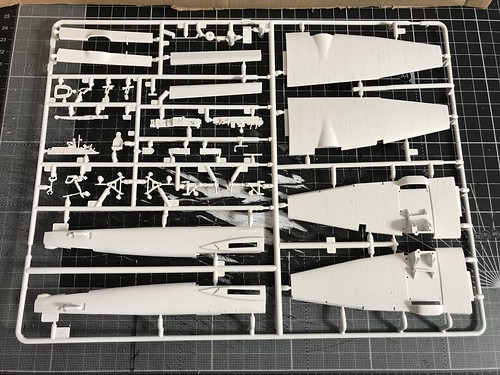
the obligatory box and sprue shots

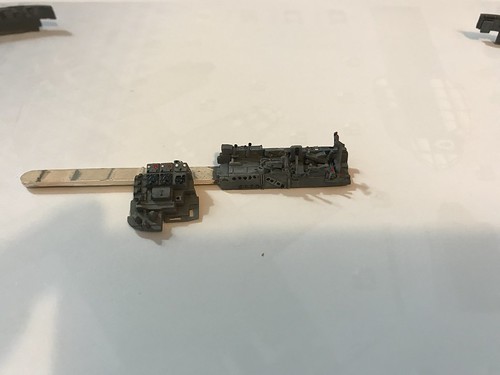
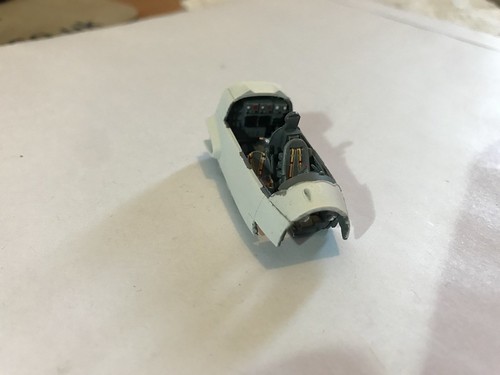
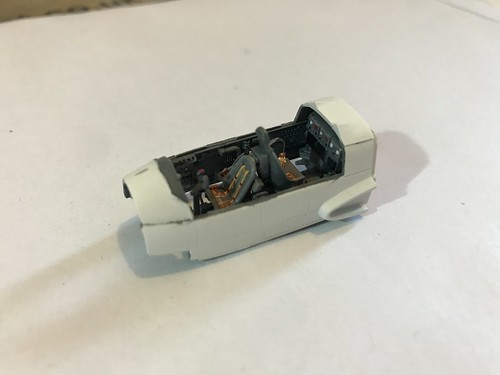
As usual the build started with the cockpit, for a 1/72 kit it has some lovely details. I dry brushed a slightly lighter shade of the interior grey to create some colour variation and pick out some details which worked well.
I opted to use the kit decals for the seatbelts, i'd recently received my new combo of micro set and sol so it seemed a good opportunity to try them out. The fit of the mechanics into the tub was pretty painless.

I've also got the wings assembled and have used them as a jig to dry fit and build up the undercarriage legs.
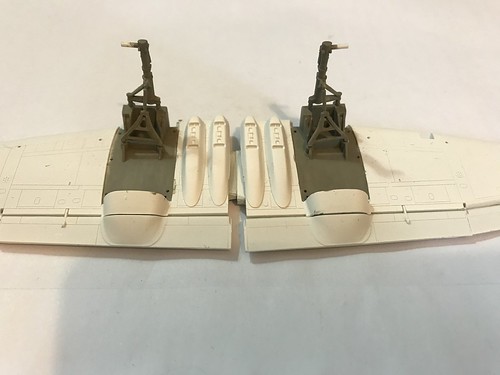
Just need to finish painting the tail wheel and the fuselage assembly process can begin
I ran out of .3mm drill bits while finishing off the rigging holes on the snipe so can't get to painting it just yet. To keep the build juices flowing i decided to make a start on my Revell Ju88, it looked a well detailed and interesting build so here's where i'm at so far...
the obligatory box and sprue shots
As usual the build started with the cockpit, for a 1/72 kit it has some lovely details. I dry brushed a slightly lighter shade of the interior grey to create some colour variation and pick out some details which worked well.
I opted to use the kit decals for the seatbelts, i'd recently received my new combo of micro set and sol so it seemed a good opportunity to try them out. The fit of the mechanics into the tub was pretty painless.
I've also got the wings assembled and have used them as a jig to dry fit and build up the undercarriage legs.
Just need to finish painting the tail wheel and the fuselage assembly process can begin
Current Builds:
Revell 1/48 S.e.5a
Revell 1/72 P-47 'bolt
Frog 1/72 Bleriot X1
Revell 1/48 S.e.5a
Revell 1/72 P-47 'bolt
Frog 1/72 Bleriot X1

Re: EB's bench ramblings
Should be interesting 
All models are equal. Some models are more equal than others.
Airfix Tribute Forum
Airfix Tribute Forum
-
iggie

- Modelling Gent and Scholar
- Posts: 23438
- Joined: July 31st, 2013, 11:04 am
- Location: North Somercotes, Lincolnshire
- Contact:
Re: EB's bench ramblings
Nice start on the Ju-88 

Best wishes
Jim
If you can walk away from a landing, it's a good landing. If you use the airplane the next day, it's an outstanding landing
"Never put off till tomorrow, what you can do the day after tomorrow"
Jim
If you can walk away from a landing, it's a good landing. If you use the airplane the next day, it's an outstanding landing
"Never put off till tomorrow, what you can do the day after tomorrow"
-
Lone Modeller
- Modelling Gent and Scholar
- Posts: 5345
- Joined: April 1st, 2013, 6:45 pm
Re: EB's bench ramblings
Good start on the Ju 88. But er...where is the spare wing?
-
VickersVandal

- Modelling Gent and Scholar
- Posts: 5044
- Joined: October 4th, 2012, 3:37 am
- Location: Sydney, Australia
Re: EB's bench ramblings
The snipe is looking very fine, sir. Do you use full through holes for the rigging? I used to but the clean up drove me insane. I now drill partly into the wing so there is a locating/anchor point for the rigging line, then I cut it about 0.5mm over length so it sits in the hole at each end and there is some freedom to allow me to tension it.
Must.....build....ALL the Sopwith Camels!...
My Biggles Model display website: https://tinyurl.com/y74ydzae
My Biggles Model display website: https://tinyurl.com/y74ydzae
-
Early Bird Fan
- Modelling Gent and Scholar
- Posts: 1808
- Joined: February 25th, 2020, 1:41 am
- Location: Hertfordshire
Re: EB's bench ramblings
the last few models (including this one) i drilled all the way through, i stop painting the wing surfaces when there's one more coat to go then assemble it all including rigging. Then once rigging is complete i finish the paint job, that makes it feel more like i'm completing the model rather than doing touch ups. I have thought about not drilling all the way through but i'm paranoid about the rigging pulling out the holesVickersVandal wrote: ↑April 9th, 2022, 10:29 pm The snipe is looking very fine, sir. Do you use full through holes for the rigging? I used to but the clean up drove me insane. I now drill partly into the wing so there is a locating/anchor point for the rigging line, then I cut it about 0.5mm over length so it sits in the hole at each end and there is some freedom to allow me to tension it.
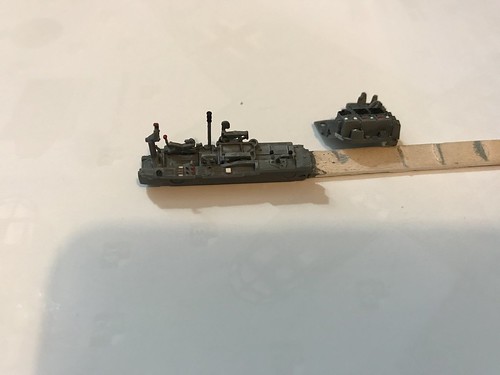
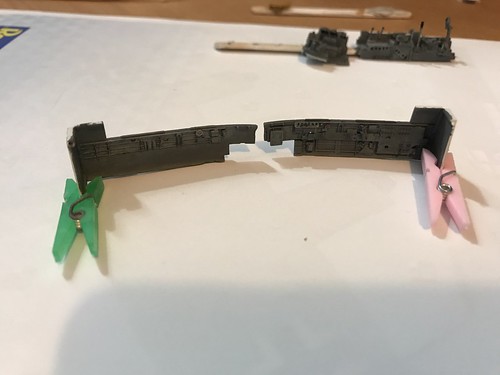
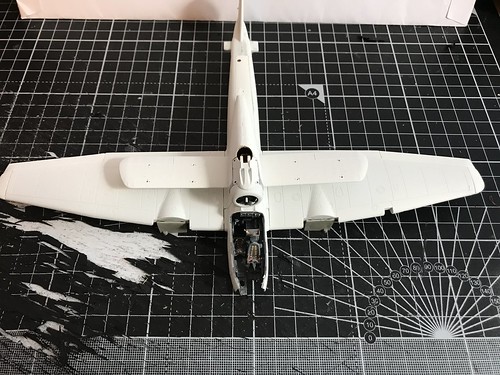
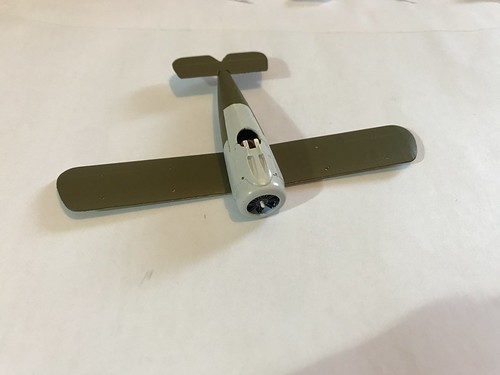
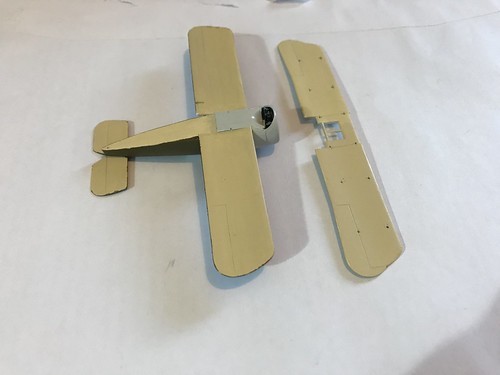
Had a bit of bench time today so have assembled a few things, engine and shroud is fitted to the snipe so the paint process can begin, also got the 88 largely assembled. There's a few small gaps that need filling on the 88, mainly in the wing root areas but for the most part it went together very nicely.
Just for LM i made sure the pics had the correct amount of wings in shot
Current Builds:
Revell 1/48 S.e.5a
Revell 1/72 P-47 'bolt
Frog 1/72 Bleriot X1
Revell 1/48 S.e.5a
Revell 1/72 P-47 'bolt
Frog 1/72 Bleriot X1
-
VickersVandal
- Modelling Gent and Scholar
- Posts: 5044
- Joined: October 4th, 2012, 3:37 am
- Location: Sydney, Australia
Re: EB's bench ramblings
Early Bird Fan wrote: ↑April 9th, 2022, 11:16 pm Just for LM i made sure the pics had the correct amount of wings in shot
For the record, I don't think I've ever once had a rigging line pull out of an anchor hole. When I bond to flat surfaces they regularly detach but they lock tight into the holes.
Must.....build....ALL the Sopwith Camels!...
My Biggles Model display website: https://tinyurl.com/y74ydzae
My Biggles Model display website: https://tinyurl.com/y74ydzae
-
Stuart
- Raider of the Lost Ark Royal
- Posts: 19451
- Joined: February 25th, 2013, 4:55 pm
- Location: North Wales
- Contact:
Re: EB's bench ramblings
Very cool!
Stuart Templeton I may not be good but I'm slow...
My Blog: https://stuartsscalemodels.blogspot.com/
My Blog: https://stuartsscalemodels.blogspot.com/
-
JamesPerrin

- Looks like his avatar
- Posts: 13695
- Joined: April 5th, 2011, 8:09 pm
- Location: W. Yorkshire
- Contact:
Re: EB's bench ramblings
Great detail in the cockpit.
Classic British Kits SIG Leader Better to fettle than to fill
(2024 A:B 5:2) (2023 13:8:7) (2022 21:11) (2021 15:8) (2020 8:4:4)
(2024 A:B 5:2) (2023 13:8:7) (2022 21:11) (2021 15:8) (2020 8:4:4)
-
Lone Modeller
- Modelling Gent and Scholar
- Posts: 5345
- Joined: April 1st, 2013, 6:45 pm
Re: EB's bench ramblings
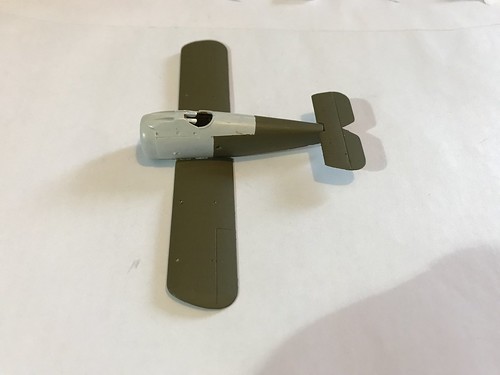
Is that a Mistel variant?
-
skypirate

- Modelling Gent and Scholar
- Posts: 7303
- Joined: May 1st, 2011, 6:13 am
- Location: Port Macquarie, Australia
Re: EB's bench ramblings
Lovely cockpit details!
Well done!
David
Well done!
David
-
Early Bird Fan
- Modelling Gent and Scholar
- Posts: 1808
- Joined: February 25th, 2020, 1:41 am
- Location: Hertfordshire
Re: EB's bench ramblings
thanks all for the comments, the paintwork on the Snipe i now 99% done, a couple of small bleeds but managed to scrape the worst of it off and will do any touch-ups at the end of the build. I added some dark earth to the olive drab to make it a bit browner, not sure if it really shows but it doesn't look horrendous so all good
Just need to paint the top surface of the upper wing and then the paint is all done...for now...
Just need to paint the top surface of the upper wing and then the paint is all done...for now...
Current Builds:
Revell 1/48 S.e.5a
Revell 1/72 P-47 'bolt
Frog 1/72 Bleriot X1
Revell 1/48 S.e.5a
Revell 1/72 P-47 'bolt
Frog 1/72 Bleriot X1