Mark_75's modelling workspace!
-
ShaunW
- NOT the sheep
- Posts: 26188
- Joined: November 26th, 2011, 6:11 pm
- Location: Pontefract West Yorkshire
Re: Mark_75's modelling workspace!
The Seahawk is a handsome float plane though, Mark and in some ways it reminds me of a Nakajima "Rufe" which was essentially a Mitsubishi Zero on floats.
Doing - Tamiya 1/35th Universal Carrier.
Work is the curse of the modelling classes!
IPMS#12300
Work is the curse of the modelling classes!
IPMS#12300
-
Markh_75

- Modelling Gent and Scholar
- Posts: 1112
- Joined: July 3rd, 2020, 5:38 pm
- Location: South Lanarkshire, Scotland.
Re: Mark_75's modelling workspace!
Yes, that’s the one I was thinking about, although I couldn’t remember the name!ShaunW wrote:The Seahawk is a handsome float plane though, Mark and in some ways it reminds me of a Nakajima "Rufe" which was essentially a Mitsubishi Zero on floats.
Twas Blollig and the Shalomey Touves didst gear and grumble in the wardrobe!
-
Markh_75
- Modelling Gent and Scholar
- Posts: 1112
- Joined: July 3rd, 2020, 5:38 pm
- Location: South Lanarkshire, Scotland.
Re: Mark_75's modelling workspace!
Greetings, fellow modellers! 
Havent been able to do much modelling over the past few days, was not very well, but feeling a bit better now.
Today i was able to get the decals done on the C-47, and on the little Seahawk, (pictures and comments on the Seahawk to follow, once its been matted down, but it looks great!). Only issues i had with the decals on the C-47 was the large decal on the port side behind the cockpit and the star and bars under the wing. the one under the wing left a bit of the decal on the paper, tried to release it but it wasnt playing my game; i didnt bin the decal though, i managed to fit it and afterwards i found a similarly coloured decal and cut a little off it, i used that to cover over the torn part. Good repair! The one on the side of the fuselage was fine but there is a small air intake on the side of the fuselage and the decal had to conform to it; lots of Micro-sol and it was behaving itself! They went on rather well considering this is not a new kit!


I found it quite alot easier to apply the decals before the wings were fitted on this build, i did the same when i built my Privateer last year. Over all i'm very pleased with this one even though its not quite finished yet, got the landing gear, antennas, pitot, exhaust pipes to fit and one or two little areas at the nacelles/wings to tidy. The wings went on very nicely indeed. Always good when things happen like this, dont know where i got my patience to repair the decal and taking my time with the big side decal but i got it in the end!
Havent been able to do much modelling over the past few days, was not very well, but feeling a bit better now.
Today i was able to get the decals done on the C-47, and on the little Seahawk, (pictures and comments on the Seahawk to follow, once its been matted down, but it looks great!). Only issues i had with the decals on the C-47 was the large decal on the port side behind the cockpit and the star and bars under the wing. the one under the wing left a bit of the decal on the paper, tried to release it but it wasnt playing my game; i didnt bin the decal though, i managed to fit it and afterwards i found a similarly coloured decal and cut a little off it, i used that to cover over the torn part. Good repair! The one on the side of the fuselage was fine but there is a small air intake on the side of the fuselage and the decal had to conform to it; lots of Micro-sol and it was behaving itself! They went on rather well considering this is not a new kit!
I found it quite alot easier to apply the decals before the wings were fitted on this build, i did the same when i built my Privateer last year. Over all i'm very pleased with this one even though its not quite finished yet, got the landing gear, antennas, pitot, exhaust pipes to fit and one or two little areas at the nacelles/wings to tidy. The wings went on very nicely indeed. Always good when things happen like this, dont know where i got my patience to repair the decal and taking my time with the big side decal but i got it in the end!
Twas Blollig and the Shalomey Touves didst gear and grumble in the wardrobe!
-
Clashcityrocker

- Modelling Gent and Scholar
- Posts: 10823
- Joined: May 1st, 2011, 12:31 am
- Location: Adelaide. South Australia
Re: Mark_75's modelling workspace!
Coming along nicely.
Nigel
Nigel
-
Markh_75
- Modelling Gent and Scholar
- Posts: 1112
- Joined: July 3rd, 2020, 5:38 pm
- Location: South Lanarkshire, Scotland.
Re: Mark_75's modelling workspace!
Been busy today!
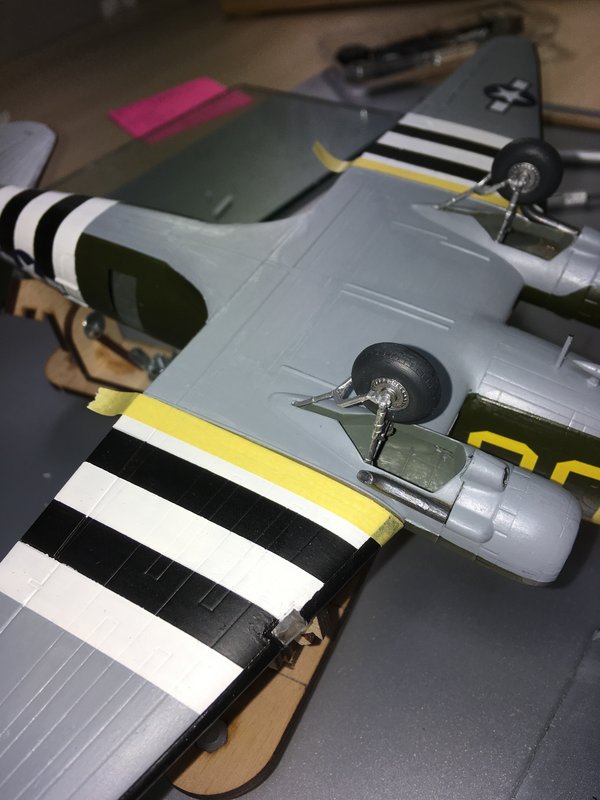
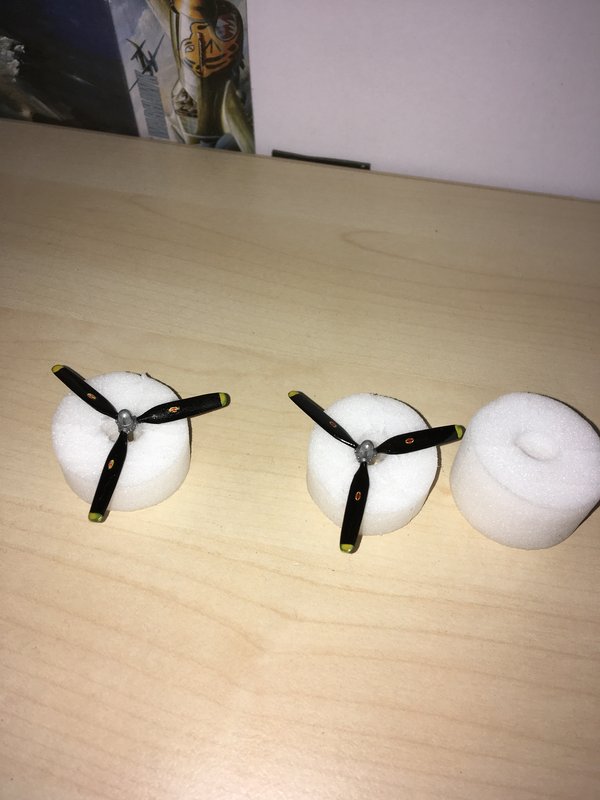
Got the finals done on the Seahawk and put it away in the cabinet, got 99.99% complete on the C-47 but on closer inspection i noticed that the one side of the little 'fences' on the underwings they are bare. Its where the wing joins to the fuselage and centre wing section; quick mask and ran some grey down it. The props in the last picture are for the C-47.
Tomorrow i'll remove the tape and then matt it down, pencil in some surface features and i'll even let y'all see it! 
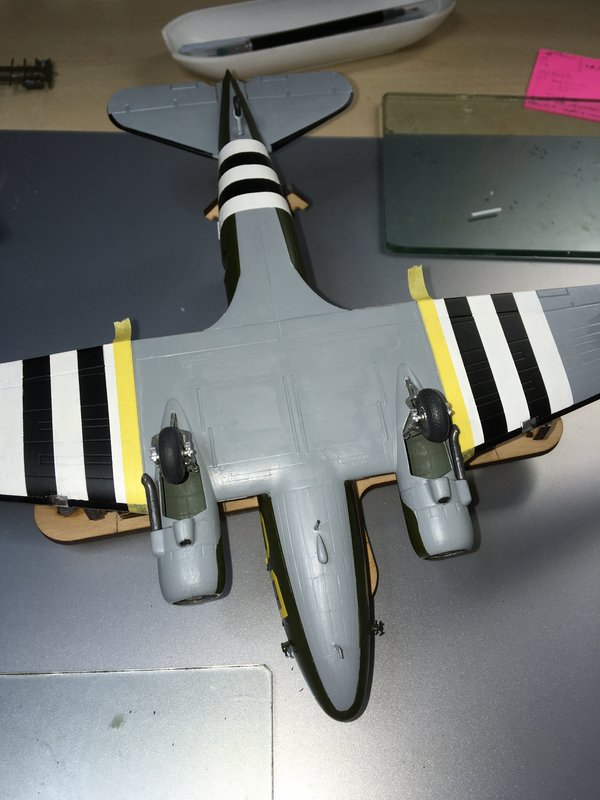
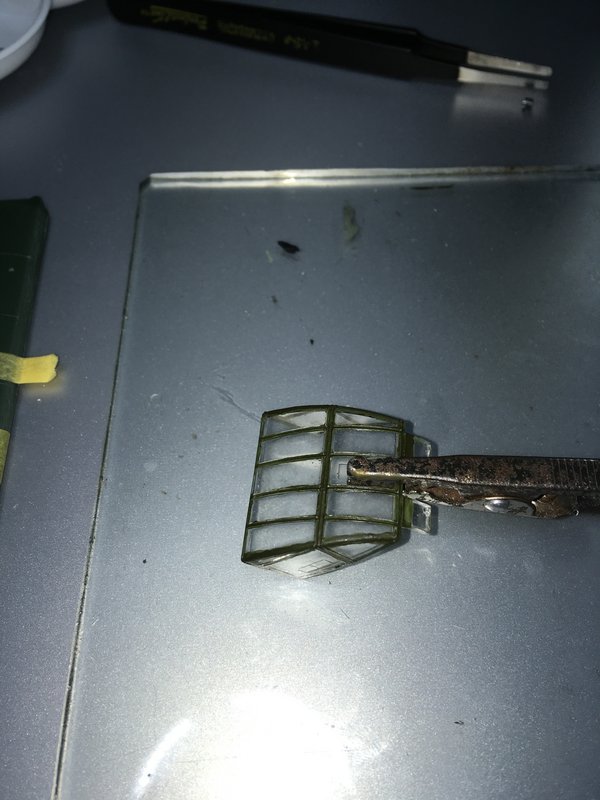
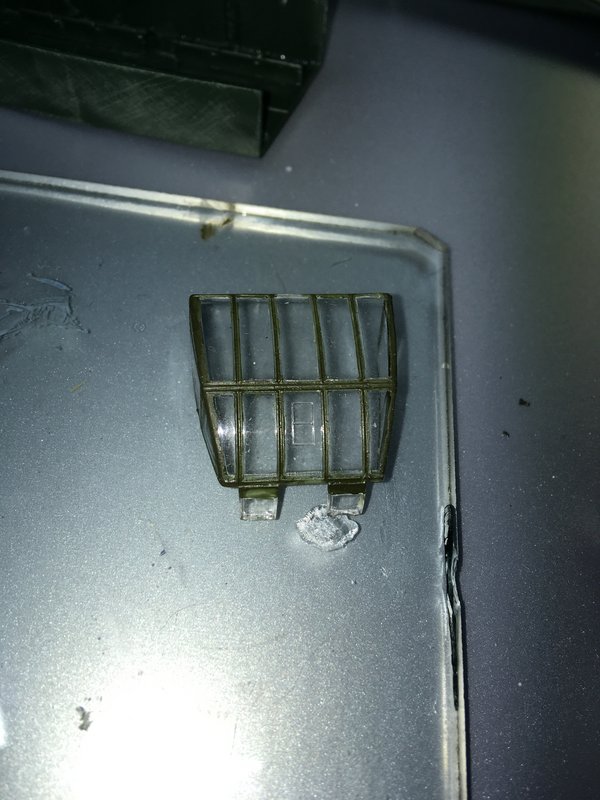
Started on the Waco CG4A glider during the week but i was preoccupied with finishing the C-47 and the Seahawk. The cockpit canopy has three coats of paint on the panel lines; normally canopies need up to two coats but this one being rather a greenhouse and lots of flat side area needs just that bit more.
I fitted the porthole windows in the fuselage and in the door panels, and then fitted the doors.
I also started masking off the wings, on the C-47 i did it the other way around and painted the black stripes first (why? i dont know), this time i'll paint the white ones first. I'll mask the fuselage once its all assembled. A small departure on this build is that i'm not going to prime it, because there are so many little portholes and door openings that it would be quite awkward to prime it first; it has a 'textured' surface on the outside so i think it'll be okay for coverage.


Not far to go now with the F1 USAAF tanker, wheels on, i'll fit the tanker body to the chassis first and then fit the tandem axles to the chassis.
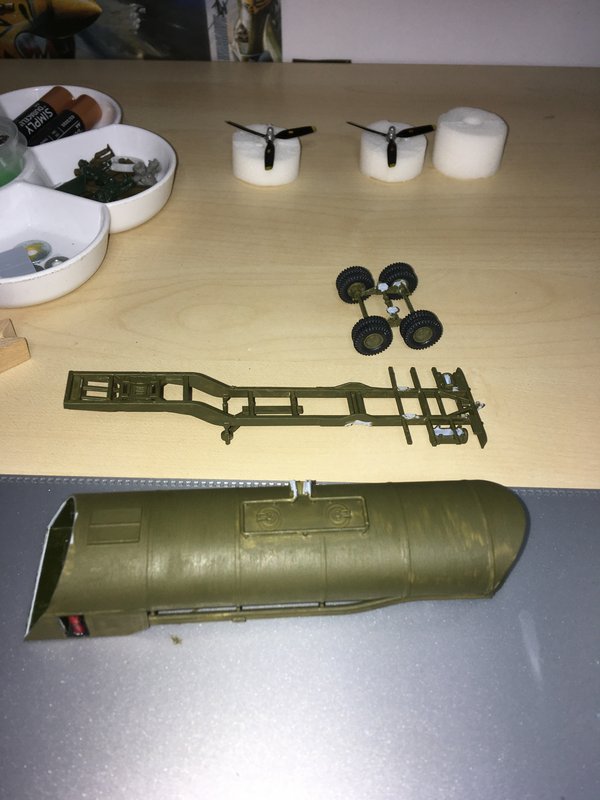
The props are for the C-47.
Thats all i've done today.

Got the finals done on the Seahawk and put it away in the cabinet, got 99.99% complete on the C-47 but on closer inspection i noticed that the one side of the little 'fences' on the underwings they are bare. Its where the wing joins to the fuselage and centre wing section; quick mask and ran some grey down it. The props in the last picture are for the C-47.
Tomorrow i'll remove the tape and then matt it down, pencil in some surface features and i'll even let y'all see it!
Started on the Waco CG4A glider during the week but i was preoccupied with finishing the C-47 and the Seahawk. The cockpit canopy has three coats of paint on the panel lines; normally canopies need up to two coats but this one being rather a greenhouse and lots of flat side area needs just that bit more.
I fitted the porthole windows in the fuselage and in the door panels, and then fitted the doors.
I also started masking off the wings, on the C-47 i did it the other way around and painted the black stripes first (why? i dont know), this time i'll paint the white ones first. I'll mask the fuselage once its all assembled. A small departure on this build is that i'm not going to prime it, because there are so many little portholes and door openings that it would be quite awkward to prime it first; it has a 'textured' surface on the outside so i think it'll be okay for coverage.
Not far to go now with the F1 USAAF tanker, wheels on, i'll fit the tanker body to the chassis first and then fit the tandem axles to the chassis.
The props are for the C-47.
Thats all i've done today.
Twas Blollig and the Shalomey Touves didst gear and grumble in the wardrobe!
-
ShaunW
- NOT the sheep
- Posts: 26188
- Joined: November 26th, 2011, 6:11 pm
- Location: Pontefract West Yorkshire
Re: Mark_75's modelling workspace!
That C-47 is really looking excellent, Mark.
Doing - Tamiya 1/35th Universal Carrier.
Work is the curse of the modelling classes!
IPMS#12300
Work is the curse of the modelling classes!
IPMS#12300
-
Markh_75
- Modelling Gent and Scholar
- Posts: 1112
- Joined: July 3rd, 2020, 5:38 pm
- Location: South Lanarkshire, Scotland.
Re: Mark_75's modelling workspace!
Thank you Shaun!
Between getting the C-47 finished (its already in my cabinet!), i attended the doctors for a blood test, did some housework, and i did some more on the Glider and Fuel tanker!
I cleaned the lines on the cockpit canopy, and installed the bench seating; boy was that fiddly! Every leg has a particular place and there are bench seats on both sides of the fuselage, so i had to do the other side in reverse order, of course they are so tiny i lost one or two and substituted with other plastic. But i got them in; next job is to start painting the interior of the glider, and add the rest of the fiddly bits to the cockpit!
I also checked and fitted the tanker body to its chassis, a bit more painting required for that! I didnt do any more after dinner, i've done enough today! Everything in moderation!
Twas Blollig and the Shalomey Touves didst gear and grumble in the wardrobe!

Re: Mark_75's modelling workspace!
Very nice C-47. The Seahawk too. Will be nice to see it with the next coats of paint on.
Paul
This is it. The moment we should have trained for.
This is it. The moment we should have trained for.
-
Markh_75
- Modelling Gent and Scholar
- Posts: 1112
- Joined: July 3rd, 2020, 5:38 pm
- Location: South Lanarkshire, Scotland.
Re: Mark_75's modelling workspace!
Kept busy today, and came a step closer with the glider!
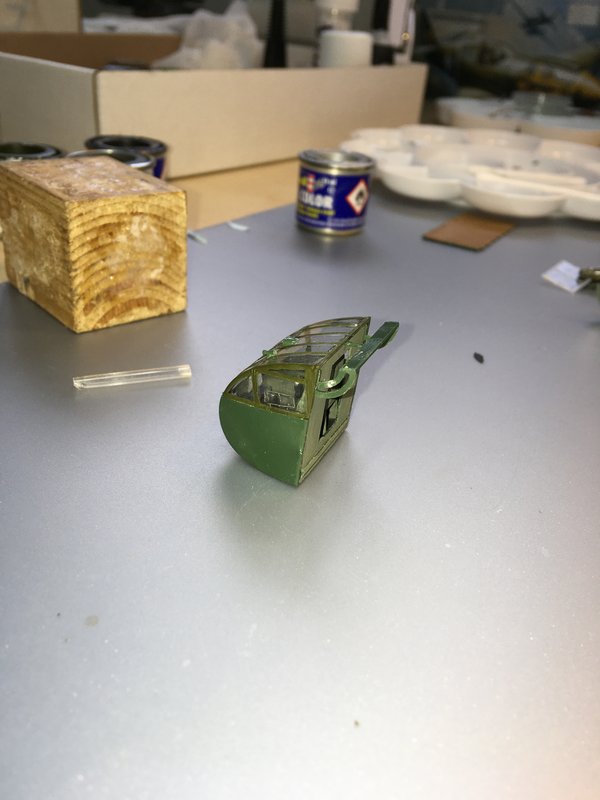
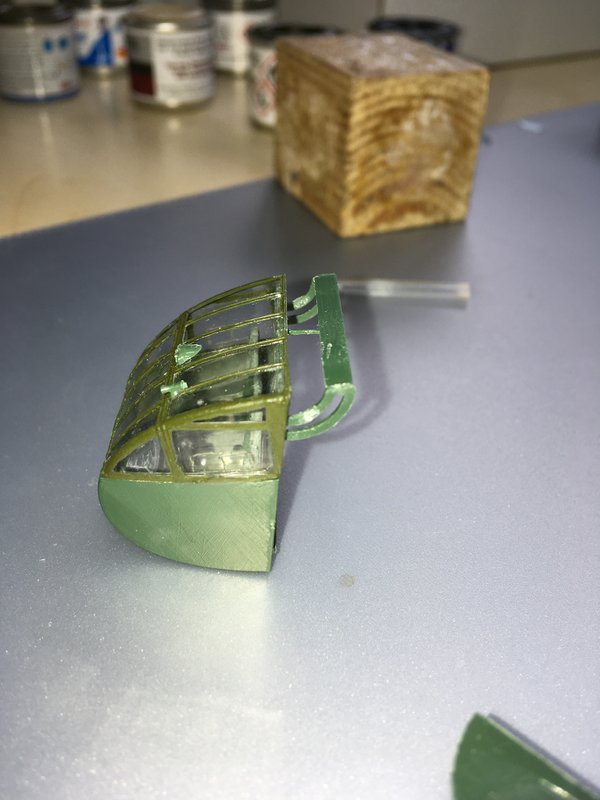
I painted the interior of the fuselage, the benches, walls and floor, and fitted the clear canopy to the lower half of the cockpit, but first of all i fitted the two sliding brackets and the brace for them. The pitot is on (rather tiny part for my big 'bunch of banana' hands! ), i also fitted the little bulge that is the tow hook point and then got the parts for an aerial but the parts are so thin and the plastic is a tad softer, one part broke; i fixed it but then decided i'd make the assembly from wire instead; it'll be much stronger for a delicate part that sticks out!
I made sure the floor panel would fit the fuselage and carefully trimmed the opening for the square window in the top of the rear fuselage. I then had a test of the brackets on the stops in the fuselage and found them to be woefully short!
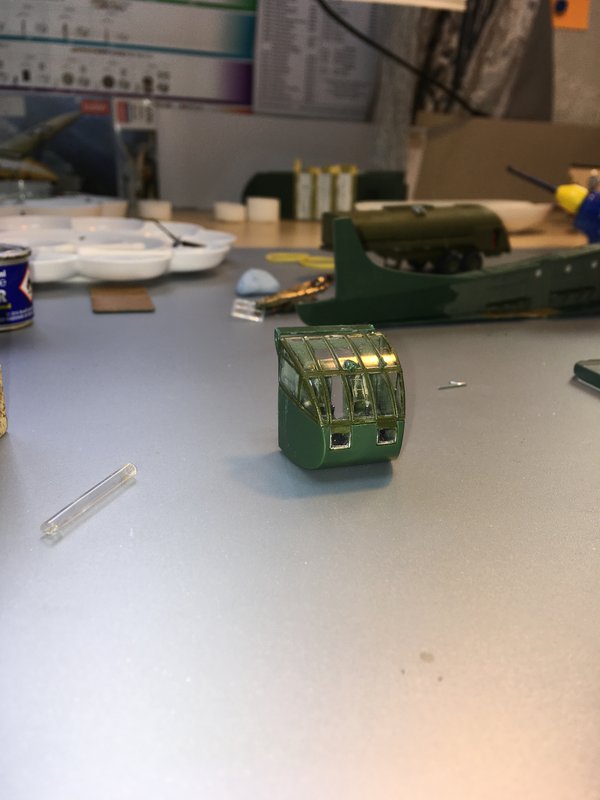
My solution is to use two metal sewing pins, cut to size and cut of the existing lugs so that i could drill a hole through the fuselage and insert the pins; they're cut to length so they meet in the middle and i'll either supergloop them together OR find a little sleeve! I'll glue the pins in at the fuselage, they dont have to spin or move. This solution is far better because it means the cockpit can go on later! The cockpit on this model can swing upwards, opening the fuselage. When they used these gliders they could fit a jeep inside it as long as the benches were folded away, the would lift the tail of the glider, swing the cockpit up outta the way and drive out! There are also two doors in both sides of the fuselage, under and behind the wing chord in case the glider crashed on landing (often they did!), at least the guys inside could escape out the sides!

I glued in the square window in the rear of the fuselage and checked the fit of the fuselage halves, all looking good; glue time! The square window wasnt fitting in the other side of the fuselage, was leaning inwards, i dont have a clamp that will reach away in there so my longer tweezers were ideal to raise the glass up so i could get some sticky stuff around it! I kept them closed tight with a croc clip while the glue dries. I'll remove the tweezers soon but leave the tape on overnight.


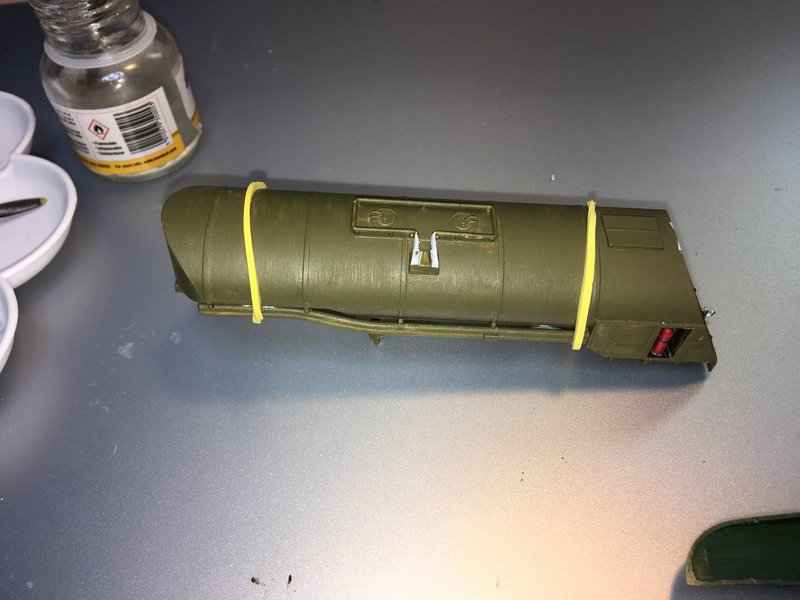
I also did some more on the F1 tanker, yesterday i attached the tanker body to the chassis so today i fitted the tandem axle bogey to the chassis and left it sitting on its wheels.

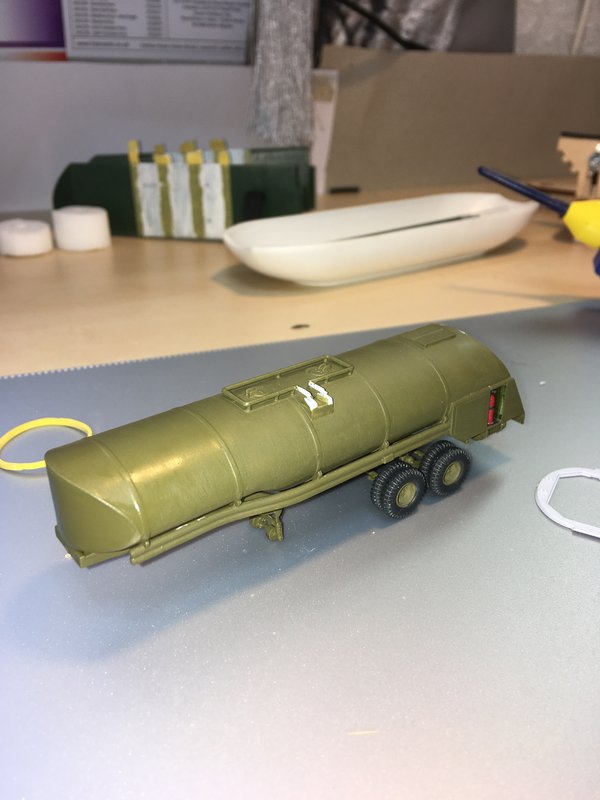
I fitted the rear panel and done some more painting. I'm displaying this with the door halves open, and each door has two halves so i've bet the doors along a line in the plastic, i need to paint them and fit decals on them so they will probably be one of the last things to fit. I also have a later to fit to it but there are decals that fit along the sides of the tanker; i'll leave the later off until the decals are on, but i'll have it painted, ready.

Looks much more like a Tanker now! Painted the tow hook at the back with iron metallic and the king-pin and slides, underneath. Got plenty to do on the glider and some research to do, so i havent decided what i will start building next! 
I painted the interior of the fuselage, the benches, walls and floor, and fitted the clear canopy to the lower half of the cockpit, but first of all i fitted the two sliding brackets and the brace for them. The pitot is on (rather tiny part for my big 'bunch of banana' hands!
I made sure the floor panel would fit the fuselage and carefully trimmed the opening for the square window in the top of the rear fuselage. I then had a test of the brackets on the stops in the fuselage and found them to be woefully short!
My solution is to use two metal sewing pins, cut to size and cut of the existing lugs so that i could drill a hole through the fuselage and insert the pins; they're cut to length so they meet in the middle and i'll either supergloop them together OR find a little sleeve! I'll glue the pins in at the fuselage, they dont have to spin or move. This solution is far better because it means the cockpit can go on later!
I glued in the square window in the rear of the fuselage and checked the fit of the fuselage halves, all looking good; glue time! The square window wasnt fitting in the other side of the fuselage, was leaning inwards, i dont have a clamp that will reach away in there so my longer tweezers were ideal to raise the glass up so i could get some sticky stuff around it! I kept them closed tight with a croc clip while the glue dries. I'll remove the tweezers soon but leave the tape on overnight.
I also did some more on the F1 tanker, yesterday i attached the tanker body to the chassis so today i fitted the tandem axle bogey to the chassis and left it sitting on its wheels.
I fitted the rear panel and done some more painting. I'm displaying this with the door halves open, and each door has two halves so i've bet the doors along a line in the plastic, i need to paint them and fit decals on them so they will probably be one of the last things to fit. I also have a later to fit to it but there are decals that fit along the sides of the tanker; i'll leave the later off until the decals are on, but i'll have it painted, ready.
Looks much more like a Tanker now! Painted the tow hook at the back with iron metallic and the king-pin and slides, underneath. Got plenty to do on the glider and some research to do, so i havent decided what i will start building next!
Twas Blollig and the Shalomey Touves didst gear and grumble in the wardrobe!
-
ShaunW
- NOT the sheep
- Posts: 26188
- Joined: November 26th, 2011, 6:11 pm
- Location: Pontefract West Yorkshire
Re: Mark_75's modelling workspace!
That Waco sounds like a bit of a challenge in parts, Mark, but it's coming together nicely and will look great paired up with your C-47. Great work with that tanker semi-trailer and I'm sure the finished rig will look excellent.
Doing - Tamiya 1/35th Universal Carrier.
Work is the curse of the modelling classes!
IPMS#12300
Work is the curse of the modelling classes!
IPMS#12300
-
Markh_75
- Modelling Gent and Scholar
- Posts: 1112
- Joined: July 3rd, 2020, 5:38 pm
- Location: South Lanarkshire, Scotland.
Re: Mark_75's modelling workspace!
Thanks Shaun; i'm watching "Dropzone Normandy" just now and i will have to buy a Horsa glider too; some units of lX Troop Carrier Command went to war in Horsas, all marked in stars and bars! So i'll keep my eyes open for one!
I built a CG4A years back but this will be even better, yes its quite challenging in places but i have the time, if i dont feel like doing anything on it; i dont touch it, if i'm inspired enough i'll do bits at a time until its finished!
I built a CG4A years back but this will be even better, yes its quite challenging in places but i have the time, if i dont feel like doing anything on it; i dont touch it, if i'm inspired enough i'll do bits at a time until its finished!
Twas Blollig and the Shalomey Touves didst gear and grumble in the wardrobe!
-
Dazzled

- Modelling Gent and Scholar
- Posts: 9592
- Joined: October 1st, 2011, 11:08 pm
- Location: Mid Glamorgan, South Wales
- Contact:
Re: Mark_75's modelling workspace!
Great update Mark. Lots going on and some amazing progress 
COLD WAR S.I.G. LEADER
Wherever there's danger, wherever there's trouble, wherever there's important work to be done....I'll be somewhere else building a model!
Wherever there's danger, wherever there's trouble, wherever there's important work to be done....I'll be somewhere else building a model!
-
Markh_75
- Modelling Gent and Scholar
- Posts: 1112
- Joined: July 3rd, 2020, 5:38 pm
- Location: South Lanarkshire, Scotland.
Re: Mark_75's modelling workspace!
Cheers for that; the paint you sent will be used for the glider as well as the tanker; had a good look around online for the correct colour for it and the places i have looked its def the same shade of OD!Dazzled wrote:Great update Mark. Lots going on and some amazing progress
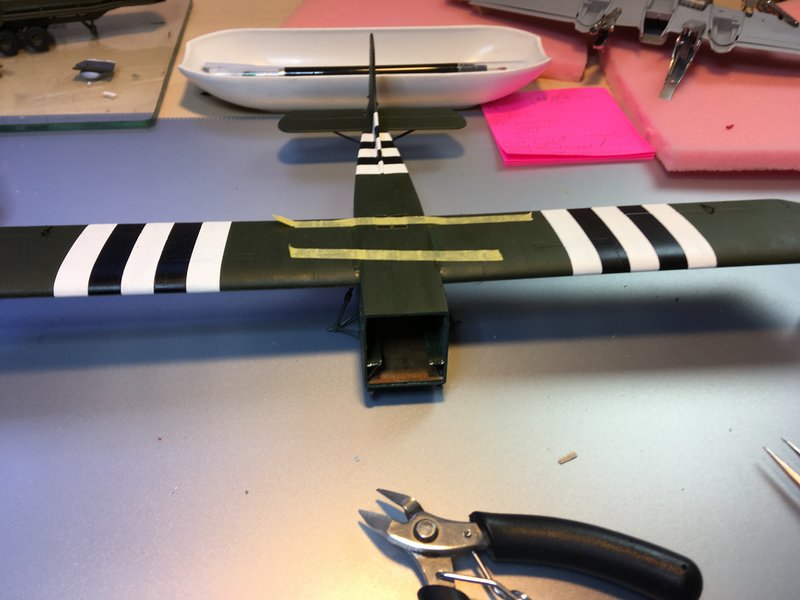
The fuselage is set so i removed the tape and clamps and got down to masking the fuselage for the invasion stripes! The ones on the wings were easy as they were 10mm and easy to mask but the tail ones were to be 8mm (6mm and 2mm tape). The fuselage is sure in section but tapers not far from the rear of the wing roots and keeps on tapering, add to that the tail fillet also has the stripes; lots of nice straight lines but care needed not to stretch the tape too much. I kept the tape as loose as possible at the corners and only pinched them one each straight line was on and pressed down. Worked out very nicely too. Once finished masking i cave the white stripes their first coat and the ones on the wings their third and final coat!
I then touched in some areas on the tanker; i'll start applying Klear on the tanker tomorrow but i still need to paint the two double doors!


Twas Blollig and the Shalomey Touves didst gear and grumble in the wardrobe!
-
Markh_75
- Modelling Gent and Scholar
- Posts: 1112
- Joined: July 3rd, 2020, 5:38 pm
- Location: South Lanarkshire, Scotland.
Re: Mark_75's modelling workspace!
Its been a few days; lots going on, health playing up, and then resting and enjoying weather (when it eventually warms up!) but i have been able to do a bit at the bench!
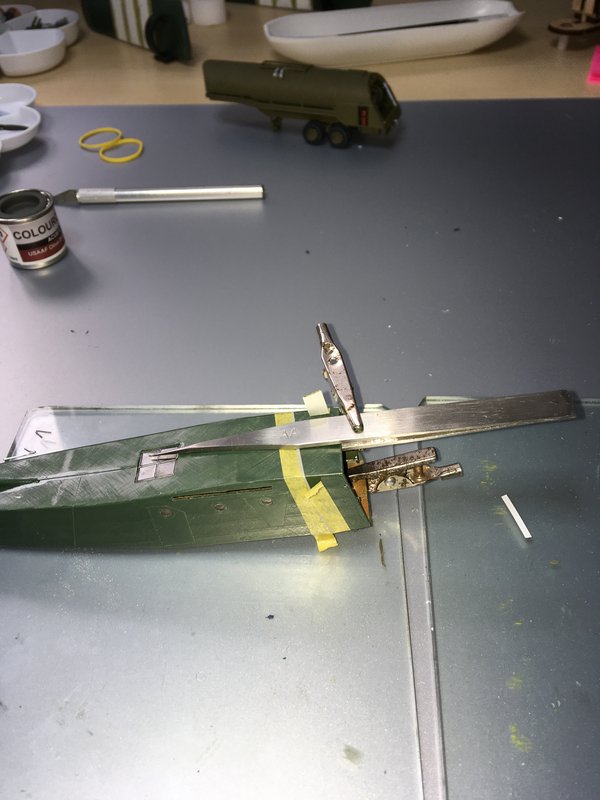
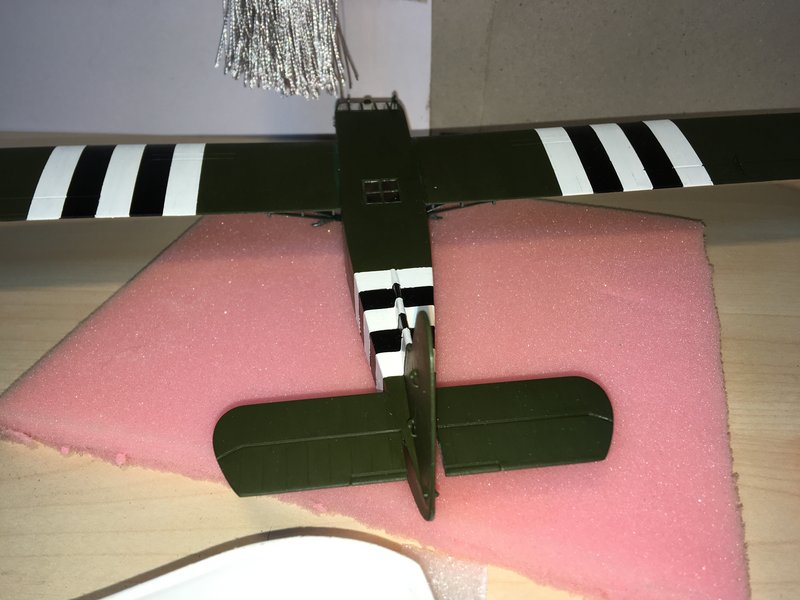
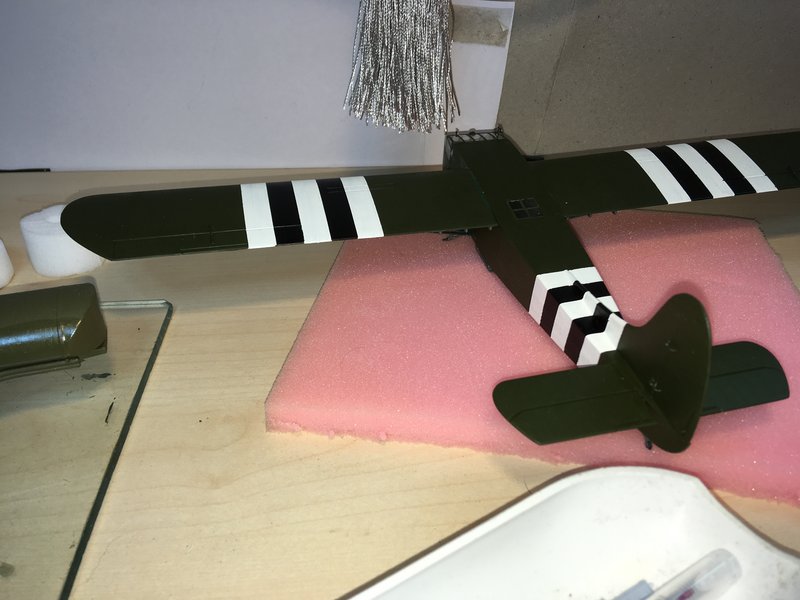
The CG4A is coming on VERY nicely indeed! Had a few tricky moments with it, with one or two bits of remedial 'surgery' carried out! Today i decided to fit the wings! I had some 'surgery' to do on the landing gear leg on one side where i had to cut the main strut at the wheel hub and carefully splice in a tiny spacer about 1mm long to true it up as it was sitting to one side! This happened last time i made one of these too but this time i knew wot to do! I also did a little surgery on the tailwheel and its support because horrors of horrors i thought the glider was needing more work on the other landing gear but it was because the fuselage being a square section was sitting on one of the skids and the tailwheel wasnt touching the ground, i carefully cut the apex of the supporting V at the tailwheel, and gently 'encouraged' the tailwheel leg to lean back a bit more, i then re-glued and left it to dry. Sorted!
I used two paint tins to level the wings up and then tested with a spirit level! I made sure the new desk is sitting flat and level too when i set the table up! I set the wings in place at the roots and then painted on some poly and left it to dry a bit; i also used a couple of bits of masking tape to pull the wings toward each other making the seam nice and tight and left it to fully set. And then it was time to fit the wing struts; i envisaged a nightmare but in fact i decided to fit the little spacer struts to the large one first, and then started fitting the struts to the wing with this small one first, then the two outer ends and finally getting the exact spot, i glued the apex of the two main struts to the fuselage.


I've got the nose on it now too, took some time and patience to get it to fit right but its now on and it opens up (with care). Just a few little bits of painting to do and then the wheels! Then its off to the 'decals and varnish dept'!

I was watching a film on Youtube the other day called DZ Normandy, and learned that the 9th USAAF TCC also operated and maintained Horsa gliders; so i have one on order, it will be wearing USAAF livery when its complete! That'll be interesting!
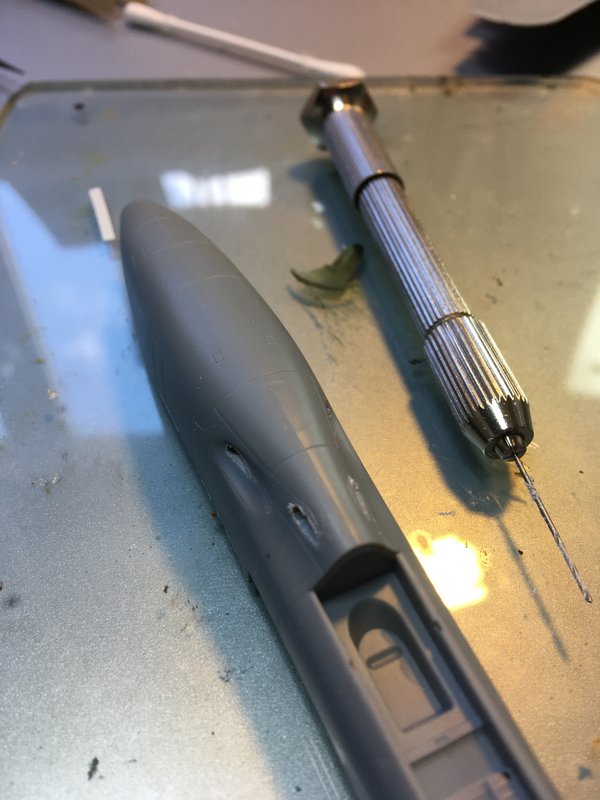
I also started my next project; i bought it last year and its been in the stash for a few mumphs since, but the Hobbyboss P-61B Black Widow is a very nice model to build. Hobbyboss have made a very nice set of moulds and everything just seems to click into place with very minimal 'engineering!
Its actually a dream to assemble, and i'm really enjoying it!


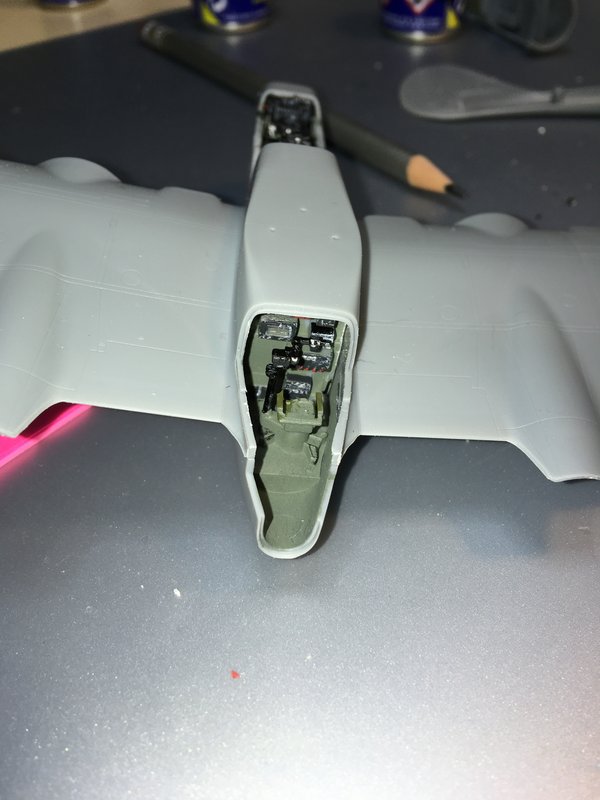
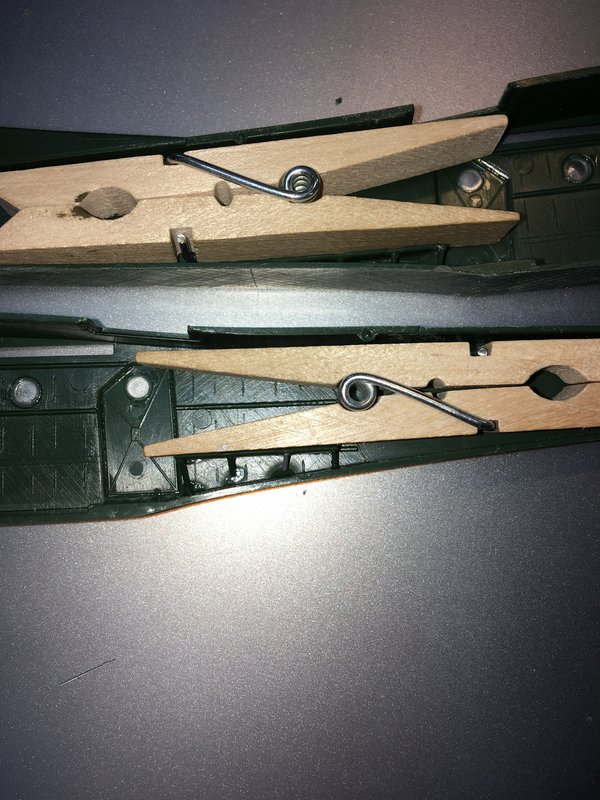
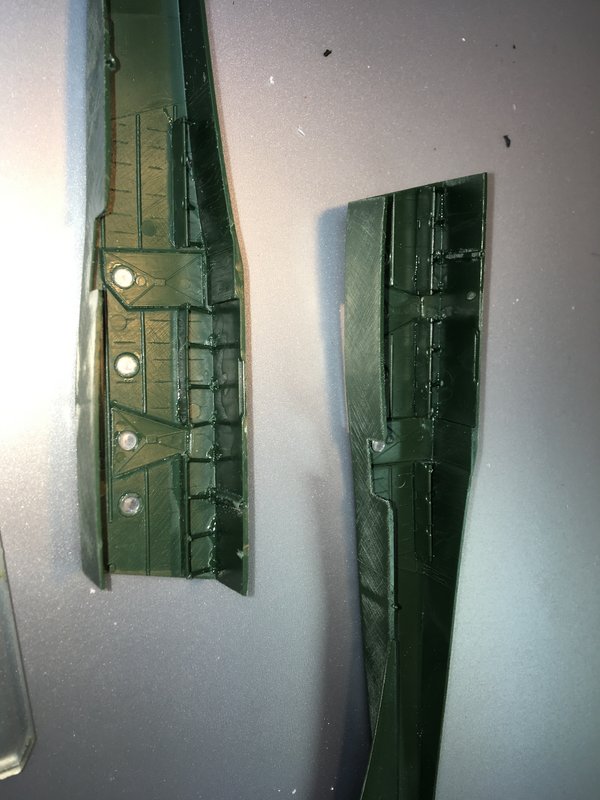
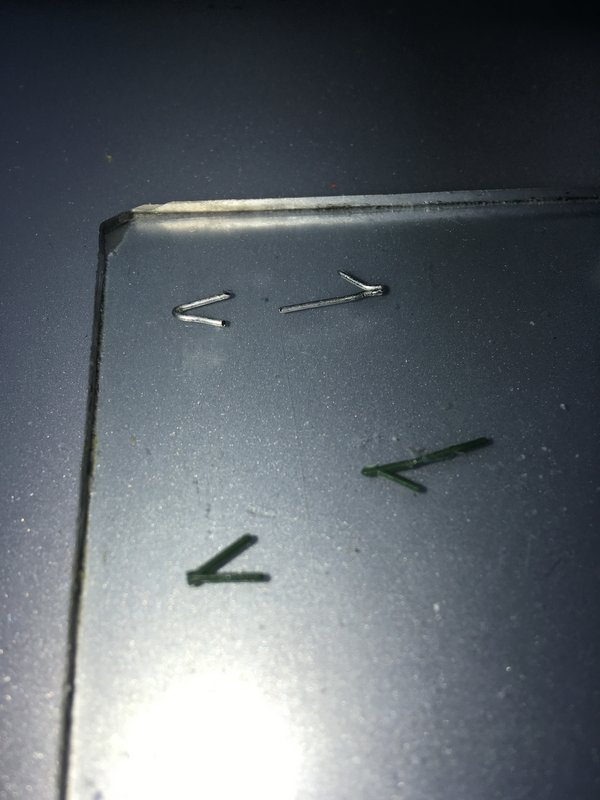
Only thing that i didnt like was the side fitting gun barrels on the underside, but you know me and drilling 'oles! I drilled them right through and i'll fit lengths of sewing pins in each slot. Got the landing gear painted, the wheels are looking nice but having some bother getting the engines into the cowlings; i'll have to give them a rub around the outer edge to get them to fit nice and clean, no popping back out!

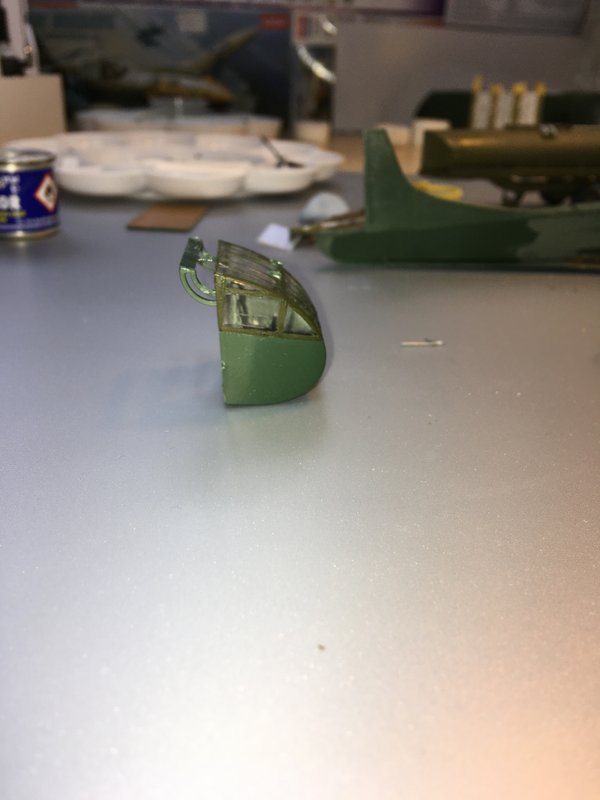
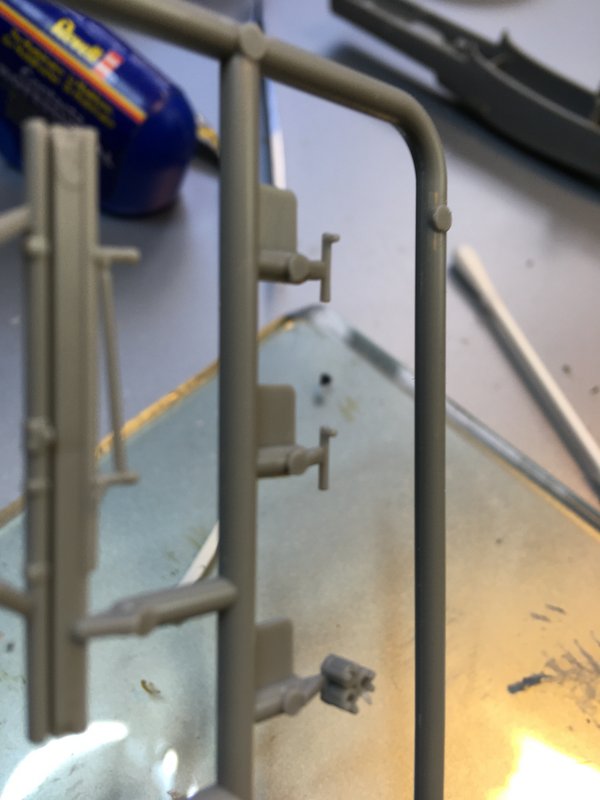 These are a pair of the underside machine guns, they are not going on MY model!
Got the fuselage together and crew stations all painted, looking great. I'm finding this version far easier to make than the old Airfix one, i dont know if Airfix have retooled theirs yet but i always had bother trying to get it to go together properly, this one is so crisp and clean in comparison!
I'll do a small one next before i think about my next but i'd like to get the P-71 nighthawk done soon!
Night, night!
The CG4A is coming on VERY nicely indeed! Had a few tricky moments with it, with one or two bits of remedial 'surgery' carried out! Today i decided to fit the wings! I had some 'surgery' to do on the landing gear leg on one side where i had to cut the main strut at the wheel hub and carefully splice in a tiny spacer about 1mm long to true it up as it was sitting to one side! This happened last time i made one of these too but this time i knew wot to do! I also did a little surgery on the tailwheel and its support because horrors of horrors i thought the glider was needing more work on the other landing gear but it was because the fuselage being a square section was sitting on one of the skids and the tailwheel wasnt touching the ground, i carefully cut the apex of the supporting V at the tailwheel, and gently 'encouraged' the tailwheel leg to lean back a bit more, i then re-glued and left it to dry. Sorted!
I used two paint tins to level the wings up and then tested with a spirit level! I made sure the new desk is sitting flat and level too when i set the table up! I set the wings in place at the roots and then painted on some poly and left it to dry a bit; i also used a couple of bits of masking tape to pull the wings toward each other making the seam nice and tight and left it to fully set. And then it was time to fit the wing struts; i envisaged a nightmare but in fact i decided to fit the little spacer struts to the large one first, and then started fitting the struts to the wing with this small one first, then the two outer ends and finally getting the exact spot, i glued the apex of the two main struts to the fuselage.
I've got the nose on it now too, took some time and patience to get it to fit right but its now on and it opens up (with care). Just a few little bits of painting to do and then the wheels! Then its off to the 'decals and varnish dept'!
I was watching a film on Youtube the other day called DZ Normandy, and learned that the 9th USAAF TCC also operated and maintained Horsa gliders; so i have one on order, it will be wearing USAAF livery when its complete! That'll be interesting!
I also started my next project; i bought it last year and its been in the stash for a few mumphs since, but the Hobbyboss P-61B Black Widow is a very nice model to build. Hobbyboss have made a very nice set of moulds and everything just seems to click into place with very minimal 'engineering!
Its actually a dream to assemble, and i'm really enjoying it!
Only thing that i didnt like was the side fitting gun barrels on the underside, but you know me and drilling 'oles! I drilled them right through and i'll fit lengths of sewing pins in each slot. Got the landing gear painted, the wheels are looking nice but having some bother getting the engines into the cowlings; i'll have to give them a rub around the outer edge to get them to fit nice and clean, no popping back out!
These are a pair of the underside machine guns, they are not going on MY model!Got the fuselage together and crew stations all painted, looking great. I'm finding this version far easier to make than the old Airfix one, i dont know if Airfix have retooled theirs yet but i always had bother trying to get it to go together properly, this one is so crisp and clean in comparison!
I'll do a small one next before i think about my next but i'd like to get the P-71 nighthawk done soon!
Night, night!
Twas Blollig and the Shalomey Touves didst gear and grumble in the wardrobe!
-
Clashcityrocker
- Modelling Gent and Scholar
- Posts: 10823
- Joined: May 1st, 2011, 12:31 am
- Location: Adelaide. South Australia
Re: Mark_75's modelling workspace!
A very busy bench Mark. Using paint tins as levelling devices for wings and things is the one true way. The P-71 looks to be a nice kit.
Nigel
Nigel