Mark_75's modelling workspace!
-
Markh_75

- Modelling Gent and Scholar
- Posts: 1112
- Joined: July 3rd, 2020, 5:38 pm
- Location: South Lanarkshire, Scotland.
Re: Mark_75's modelling workspace!
Thanks Nigel; i havent built anything since i got it all sorted; but it happened that way for me. I havent quit or anything like that; i just have to obey when my body and mind say they are tired. If i did try i wouldn't be able to concentrate anyway and would just make a mess; I want to keep the standard i have established. I'll get back to it when i'm good and ready; i have about 20 or so models to choose from so there's plenty of choice! Thanks for your comments, i AM looking forward to working with my new lamp though! 
Twas Blollig and the Shalomey Touves didst gear and grumble in the wardrobe!
-
Markh_75
- Modelling Gent and Scholar
- Posts: 1112
- Joined: July 3rd, 2020, 5:38 pm
- Location: South Lanarkshire, Scotland.
Re: Mark_75's modelling workspace!
Here is a picture of my modelling jig; many people have commented on it so i thought i'd put a picture of it in the grooop!

I added the graduated lines myself so that when i'm adjusting the wing supports they are in the same place as each other.
I got mine on eBay from a seller in Ukraine, it took about 2 weeks to arrive and was two sheets of ply with the parts for the jig cut in them, i just popped the parts out and assembled it gluing the non moving parts! I also added the little polycarbonate tubes as feet for it because the bolts under the jig can stop it sitting level and it can slide about; i also use a couple of blobs of blu-tac on two of the feet to stop it sliding around. It is brilliant piece of kit and really helps my modelling.
A tip for using a jig is to know that the surface you are putting it on is level in two directions so i checked my work table with a spiritual level and i use it when i'm setting up the wing rests for each model too; that way i know there is no error when using to set up the correct line for wings on a model before i glue 'em on!
I added the graduated lines myself so that when i'm adjusting the wing supports they are in the same place as each other.
I got mine on eBay from a seller in Ukraine, it took about 2 weeks to arrive and was two sheets of ply with the parts for the jig cut in them, i just popped the parts out and assembled it gluing the non moving parts! I also added the little polycarbonate tubes as feet for it because the bolts under the jig can stop it sitting level and it can slide about; i also use a couple of blobs of blu-tac on two of the feet to stop it sliding around. It is brilliant piece of kit and really helps my modelling.
A tip for using a jig is to know that the surface you are putting it on is level in two directions so i checked my work table with a spiritual level
Twas Blollig and the Shalomey Touves didst gear and grumble in the wardrobe!
-
Markh_75
- Modelling Gent and Scholar
- Posts: 1112
- Joined: July 3rd, 2020, 5:38 pm
- Location: South Lanarkshire, Scotland.
Re: Mark_75's modelling workspace!
Okay, a new start being made here; i'll put the builds that i do and feature in my workspace and the finished result in Aviation Modelling.
Have started the Sword Curtiss Seamew this morning and it is a tad rough! The interiors are not too well defined, a bit vague as to exactly where things go in the fuselage, and there are resin parts to add. The plastic is a little softer too, gotta be careful wot i cut and where. Once the insides are done and the fuselage has been closed up i can start to assemble it into something recognisable. Its gonna take time though.
Bear with me!
Have started the Sword Curtiss Seamew this morning and it is a tad rough!
Bear with me!
Twas Blollig and the Shalomey Touves didst gear and grumble in the wardrobe!

Re: Mark_75's modelling workspace!
No need to rush, rushing is for other people without a hobby.
It's only pain, work through it.
-
Markh_75
- Modelling Gent and Scholar
- Posts: 1112
- Joined: July 3rd, 2020, 5:38 pm
- Location: South Lanarkshire, Scotland.
Re: Mark_75's modelling workspace!
Absolutely correct my friendwokka wrote:No need to rush, rushing is for other people without a hobby.
Twas Blollig and the Shalomey Touves didst gear and grumble in the wardrobe!
-
Markh_75
- Modelling Gent and Scholar
- Posts: 1112
- Joined: July 3rd, 2020, 5:38 pm
- Location: South Lanarkshire, Scotland.
Re: Mark_75's modelling workspace!
Here we are, The Curtiss SOC Seamew.
its a limited run kit and is a tad vague, i have added tabs to the inside for when i start fitting 'furniture', i can get the liquid poly to work very well on it so i'm setting parts with it and once in place a tiny spot of supergloop.
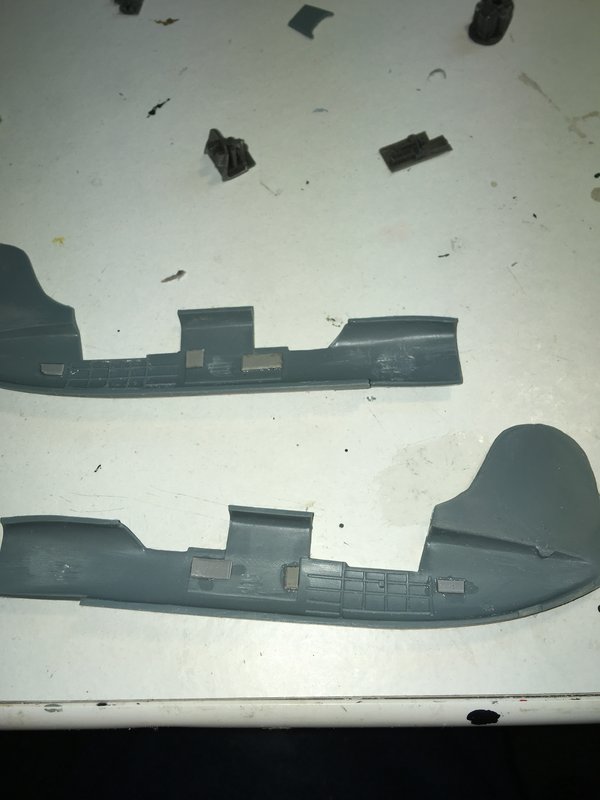
I've added tabs myself for this kit, so that it will be easier to locate the 'furniture'! Without the tabs there is no way the parts will sit IN the fuselage.
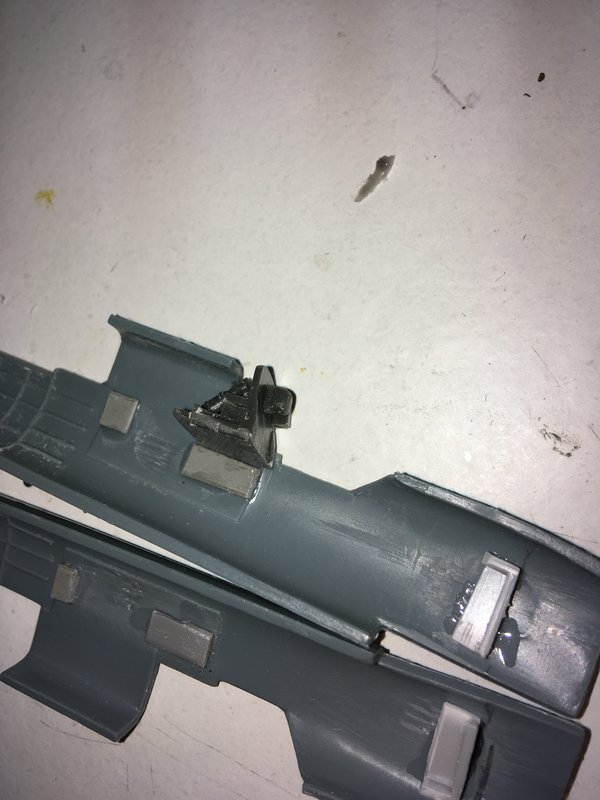
The cockpit area. I've glued it twice but the glue isnt working, must be something to do with the plastic.

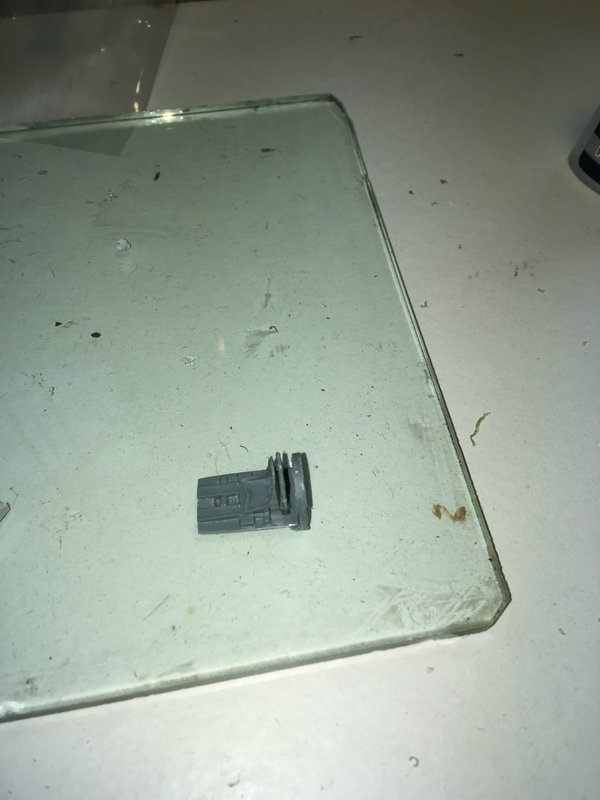
The gun ring, for the 'back bedroom'

I also fitted a bigger tab to locate the engine when i'm ready. The engine is a resin part as is the forward bulkhead in the 'back room', and the area behind the pilot. The two side panels for the cockpit are resin and the exhaust stubs. I'm not that keen on resin parts because they are awkward to fit and so far the ones i have fitted havent been that great.
Cockpit and the area behind the pilots seat. (above and below).

I have also put the two halves of the main float together, using glue from the needle applicator, its a Revell one. I want to see if this holds the parts better. I also closed up the wings. If this glue doesnt work either it will be 3 steps forward and two back as i'll have to go over everything again with superglue.
I think thats it for today.
its a limited run kit and is a tad vague, i have added tabs to the inside for when i start fitting 'furniture', i can get the liquid poly to work very well on it so i'm setting parts with it and once in place a tiny spot of supergloop.
I've added tabs myself for this kit, so that it will be easier to locate the 'furniture'! Without the tabs there is no way the parts will sit IN the fuselage.
The cockpit area. I've glued it twice but the glue isnt working, must be something to do with the plastic.
The gun ring, for the 'back bedroom'
I also fitted a bigger tab to locate the engine when i'm ready. The engine is a resin part as is the forward bulkhead in the 'back room', and the area behind the pilot. The two side panels for the cockpit are resin and the exhaust stubs. I'm not that keen on resin parts because they are awkward to fit and so far the ones i have fitted havent been that great.
Cockpit and the area behind the pilots seat. (above and below).
I have also put the two halves of the main float together, using glue from the needle applicator, its a Revell one. I want to see if this holds the parts better. I also closed up the wings. If this glue doesnt work either it will be 3 steps forward and two back as i'll have to go over everything again with superglue.
I think thats it for today.
Twas Blollig and the Shalomey Touves didst gear and grumble in the wardrobe!
-
ShaunW
- NOT the sheep
- Posts: 26188
- Joined: November 26th, 2011, 6:11 pm
- Location: Pontefract West Yorkshire
Re: Mark_75's modelling workspace!
It's good to see you back in action, Mark and you're off to a great start with the Seamew. I've yet to try a limited run kit.
Doing - Tamiya 1/35th Universal Carrier.
Work is the curse of the modelling classes!
IPMS#12300
Work is the curse of the modelling classes!
IPMS#12300
-
Markh_75
- Modelling Gent and Scholar
- Posts: 1112
- Joined: July 3rd, 2020, 5:38 pm
- Location: South Lanarkshire, Scotland.
Re: Mark_75's modelling workspace!
I have built much easier limited run kits tbh, ones that give you a clue where the parts go and the parts actually do fit there.
I have put this aside for now and i'll do bits and pieces on it as and when (or if). Its not filling me with confidence at all, in fact its murdering my mojo; nothing fits, i have shaved parts back so they fit; and they still dont fit! Rather than stopping modelling completely i'll put this aside and do something a bit easier for now as i seem to have lost my spark.
Maybe i'll just paint the clear parts in and just make it as a blank model with no interior, coz it aint working. It might be that i'm still mourning the loss of my friend and this time of year is NOT my best time.
I'll start something else maybe tomorrow. Or wait until i feel a bit better about it all. I think thats wise.
Its also a thing i have learned to do; if it aint working STOP; put the lids back on, clean the brush and come back another day. I stopped busting non behaving kits a while back.
I will NOT give up. When i get going i love this hobby.
I have put this aside for now and i'll do bits and pieces on it as and when (or if). Its not filling me with confidence at all, in fact its murdering my mojo; nothing fits, i have shaved parts back so they fit; and they still dont fit!
Maybe i'll just paint the clear parts in and just make it as a blank model with no interior, coz it aint working.
I'll start something else maybe tomorrow. Or wait until i feel a bit better about it all. I think thats wise.
Its also a thing i have learned to do; if it aint working STOP; put the lids back on, clean the brush and come back another day. I stopped busting non behaving kits a while back.
I will NOT give up. When i get going i love this hobby.
Twas Blollig and the Shalomey Touves didst gear and grumble in the wardrobe!
-
Markh_75
- Modelling Gent and Scholar
- Posts: 1112
- Joined: July 3rd, 2020, 5:38 pm
- Location: South Lanarkshire, Scotland.
Re: Mark_75's modelling workspace!
Got a Curtiss Seagull and a Vought Sikorsky Kingfisher on the table just now. Haven’t any pictures as I’m most of the way through with them. There’ll be pictures of the finished models though, Lots of masking bits and bobs, painting in. Looking nice.
Twas Blollig and the Shalomey Touves didst gear and grumble in the wardrobe!
-
PaulBradley

- Staring out the window
- Posts: 21219
- Joined: April 6th, 2011, 3:08 pm
- Location: Flagstaff, AZ
Re: Mark_75's modelling workspace!
I look forward to seeing the results!
Paul
За демократію і незалежний Україну
"For Democracy and a Free Ukraine"
За демократію і незалежний Україну
"For Democracy and a Free Ukraine"
-
Markh_75
- Modelling Gent and Scholar
- Posts: 1112
- Joined: July 3rd, 2020, 5:38 pm
- Location: South Lanarkshire, Scotland.
Re: Mark_75's modelling workspace!
https://uamf.org.uk/viewtopic.php?f=19&t=21819;
Yes, its been a while; and its a little late in the build but better late than never! Been trying to pluck up the courage to put a build on the forum for a few days, didnt want to start way back at the beginning as i'm sure we've all seen and many have built the Italeri C-47 Skytrain themselves and know wots involved!
You may remember that last time i was here i tended to put my builds in Aviation or vehicle modelling, this time if its on the bench it goes in 'ere!
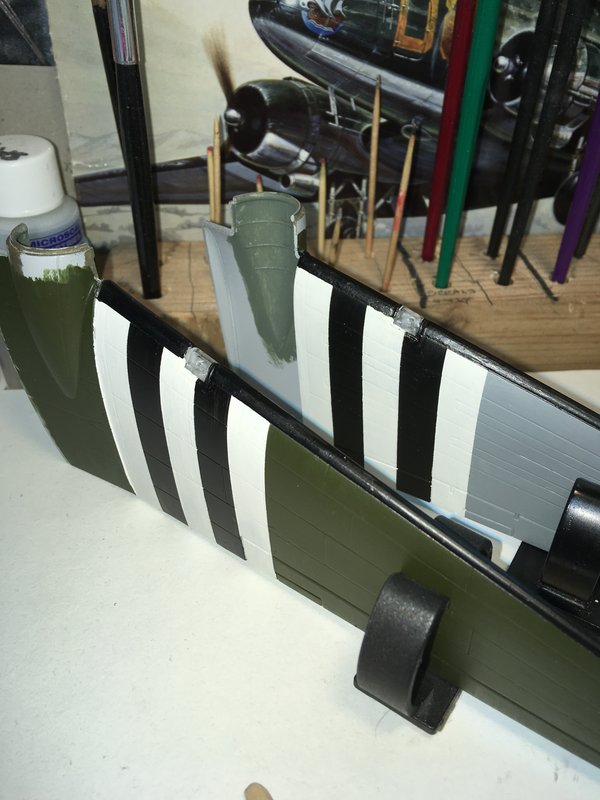
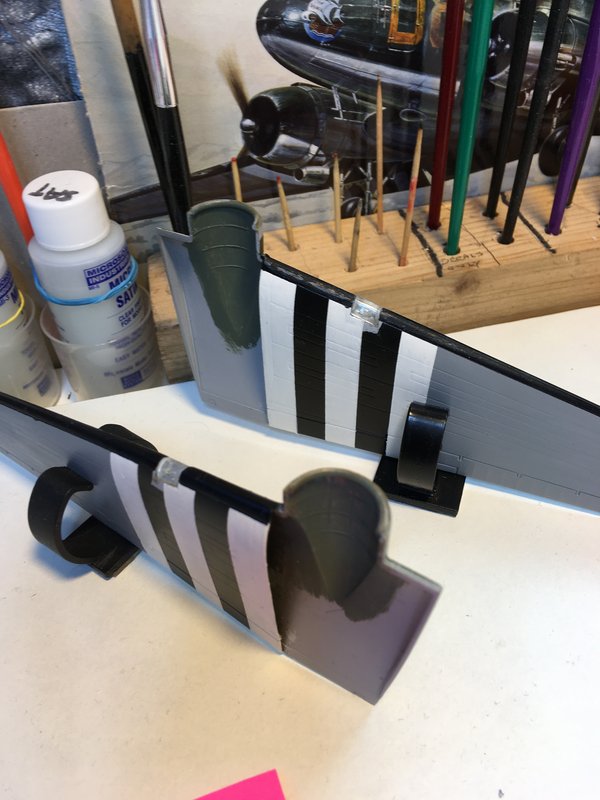
Mine is mostly assembled but i decided to keep the wings off and prefab them completely, no point in lifting all that model each time i want to paint a bit and the masking was much easier to do with the wings off. I will also apply the decals before i fit the wings too.
This has been covered a bit on the UAMF Fb page but i felt it better to put in the forum proper.
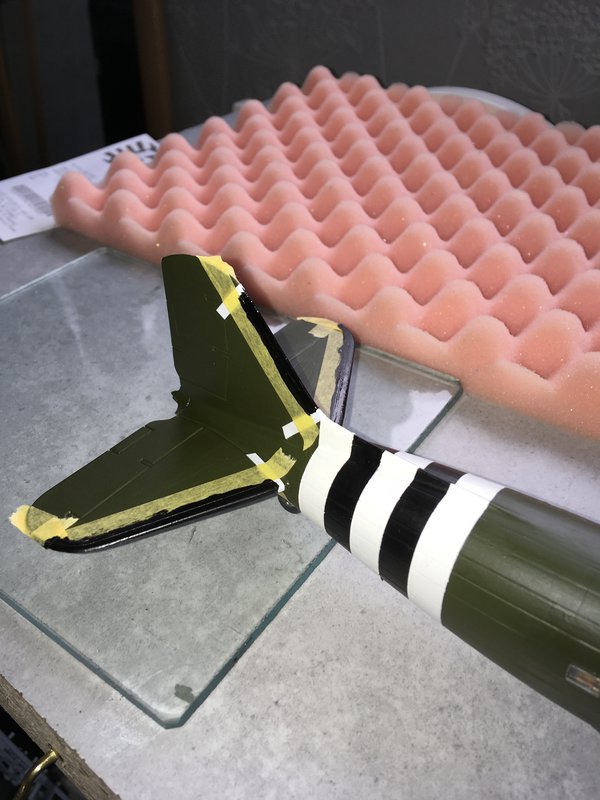
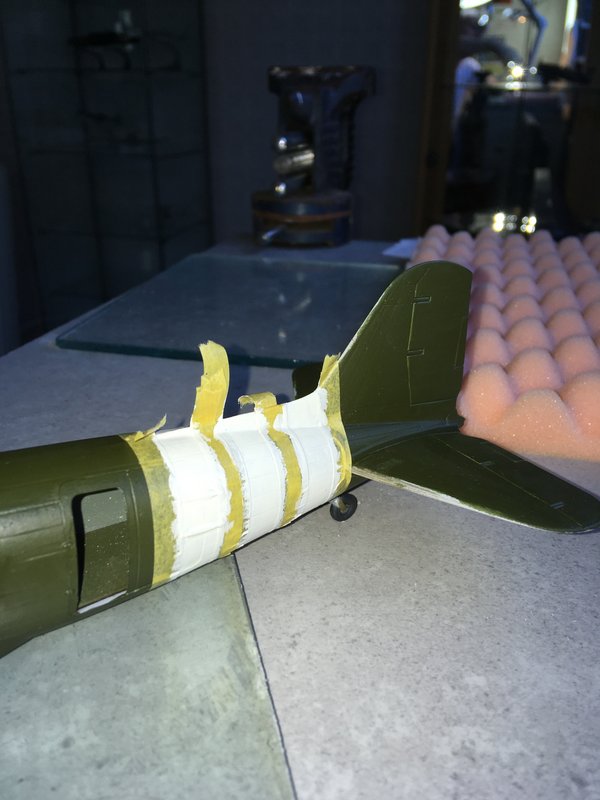
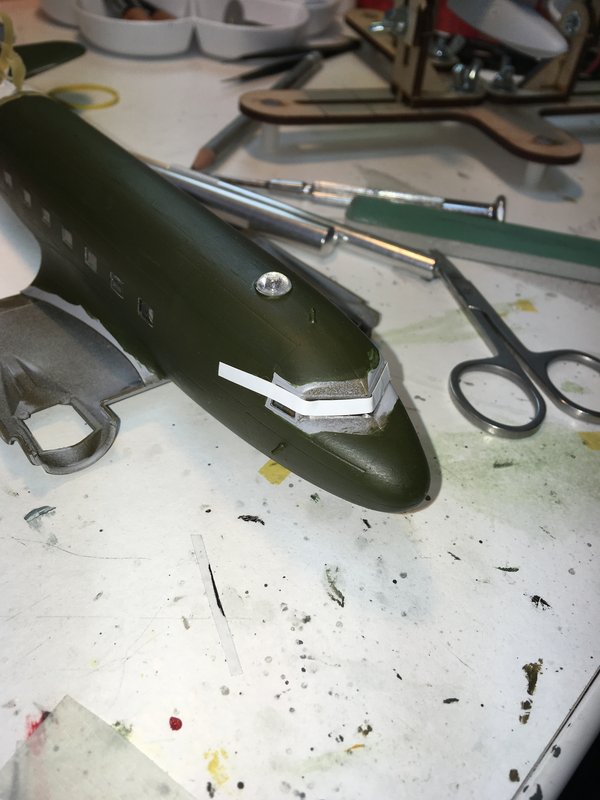
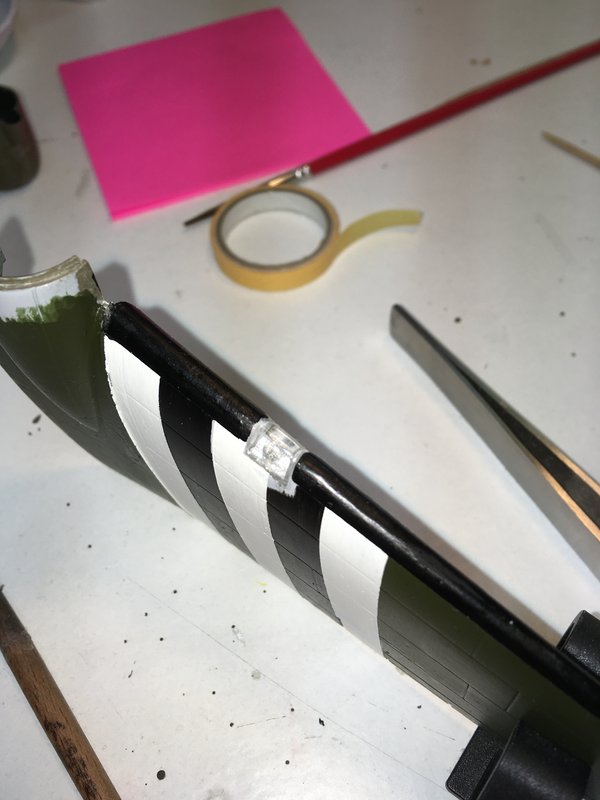
Its been a nice straightforward build, easy enough to build the larger parts. Today i started off with a light rub back on the white invasion stripes on the fuselage before i gave them a last top coat. That done; later in the afternoon i was able to remove the tape from the fuselage and found that as far as bleed-under went it was less than 2%, very pleased because a couple of areas wanted to peel after i'd applied the tape; i'd decided to just go with it, wait and see how it turned out later, if need be, i would touch in later. Actually i did the stripes the wrong way around; i normally paint the white areas first and then mask but this time i'd already painted the black stripes after masking on both the wings and fuselage. Whats the point in worrying?
I'd removed the tape from the wings already and all that was left was to fit the lights in the wings, for this i had to carefully rub back the length of the lights, they're never a perfect fit. I painted the inside on the wing half of the lights with aluminium paint and i used PVA to glue a sequin into each area for extra sparkle. This morning i tested the fit of the light shields and then fitted them, once dry i went around the edges with PVA to fill gaps. Later in the day i went in a back-painted the areas where the lights are with black and white. I touched in any other areas too.
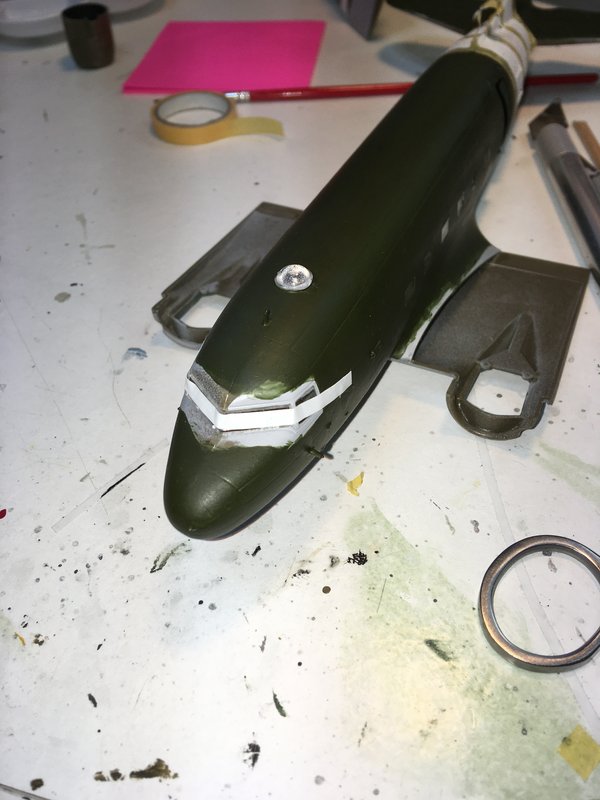
I fitted the windscreen this morning using narrow masking tape; this is MUCH easier to do that to try and position a thin, narrow and angled piece of plastic with my bunch o' banana fingers, plus the tape holds it in place too until dry!
I had work to do on another build i have on the table, so i tended to go between one and the other. I will cover all building work here and post completed models either in aviation or Military vehicles (ya know what i mean).
Once the white paint was dry on the fuselage invasion stripes i removed the tape, great job, bit of touching in and i masked off the de-icer boots on the tail, and then applied some PVA around the windscreen. I'll let all that dry for a while now, i have touching in underneath and around the cockpit windows, maybe later today/evening.


Smer, Curtiss SC-1 Seahawk, seaplane.
Again, a bit late in the build with this, but i have to start somewhere! This was a very sweet build to do and went along very smoothly, one or two issues in how things were arranged on the sprues but the build was very straightforward.
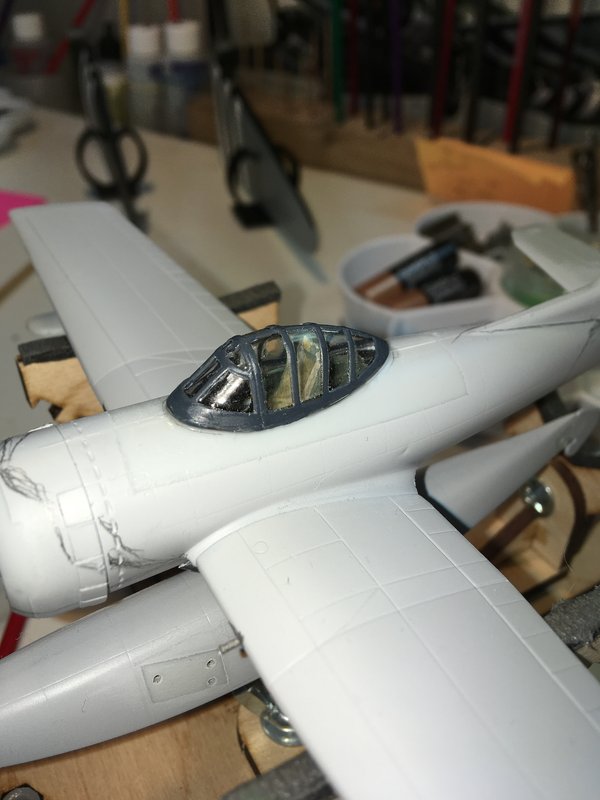


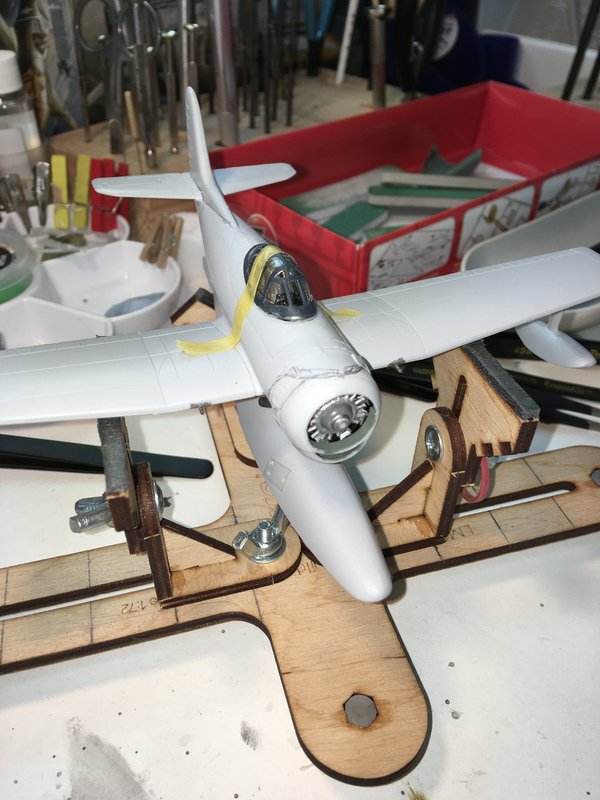
I had cleaned it all and then sprayed primer on it yesterday, so i knew it was dry; i just removed the masking tape and gently rubbed back those areas to remove any ridge in the paint. As i had the canopy already painted, i decided to fit it before i paint this time; usually i leave the area unpainted until the clear parts are fitted. This part of the build was the worst because the canopy had a fair bit of flash and even after tidying, it was a very poor fit, i had to carefully rub back the long sides of it underneath but it was still a bit hit & miss. But, i fitted it in place and put in some glue and left it to dry. I knew i'd have lots of work to do around it with the PVA, but its looking good, i'll start painting it tomorrow. I had masked over the wing light, the area where the bomb racks go, the holes in the main float for the beaching gear, i've made and painted the beaching gear ready to be popped on when i'm ready. The exhaust pipes (as you can imagine) i drilled out, and painted; i also didnt like the guns provided so i drilled into the wing and added replacements made with metal sewing pins. I may have to go around the canopy base yet again this evening but i want it right.
More tomorrow folks.
Yes, its been a while; and its a little late in the build but better late than never! Been trying to pluck up the courage to put a build on the forum for a few days, didnt want to start way back at the beginning as i'm sure we've all seen and many have built the Italeri C-47 Skytrain themselves and know wots involved!
You may remember that last time i was here i tended to put my builds in Aviation or vehicle modelling, this time if its on the bench it goes in 'ere!
Mine is mostly assembled but i decided to keep the wings off and prefab them completely, no point in lifting all that model each time i want to paint a bit and the masking was much easier to do with the wings off. I will also apply the decals before i fit the wings too.
This has been covered a bit on the UAMF Fb page but i felt it better to put in the forum proper.
Its been a nice straightforward build, easy enough to build the larger parts. Today i started off with a light rub back on the white invasion stripes on the fuselage before i gave them a last top coat. That done; later in the afternoon i was able to remove the tape from the fuselage and found that as far as bleed-under went it was less than 2%, very pleased because a couple of areas wanted to peel after i'd applied the tape; i'd decided to just go with it, wait and see how it turned out later, if need be, i would touch in later. Actually i did the stripes the wrong way around; i normally paint the white areas first and then mask but this time i'd already painted the black stripes after masking on both the wings and fuselage. Whats the point in worrying?
I'd removed the tape from the wings already and all that was left was to fit the lights in the wings, for this i had to carefully rub back the length of the lights, they're never a perfect fit. I painted the inside on the wing half of the lights with aluminium paint and i used PVA to glue a sequin into each area for extra sparkle. This morning i tested the fit of the light shields and then fitted them, once dry i went around the edges with PVA to fill gaps. Later in the day i went in a back-painted the areas where the lights are with black and white. I touched in any other areas too.
I fitted the windscreen this morning using narrow masking tape; this is MUCH easier to do that to try and position a thin, narrow and angled piece of plastic with my bunch o' banana fingers, plus the tape holds it in place too until dry!
I had work to do on another build i have on the table, so i tended to go between one and the other. I will cover all building work here and post completed models either in aviation or Military vehicles (ya know what i mean).
Once the white paint was dry on the fuselage invasion stripes i removed the tape, great job, bit of touching in and i masked off the de-icer boots on the tail, and then applied some PVA around the windscreen. I'll let all that dry for a while now, i have touching in underneath and around the cockpit windows, maybe later today/evening.
Smer, Curtiss SC-1 Seahawk, seaplane.
Again, a bit late in the build with this, but i have to start somewhere! This was a very sweet build to do and went along very smoothly, one or two issues in how things were arranged on the sprues but the build was very straightforward.
I had cleaned it all and then sprayed primer on it yesterday, so i knew it was dry; i just removed the masking tape and gently rubbed back those areas to remove any ridge in the paint. As i had the canopy already painted, i decided to fit it before i paint this time; usually i leave the area unpainted until the clear parts are fitted. This part of the build was the worst because the canopy had a fair bit of flash and even after tidying, it was a very poor fit, i had to carefully rub back the long sides of it underneath but it was still a bit hit & miss. But, i fitted it in place and put in some glue and left it to dry. I knew i'd have lots of work to do around it with the PVA, but its looking good, i'll start painting it tomorrow. I had masked over the wing light, the area where the bomb racks go, the holes in the main float for the beaching gear, i've made and painted the beaching gear ready to be popped on when i'm ready. The exhaust pipes (as you can imagine) i drilled out, and painted; i also didnt like the guns provided so i drilled into the wing and added replacements made with metal sewing pins. I may have to go around the canopy base yet again this evening but i want it right.
More tomorrow folks.
Twas Blollig and the Shalomey Touves didst gear and grumble in the wardrobe!
-
X12A

- Modelling Gent and Scholar
- Posts: 1327
- Joined: October 5th, 2020, 6:30 pm
- Location: The New Forest, UK
Re: Mark_75's modelling workspace!
Nice to see you back with some good stuff Mark.
-
Markh_75
- Modelling Gent and Scholar
- Posts: 1112
- Joined: July 3rd, 2020, 5:38 pm
- Location: South Lanarkshire, Scotland.
Re: Mark_75's modelling workspace!
Thanks! i felt after trying other places including facebook; this is the best place; i have calmed down alot, including with building models. I build for ME but like to share, i just take my time now and if i dont feel up to it i just dont do it; its always sitting waiting for me to go back. Want to get some GOOD building done, pack them cabinets! 
Twas Blollig and the Shalomey Touves didst gear and grumble in the wardrobe!
Re: Mark_75's modelling workspace!
Those D Day stripes have come out well, they're not that easy to do especially when taking account curves on the rear fuselage. The Seahawks coming along nicely.
It's only pain, work through it.
-
iggie

- Modelling Gent and Scholar
- Posts: 23438
- Joined: July 31st, 2013, 11:04 am
- Location: North Somercotes, Lincolnshire
- Contact:
Re: Mark_75's modelling workspace!
Nice work Mark
Best wishes
Jim
If you can walk away from a landing, it's a good landing. If you use the airplane the next day, it's an outstanding landing
"Never put off till tomorrow, what you can do the day after tomorrow"
Jim
If you can walk away from a landing, it's a good landing. If you use the airplane the next day, it's an outstanding landing
"Never put off till tomorrow, what you can do the day after tomorrow"