1/12th Honda VFR750F
-
JamesPerrin

- Looks like his avatar
- Posts: 13695
- Joined: April 5th, 2011, 8:09 pm
- Location: W. Yorkshire
- Contact:
Re: 1/12th Honda VFR750F
Good to hear.
Classic British Kits SIG Leader Better to fettle than to fill
(2024 A:B 5:2) (2023 13:8:7) (2022 21:11) (2021 15:8) (2020 8:4:4)
(2024 A:B 5:2) (2023 13:8:7) (2022 21:11) (2021 15:8) (2020 8:4:4)
-
DamianHarty
- Getting well comfy!
- Posts: 94
- Joined: October 25th, 2020, 6:55 pm
Re: 1/12th Honda VFR750F
I tried a different method on the second copy I printed, just slipping a scalpel around really near the part. It positively flew off the supports in a trice!
-
DamianHarty
- Getting well comfy!
- Posts: 94
- Joined: October 25th, 2020, 6:55 pm
Re: 1/12th Honda VFR750F
Small bits of progress on this, those pesky people paying my mortgage seem to think they can just command me to work full time for them, so that is limiting things a bit.
The chain & sprockets got painted. An airbrushed sort of gunmetal, some black wash and a bit of silver drybrushing. And some of that Molotow chrome pen somewhere. Arguably a bit obsessive for such a small part of the whole model, but yet very satisfying. The photography is cruel but the parts look good to my eye in real life.
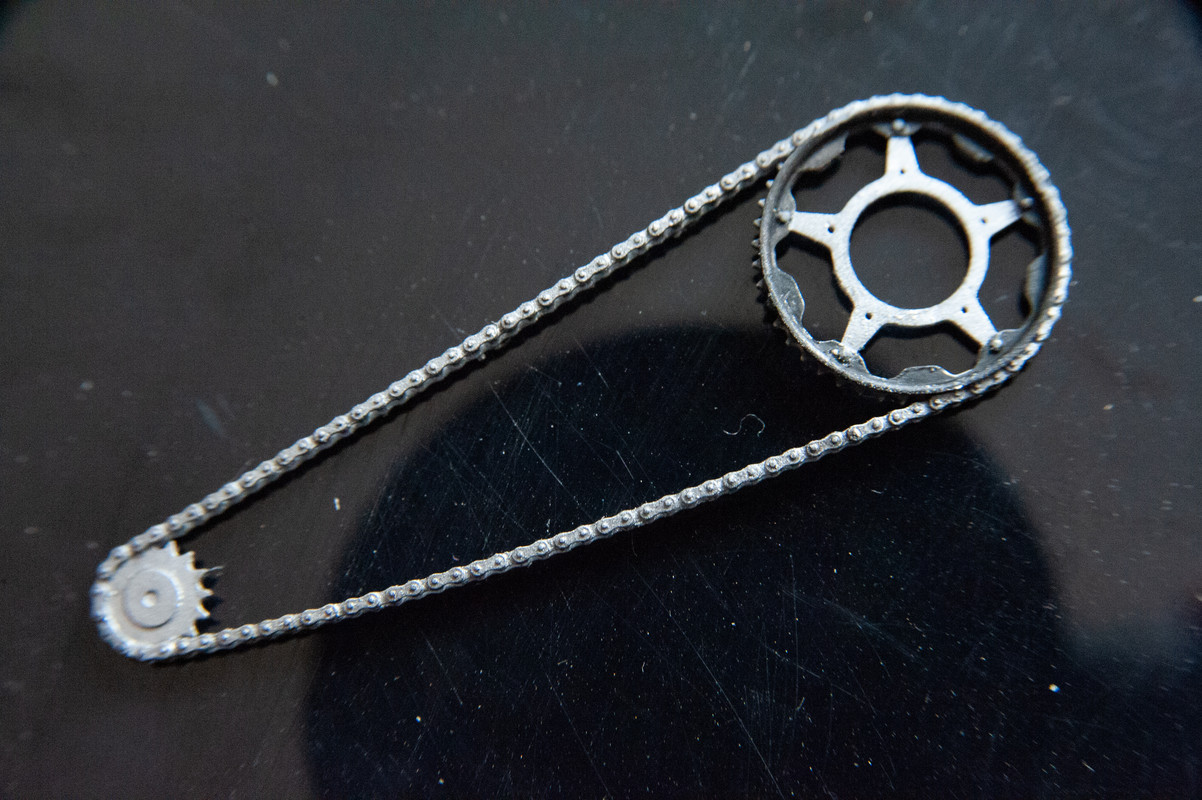
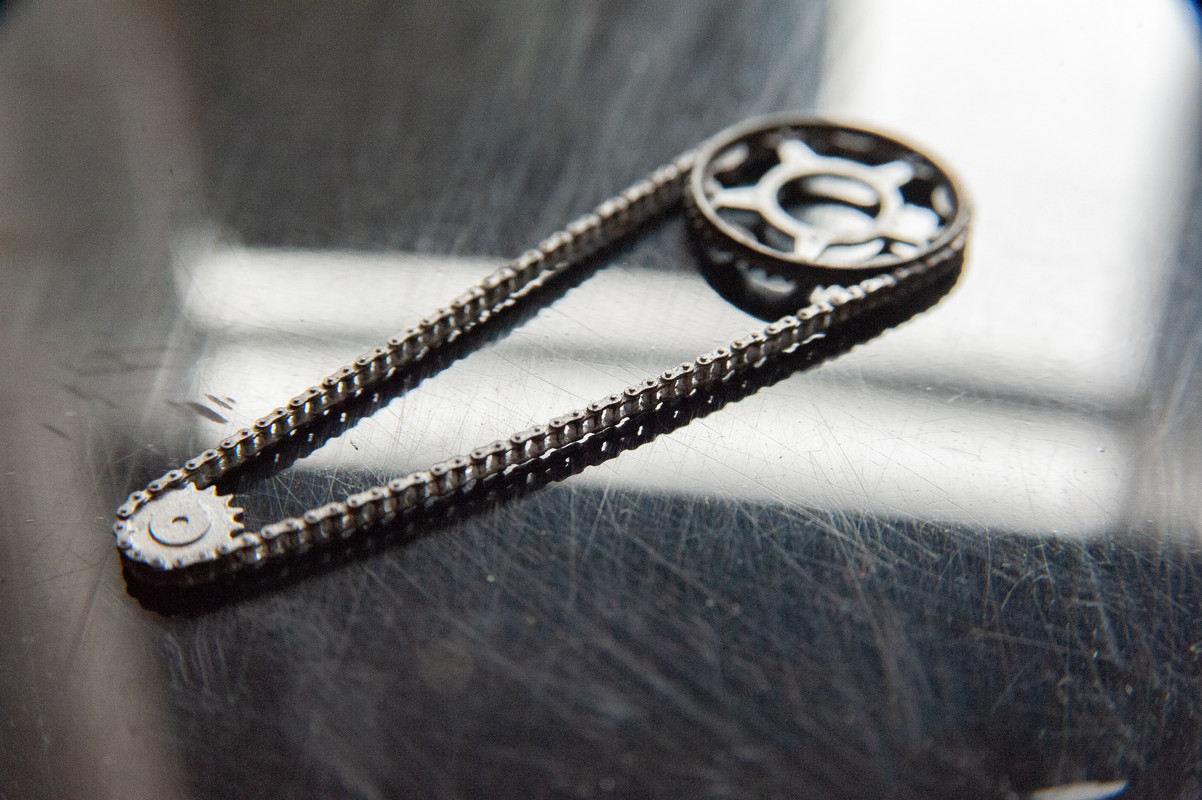
Also some experimentation with printing transparent parts, starting with the headlight lens.
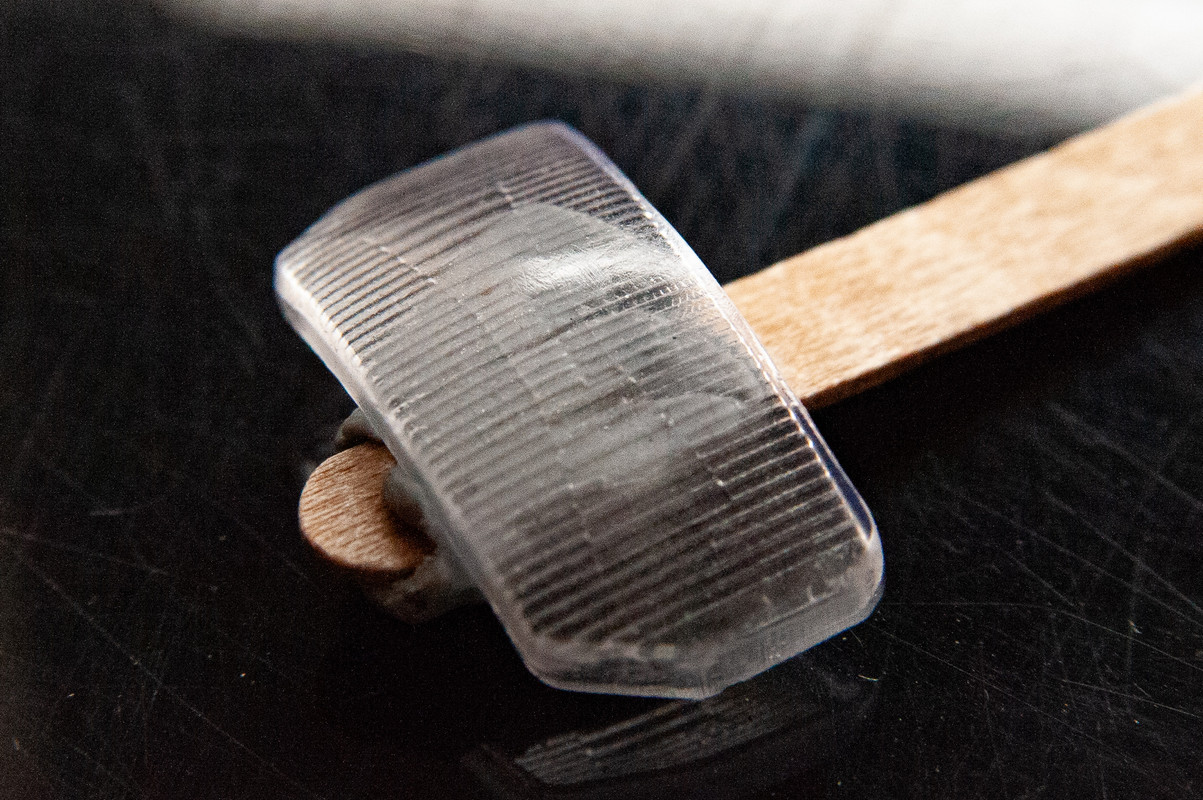
I'm pretty pleased with that; it compares well to the real headlight.
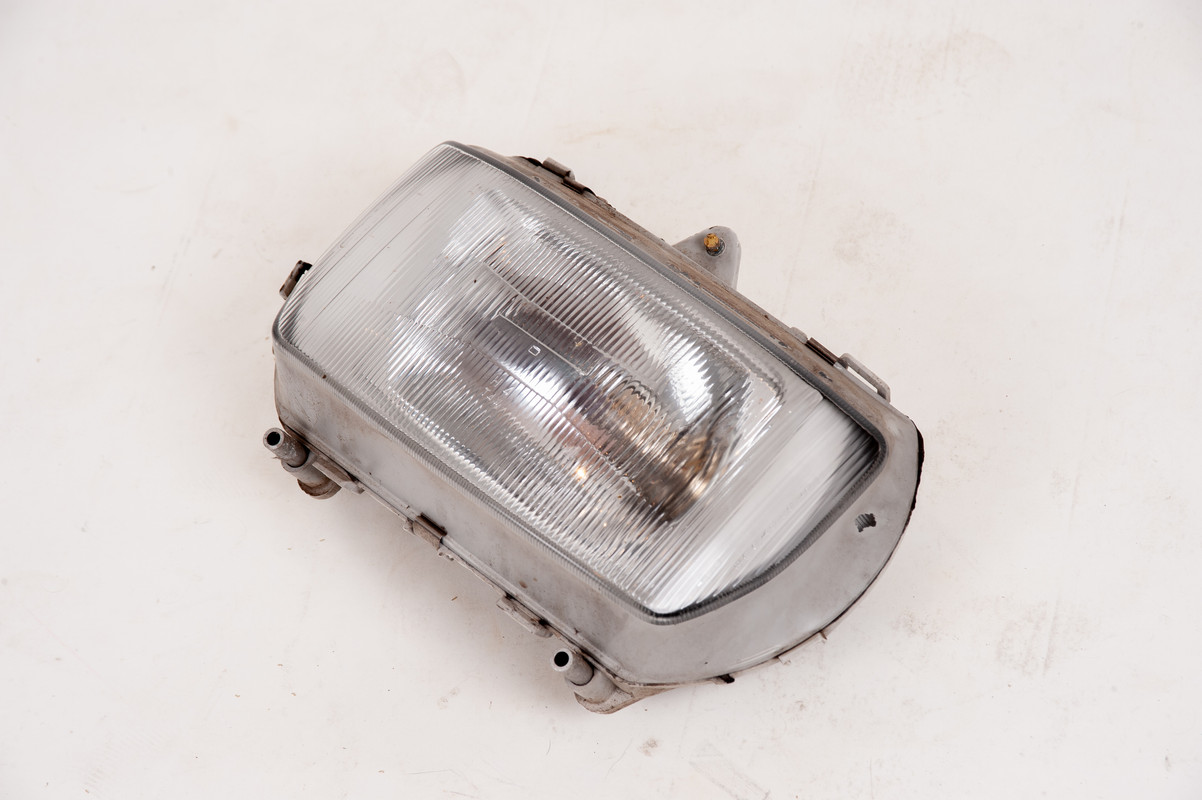
The chain & sprockets got painted. An airbrushed sort of gunmetal, some black wash and a bit of silver drybrushing. And some of that Molotow chrome pen somewhere. Arguably a bit obsessive for such a small part of the whole model, but yet very satisfying. The photography is cruel but the parts look good to my eye in real life.
Also some experimentation with printing transparent parts, starting with the headlight lens.
I'm pretty pleased with that; it compares well to the real headlight.
-
LifetimeModeler

- Onto the Clever Stuff, Now.
- Posts: 192
- Joined: January 28th, 2023, 1:00 pm
Re: 1/12th Honda VFR750F
It's just beautiful Damian!!! There's nothing to hint the pieces are not full sized parts!
Eat, drink, and be merry, but this very night your soul will be required of you.
-
syd-baines
- Modelling Gent and Scholar
- Posts: 1050
- Joined: September 10th, 2013, 4:22 pm
Re: 1/12th Honda VFR750F
this looks like a whole lot of work to me but it is looking very good the chain looks very good and realistic i have no plans for 3d printing but it is nice to see another side to the hobby very well done
-
DamianHarty
- Getting well comfy!
- Posts: 94
- Joined: October 25th, 2020, 6:55 pm
Re: 1/12th Honda VFR750F
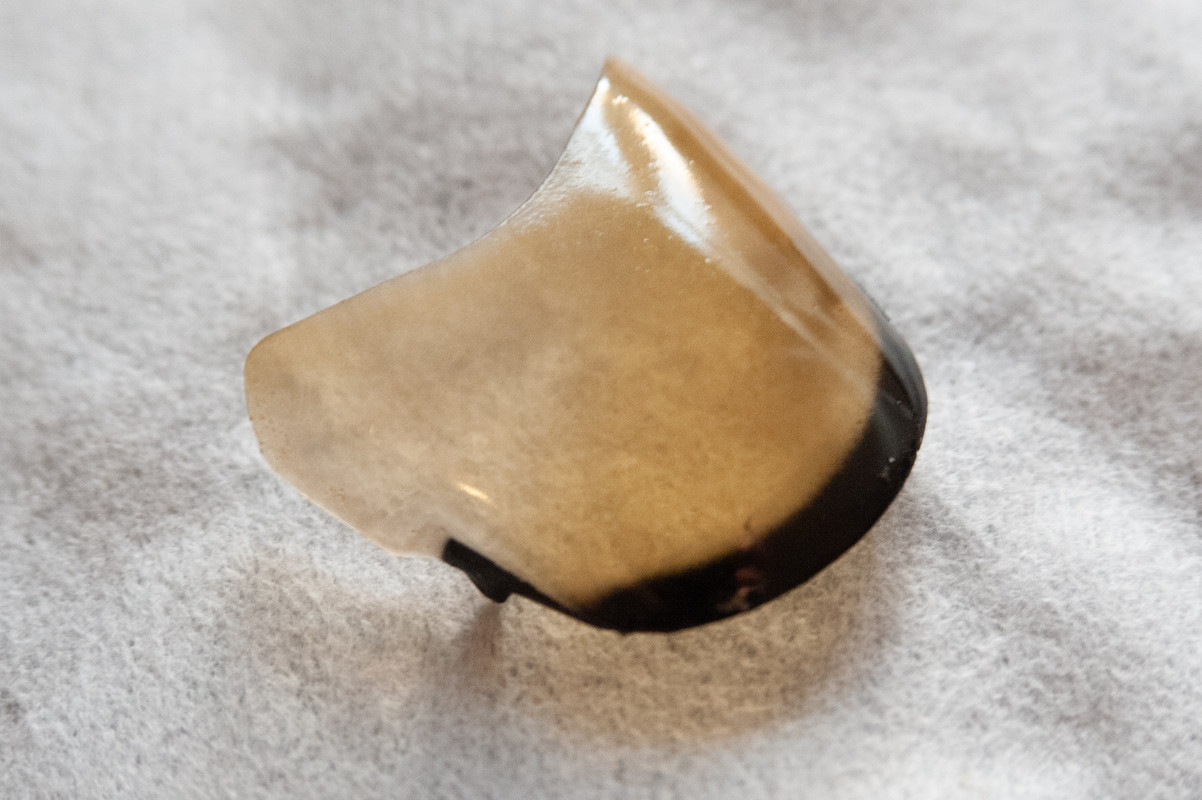
Yet more glacial progress. I was curious about the windscreen and how it would work with the transparent resin, after the success of the headlight.
There was an amount of faff to get a good finish, but in the end the process wasn't too difficult. Get rid of the supports with a small file and then 320 grit went sandpaper, then progress through 1200, 2000 and onto 3000. Finally some repeated dipping in pledge.
I mixed up a sort of smoke/bronze tint using black, clear and clear orange (all in acrylic). I gave it three or four dilute coats, then another couple of dips in Pledge. Finally I masked up the hard-edged black on the sides of the screen and the softer-edged black on the underside of the base, using a blu-tack sausage. Black enamel, using up some Testor's I brought back from the US with me. It's hard to photograph it well, the camera's focus (and my eyes, to be fair) are a bit muddled by the transparency. But it looks great in real life - very emotionally convincing.
-
JamesPerrin
- Looks like his avatar
- Posts: 13695
- Joined: April 5th, 2011, 8:09 pm
- Location: W. Yorkshire
- Contact:
Re: 1/12th Honda VFR750F
Very impressive result.
Classic British Kits SIG Leader Better to fettle than to fill
(2024 A:B 5:2) (2023 13:8:7) (2022 21:11) (2021 15:8) (2020 8:4:4)
(2024 A:B 5:2) (2023 13:8:7) (2022 21:11) (2021 15:8) (2020 8:4:4)
-
Clashcityrocker

- Modelling Gent and Scholar
- Posts: 10823
- Joined: May 1st, 2011, 12:31 am
- Location: Adelaide. South Australia
Re: 1/12th Honda VFR750F
Are you sure that's not a fingernail 
Nigel
Nigel
-
DamianHarty
- Getting well comfy!
- Posts: 94
- Joined: October 25th, 2020, 6:55 pm
Re: 1/12th Honda VFR750F
A bit more progress. The CAD is now together to the point where the model could stand on its wheels.
I've been experimenting with painting and unpainting and reprinting and on the whole it's coming together well - if glacially.
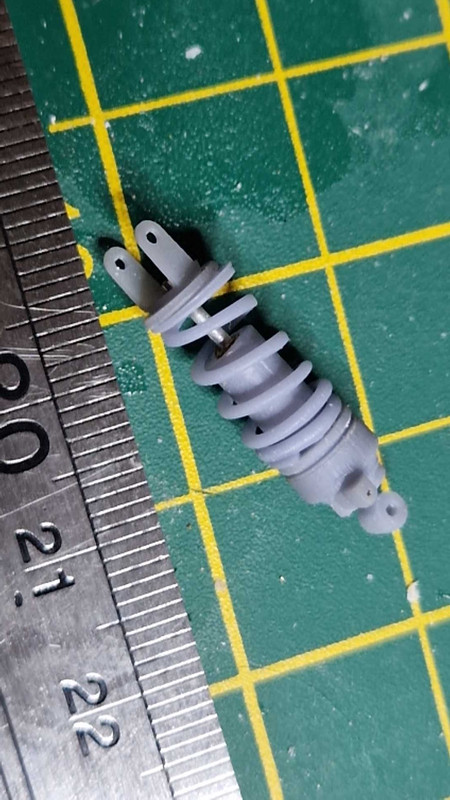
I printed the rear suspension unit in two pieces - damper and spring - then promptly cut the rod out of the damper to replace it with some 1mm rod sliding in a 2mm brass bearing in the damper body. The damper rod is really 14mm and not the implied 12mm, but I am hoping since I am among friends nobody will be toooo judgemental.
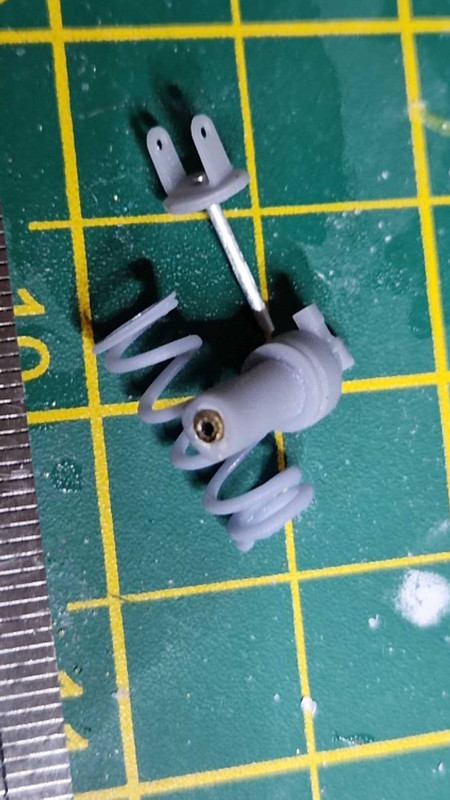
It looks pretty good together and the spring is surprisingly resilient - I can squash it down until it is coilbound and it unfurls itself without difficulty. I will probably leave it functional until I get it together. I did come up with a jolly good wheeze to make a functioning rebound stop, but I don't know if I can bring myself to actually do it.
Another small random piece is the brake torque reaction arm. There really are a lot of unnecessarily beautiful pieces on this motorcycle. I'm desperately curious about the vertical boss a third of the way down its length. It looks like it was ready to have something screwed into it, but then they changed their mind and just left it, since the tooling was already committed. Nevertheless I faithfully reproduced it.

I've been experimenting with painting and unpainting and reprinting and on the whole it's coming together well - if glacially.
I printed the rear suspension unit in two pieces - damper and spring - then promptly cut the rod out of the damper to replace it with some 1mm rod sliding in a 2mm brass bearing in the damper body. The damper rod is really 14mm and not the implied 12mm, but I am hoping since I am among friends nobody will be toooo judgemental.
It looks pretty good together and the spring is surprisingly resilient - I can squash it down until it is coilbound and it unfurls itself without difficulty. I will probably leave it functional until I get it together. I did come up with a jolly good wheeze to make a functioning rebound stop, but I don't know if I can bring myself to actually do it.
Another small random piece is the brake torque reaction arm. There really are a lot of unnecessarily beautiful pieces on this motorcycle. I'm desperately curious about the vertical boss a third of the way down its length. It looks like it was ready to have something screwed into it, but then they changed their mind and just left it, since the tooling was already committed. Nevertheless I faithfully reproduced it.
-
ShaunW
- NOT the sheep
- Posts: 26188
- Joined: November 26th, 2011, 6:11 pm
- Location: Pontefract West Yorkshire
Re: 1/12th Honda VFR750F
That rear damper is a work of art and it operates too as a bonus. Marvellous. I have no ideas about the boss on the torque arm - was the part shared with any other Honda motorcycles or perhaps a racing version of the VFR that did require the boss? Whatever the reason, your reproduction looks excellent.
Doing - Tamiya 1/35th Universal Carrier.
Work is the curse of the modelling classes!
IPMS#12300
Work is the curse of the modelling classes!
IPMS#12300
-
DamianHarty
- Getting well comfy!
- Posts: 94
- Joined: October 25th, 2020, 6:55 pm
Re: 1/12th Honda VFR750F
I modelled and printed the remote preload adjuster, and used some 1/12th scale banjos (from Top Studio) and some 0.5mm Tamiya hose/wire to connect the preload adjuster to the main shock body.
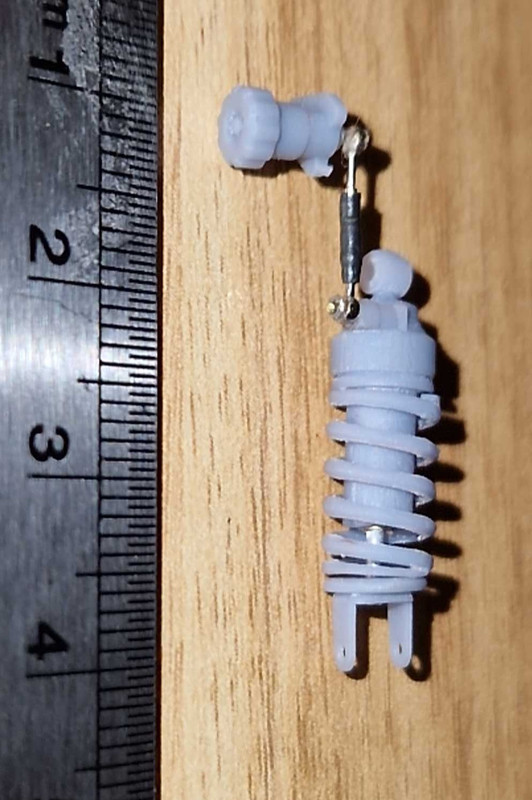
The real unit, beside the model one:
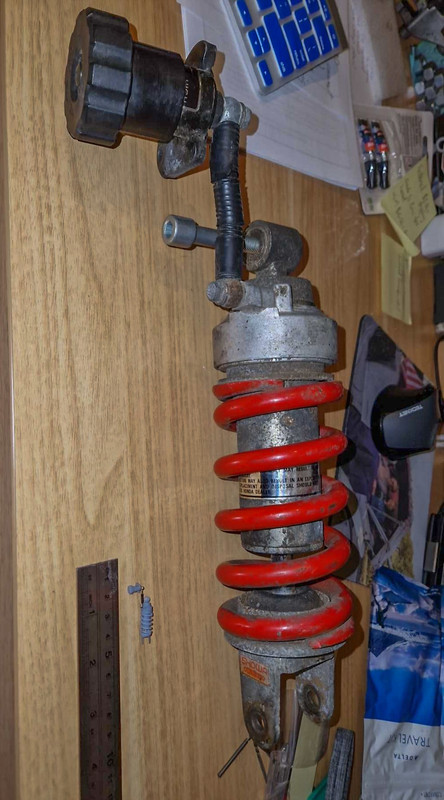
I think I'm at the point where I've got everything I need to assemble the rolling frame, so I should be getting some time painting and assembling soon!
The real unit, beside the model one:
I think I'm at the point where I've got everything I need to assemble the rolling frame, so I should be getting some time painting and assembling soon!
-
ShaunW
- NOT the sheep
- Posts: 26188
- Joined: November 26th, 2011, 6:11 pm
- Location: Pontefract West Yorkshire
Re: 1/12th Honda VFR750F
Very nice, you've nailed the look of that rear shock.
Doing - Tamiya 1/35th Universal Carrier.
Work is the curse of the modelling classes!
IPMS#12300
Work is the curse of the modelling classes!
IPMS#12300
Re: 1/12th Honda VFR750F
Looking really good

Re: 1/12th Honda VFR750F
Ahhh......3D printing. A rabbit hole I've managed to avoid so far........so far.....
Looks amazing.
Looks amazing.
Thanks,
Allan Buttrick
Youth, talent, hard work, and enthusiasm are no match for old age and treachery.
Allan Buttrick
Youth, talent, hard work, and enthusiasm are no match for old age and treachery.
-
DamianHarty
- Getting well comfy!
- Posts: 94
- Joined: October 25th, 2020, 6:55 pm
Re: 1/12th Honda VFR750F
Progress continues and I am aiming for a sort of "stage 1 completion" of the rolling frame as mentioned before, minus engine, some time ... soon. Ish.
At the moment I am doing lots of dry fitting, fettling, discovering I've made an error in the CAD, and looping back to fix things. I'm sure a lot of the things I could fix using the parts and some old fashioned fettling, but a goal I've set myself is the notional target of being able to let someone else reproduce it pretty cleanly from the CAD files.
I'm using insect pins to "bolt" things together, mostly. I've got some 0.1, 0.3, 0.45 and 0.55 mm. The postage was more than the pins. They cut readily but the cutting seems to leave a deformed end, which needs either some fettling or the drilling of a bigger hole to persuade things together. I got one of those drill sets with 0.3-1.3 mm bits every 0.05mm, and they seem to like drilling the resin. Only the biggest insect pins have a head on them.
I've been giving the rear suspension linkage a lot of love, lately, and it hasn't been terribly grateful for it. In this first picture, apart from the various results of my painting and unpainting that are apparent, the spring is crushed against a little corss-member in the frame and this prevents the linkage from articulating nicely.
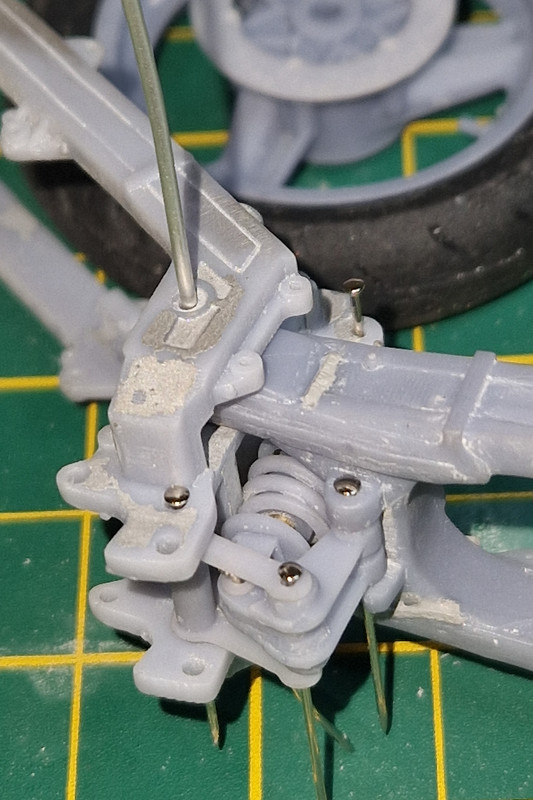
I went back to my reference eBay frame pictures and sure enough, that cross member sits ahead of the back edge of the frame. To test everything, I just sawed off the cross member and reassembled with the 0.55 mm insect pins pushed through. Now the linkage works nicely.
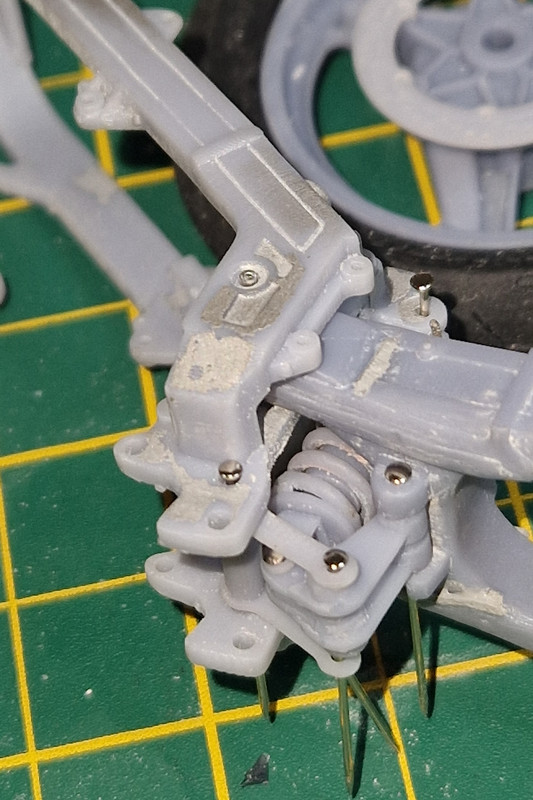
But of course, then I had to go back and correct everything in CAD (with a more realistically proportioned and detailed cross member that nobody but me will ever see) and reprint it...
The other thing I note on these pictures is the attempt I had at adding a weld fillet on the swingarm. I cut a sliver of styrene and then softened with liquid cement, then sort ofdabbed at it until it kind of resembles a weld. It contrasts with the ultra neat appearance of the CAD weld on the frame just above it in the picture. I'm still undecided about it.
At the moment I am doing lots of dry fitting, fettling, discovering I've made an error in the CAD, and looping back to fix things. I'm sure a lot of the things I could fix using the parts and some old fashioned fettling, but a goal I've set myself is the notional target of being able to let someone else reproduce it pretty cleanly from the CAD files.
I'm using insect pins to "bolt" things together, mostly. I've got some 0.1, 0.3, 0.45 and 0.55 mm. The postage was more than the pins. They cut readily but the cutting seems to leave a deformed end, which needs either some fettling or the drilling of a bigger hole to persuade things together. I got one of those drill sets with 0.3-1.3 mm bits every 0.05mm, and they seem to like drilling the resin. Only the biggest insect pins have a head on them.
I've been giving the rear suspension linkage a lot of love, lately, and it hasn't been terribly grateful for it. In this first picture, apart from the various results of my painting and unpainting that are apparent, the spring is crushed against a little corss-member in the frame and this prevents the linkage from articulating nicely.
I went back to my reference eBay frame pictures and sure enough, that cross member sits ahead of the back edge of the frame. To test everything, I just sawed off the cross member and reassembled with the 0.55 mm insect pins pushed through. Now the linkage works nicely.
But of course, then I had to go back and correct everything in CAD (with a more realistically proportioned and detailed cross member that nobody but me will ever see) and reprint it...
The other thing I note on these pictures is the attempt I had at adding a weld fillet on the swingarm. I cut a sliver of styrene and then softened with liquid cement, then sort ofdabbed at it until it kind of resembles a weld. It contrasts with the ultra neat appearance of the CAD weld on the frame just above it in the picture. I'm still undecided about it.