Academy 1/35 Merkava Mk.IV LIC

Millitary miscellany; Tanks, AFV, Trucks and other Soft-Skin vehicles etc.
User avatar
flakmonkey
Modelling Gent and Scholar
Posts: 3489
Joined: April 6th, 2011, 9:58 am
Location: Down in the tube station at midnight
Contact:

Academy 1/35 Merkava Mk.IV LIC

Post by flakmonkey »

This is next in the build pile, sadly all too topical right now, but the show must go on.

Image

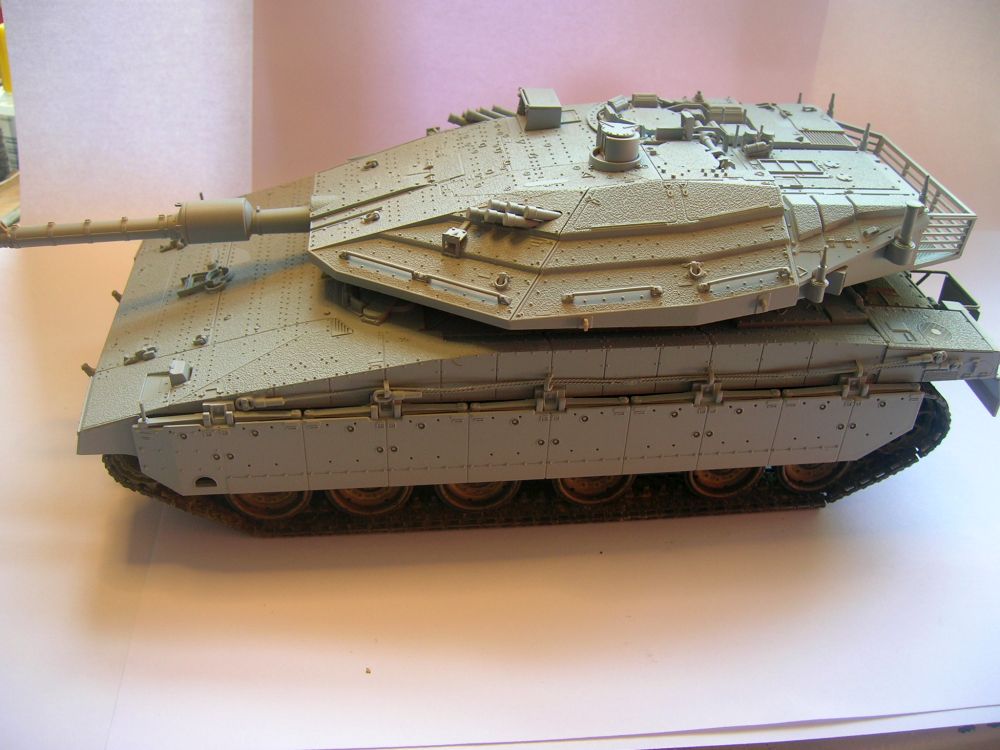
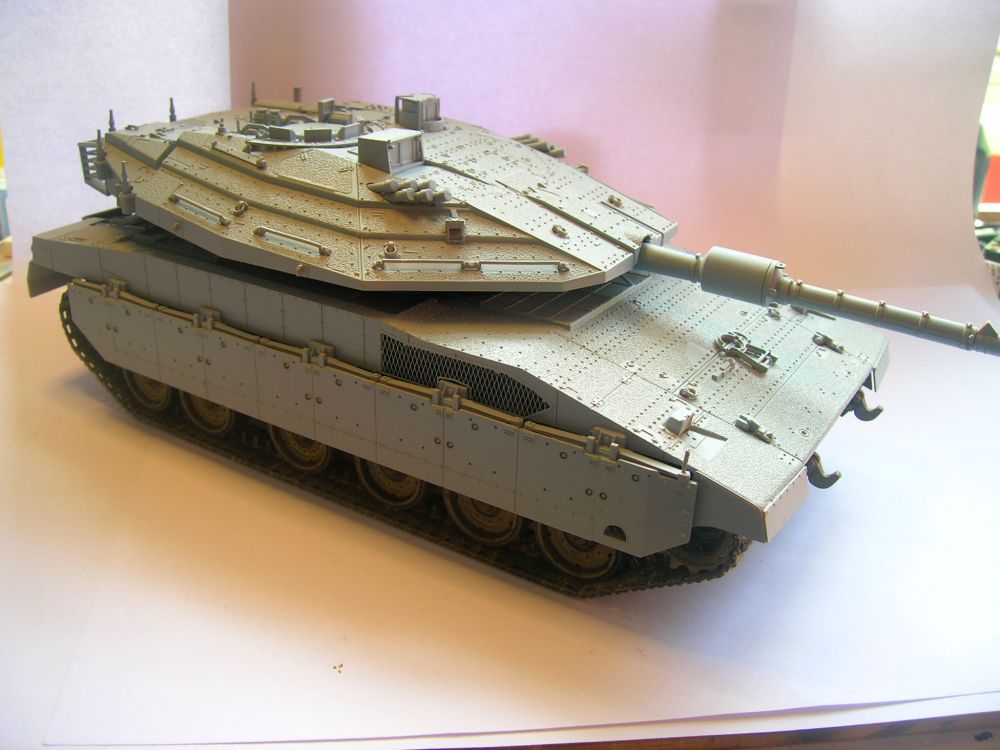
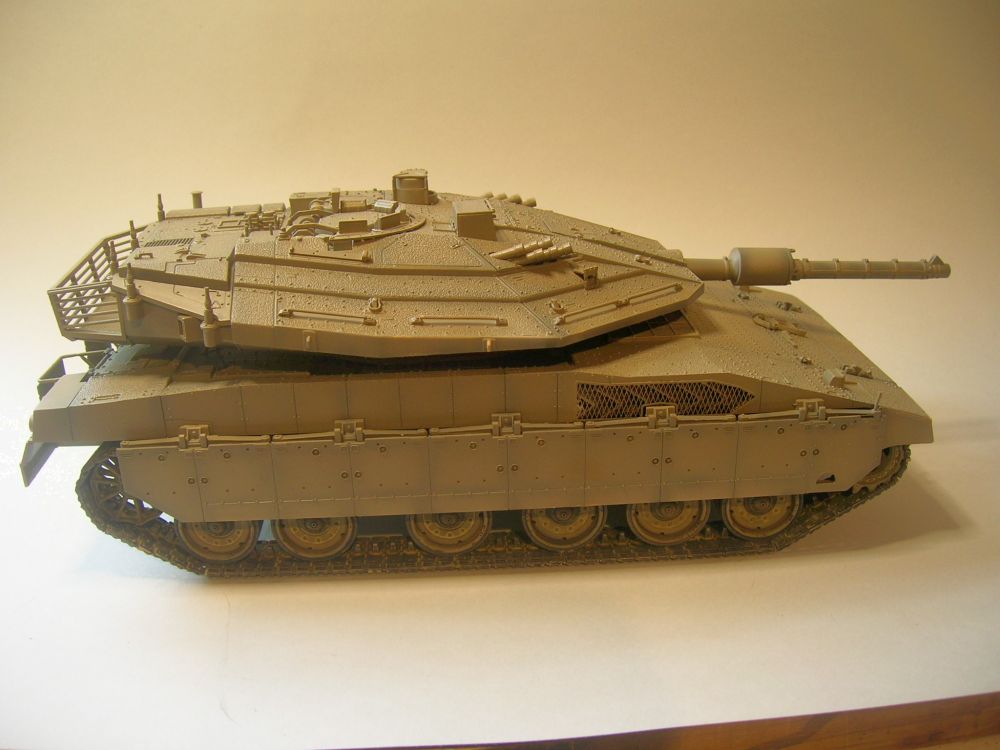
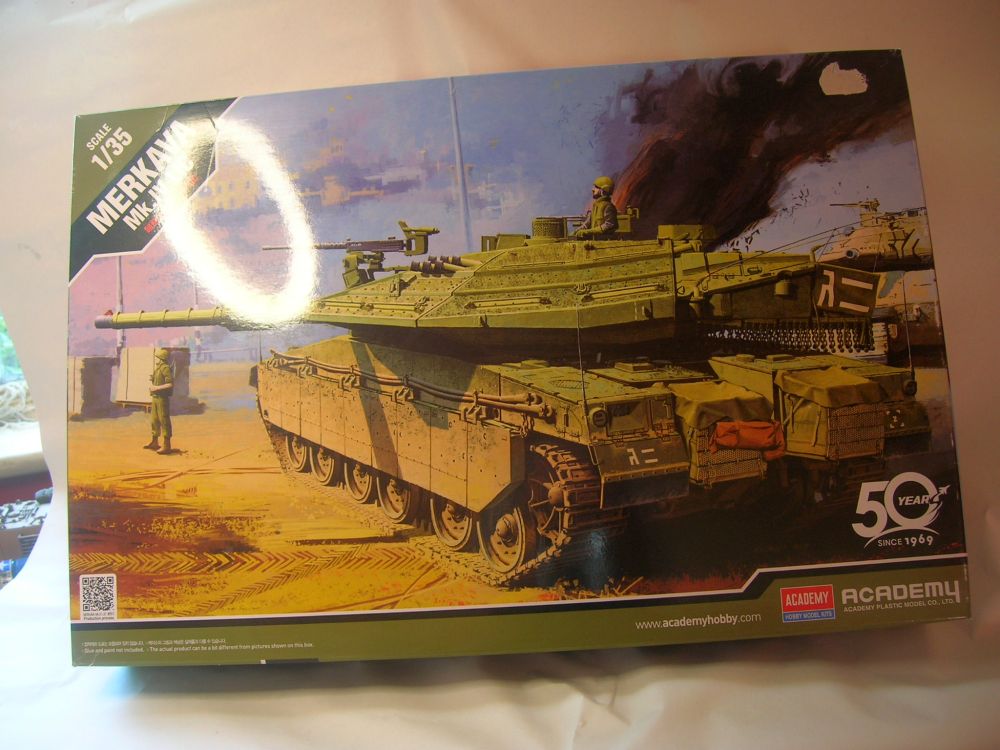
It is, of course, Academy's Merkava Mk.IV LIC. LIC stands for "Low Intensity Conflict", in other words, urban warfare. Academy's previous Merkava kits, the Mk.IID and the Mk.III, are nice enough kits but suffer from having no anti slip texture on the upper hull and upper turret, rather crude injection moulded ball and chain armour, and vinyl tracks.

Let's see what's in the box.

Image

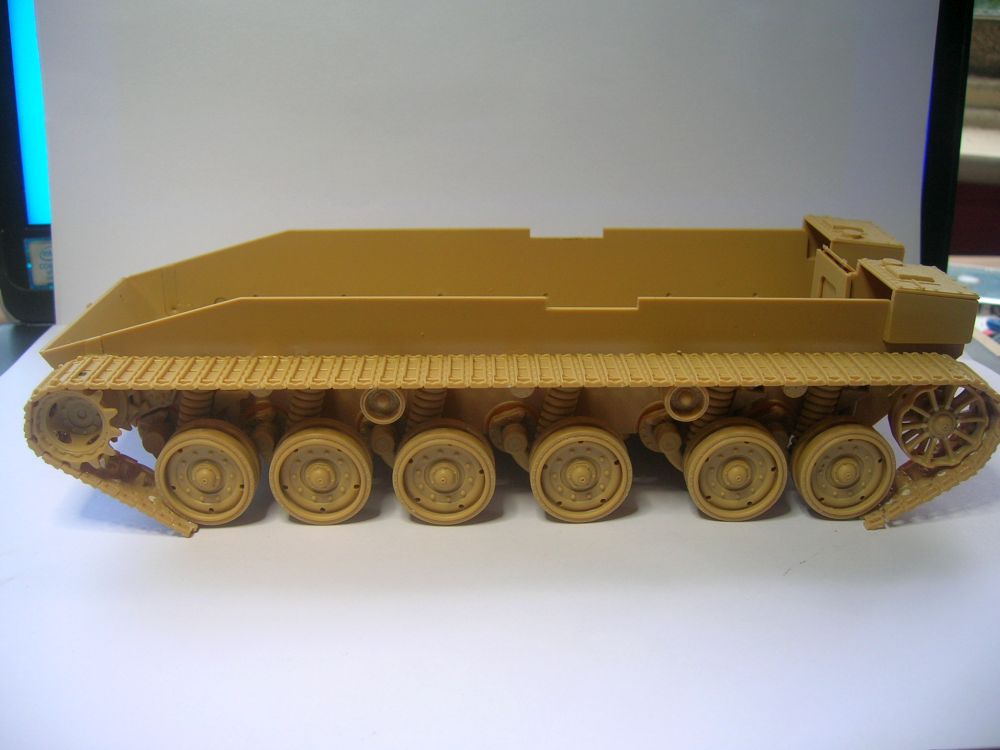
The first thing you notice about the Mk.IV LIC kit is that it costs an extra ten English dollars. The reason for the price hike is that this has been largely retooled and has little in common with the other two kits. The lower hull does still suffer from motorizationitis, with holes for the battery, switch, and control cable. But, fear not gentle reader, for this is taken care of by the inclusion of the additional mine resistant armour package.

Image

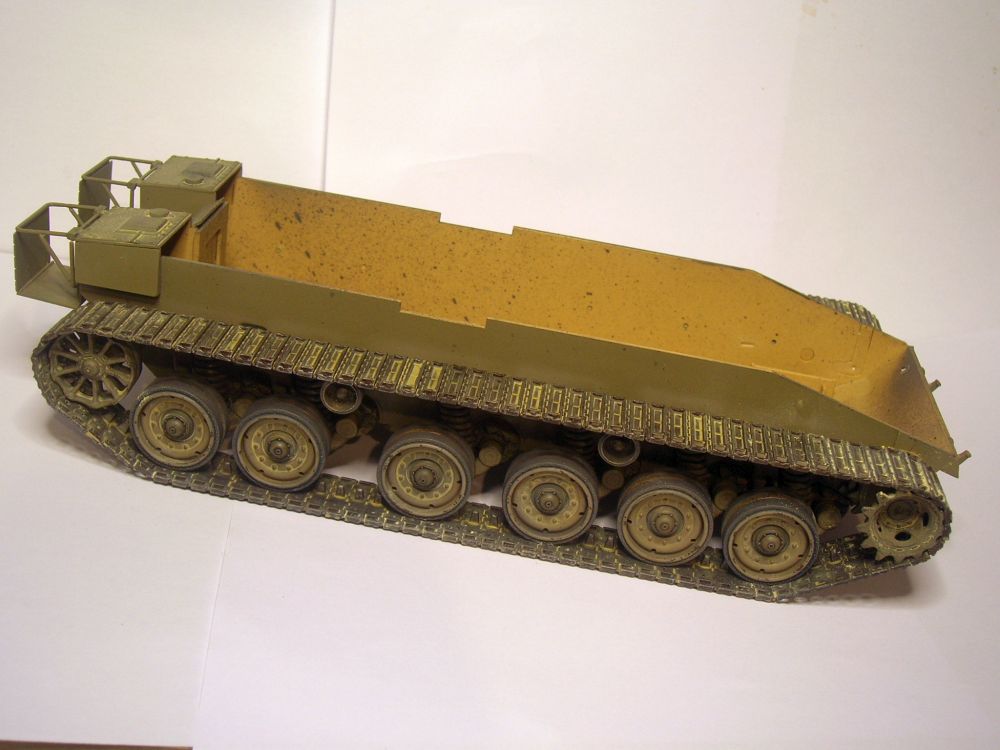
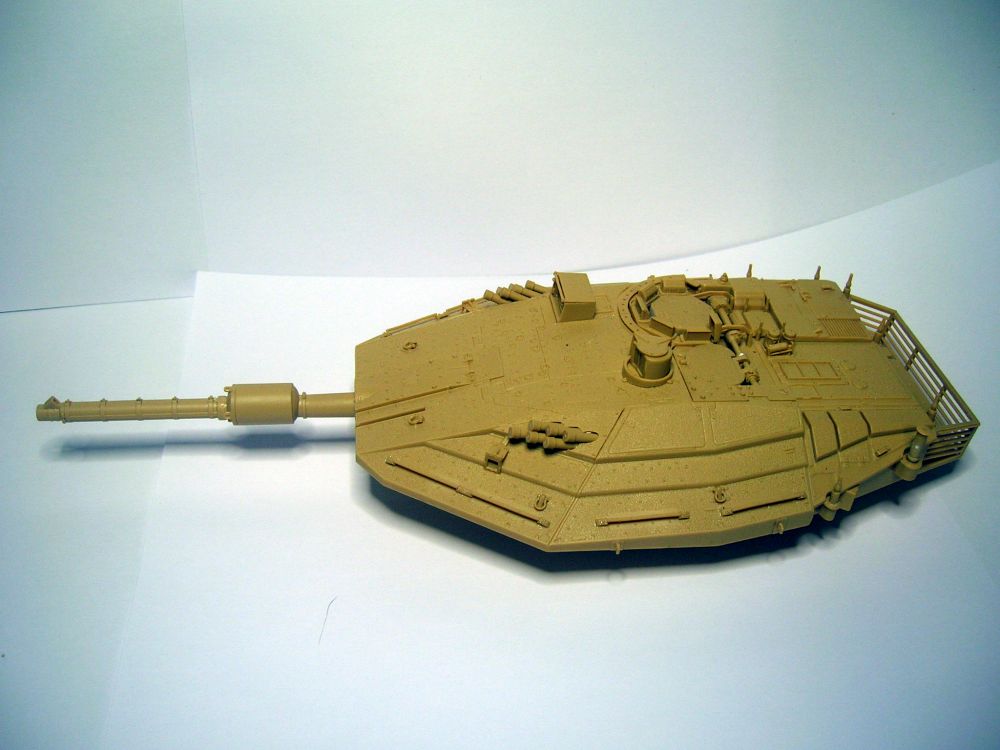
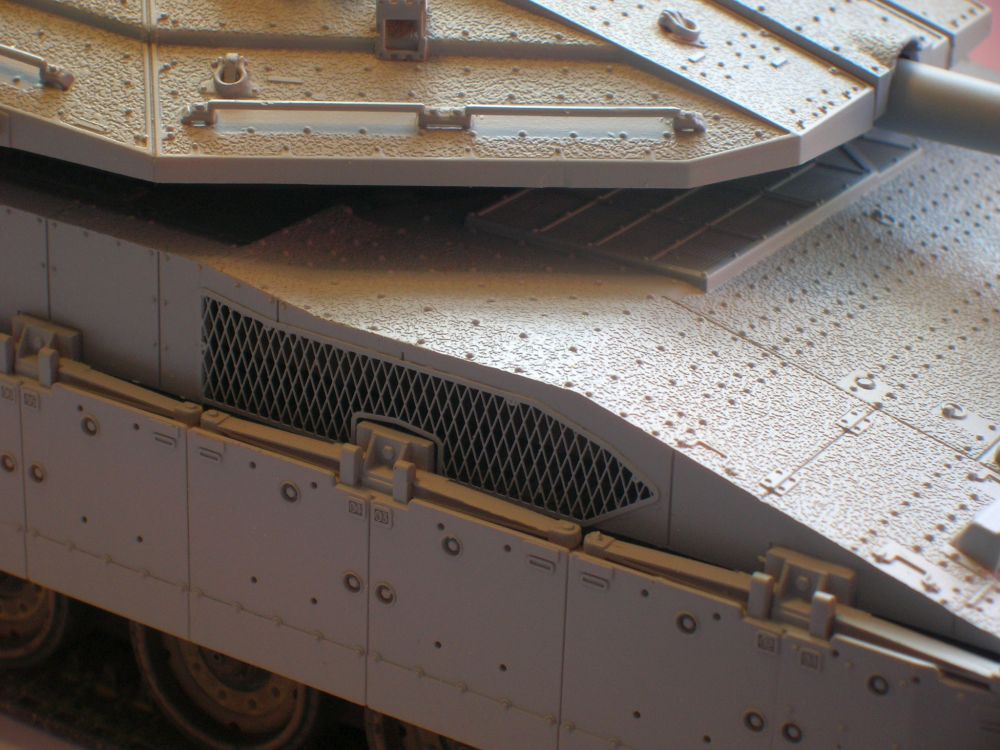
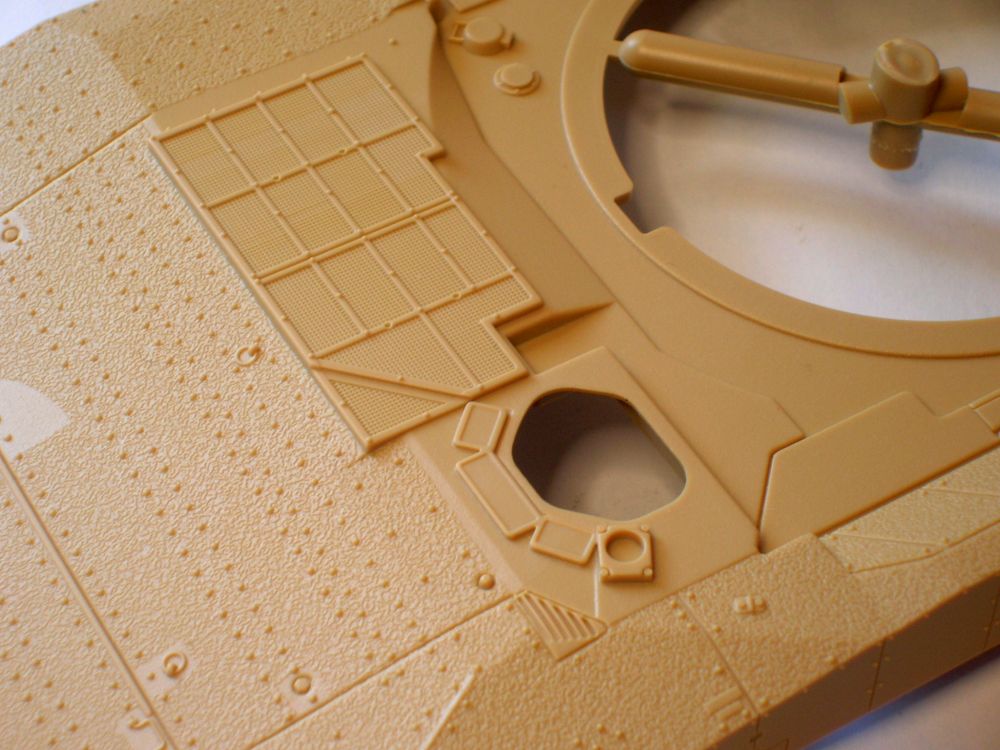
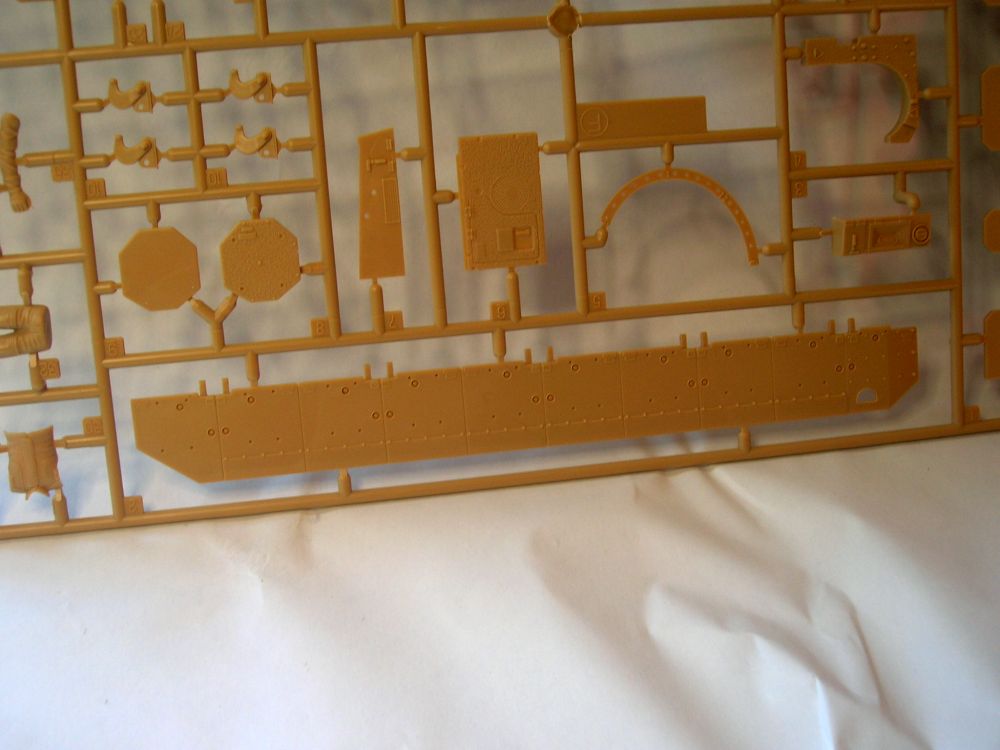
The upper hull and turret are entirely new items, and these actually do feature the anti slip texture which is missing from Academy's earlier Merkava kits.

Image

Image

Image


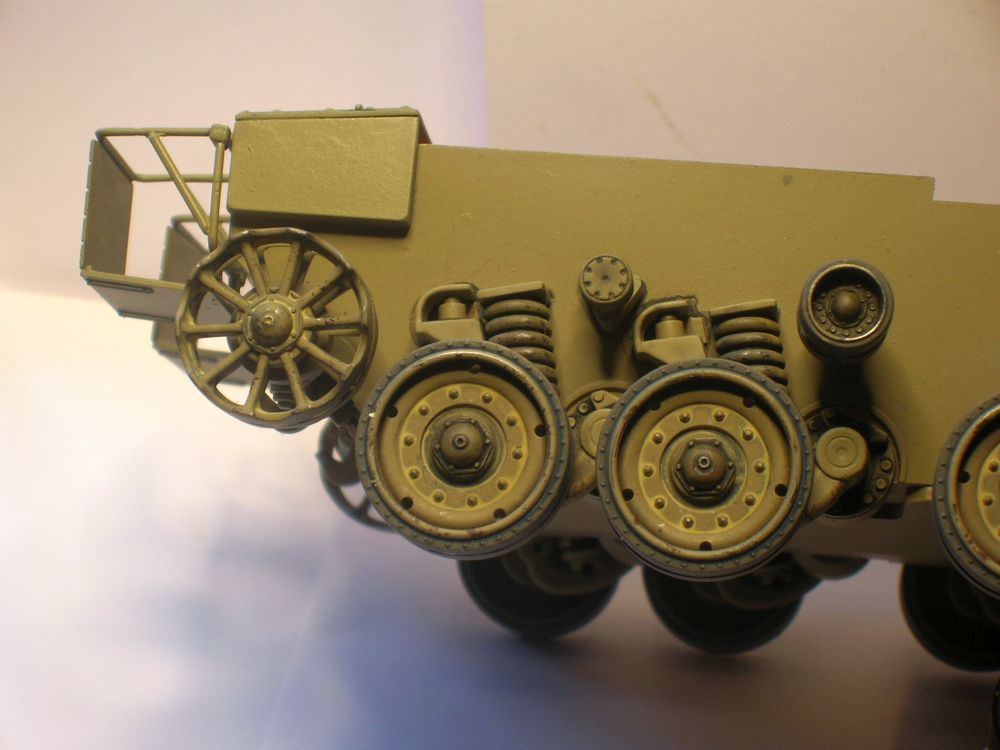
Gone are the vinyl tracks, too, and in this iteration of the Merkava you get link and length tracks. These do have ejector pin marks which the modeler will need to deal with, but they are not difficult to do and this is a far superior arrangement to the older vinyl tracks.

Image

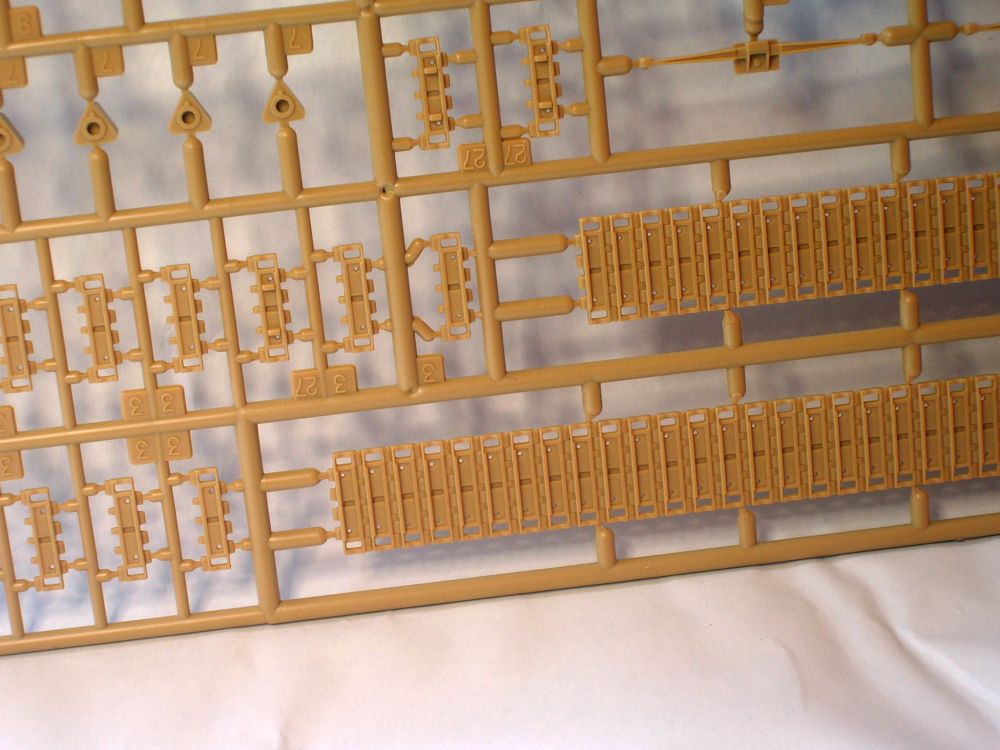
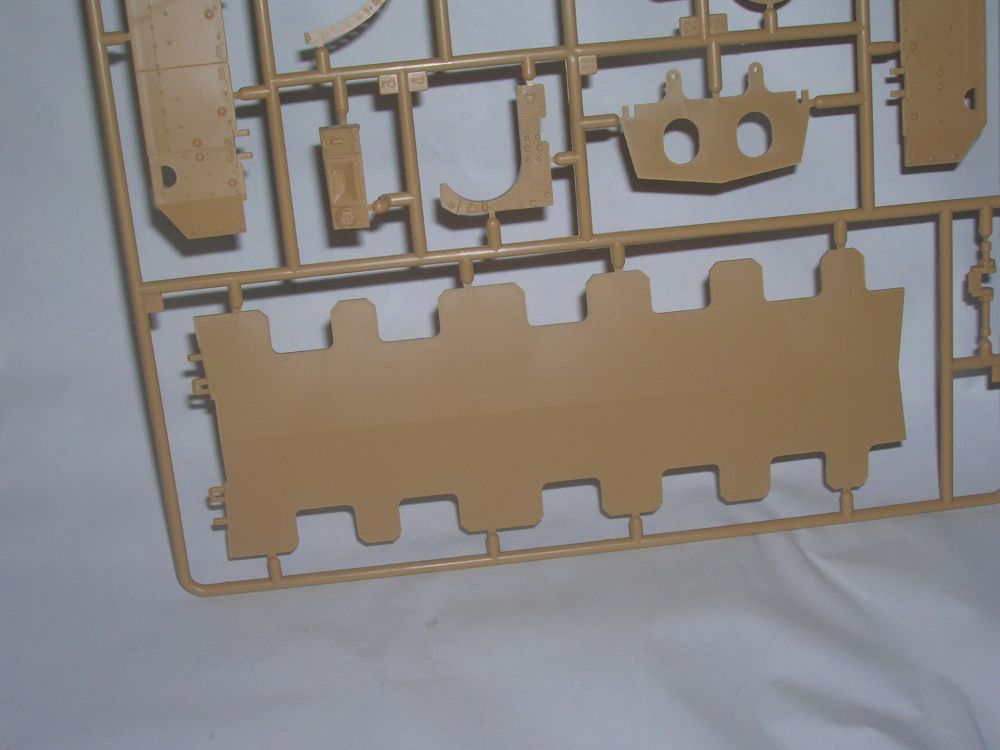
Amongst the many new parts are the LIC specific armoured side skirts, which lack the wavy edge rubber lower sections.

Image

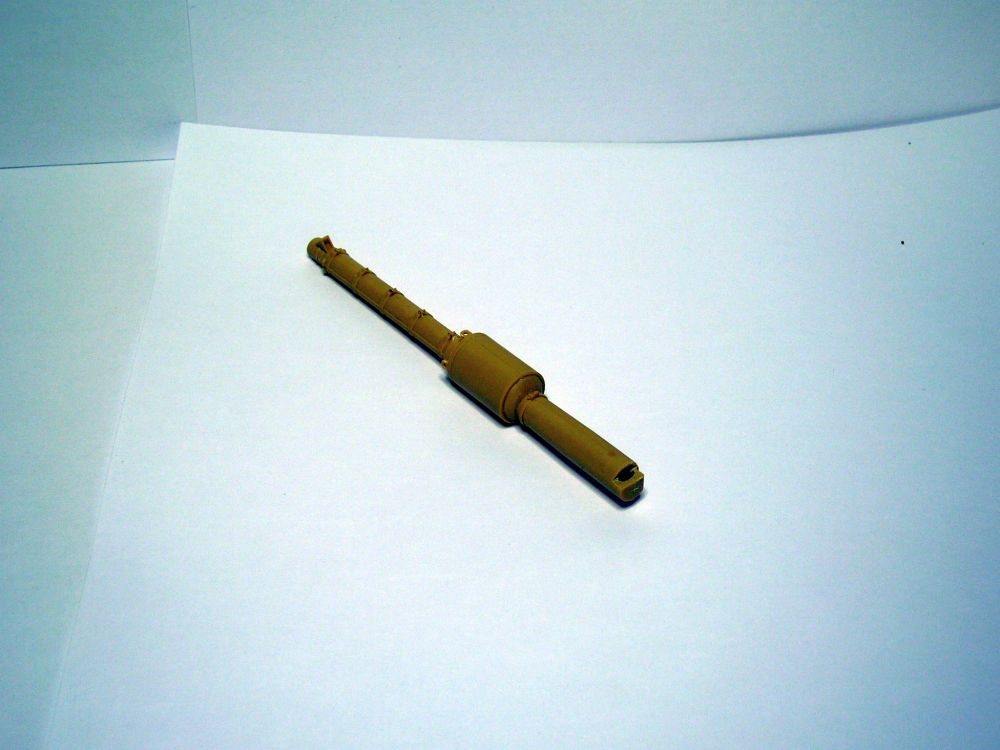
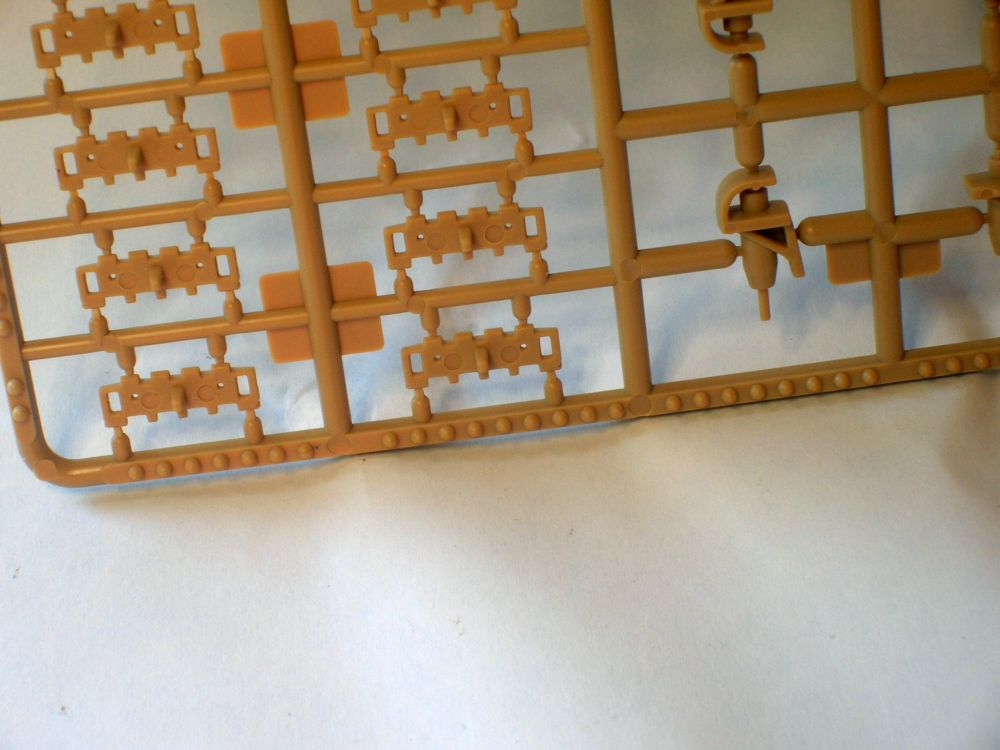
A further upgrade is an all new PE fret, which includes the cage armour for the gunner's sighting system, a pair of protective grilles for the optics, an exhaust cover grille, the cast serial number plates, and the ball and chain armour.

Image

The actual ball section of the ball and chain armour is supplied on the "D" sprue as hemispherical parts that the modeler must slice off and attach to the PE.

Image

This seems a little tedious to me, and I may in fact use 90 second epoxy to do the balls with.

Paint duties will be taken care of by Mig Ammo IDF Sinai Grey, in two flavours.

Image

Vallejo Tan Green/ Hemp or Humbrol 84 are often recommended for Sinai Grey, but the Vallejo especially looks just a little too green to my eye. These look a lot more like it, but to quote Mig Jiminez himself, "the colour is wrong, but it looks right". Make of that what you will.

Overall, a very nice kit which, if Academy's previous Merkavas are any indication, will go together without drama and is very accurate straight from the box.

I intend to begin ruining this perfectly good kit very soon.
Would ya like to learn to fly? Would ya? Would you like to see me try?
User avatar
Stuart
Raider of the Lost Ark Royal
Posts: 19451
Joined: February 25th, 2013, 4:55 pm
Location: North Wales
Contact:

Re: Academy 1/35 Merkava Mk.IV LIC

Post by Stuart »

Nice choice, that does indeed look like a nice kit. I'm going to have to pay a bit more attention to Academy kits in the future, I've not had much experience with them but the ones you've been building look excellent.
Stuart Templeton I may not be good but I'm slow...

My Blog: https://stuartsscalemodels.blogspot.com/
User avatar
flakmonkey
Modelling Gent and Scholar
Posts: 3489
Joined: April 6th, 2011, 9:58 am
Location: Down in the tube station at midnight
Contact:

Re: Academy 1/35 Merkava Mk.IV LIC

Post by flakmonkey »

Stuart wrote: October 26th, 2023, 11:12 am I'm going to have to pay a bit more attention to Academy kits in the future, I've not had much experience with them but the ones you've been building look excellent.
They are locally available to me as their UK importer has opened a very nice model shop just ten minute's walk from my house, and they have also signed up to a local loyalty card thingyummybob that gives me a 10% discount. They are also really nice kits. The 1/48 F-4 Phantom family is especially worthy of note.

Wasting no time, gentlemen, I have delved into the big box of things and I have made a thing.

I now have pretty much all of the Merkava's lower hull completed. The entire enterprise was largely free of drama, apart from the damper attachment arms (parts E6) which were a real nuisance.

Given that these parts are all but invisible on the completed model, I would not blame the hapless modeler for omitting them altogether.

In the interests of science, however, I did attach all six of said recalcitrant items.

Image

Location points are, otherwise, positive, and it really is just a case of snip, clean up, cement. I did check the spindle alignments along a straight edge, and they were perfect out of the box.

Image

The more astute reader will note that the mine resistant armour package has been attached to the underside, too. This is really nicely done and is complete with the attachment shackles. Given that previously, to build a Mk.IV LIC one would have to buy a Takom Mk.IID and a hugely expensive resin conversion kit, this £40 Academy kit represents something of a bargain buy at around one third the cost.

I built up the roadwheels, drive sprockets, return rollers, and idlers, slicing a tiny section from each of the poly caps to ease mounting and dismounting as the build progresses. The road wheels are excellent, featuring a separate outer tyre section that gives an absolutely correct "dirt trap". Meng did this same trick on their outstanding Bradley kit, too. It's an added level of realism and it really is noticeable on the model.

Image

I have PPP'ed the ejector pin marks on the link and length tracks and I should be able to assemble those tomorrow. Speaking of ejector pins, the Academy mad ejector pin guy has been living his best life, and has set about the rear infantry door with a vengeance. He is, I am sure, a distant Korean relative of the Matchbox mad trench digger.

Image

Not terribly difficult to deal with, but a little annoying as the inside (never to be seen) face is pristine. Such is life.

On which note I must report that my wife has insisted that my first task tomorrow is to clean the dishwasher.

I have argued, and I think effectively so, that it is in the very nature of a dishwasher to be a clean piece of equipment anyway, requiring no input from my good self or indeed any other self as it goes about its cleanly business. She is, unfortunately, steadfast in her position, and so I plan to give it a flawless coat of grey primer before she wakes up at whatever leisurely time she chooses.

That should do it.
Would ya like to learn to fly? Would ya? Would you like to see me try?
Bissyboat
Modelling Gent and Scholar
Posts: 1734
Joined: January 11th, 2023, 11:49 pm

Re: Academy 1/35 Merkava Mk.IV LIC

Post by Bissyboat »

Nice kit with crisp and well defined details. I like the knobly texture on the turret. This is is going to be a smash!
"We're going to need a bigger boat"
User avatar
flakmonkey
Modelling Gent and Scholar
Posts: 3489
Joined: April 6th, 2011, 9:58 am
Location: Down in the tube station at midnight
Contact:

Re: Academy 1/35 Merkava Mk.IV LIC

Post by flakmonkey »

The tracks go together without drama. I've assembled the whole thing apart from the bottom run. A quick dry fit shows that the bottom run is a perfect fit. No need to mess about with removing or shortening links here.

Image

I'll build the other side next and put those away safely until I am ready to begin final assembly.
Would ya like to learn to fly? Would ya? Would you like to see me try?
User avatar
B4en
Modelling Gent and Scholar
Posts: 1147
Joined: February 8th, 2014, 9:58 am
Location: South Yorkshire

Re: Academy 1/35 Merkava Mk.IV LIC

Post by B4en »

This is coming along fast and clean!
The past, present, and future walked into a bar. It was tense.
Bissyboat
Modelling Gent and Scholar
Posts: 1734
Joined: January 11th, 2023, 11:49 pm

Re: Academy 1/35 Merkava Mk.IV LIC

Post by Bissyboat »

Nice tracks. Not all individual links. Thankfully.
"We're going to need a bigger boat"
User avatar
flakmonkey
Modelling Gent and Scholar
Posts: 3489
Joined: April 6th, 2011, 9:58 am
Location: Down in the tube station at midnight
Contact:

Re: Academy 1/35 Merkava Mk.IV LIC

Post by flakmonkey »

Thanks for looking.

I have completed the lower hull, including the nicely done rear stowage racks.

Image

The roadwheels, drive sprockets and idlers were all painted in Mig Ammo Real IDF Sinai Grey, then dryrushed with Mig Ammo faded Sinai Grey. Chipping was done with a small scrap of sponge and Mig Ammo's appropriately named "Chipping". A 2B pencil was used for some bright bare metal wear patches here and there, and especially around the roadwheel outer rims.

The running gear and suspension were all washed with a mix of Paynes grey oil paint and odourless thinner, flat coated, and then given another wash of a pale sand colour for a dusty effect.

Image

Image

With all of that complete there was really no reason not to get the tracks painted up and fitted, so that's what I did next. The track base colour is Mig Ammo Burnt Iron. Once dry, this was drybrushed with Vallejo Metal Color Silver. The tracks were then washed with the same light sand wash I used previously.

Image

Fitting the tracks was easy, and the fit was very good. I used tiny blobs of super glue gel to secure them in place. The tracks have a nicely convincing tight wrap around the drive sprockets and idlers. Academy have done their maths right here.

Once happy, I finished off with a light dusting of pale yellow pastel dust which I worked into the various nooks and crannies for a ground-in sandy, dusty effect.

Next, the turret.

Which is enormous, and highly detailed.
Would ya like to learn to fly? Would ya? Would you like to see me try?
User avatar
B4en
Modelling Gent and Scholar
Posts: 1147
Joined: February 8th, 2014, 9:58 am
Location: South Yorkshire

Re: Academy 1/35 Merkava Mk.IV LIC

Post by B4en »

Great work on that running gear. I tend to be much more slapdash so it's interesting to see how others approach their painting.
The past, present, and future walked into a bar. It was tense.
User avatar
flakmonkey
Modelling Gent and Scholar
Posts: 3489
Joined: April 6th, 2011, 9:58 am
Location: Down in the tube station at midnight
Contact:

Re: Academy 1/35 Merkava Mk.IV LIC

Post by flakmonkey »

Thanks again for looking in.

I have been working on the Merkava's turret today. One of the A3 sized sprues is dedicated almost entirely to the turret, which gives some idea of the level of detail that has been crammed in.

Image

That's not complete, it lacks the two machine gun assemblies and none of the PE has been used yet, but it is 134 parts and 10 hours of building.

One unusual wrinkle is the mounting for the main gun, which relies on a keyway cut into the breech end of the gun barrel to locate into the mount. The problem here being that if you do this as ACademy intended, you will mount the gun exactly 90 degrees out of orientation, much like a Sherman Firefly with its sideways (-ish) mounted 17pdr.

The solution was to cut my own keyway at 90 degrees to the original.

Image

It's not a construction error, as there's only one possible way to build the parts involved. A rather puzzling error, but easily corrected. Other than that, a straightforward enough piece of assembly, requiring only a couple of ejector pin marks to be filled, and the drilling out of the six antenna bases to receive their lengths of stretched sprue or wire, or whatever I decide to use when the time arrives.

I think I may do the upper hull next, before tackling the ball and chain armour. That will be fun.
Would ya like to learn to fly? Would ya? Would you like to see me try?
Bissyboat
Modelling Gent and Scholar
Posts: 1734
Joined: January 11th, 2023, 11:49 pm

Re: Academy 1/35 Merkava Mk.IV LIC

Post by Bissyboat »

Nice progress on the Merkava.
"We're going to need a bigger boat"
User avatar
flakmonkey
Modelling Gent and Scholar
Posts: 3489
Joined: April 6th, 2011, 9:58 am
Location: Down in the tube station at midnight
Contact:

Re: Academy 1/35 Merkava Mk.IV LIC

Post by flakmonkey »

Thanks as always for dropping in.

The upper hull is now complete, and both upper hull and the turret have been primed ready for painting. Rather than use the nylon string included with the kit, I made my own tow cables from three strands of 0.3mm, silver jewelry wire, twisted together.

Image

Image

The first piece of PE has gone on, in the form of the protective screen for the exhaust baffle.

Image

The baffle itself is comprised of seven finely moulded parts, and looks really nice. It will be quite clearly visible behind the finely wrought PE screen.

Image

Speaking of PE, I have begun to work on the ball and chain armour.

Image

This could take quite some time.
Would ya like to learn to fly? Would ya? Would you like to see me try?
Bissyboat
Modelling Gent and Scholar
Posts: 1734
Joined: January 11th, 2023, 11:49 pm

Re: Academy 1/35 Merkava Mk.IV LIC

Post by Bissyboat »

It´s a phenomenal beast. Looks virtually indestructable. 8-)
"We're going to need a bigger boat"
User avatar
Clashcityrocker
Modelling Gent and Scholar
Posts: 10827
Joined: May 1st, 2011, 12:31 am
Location: Adelaide. South Australia

Re: Academy 1/35 Merkava Mk.IV LIC

Post by Clashcityrocker »

Wouldn't want to be facing one of those with just a slingshot :shock:

Nigel
User avatar
flakmonkey
Modelling Gent and Scholar
Posts: 3489
Joined: April 6th, 2011, 9:58 am
Location: Down in the tube station at midnight
Contact:

Re: Academy 1/35 Merkava Mk.IV LIC

Post by flakmonkey »

Clashcityrocker wrote: November 2nd, 2023, 5:23 am Wouldn't want to be facing one of those with just a slingshot :shock:

Nigel
Not even with a shotgun.

As always, thanks for looking and following along as I turn a perfectly nice kit into junk.

I have spent some time on applying paint to the turret and upper hull. Normally I would not pre-shade armour, but the Merkava really does lend itself to the technique.

Image

Image

I used Vallejo NATO black over Vallejo surface primer (light ghost gray) and then applied glaze coats of Mig Ammo faded Sinai Grey mixed up with Mig Ammo Transparator to build up the colour very gradually without "killing" the pre-shade. I am happy with the result.

Next task is detail painting and then it's time for weathering.
Would ya like to learn to fly? Would ya? Would you like to see me try?
Post Reply

Return to “Tanks, AFV and other Military Models”