Simon's Space
-
SJPONeill

- Modelling Gent and Scholar
- Posts: 3525
- Joined: May 1st, 2011, 12:01 am
- Location: Near the Spiral, NZ.
- Contact:
Re: Simon's Space
Please critique my posts honestly i.e. say what you think so I can learn and improve...
The World According To Me
The World According To Me
-
SJPONeill
- Modelling Gent and Scholar
- Posts: 3525
- Joined: May 1st, 2011, 12:01 am
- Location: Near the Spiral, NZ.
- Contact:
Re: Simon's Space
Got hands-on with some for real plastic last night...
We are so short-staffed at the moment, the last few months have been a real sleep-work-sleep cycle...great for the bank account but less for for lifestyle...any spare time has been dedicated to keeping up with domestic maintenance...
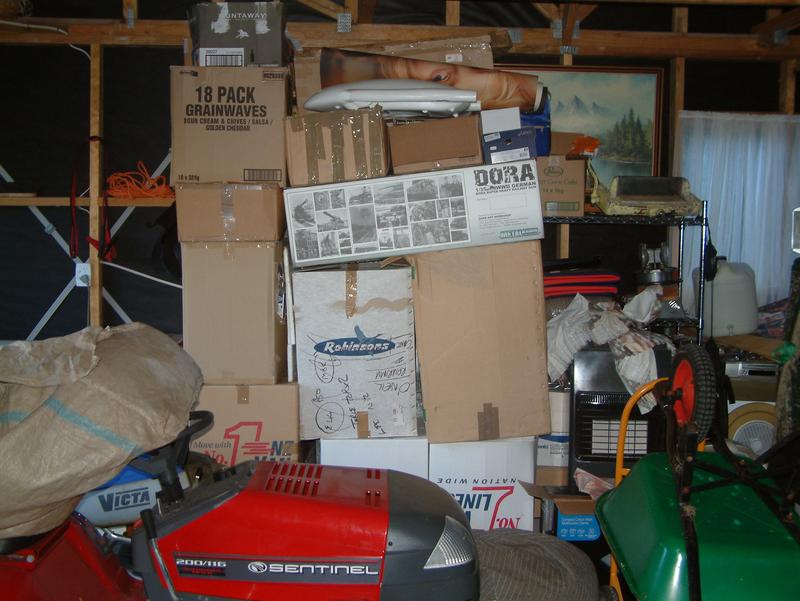
I have a small quick-access stack of kits under the coffee table in the lounge and pulled this out to check for rodents etc as it is that time of year when we often get invaded as temperatures drop. I'm also making sure that all kits are bagged to prevent parts going west and decals and instructions being affected by damp and so this was a chance to check on the welfare of these kits.
I thought that I had deflashed and prepped all the parts in the Lifelike Tillie the Toiler 90mm AAA, mais non, so I tidied up the flash off the wheel hubs and removed a few de-parted sprues. The only part that needs major cleaning up now is the shell tray which is meant to be four parallel rods but which is almost entirely flashed over...it might be easier to try to fabricate a new one...
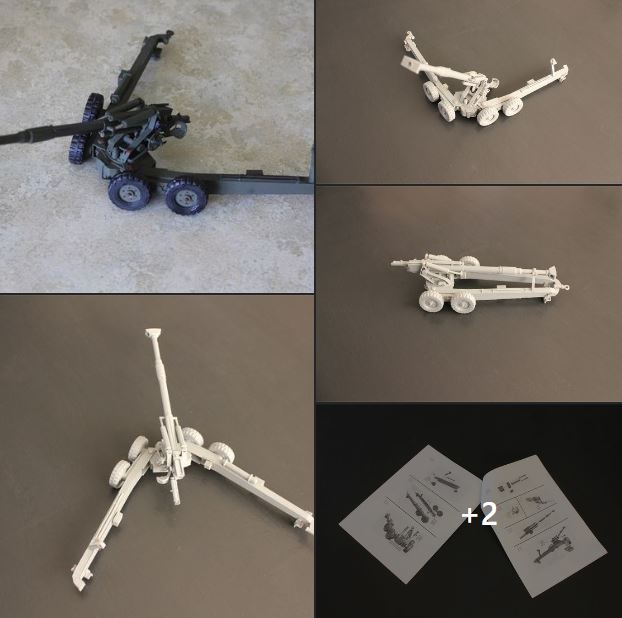
Also pulled out Rob's G-4 (see post above) and had a look at the parts make-up as Rob has asked if I've made any progress yet...
On leave from Thursday morning for a fortnight with two night shifts in Taihape (in Ohakune tonight) between now and then...will update with pix after my first big sleep-in...
We are so short-staffed at the moment, the last few months have been a real sleep-work-sleep cycle...great for the bank account but less for for lifestyle...any spare time has been dedicated to keeping up with domestic maintenance...
I have a small quick-access stack of kits under the coffee table in the lounge and pulled this out to check for rodents etc as it is that time of year when we often get invaded as temperatures drop. I'm also making sure that all kits are bagged to prevent parts going west and decals and instructions being affected by damp and so this was a chance to check on the welfare of these kits.
I thought that I had deflashed and prepped all the parts in the Lifelike Tillie the Toiler 90mm AAA, mais non, so I tidied up the flash off the wheel hubs and removed a few de-parted sprues. The only part that needs major cleaning up now is the shell tray which is meant to be four parallel rods but which is almost entirely flashed over...it might be easier to try to fabricate a new one...
Also pulled out Rob's G-4 (see post above) and had a look at the parts make-up as Rob has asked if I've made any progress yet...
On leave from Thursday morning for a fortnight with two night shifts in Taihape (in Ohakune tonight) between now and then...will update with pix after my first big sleep-in...
Please critique my posts honestly i.e. say what you think so I can learn and improve...
The World According To Me
The World According To Me
-
JohnRatzenberger

- Why is he so confused ?
- Posts: 15736
- Joined: April 5th, 2011, 3:42 pm
- Location: Living on a sandbar - Nags Head, NC.
Re: Simon's Space
There you are !!!
That's quite the muzzle brake on the G-4, wonder if it tips the trails up from overbalance ?
Nautical Research Guild had 2 Zoom workshops on paper/card ship models recently, got me all fired up again so I downloaded a few items from Scale Scenes, where I got the Puffer, but I dropped down to N-scale for space.
Good to see you around, again - take care.
John Ratzenberger 
It's my model and I'll do what I want with it.
It's my model and I'll do what I want with it.
-
PaulBradley

- Staring out the window
- Posts: 21219
- Joined: April 6th, 2011, 3:08 pm
- Location: Flagstaff, AZ
Re: Simon's Space
That's the thing about seasonal work, isn't it? All work, no play. Good to see you playing with plastic again!
Paul
За демократію і незалежний Україну
"For Democracy and a Free Ukraine"
За демократію і незалежний Україну
"For Democracy and a Free Ukraine"
-
SJPONeill
- Modelling Gent and Scholar
- Posts: 3525
- Joined: May 1st, 2011, 12:01 am
- Location: Near the Spiral, NZ.
- Contact:
Re: Simon's Space
Thanks, John
Good to be back - well, not lurking any more...
I used to know heaps about the SADF systems in the 80s but have overwritten/forgotten most of that now...I think though that the whole system was quite well-balanced and that the transition from firing to towing position was quite smooth...might have to see if I can dig out all those old MilTech magazines if my ex didn't toss them all) and refresh myself...Rob's selection is still growing and I saw a L119 Light Gun on his page today...
Great to see you getting back on the paper trail...my mission over my leave is to complete all my summer projects (from a few summers!) and get a decent indoors workspace sorted out so I can model easier over winter. Card modelling brings an extra challenge now as my big dog has developed a taste for cardboard and lays claim to anything that is not secured properly or that looks like it MIGHT end up on the floor...
Please critique my posts honestly i.e. say what you think so I can learn and improve...
The World According To Me
The World According To Me
-
SJPONeill
- Modelling Gent and Scholar
- Posts: 3525
- Joined: May 1st, 2011, 12:01 am
- Location: Near the Spiral, NZ.
- Contact:
Re: Simon's Space
I'm slowly sorting throu8gh my stash and moving it all from cardboard boxes into plastic bits to better protect the contents from damp and other vermin.
I think I bought the Dragon LSSC in the early 90s after being summoned (again) to Army HQ to explain myself - can't remember which infraction this was this time but had time to wander around Wellington and found Modelcrafts and Hobbies in one of its earlier incarnations before it moved to the shop on the corner of Victoria and Dixon Streets.
I did a bit of building - usually I stop when I need to do some painting - but this time I seem to have stopped well before that point. It wasn't through lack of interest in the kit otherwise it would have disappeared in one of the big purges I had in the 90s. Anyway, I found during the current stash re-org and was surprised that there is still quite a bit of pre-painting assembly that still can be done...
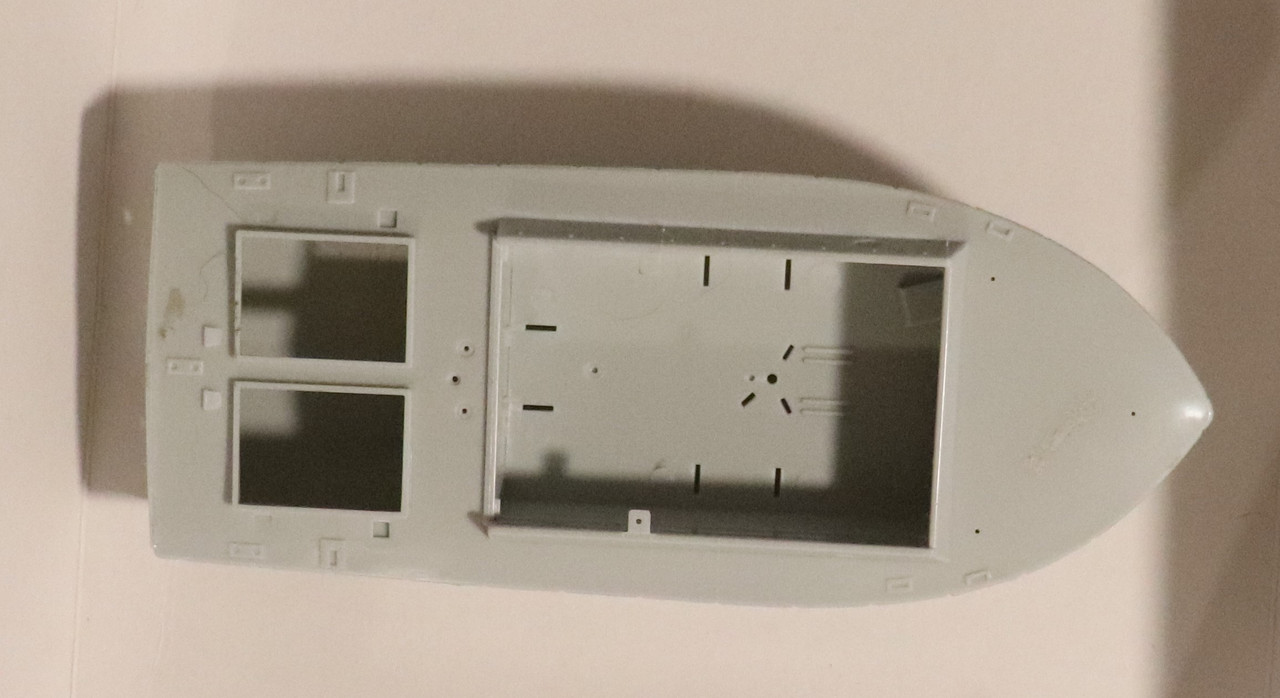
This is the hull as far as I got orginally...

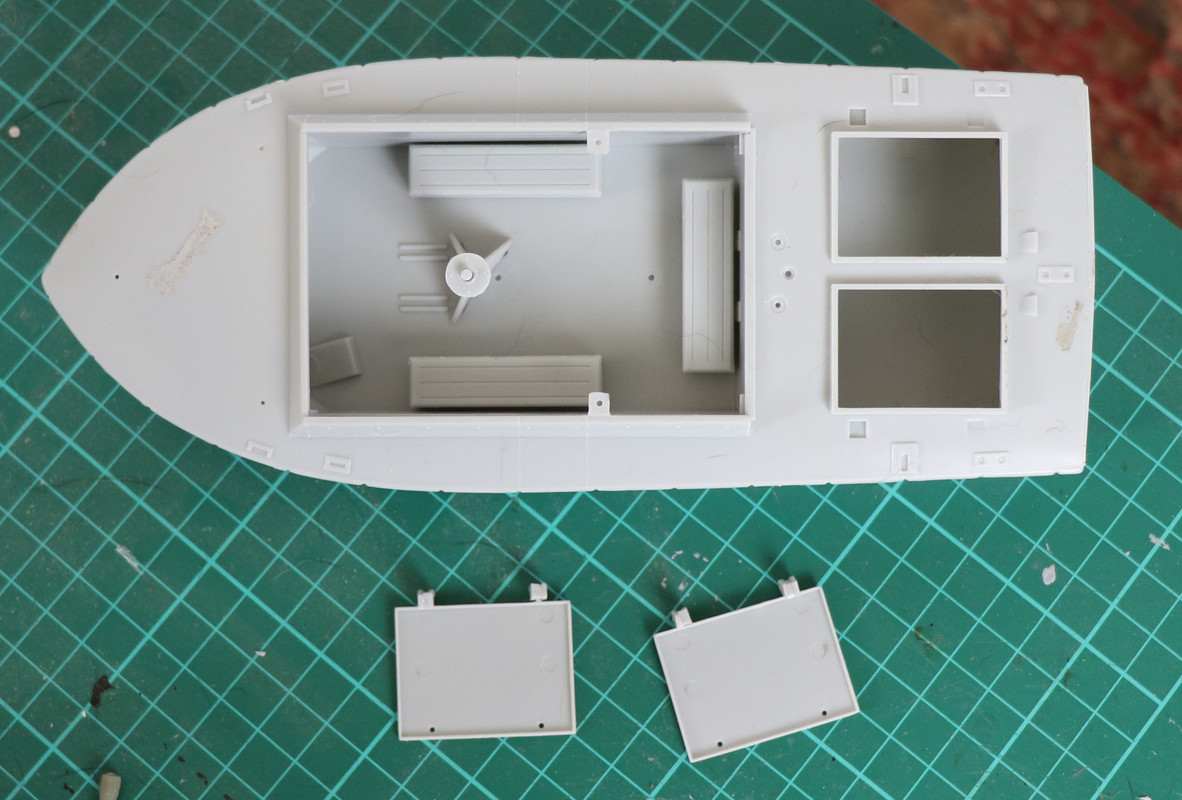
These are some of the parts that I've taken off the sprue and tidied up prior to fixing in place in the next few days. Engine covers (there are no engines in the kit) will go on as well...
I think I bought the Dragon LSSC in the early 90s after being summoned (again) to Army HQ to explain myself - can't remember which infraction this was this time but had time to wander around Wellington and found Modelcrafts and Hobbies in one of its earlier incarnations before it moved to the shop on the corner of Victoria and Dixon Streets.
I did a bit of building - usually I stop when I need to do some painting - but this time I seem to have stopped well before that point. It wasn't through lack of interest in the kit otherwise it would have disappeared in one of the big purges I had in the 90s. Anyway, I found during the current stash re-org and was surprised that there is still quite a bit of pre-painting assembly that still can be done...
This is the hull as far as I got orginally...
These are some of the parts that I've taken off the sprue and tidied up prior to fixing in place in the next few days. Engine covers (there are no engines in the kit) will go on as well...
Please critique my posts honestly i.e. say what you think so I can learn and improve...
The World According To Me
The World According To Me

Re: Simon's Space
The LSSC looks interesting. And the H19 heavily armed is a version I had not heard of. But they were out of service during my brief Army Aviation life.
Besting 60 years of mediocre building of average kits in the stand off scale
-
SJPONeill
- Modelling Gent and Scholar
- Posts: 3525
- Joined: May 1st, 2011, 12:01 am
- Location: Near the Spiral, NZ.
- Contact:
Re: Simon's Space
Just over 22 feet long, and packs a punch of 3 x M60 and 1 x 40mm AGL, plus whatever the passengers might be carrying...it comes with the Dragon Seal Team set as well but the figures are posed in on-land poses so probs not suitable for mounting onboard. It does have two dedidacted crew figures, one driver with a heli helment and another posed firing one of the M60s...
I just noticed in one in-box review that no radio is included and so now I am trying to resist the urge to add anything else to the cockpit...there's a lot of scope for clagage inside...
I just noticed in one in-box review that no radio is included and so now I am trying to resist the urge to add anything else to the cockpit...there's a lot of scope for clagage inside...
Please critique my posts honestly i.e. say what you think so I can learn and improve...
The World According To Me
The World According To Me
-
SJPONeill
- Modelling Gent and Scholar
- Posts: 3525
- Joined: May 1st, 2011, 12:01 am
- Location: Near the Spiral, NZ.
- Contact:
Re: Simon's Space
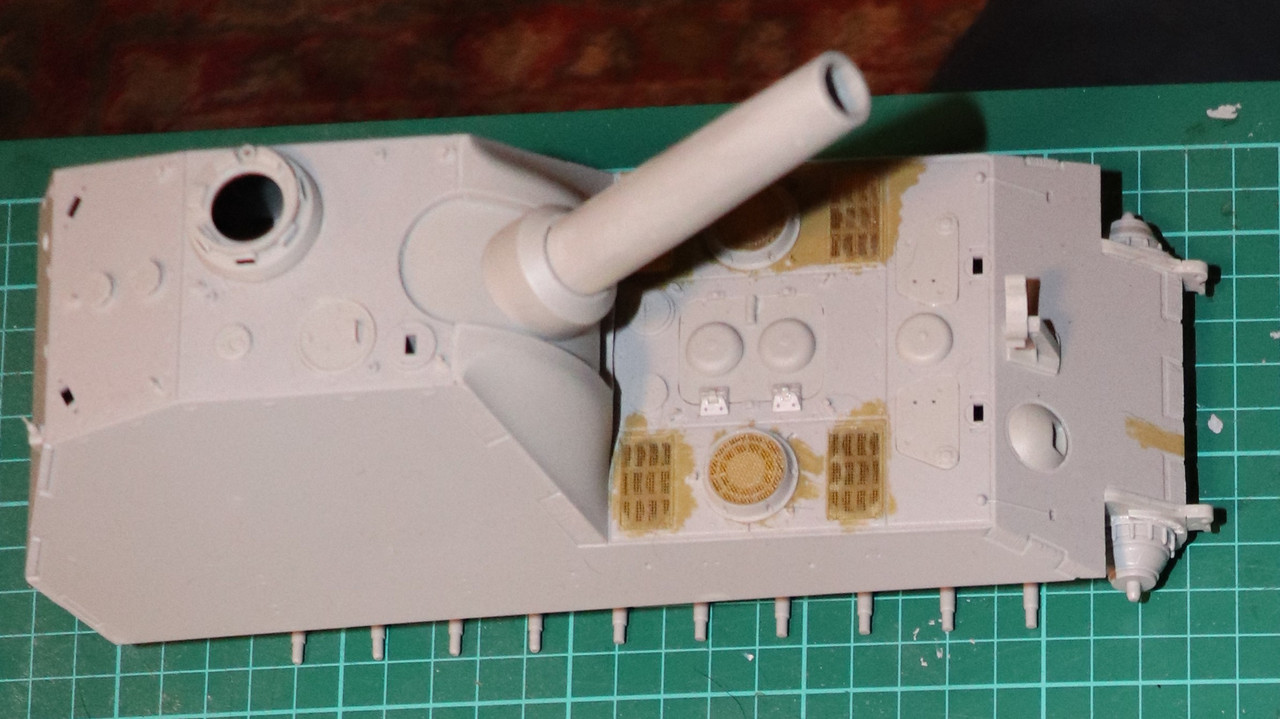
A bit more fiddling last night....
Added the cockpit stowages boxes x 3, added the fiddly hinges to the engine covers (obviously left to be openable in case anyone ever pumps out some applicable 1/35 V-8s); and added the radar mount - which doesn't actually touch the three angle braces on the floor that are meant to support it - don't think anyone will notice unless they are looking for + the braces were too well attached to the floor by now...If I built another of these, I would removed the mounting tabs, fix the radar mount in place first and then shimmy each brace right up to the mounting pole...
Added the cockpit stowages boxes x 3, added the fiddly hinges to the engine covers (obviously left to be openable in case anyone ever pumps out some applicable 1/35 V-8s); and added the radar mount - which doesn't actually touch the three angle braces on the floor that are meant to support it - don't think anyone will notice unless they are looking for + the braces were too well attached to the floor by now...If I built another of these, I would removed the mounting tabs, fix the radar mount in place first and then shimmy each brace right up to the mounting pole...
Please critique my posts honestly i.e. say what you think so I can learn and improve...
The World According To Me
The World According To Me
-
SJPONeill
- Modelling Gent and Scholar
- Posts: 3525
- Joined: May 1st, 2011, 12:01 am
- Location: Near the Spiral, NZ.
- Contact:
Re: Simon's Space
While I was blasting some primer around, I put a layer over the barrel parts from the RHS 5.5" so see how much more work I need to do to cover the filament layers...
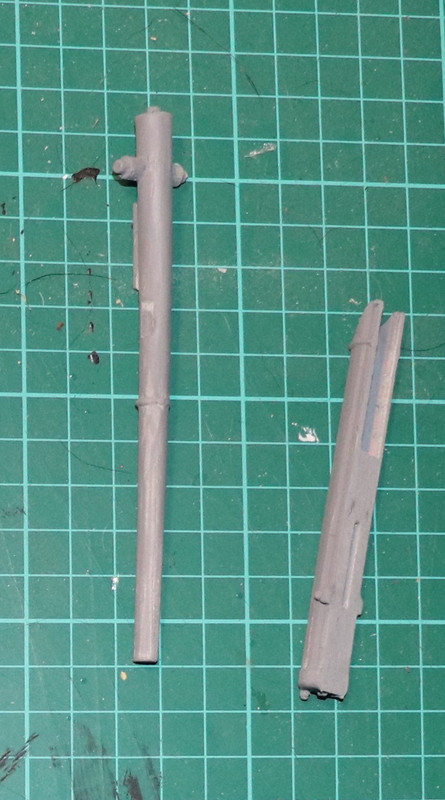
A little more snading around the edges and they should be nice and smooth. I noticed that the barrle has a slight curve in it (it's not actually as bad as it looks here), so will be looking into ways of straightening this without making the problem worse in another dimension...
Have also been putting some time into the Bar, adding more greeble - it would have been primed today as well excpt a couple of the hatch grab handles succumbed to the carpet monster last night: if they don't turn up in tonight's SAROP, then I will have to get some fuse wire when I am in town tomorrow...
Please critique my posts honestly i.e. say what you think so I can learn and improve...
The World According To Me
The World According To Me
-
SJPONeill
- Modelling Gent and Scholar
- Posts: 3525
- Joined: May 1st, 2011, 12:01 am
- Location: Near the Spiral, NZ.
- Contact:
Re: Simon's Space
Added new handles for the driver's and hull gunner's hatches from fuse wire...this was actually easier than trying to tidy up the kit parts so may experiment some more with wire handles...also fixed the headlight in place and mounted the rear idler axles...
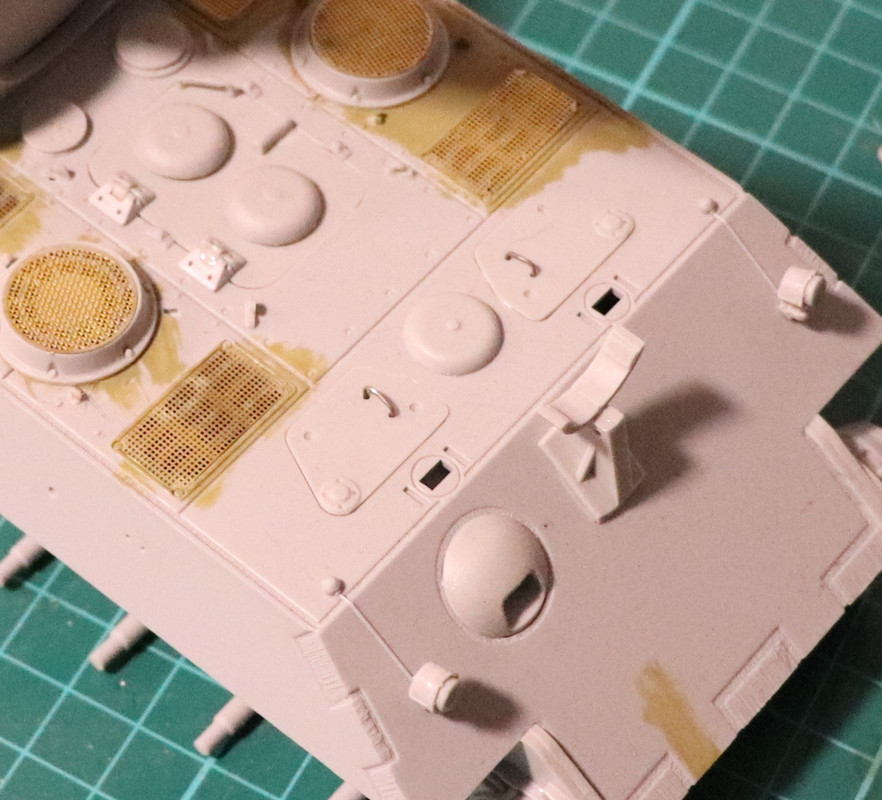
This may also have a date with the airbrush tomorrow...although I just had a horrible thought that I didn't see any Drak Yellow when I was testing Russian Greens this afternoon. Kitbase assures me that I have some ModelMaster Panzer DunkelGelb 1943 but I don't recall seeing that either...
This may also have a date with the airbrush tomorrow...although I just had a horrible thought that I didn't see any Drak Yellow when I was testing Russian Greens this afternoon. Kitbase assures me that I have some ModelMaster Panzer DunkelGelb 1943 but I don't recall seeing that either...
Please critique my posts honestly i.e. say what you think so I can learn and improve...
The World According To Me
The World According To Me
-
SJPONeill
- Modelling Gent and Scholar
- Posts: 3525
- Joined: May 1st, 2011, 12:01 am
- Location: Near the Spiral, NZ.
- Contact:
Re: Simon's Space
DNF'd in the Airfix Vintaged Classics GB but got paint on plastic which is a first in a long time...got stymied on teh road wheel coz I thought from sloppy research (or just casually glancing at some pix) that it had rubber rimmed road wheels and went off on a tangent to over-engineer a solution to this...that added delay and nek minit out of time...
This is as far as we got:
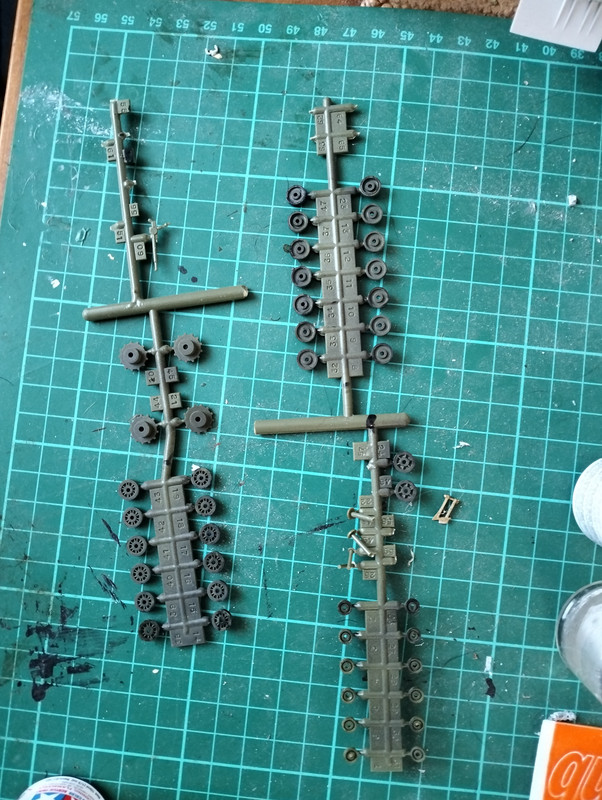
The Tyre black paint that I tried to handbrush on was too liquidy and ended up as a wash on the road wheels. My over-engineered solution was to scan the road wheel sprues to make masks on the Scan'n'Cut that would leave a thin dark lime around the edge of each road wheel. There was a delay getting some frisket delivered and there went the rest of my time - when I could have easily gotten away with a smear of Burnt Iron or similar around each road wheel to show where the (not)rubber hits the road (or track).
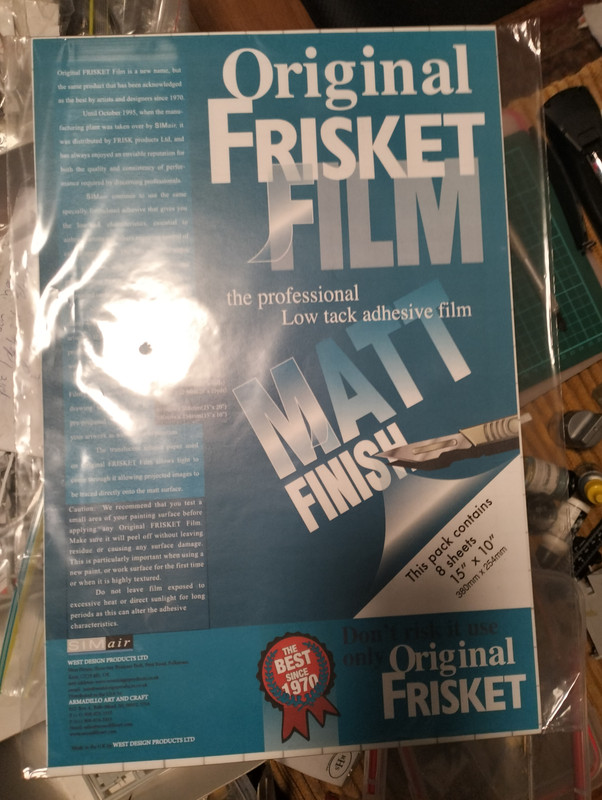
This is the frisket stuff - enough to last for a long time - that I will next try with masks for the Bar wheels and see how that goes. I'll also use this to make masks to replace the pretty average red stars in the JS-3 decal sheet and leave off of the white aiming mark circles on the decal sheet - unfortunately this latest release doesn't have the Guards turret badges as in some previous releases.
In other news, I have been using my limited fee time to continue to transfer the stash from the deteriorating cardboard packing boxes into plastic bins for better storage; also reuniting parts that got separated during the big move and, less successfully, trying to pack like kits together; also trying to get started kits closer to the top of the heap rather than keep starting new kits...
This is as far as we got:
The Tyre black paint that I tried to handbrush on was too liquidy and ended up as a wash on the road wheels. My over-engineered solution was to scan the road wheel sprues to make masks on the Scan'n'Cut that would leave a thin dark lime around the edge of each road wheel. There was a delay getting some frisket delivered and there went the rest of my time - when I could have easily gotten away with a smear of Burnt Iron or similar around each road wheel to show where the (not)rubber hits the road (or track).
This is the frisket stuff - enough to last for a long time - that I will next try with masks for the Bar wheels and see how that goes. I'll also use this to make masks to replace the pretty average red stars in the JS-3 decal sheet and leave off of the white aiming mark circles on the decal sheet - unfortunately this latest release doesn't have the Guards turret badges as in some previous releases.
In other news, I have been using my limited fee time to continue to transfer the stash from the deteriorating cardboard packing boxes into plastic bins for better storage; also reuniting parts that got separated during the big move and, less successfully, trying to pack like kits together; also trying to get started kits closer to the top of the heap rather than keep starting new kits...
Please critique my posts honestly i.e. say what you think so I can learn and improve...
The World According To Me
The World According To Me
-
Dirkpitt289

- NUMA's Auto Mechanic
- Posts: 8724
- Joined: May 2nd, 2011, 1:55 am
- Location: New jersey USA
- Contact:
Re: Simon's Space
Congrats on the new modeling space, let the builds begin
.... Dirk
Beware of the DOG's of WAR
My Youtube Channel
https://www.youtube.com/user/ModelingGu ... rid&view=0
Beware of the DOG's of WAR
My Youtube Channel
https://www.youtube.com/user/ModelingGu ... rid&view=0
-
iggie

- Modelling Gent and Scholar
- Posts: 23438
- Joined: July 31st, 2013, 11:04 am
- Location: North Somercotes, Lincolnshire
- Contact:
Re: Simon's Space
You raise a very good question as regards stash organisation; just how do people organise theirs? Mine is sort of by scale, also genre, and by manufacturer which really means it's disorganised 

Best wishes
Jim
If you can walk away from a landing, it's a good landing. If you use the airplane the next day, it's an outstanding landing
"Never put off till tomorrow, what you can do the day after tomorrow"
Jim
If you can walk away from a landing, it's a good landing. If you use the airplane the next day, it's an outstanding landing
"Never put off till tomorrow, what you can do the day after tomorrow"
-
DavidWomby

- Modelling Gent and Scholar
- Posts: 11766
- Joined: May 1st, 2011, 8:09 pm
- Location: Florida, USA