I have returned to modelling after many years and I am starting to build some German WW2 armour kits.
I'm OK with painting a base coat of 'sand' and wheathering but now I want to bit the bullet and start doing camo colours in green or red brown or both on some kits - but without an airbrush.
Can anyone suggest a method and show examples of how this is best achieved on a budget?
How to paint WW2 German green / red disruptive camouflage in

Re: How to paint WW2 German green / red disruptive camouflag
The disruptive camouflage was added ad hoc in the field. Some tanks had a compressor and spray gun but for most it would be applied with a brush, a broom or an old rag 

All models are equal. Some models are more equal than others.
Airfix Tribute Forum
Airfix Tribute Forum
Re: How to paint WW2 German green / red disruptive camouflag
It seems that in 1/72 scale that the camo patterns that I have appied look too false; a bit like a giant has painted a real tank with a giant brush, when in fact I want to do something that looks in scale.
Perhaps I should use lighter colours for scale effect as to date the green camo looks too harsh.
Any tips greatfully received
Perhaps I should use lighter colours for scale effect as to date the green camo looks too harsh.
Any tips greatfully received
-
beany

- Fat git, glasses, goatie - Avoid!
- Posts: 4334
- Joined: April 6th, 2011, 11:05 am
- Location: Chellaston, Derby
Re: How to paint WW2 German green / red disruptive camouflag
I'm no expert mate, but I'd say start with the base colour, then mix that colour with a bit of white and re-apply, repeating several times with more white but thinning the paint each time to get a faded/ weathered look. Another method I've used is chalk (not oil) pastel dust, scrubbed on with a brush after rubbing it on some sandpaper or a file to get the powder. Again, repeated application will probably be required. At least try it - if you don't like the results then just move on to the next suggestion - nothing ventured, nothing gained eh?!
This was my first attempt at a tank - I usually stick to things with wings. The weathering is all done with the chalk pastel method. Hobby Craft do a nice pastel sets of greys and browns for example for a few quid each.

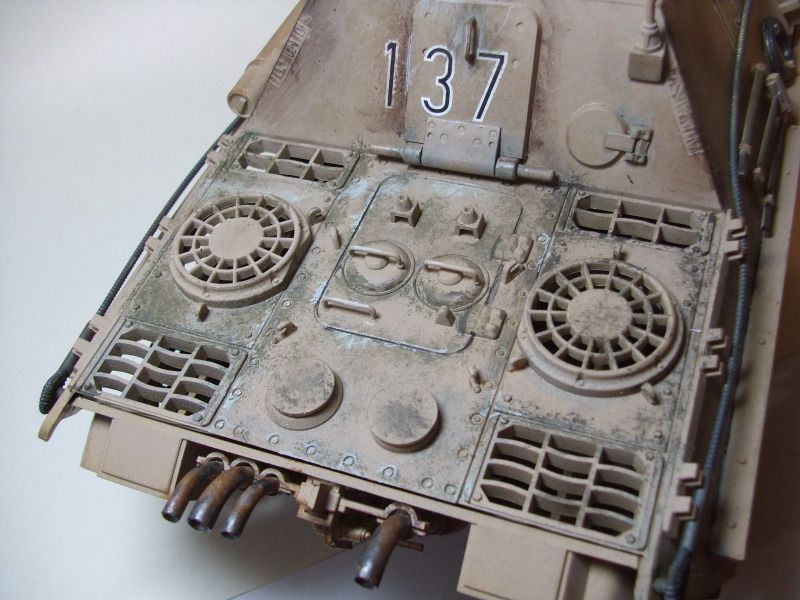
Hope that helps a little but.
cheers
Al.
This was my first attempt at a tank - I usually stick to things with wings. The weathering is all done with the chalk pastel method. Hobby Craft do a nice pastel sets of greys and browns for example for a few quid each.
Hope that helps a little but.
cheers
Al.
2024 Acquired: 9 Built: 1
Re: How to paint WW2 German green / red disruptive camouflag
Thats great
My Airfix Panzer IV looks similar in 1/76 but I'm working on a Sd KFz 250 in 1/72 and wanted to do a camo scheme for it. Perhaps an ear bud will do as a brush for the green. I'll try
My Airfix Panzer IV looks similar in 1/76 but I'm working on a Sd KFz 250 in 1/72 and wanted to do a camo scheme for it. Perhaps an ear bud will do as a brush for the green. I'll try