The IAR 80 and 80A series
In the early 1930's, the Royal Romanian Air Force ( the Fortele Aeriene Regale ale Romaniei, or FARR) sought to purchase modern fighter aircraft from the Romanian company, Industria Aeronautica Romana (IAR). IAR produced prototype aircraft, the IAR 24, but they were unable to meet production goals and the FARR was forced to procure aircraft from outside the country. In 1935, they decided to purchase the Polish P-11B fighter. As the threat of war in Europe increased, the Romanian government grew concerned about interruptions in fighter production, parts, and equipment from Poland. In 1936, they decided on purchasing a license to build the PZL P-24 in Romania using engines built by IAR. However, IAR still continued working on a fighter of their own design.
IAR created a hybrid aircraft by combining parts from their design (IAR 24), with parts from the Polish P-24. So you have the tail section from the P-24 mated with the fuselage from the IAR 24. The engine and cowling were from the P-24, while the wings are from IAR. This aircraft became the IAR 80. It must have worked pretty well as, in Dec. 1939, the FARR ordered production of 100 aircraft from IAR. The aircraft was armed with two .30 caliber machine guns (Belgian license-built Browning's) in the wings and an 870 hp radial engine which gave it a top speed of just under 320 mph at 13,000 feet.
Production was underway when the Germans invaded Belgium and stopped the supply of machine guns to IAR. It wasn't until Romania joined the Axis that supply of the machines guns, ammunition, and other parts would resume in late 1940. When production of the IAR 80 resumed, the FARR would not receive the aircraft until the first quarter of 1941. Pilots then began to fly the new fighter, which they generally liked, but felt it had weak firepower and was under powered. IAR took this information and modified the aircraft still in production. They added two additional .30 caliber machine guns (total of four wing mounted machine guns), and a more powerful engine (960 hp). This would become the IAR 80A.
FARR pilots would use both versions in combat against Soviet aircraft during the German invasion of the Soviet Union in 1941-42. As the Soviets began supplying better aircraft to their pilots, the IAR pilots found their aircraft becoming more and more outclassed. The German Luftwaffe saw this too, and began supplying the FARR with German aircraft on the front lines. The remaining IAR 80 and 80A aircraft were removed from front-line service and placed in reserve for protecting such targets as oil refineries. It is in this role that they began having combat with aircraft of the USAAF. They would serve in this capacity through the end of Romania's involvement in the war.
LTD Models kit
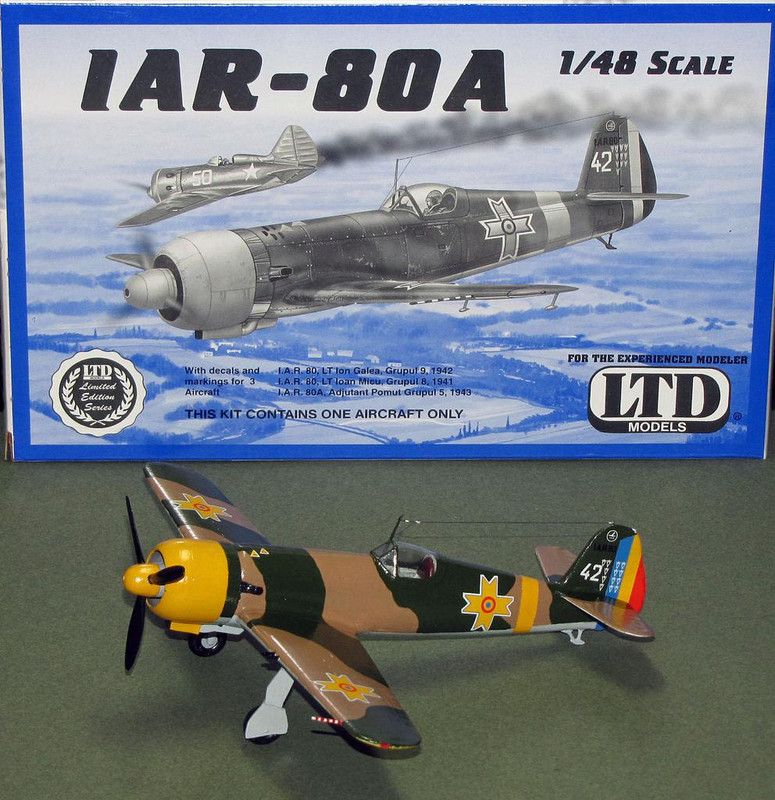
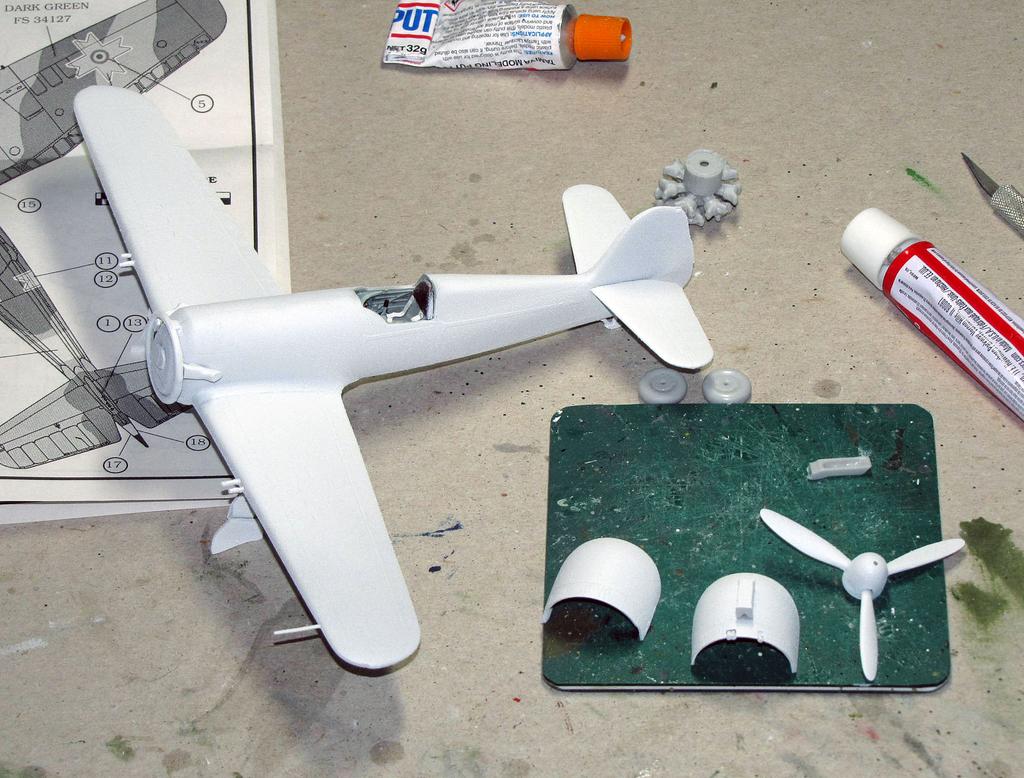
The IAR 80 is a limited release / short-run kit from LTD Models in the Czech Republic. I couldn't find a release date for it (not even on Scalemates). The sprues, decal sheet, and clear canopies are in a single bag, packed inside a box with attractive cover art on one side, and profiles of the three different aircraft you can build. Here's a pic of the open and unbagged kit:
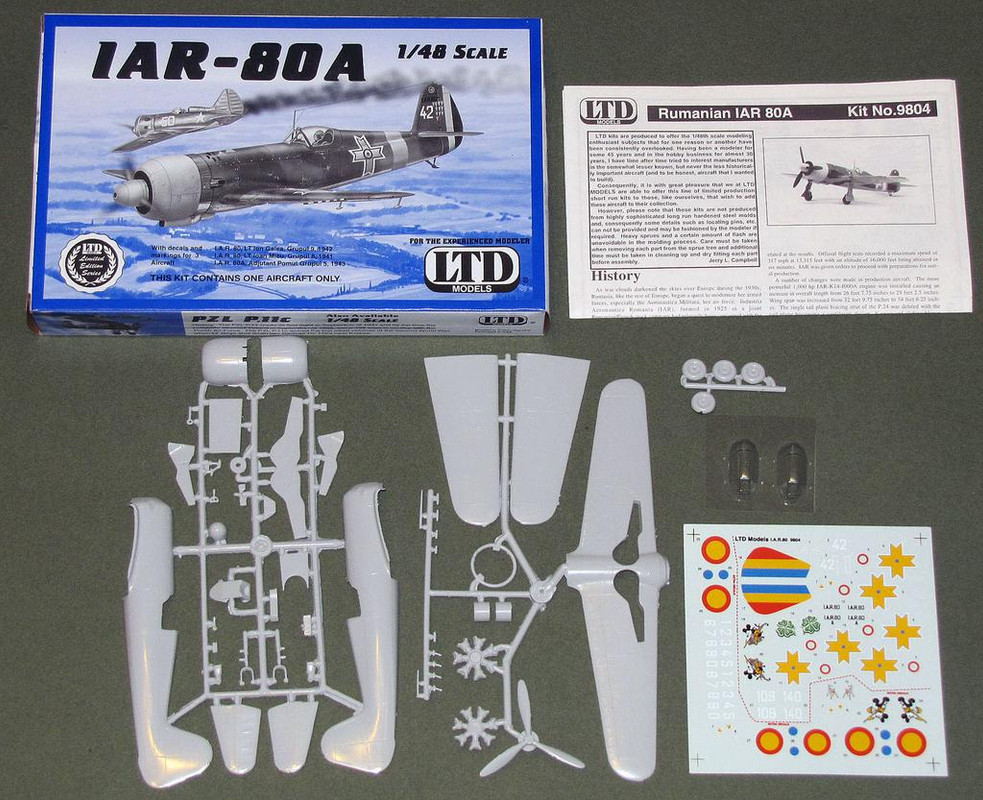
The parts are attached to two sprue trees of light gray plastic (of good quality). Panel lines are very light and some are raised. You get two vacuform canopies (both are the same) that have some visual distortion, but are not to big of a problem. The decals are really quite nice with good color and register. The instructions are only okay in that they show how to assemble the parts. However, neither the instructions or sprue trees have any part numbers. This can be a problem as many of the small parts are globby (through poor molding) and look alike. I used a throttle for the control stick until I found the error and replaced it. Here's a closer view:
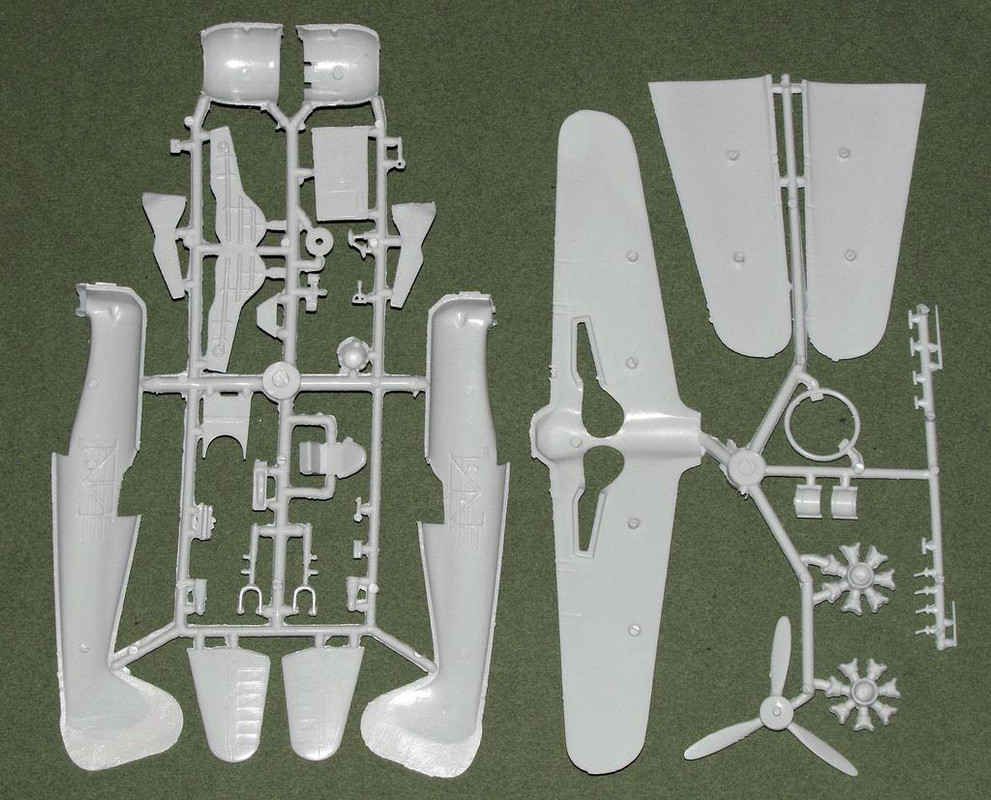
You can just about see that there is plenty of flash to keep you busy scraping and sanding. You can also spot the HUGE ejector pins on the wings. Parts are attached to the trees with excessively large, and badly placed, attachment points. This causes a lot of problems with some of the smaller parts and the cowling. One last thing, you cannot see how badly the plastic is with a multitude of bumps and globs of plastic that sometimes ruin the detail on the model.
The Build
Starting with the cockpit, you can see there isn't much in the way of detail. There are some rudimentary details on the sides and on the control panel, but that's about it.
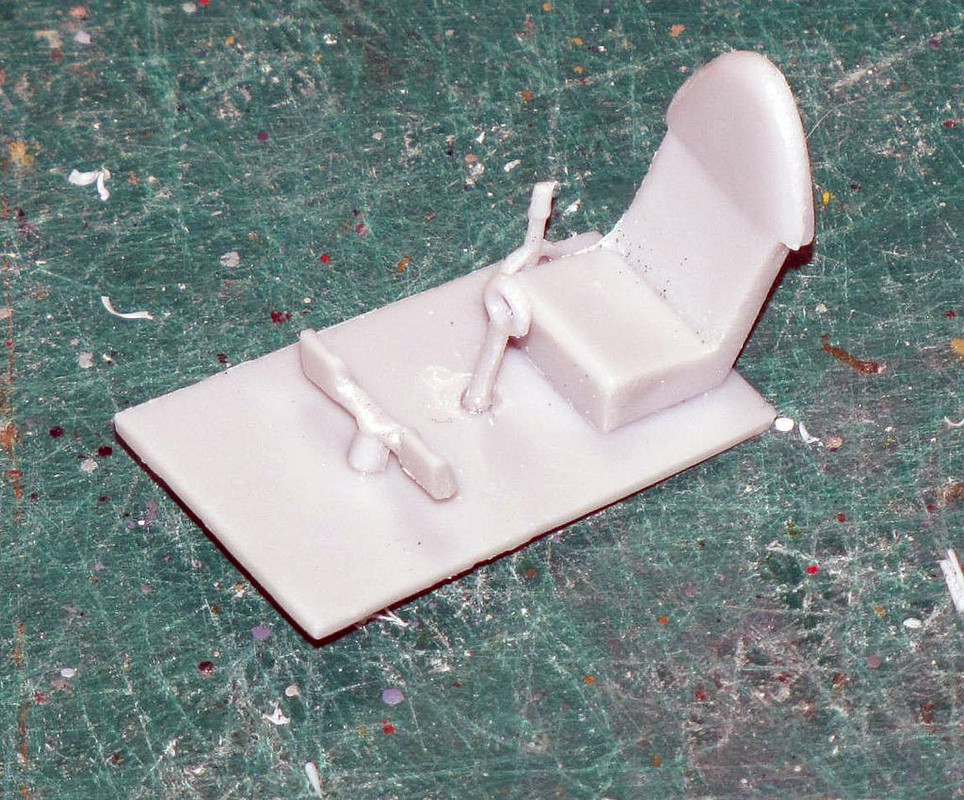
I added seat belts and harness for the pilot. I also added a fire extinguisher to the side panel after seeing one in a pic of the cockpit of an IAR 80.
Next come the wings. The wheel wells are not enclosed at all. I fixed that by enclosing them with card leftover from my SeaMaster build (wonderful stuff to have around!).

After that's done I can add the top halves to the wing. Be prepared to drill the gun ports. I should mention that you can also modify the wings to the "up-gunned" IAR 80B version if you like (six machine guns). The instructions tell you what to do should you opt to make it so. While the wings set, I glued the fuselage together. Filler was needed as there were globs of plastic in the exhaust vent on the top (one side was good while the other ruined). I filled them both in and sanded away.

I didn't take pics of the wings and horizontal stabilizers being joined to the fuselage (the latter being a pain as they were butt-fitted and had a hard time staying attached). Same with the wheels which seem a tad weak. Here's a pic after the parts were primed:
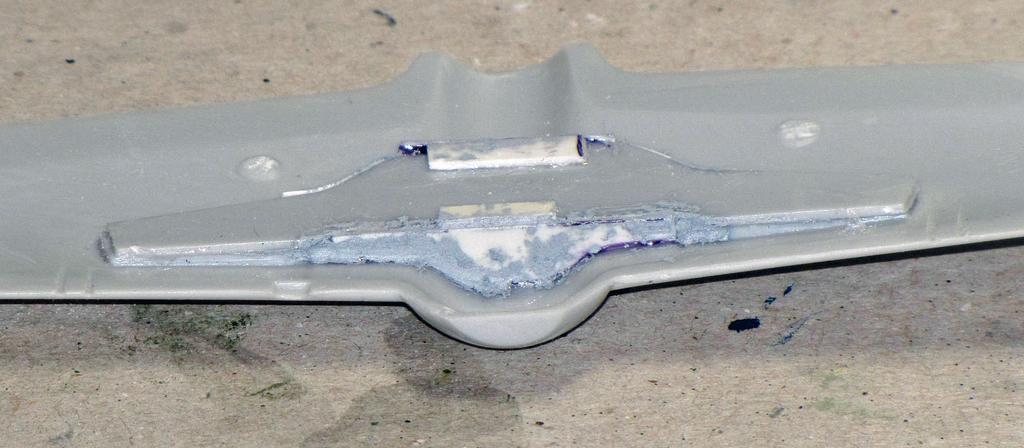
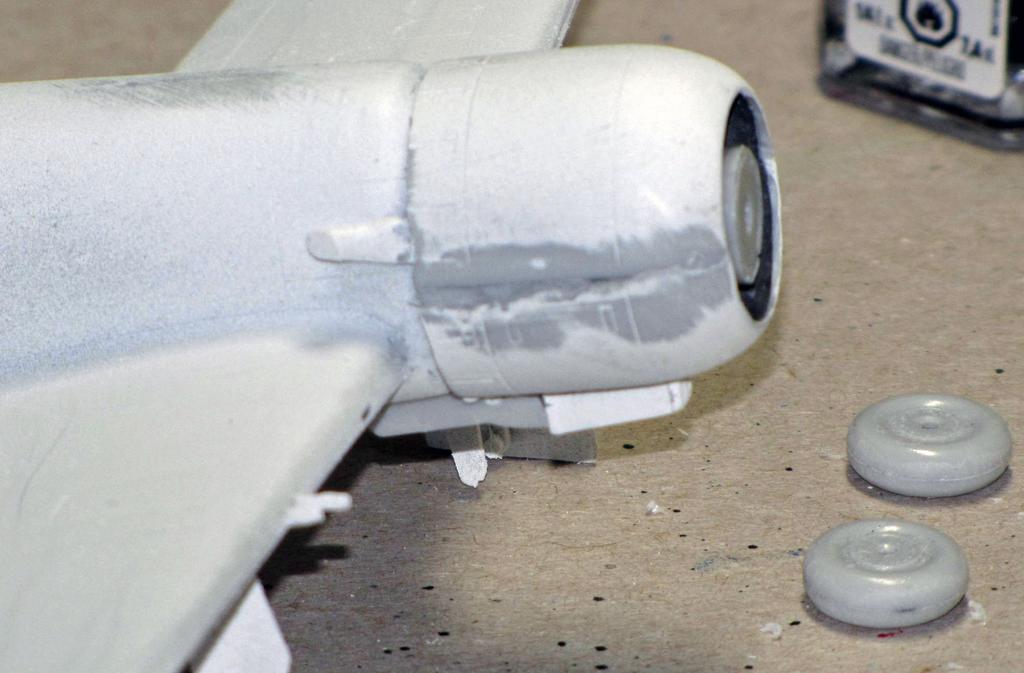
After the engine is glued in place, you can install the cowling. Unfortunately, the cowling cannot be glued together before placement over the engine. Rather, you need to glue the two halves together on the engine. In my case it was complicated by some poorly fitted parts, which necessitated the removal of the exhaust ring. The cowling also had a large gash from where it was attached to the sprue (seen here):
Painting and decals
The painting instructions were pretty good and were well illustrated. Same with the decals. The decals were easy to apply and, in my opinion, were of a proper thickness. Here's the start of the painting:

For the most part, I found this section to be the easiest to do. I did have a problem with the can of primer I used which made the model looked like it was flocked (as in that stuff you spray on Xmas trees to make them look like they have snow on them). I never had that happen before and had to scrape and sand the stuff off the model. After painting, I coated the model with a couple of coats of clear acrylic and applied the decals. Then another coat or two of the clear acrylic. I wanted to do some minor detailing and weathering but decided not to since most of the panel lines had been obscured or ruined by the sanding.
Then came the Dullcote. I've applied it before and sometimes get a less than smooth application. So I thought I would try brushing it on instead (what could go wrong?
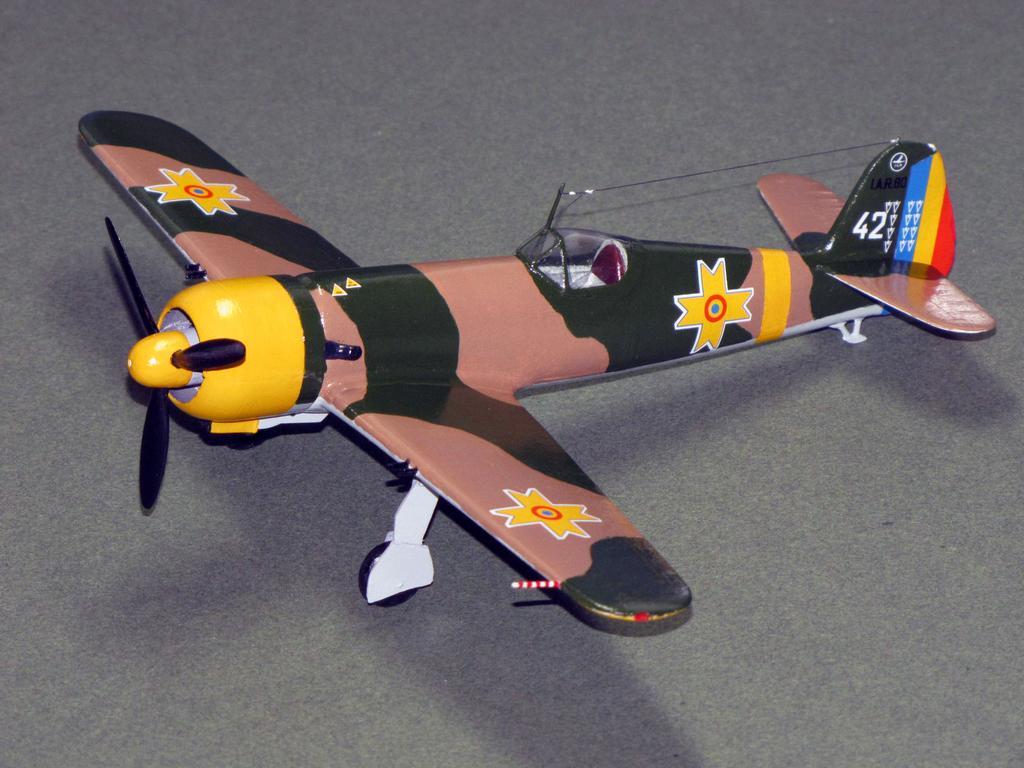
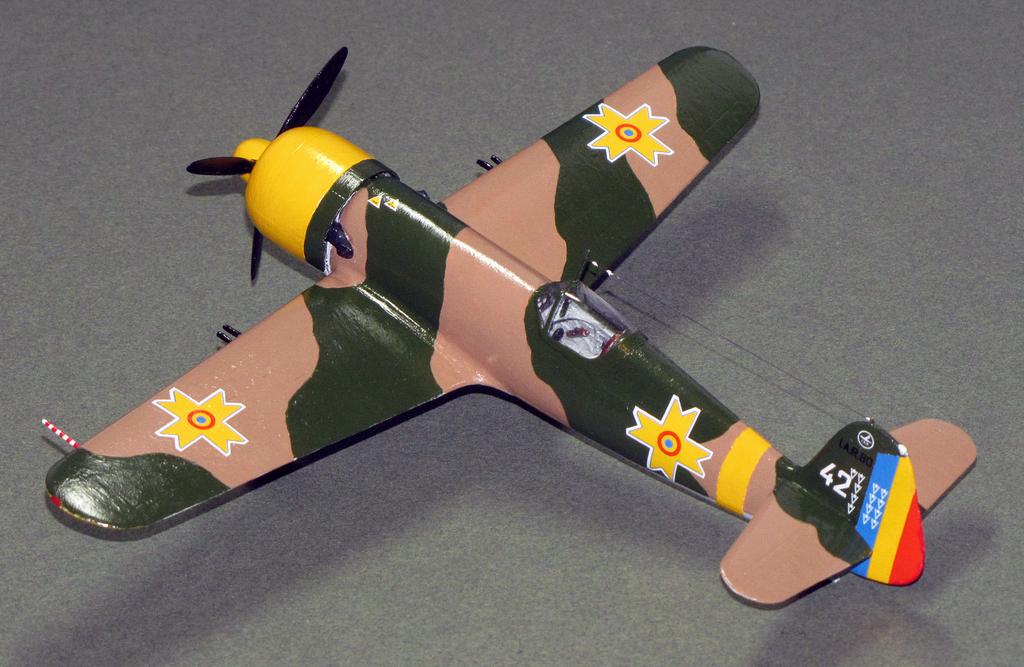
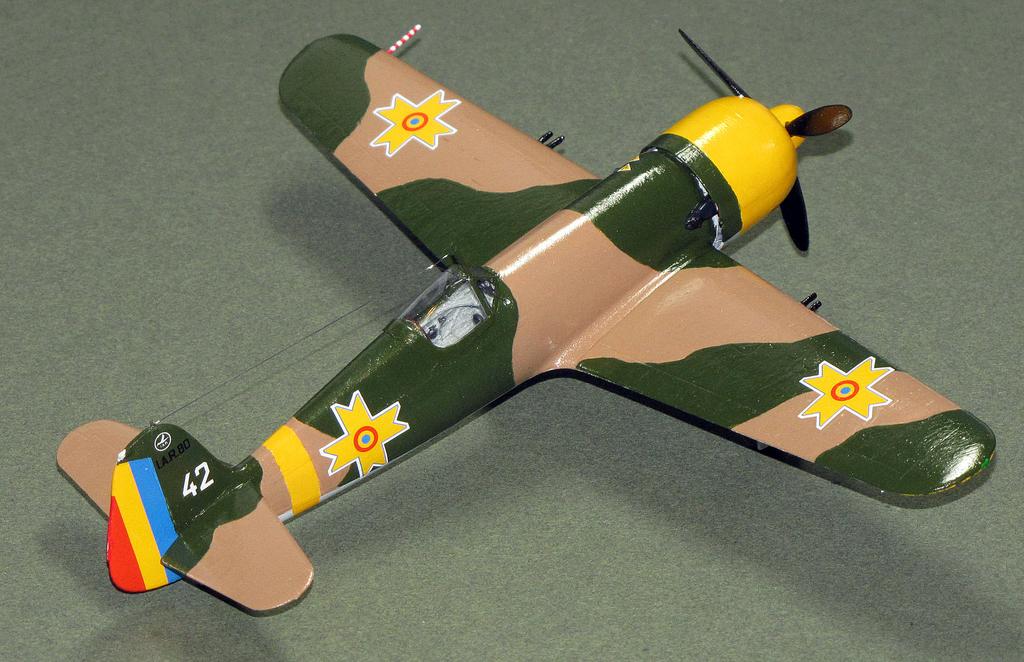
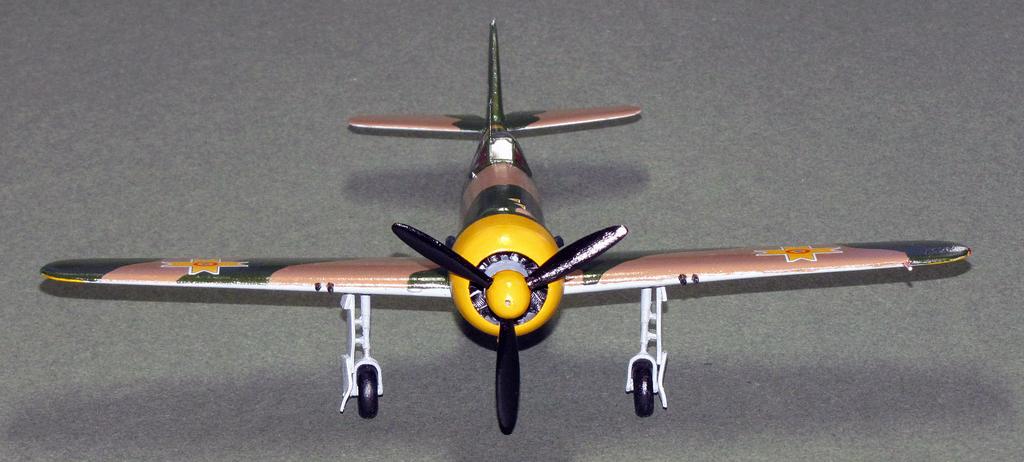
Btw, I did the model's scheme in that of FARR ace, Lt. Ioan Micu. He has thirteen kills, of Soviet aircraft, on the tail.
Conclusions
While it didn't turn out badly, the kit is a lot of work (cleaning and sanding parts) and has a lot of issues (poor molding). It is one thing if the LTD kit was the only 1/48 IAR 80 available (then you could almost overlook its deficiencies), but another when HobbyBoss has one available with new tooling (issued 2016). I would probably try for the HB kit if possible. But if you like a challenge, and can get it at a good price, the LTD kit has potential.
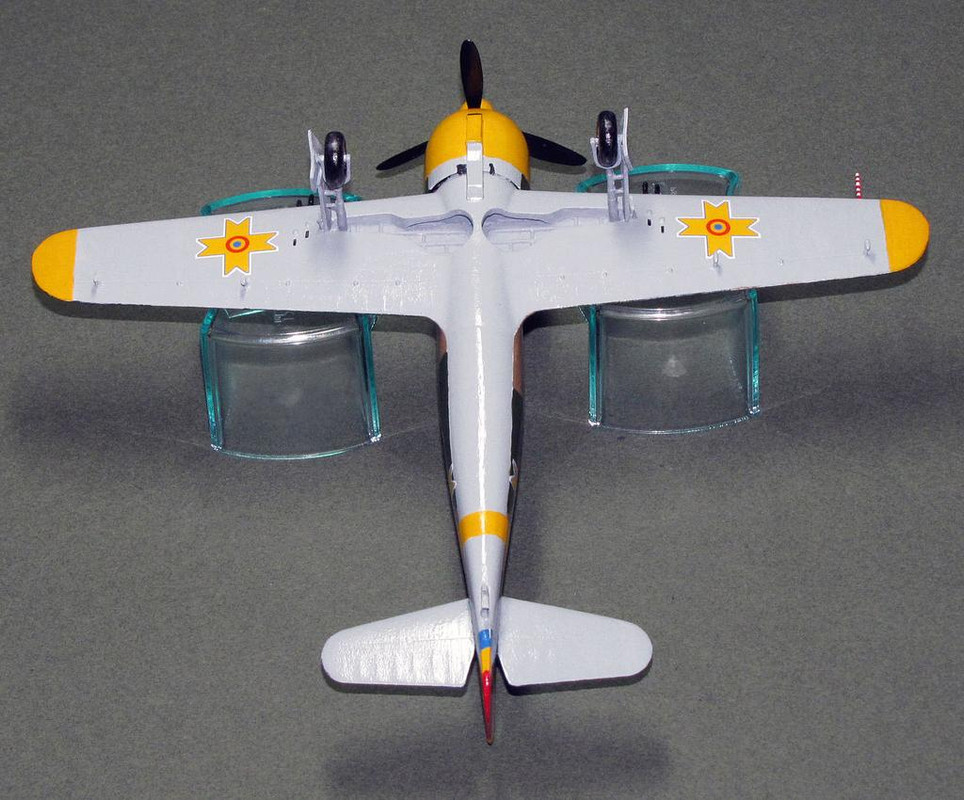
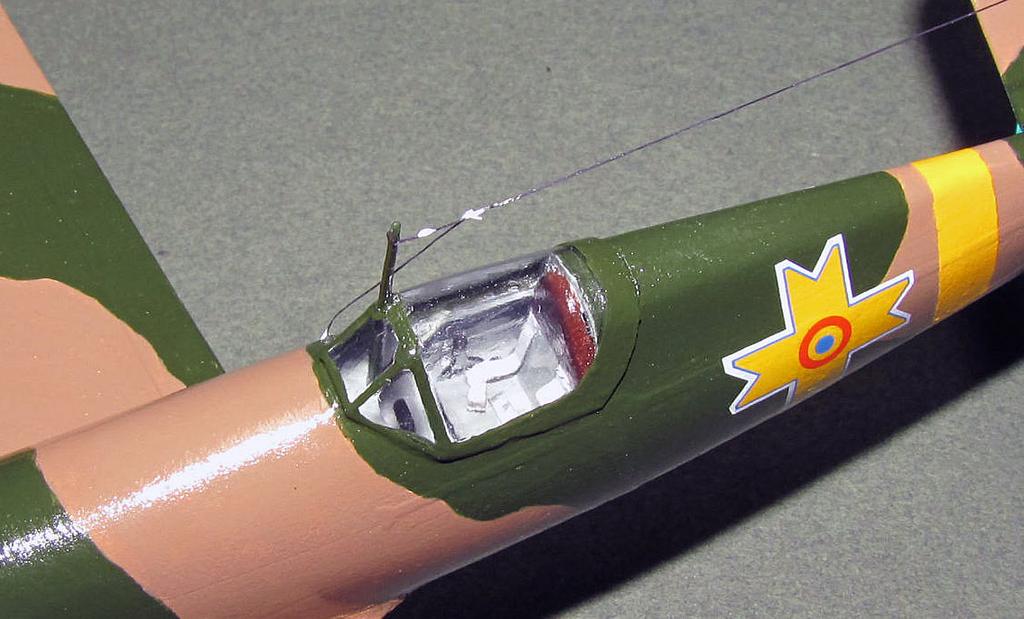
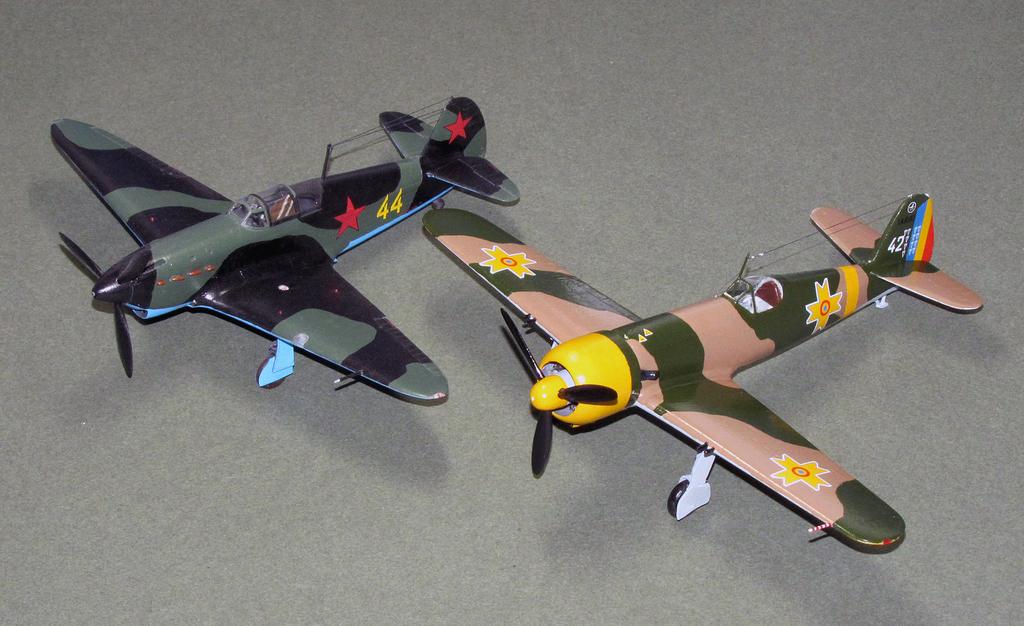
Here are pics of the finished model. I hope you enjoy them.