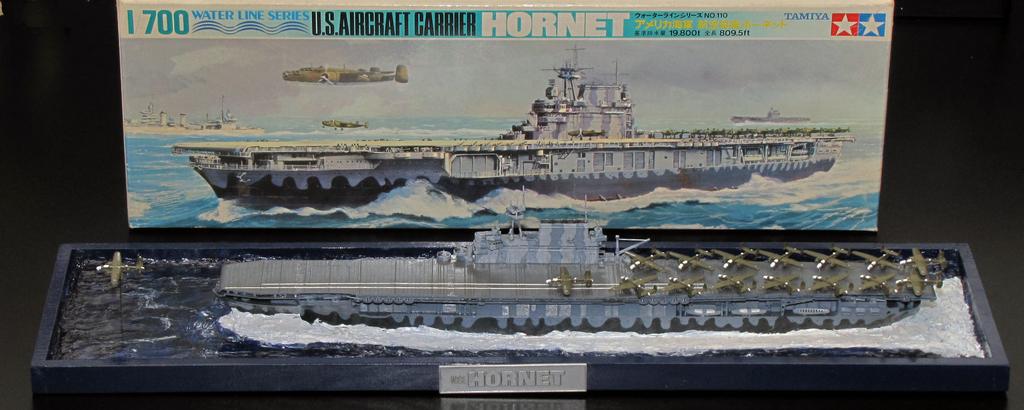
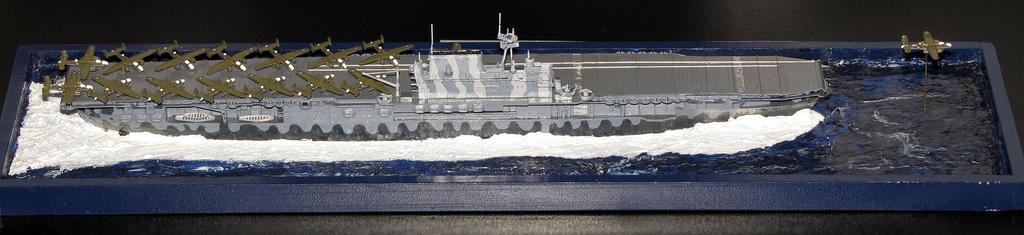
USS Hornet CV-8
The seventh USN ship to carry the Hornet name, the Yorktown-class CV-8 was launched in December, 1940. It would be commissioned into the Navy in October, 1941. The carrier has a short, but illustrious, career and is most famous for launching the first American strike against the Japanese mainland in April, 1942. This was the "Doolittle Raid" of sixteen NA B-25 medium bombers launched against targets such as Tokyo, Yokohama, and Kobe. This is the subject for my build and diorama.
USS Hornet CV-8, would finally be sunk during the Battle of the Santa Cruz Islands in October, 1942.
Tamiya 1/700: USS Hornet (Kit # 110)
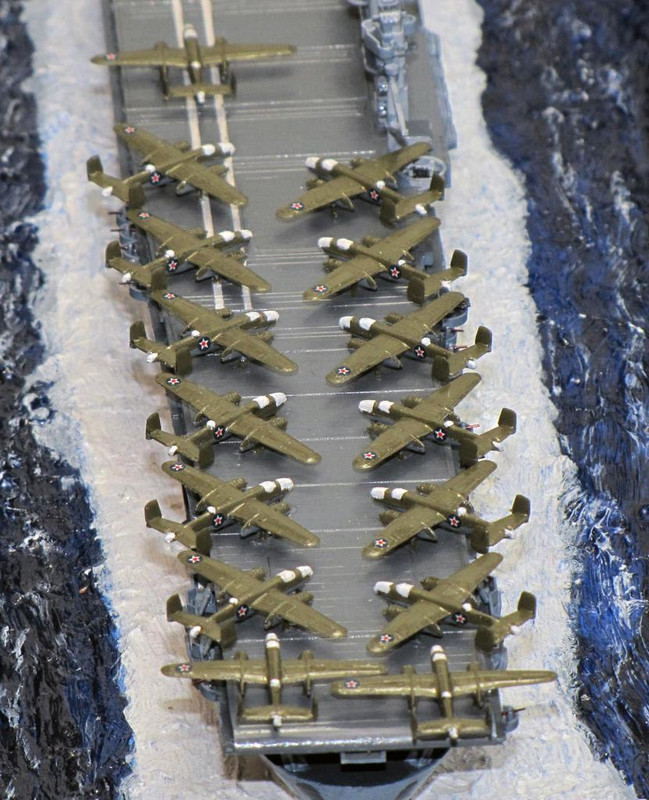
This version of the kit was released in 1974. Parts are crisply molded in good-quality gray plastic. Flash was minimal. Detail was okay (for the time). Instructions are on a single-sheet of paper, printed on both sides, with clear assembly drawings and directions. There is a single sheet of decals with the national insignia for all 16 bombers (64 total!). The assembly does provide you with a couple of options: aft elevator up or down (I don't know why if you have the bombers on the deck it will need to be up), and some of the bay doors along the sides can be open or closed (if open you see nothing inside so you will need to scratch-build details).
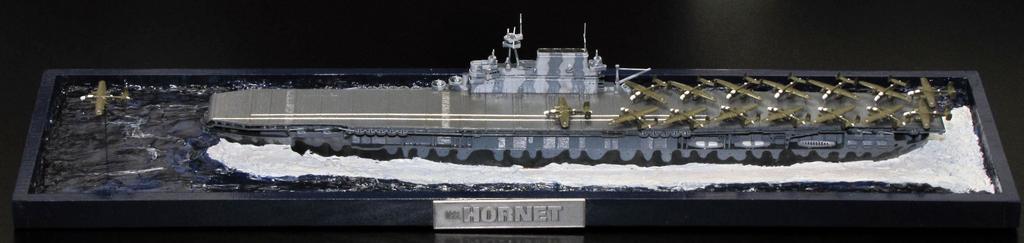
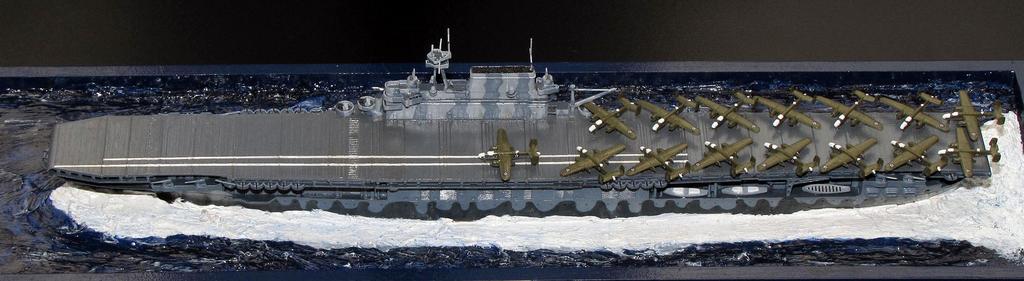
Since I wanted to show the ship during the Doolittle Raid launch, in heavy seas, I left the elevator up and the doors closed. Because the raid was launched during heavy seas and wet weather, I opted to coat the entire ship in Future to give it a wet look.
Assembly was straight-forward but there were a few things to be aware of:
1. 50 cal. machine guns are only molded as mounts along the sides of the ship. You have a choice of using the included ruler to cut plastic gun barrels or fine wire. Both plastic and wire are included for this purpose. I opted for the wire as it looked more to scale.
2. Speaking of scale, there are many modelers who feel this model is not a true 1/700 scale. Rather, they feel it is more closer to 1/720. Just saying in case that's important to you.
3.Instruction colors for the ship are questionable. Tamiya gives the following colors keyed to B/W illustrations of the ship: Dark Gray, Deck Color, and Light Gray. That's it. Well, it's a little more complicated than that if you want to build the ship correctly. The Hornet was painted in Measure 12 Camouflage and used the following colors:
a. 5-N Navy Blue (hull camo).
b. 5-O Navy Ocean Gray (hull, dark parts of superstructure).
c. 5-H Haze Gray (light parts of the superstructure).
d. Weather Deck Blue (all horizontal surfaces).
e. Norfolk Blue 250-N Flight Deck Stain (flight deck). This was the only color I couldn't obtain. The closest substitution would be Luftwaffe Uniform Gray (Vallejo 216), but I couldn't get that either. Next closest, to my eyes anyway, is Gunship Gray - which is what I used.
4. Aircraft placement, in the instructions, are fine IF you want to show the planes during transport. They were moved into different launch positions for the raid and is what I chose to do. You will need to go online to see and figure it out.
I only encountered two issues during the build which were maddening. The first was getting the 45 year old decals to stick (argh!). The second getting the aircraft to stick to the painted and clear-coated deck (double argh!).
Overall, it is a decent model (although it shows its age) that makes an okay build of this important aircraft carrier. Just be aware of some of its "gotchas."
Diorama
I have never built a diorama before so I turned to the Internet, and some modeling books I have, for help. After checking out all the various methods I could find, I opted to go the easiest route for me, and use Liquitex Modeling Paste for my "water." It is odorless, dries quickly, comes in a tube, and sells for around $9.00 USD. So I went off to Hobby Lobby and purchased the paste, along with two bottles of acrylic paint (for the water) and an unfinished wood tray (for the diorama itself).
I first painted the wood tray with a gloss blue paint (this also helps seal the wood against the water-based paste). I then attached the base of my water-line model to the tray using two screws and some glue (the pic shows three screws holding the model base to the tray, but when I attached the model to the base I had to remove the center screw as the steel weight inside the model interfered with it) .
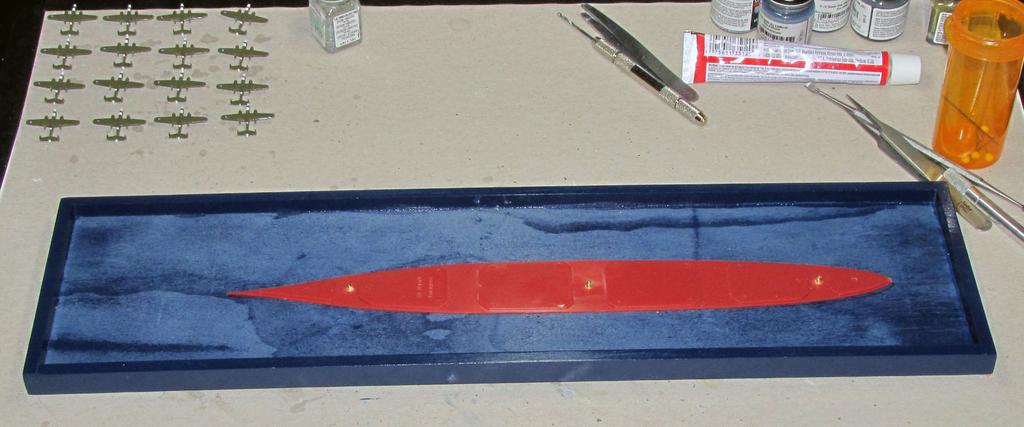
After doing that, I secured the model to its base using glue. Because I anticipated having to manipulate the model around while applying the paste, and later, paint, I left off anything I could snag. Otherwise the model was pretty much finished.
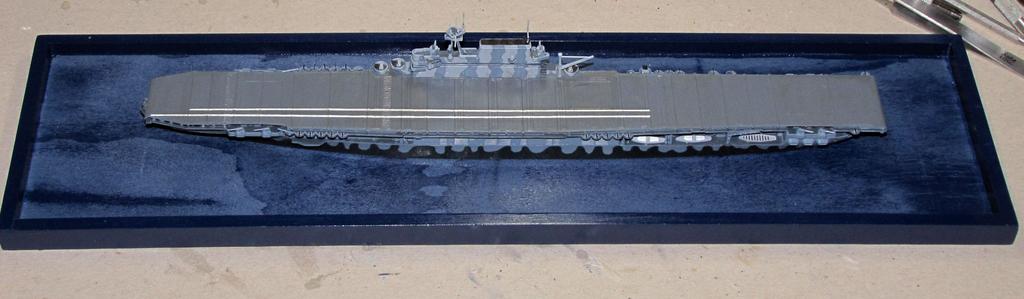
Now I began adding the modeling paste. It was not an easy task at all and I certainly made a mess of it. The paste was not overly sticky, but it somehow managed to spatter on the model, tray, and my desk with great frequency and abandon. I would need to scrape and repaint many parts during this process. As seen here after having to give the tray another spray.
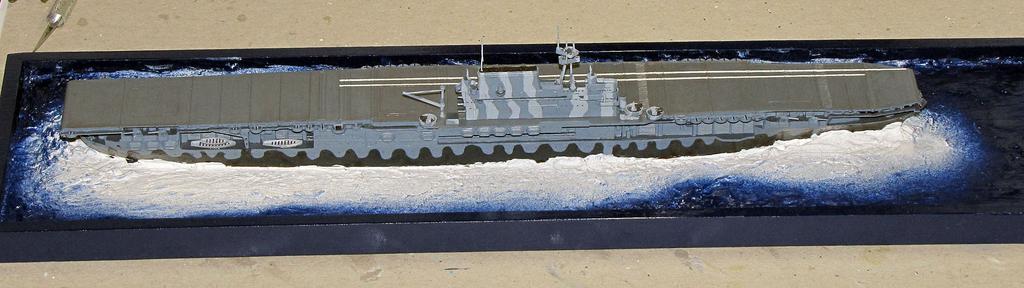
I then tried using the two colors of acrylic paint I purchased at Hobby Lobby to make the water. I wanted to imply some depth by using two different colors. Well, the paints didn't look at all like I thought they would. I ended-up using enamel Dark Sea Blue paint for my first coat. I then followed with random swipes of color in light blue acrylic paint.
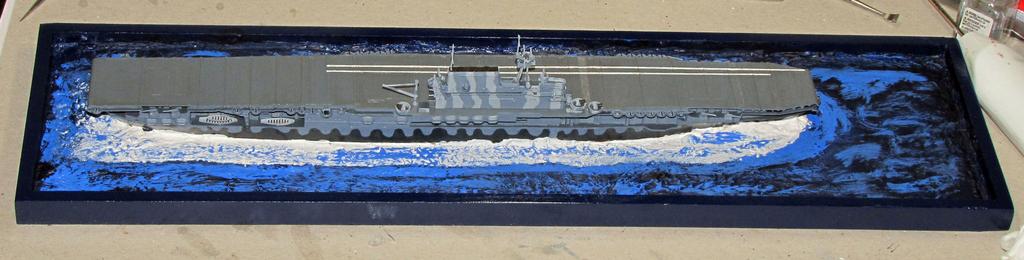
I would then follow this with another coat of the enamel. And I am happy to say it doesn't look bad at all.
Once that was done, and my touch-up painting completed, I gave the flight deck a wash to bring out some details. Then comes the B-25s (all sixteen of them).
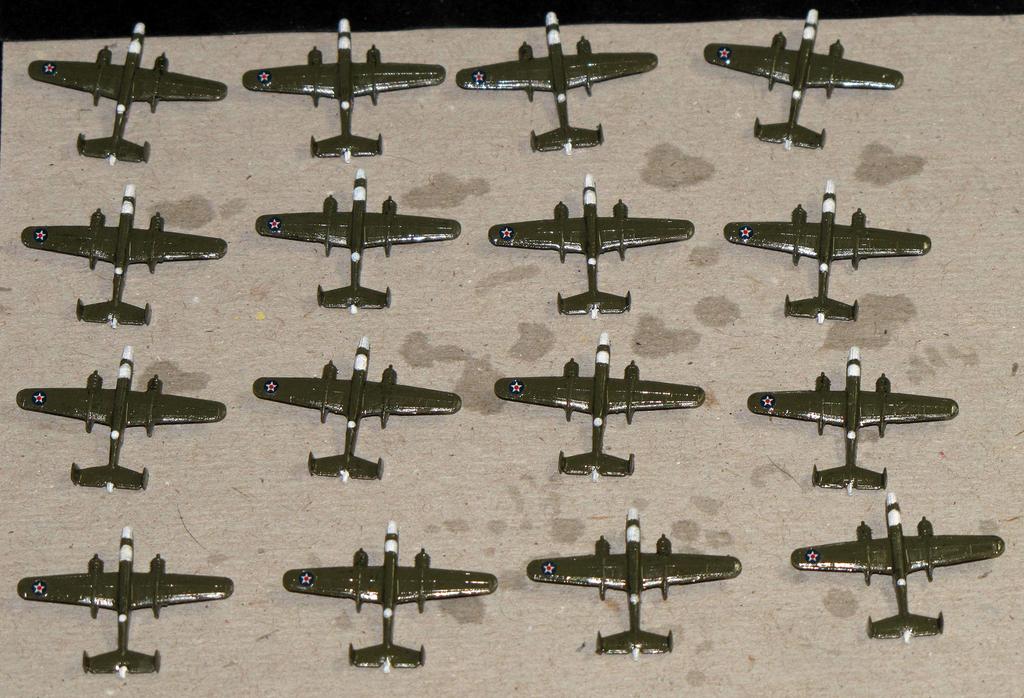
They are a bugger to get to stick to the deck. I tried several glues and the only one that worked was the regular model cement. That didn't hold all that well, but did so long enough that I could follow-up with some CA glue on the wheels. NOW they stick! And, of course, I had to model the first B-25 to clear the deck ifo the carrier.
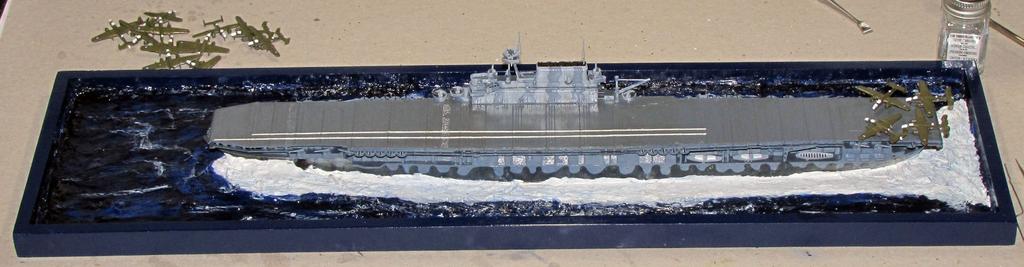
So here's my finished model and diorama.